Electricity is an essential element of modern life and businesses. Nevertheless, it’s important to monitor your energy consumption to help minimize costs and ensure safety. An electric meter is a device that measures the amount of electrical energy consumed by a household or business. It is typically installed by professional electricians, but with the right knowledge and tools, you can connect an electric meter yourself.
As an expert in electrical meter installation, I will provide you with a comprehensive guide on how to connect an electric meter safely and efficiently. This article will cover the necessary steps involved in connecting both single-phase and three-phase meters, including choosing the right location for your meter, installing the correct wiring and breaker, and testing your connection to ensure it is working correctly. Additionally, this guide will emphasize the importance of observing safety precautions when working with electricity and provide tips for avoiding common mistakes during installation. By following these guidelines, you can successfully install your own electric meter without needing to call in professional assistance.
Understanding Electrical Safety Precautions
Electricity is a powerful force that can be dangerous if not handled properly. Understanding electrical safety precautions is crucial before attempting to connect an electric meter. One important aspect of electrical safety is understanding electrical grounding. Grounding provides a safe path for excess electricity to flow into the ground, preventing electric shock and other hazards. It is essential to ensure that the system is properly grounded before working with live wires.
Proper handling of live wires is another critical safety precaution when connecting an electric meter. Live wires carry electricity and pose a significant risk of electrocution if touched or mishandled. Always turn off the power source before beginning work on live wires, and use proper protective equipment such as gloves and goggles. Additionally, avoid touching any exposed wiring or metal parts while working on live circuits.
In summary, understanding electrical grounding and proper handling of live wires are essential steps in ensuring your safety when connecting an electric meter. Before starting any work on electrical systems, be sure to review these precautions carefully and take all necessary steps to protect yourself from potential hazards. With these precautions in mind, you can confidently proceed with your installation project and achieve your desired results safely and effectively. As you move forward with this project, let’s explore the tools and materials required for the task at hand.
Gathering The Necessary Tools And Materials
Now that you understand the importance of electrical safety precautions, it’s time to gather the necessary tools and materials for connecting an electric meter. This process requires specific equipment and knowledge, so it’s important to approach it with caution. A few common mistakes can lead to dangerous situations, which is why following these tips and tricks is crucial.
Firstly, make sure you have all the necessary tools and equipment on hand before starting. You’ll need a screwdriver set, wire strippers, pliers, a voltage tester, and of course, the electric meter itself. It’s also important to check your local regulations regarding meter installation to ensure you’re following all the guidelines.
Secondly, take your time when connecting the electric meter. Rushing through this process can lead to mistakes such as improper wiring or incorrect placement of components. Double-check each step along the way to ensure everything is connected properly and securely.
Finally, choosing the right location for your electric meter is essential for proper functionality and safety. Consider factors such as accessibility for readings and maintenance, protection from weather elements, and proximity to the main electrical panel. Following these tips and tricks will help ensure a successful installation process without any mishaps or safety hazards.
Remember that installing an electric meter requires specific knowledge and expertise. Take the time to gather all necessary tools and materials beforehand, double-check each step along the way, and carefully choose a suitable location for your new meter. With patience and attention to detail, you can successfully connect an electric meter while avoiding any potential hazards or complications.
Choosing The Right Location For Your Electric Meter
When it comes to installing an electric meter in your home or business, the first step is finding a suitable location for it. The location you choose will depend on several factors, such as accessibility, safety, and convenience. Ideally, the meter should be placed in an area that is easily accessible to utility workers but not readily visible to the public.
Before you can install your electric meter, you’ll need to obtain the necessary permits from your local government. Depending on where you live, this may involve filling out paperwork and paying a fee. You’ll also need to provide information about the location of your meter, including its address and GPS coordinates.
Finding the right location and obtaining the necessary permits are crucial steps in installing an electric meter. By taking the time to do these things properly, you can ensure that your meter is installed safely and correctly. In the next section, we’ll discuss how to select the correct type of electric meter for your needs.
Selecting The Correct Type Of Electric Meter
When selecting the correct type of electric meter, the size should be chosen carefully in order to ensure that it meets the requirements of the system. The electrical needs must be evaluated in order to determine the appropriate current rating and voltage rating for the meter. Furthermore, the type of wiring and the number of circuit breakers should be taken into account when selecting the meter. Finally, it is important to consider the environment in which the electric meter will be installed, as this may have an impact on the type of meter chosen.
Choosing The Right Size
Selecting the correct type of electric meter requires careful consideration of various factors, such as sizing considerations and installation challenges. Choosing the right size is crucial to ensure that the meter can handle the electrical load of your property. Sizing considerations include the total amperage demand, voltage requirement, and phase arrangement.
When selecting an electric meter, it is essential to choose a size that can accommodate your property’s electrical load without overloading or underutilizing the system. The right size also ensures that the meter meets local code requirements and regulations. Failure to consider these sizing considerations could result in costly repairs or penalties.
Installation challenges may arise when selecting a larger-sized electric meter than what is needed. This could lead to difficulty fitting the meter into tight spaces or even require expensive modifications to your electrical panel. On the other hand, choosing a smaller-sized electric meter could mean frequent tripping of breakers and premature wear on electrical components due to overload.
In conclusion, choosing the right size for your electric meter is critical in ensuring optimal performance and safety of your property’s electrical system. Proper sizing consideration will help you avoid installation challenges and costly repairs while ensuring compliance with local codes and regulations.
Evaluating The Needs
Selecting the correct type of electric meter is a crucial process that requires careful consideration of various factors. One aspect that must not be overlooked is evaluating the needs of your property. This involves conducting a thorough power consumption assessment to determine the amount of electricity required to run all electrical systems and appliances.
Evaluating the needs of your property also includes conducting a cost analysis to determine the most economical option for your budget. You do not want to overspend on a meter that exceeds your needs or underspend on one that cannot handle your property’s electrical load. A proper cost analysis will help you make an informed decision about the right type and size of electric meter.
In conclusion, evaluating the needs of your property is critical in selecting the correct type of electric meter. Conducting a power consumption assessment and cost analysis will help you determine the appropriate size and type for optimal performance, safety, and compliance with local codes and regulations. Remember, ensuring your property’s electrical system runs smoothly should always be a top priority.
Understanding Single-Phase Vs Three-Phase Meters
Imagine you’ve recently purchased a new property and need to install an electric meter. You have the option of choosing between single-phase and three-phase meters, but which one is the best fit for your needs? Single-phase meters are commonly used in smaller residential properties while three-phase meters are typically used in larger commercial or industrial properties. One advantage of using a single-phase meter is its simplicity and easy installation process. However, this type of meter may not be able to handle heavy loads, which could lead to inaccurate readings or even damage to the device.
On the other hand, three-phase meters are more complex and require professional installation. These types of meters can handle heavier electrical loads, making them ideal for larger properties with high power requirements. Three-phase meters also tend to be more accurate, providing precise readings that can help businesses better manage their energy consumption. However, it’s worth noting that three-phase meters may come with a higher initial cost compared to single-phase meters.
When it comes to reading and interpreting electric meter readings, it’s important to understand how your specific meter operates. Single-phase and three-phase meters may have different displays and measurement units, so it’s essential to familiarize yourself with the device before attempting any calculations. Additionally, understanding your energy usage patterns can help you identify areas where you could potentially save money on your monthly bill. By monitoring your electric meter regularly and taking note of any unusual spikes or dips in usage, you can make informed decisions about how to adjust your energy consumption habits.
Understanding the advantages, disadvantages, and usage scenarios of single-phase vs three-phase meters is critical when determining which type of meter is appropriate for your property. Once you’ve made this decision, the next step is properly installing the meter base.
Installing The Meter Base
To properly install an electric meter, it is important to start with the installation of the meter base. The meter base is typically installed by a licensed electrician and must meet local codes and regulations. It provides a secure foundation for the meter socket, which houses the actual meter.
One key aspect of installing the meter base is ensuring proper grounding. This involves connecting a grounding wire from the base to a grounding rod or other suitable grounding point. Proper grounding helps protect against electrical shocks and ensures safe operation of the electrical system.
Another important consideration when installing the meter base is weatherproofing techniques. The base should be sealed and protected against moisture, which can cause damage to electrical components over time. This may involve using special sealants or coatings to protect against corrosion and other forms of weathering.
With the proper installation of the meter base complete, it is now possible to move on to connecting the meter socket. This involves carefully wiring the socket according to local codes and regulations, as well as ensuring that all connections are tight and secure before testing for proper operation.
Connecting The Meter Socket
- Gather the necessary materials for the electric meter installation, including a meter socket, meter base, wires, and mounting hardware.
- Inspect the wiring for any signs of damage before starting the installation process.
- Install the meter socket in accordance with local safety regulations and using the appropriate mounting hardware.
- Connect the black, red and white wires to the terminals of the meter socket, making sure the wire is securely fastened.
- Ensure that the ground wire is properly connected to the meter socket and secured to a grounding rod.
- Inspect all wiring to confirm the meter socket is properly installed and secured before turning on the electricity.
Gathering Materials
Choosing the right materials is essential in connecting an electric meter. Before starting the installation process, it is important to gather all the necessary materials for a successful outcome. Materials such as a waterproof meter socket, weatherproof conduit, grounding rods, and wires should be carefully chosen to ensure they meet the required specifications.
Preparing the site is also crucial in connecting an electric meter. The site must be inspected and cleared of any obstructions that may hinder proper installation. The area where the meter socket will be placed should be leveled to prevent water pooling around the meter base. Additionally, it is necessary to check with local authorities to ensure compliance with regulations and obtain necessary permits before beginning any work.
In conclusion, gathering materials and preparing the site are vital steps in connecting an electric meter successfully. Choosing appropriate materials and inspecting the site are critical to ensuring safety and avoiding potential hazards during installation. By following these guidelines, one can achieve a smooth and efficient connection of an electric meter.
Preparing Wiring
After ensuring that all the necessary materials are gathered and the site is prepared, the next step in connecting an electric meter is preparing the wiring. Planning considerations should be taken into account when preparing for wiring installation. This includes determining the number of wires required based on the electrical load and selecting appropriate wire sizes and types.
Wire termination techniques must also be considered to ensure a secure connection of wires to terminals. The use of wire nuts or crimping tools can provide a reliable and safe connection. It is essential to follow manufacturer instructions and local codes when terminating wires to prevent any electrical hazards.
Proper cable management should also be taken into account during wiring preparation. Wires should be routed appropriately to minimize stress on connections, protect against damage, and ensure ease of maintenance. Overall, meticulous planning, proper wire termination techniques, and good cable management practices are crucial in successfully preparing wiring for an electric meter connection.
Installing Meter Socket
After the preparation of wiring, the next crucial step in connecting an electric meter is installing the meter socket. It is essential to follow a Meter Socket Installation: Wiring Guide to ensure that all the necessary steps are taken into account. This includes selecting the appropriate location for installation, securing the socket onto a wall or panel, and properly grounding it.
Before starting with the installation process, safety tips must always be considered. It is important to turn off the power supply and verify that there are no live wires before working on the meter socket. Additionally, proper personal protective equipment should always be worn, such as safety glasses and gloves.
Once all safety measures have been taken care of, it is time to install the meter socket. The wiring connections from earlier should be carefully connected according to manufacturer instructions and local codes. Proper cable management should also be taken into account during installation to ensure neatness and organization of wires. Overall, following a Meter Socket Installation: Wiring Guide and adhering to safety tips are crucial in successfully installing a meter socket for electric meter connection.
Wiring The Meter
With the meter installation process, it is important to ensure that all electrical codes and regulations are followed for safety. To begin wiring the meter, first locate the designated meter socket. This is typically found on an exterior wall with a conduit pipe leading to the main breaker panel.
Next, turn off power to the panel and remove the cover. It may be necessary to install a new circuit breaker if there is not a spare one available for use with the meter. Once this is done, connect the hot wires to their corresponding terminals on the meter socket and then connect the neutral wire to its terminal. Finally, connect the ground wire to its designated location and attach any other necessary wires according to manufacturer instructions.
To ensure a successful installation, follow these tips:
- Always turn off power before beginning any electrical work.
- Use appropriate tools and equipment for each task.
- Verify that all connections are secure before restoring power.
- Have a licensed electrician inspect your installation for compliance with electrical codes and regulations.
By following these guidelines, you can safely and effectively wire your electric meter in accordance with industry standards. Next up in the installation process is installing the circuit breaker, which will be covered in detail in the subsequent section.
Installing The Circuit Breaker
The selection of the right circuit breaker is critical for the proper operation of any electrical system. When installing the breaker, attention should be paid to manufacturer specifications, the load to be protected, and the applicable regulatory standards. Wiring should be installed in accordance with applicable codes, and the breaker should be securely fastened to the panel. When connecting the wires, special attention should be paid to ensure the correct polarity of the connections, and the use of the correct wire gauge for the amperage rating of the breaker. Properly connecting the ground wire is also essential for safety. Finally, all wiring should be tested for proper operation after installation is complete.
Choosing The Right Breaker
Selecting the appropriate breaker is a crucial aspect of installing an electric meter. One must consider breaker compatibility and safety regulations when selecting the right breaker for the job. Breaker compatibility is determined by the type and size of the electrical panel that will be used to house the breaker. It is essential to ensure that your breaker selection is compatible with your existing electrical panel.
Safety regulations must also be taken into account when choosing a breaker. The National Electric Code (NEC) provides guidelines on how to install circuit breakers properly. These guidelines include information on proper installation, wiring, and grounding techniques that must be followed to ensure optimal safety standards.
Before selecting a breaker, it is important to consult with an expert who has knowledge about electrical installations. The advice of experts can help you avoid costly mistakes and ensure that you choose a reliable and safe device for your electric meter installation project. By following these guidelines, you can reduce the risk of accidents related to improper installation practices and ensure that your electric meter operates efficiently without any issues.
Installing The Breaker
When installing an electric meter, selecting the appropriate breaker is just one part of the process. After choosing the right breaker for your electrical panel, it’s time to install it correctly. The first step in installing a breaker is to ensure that it is sized correctly for your system. A properly sized breaker will protect your electrical system from overloading and prevent damage to your home’s wiring and appliances.
To begin with, you must turn off all power to the area where you will be working before starting the installation process. You can do this by turning off the main breaker or unplugging any devices connected to the circuit that you will be working on. Next, follow all electrical code compliance guidelines when installing the new circuit breaker. These codes ensure that your new installation meets safety standards and reduces potential hazards.
When installing a new circuit breaker, it’s always best to consult with a licensed electrician or expert who has experience in meter installation projects. They have knowledge about proper wiring techniques and can perform the installation safely and efficiently without any issues. Additionally, their expertise helps you avoid costly mistakes and ensures that your electric meter operates reliably for years to come. By following these steps, you can complete your meter installation project with confidence knowing that your circuit breakers are installed safely and appropriately according to electrical code compliance regulations.
Connecting The Wires
Now that the appropriate circuit breaker has been selected and installed, it’s time to connect the wires. This step must be done with utmost care as improper wire connections can cause electrical hazards such as shock, short circuits, or even fires. Therefore, it is crucial to know the proper techniques for connecting wires and follow all safety measures during wiring.
Before starting any wiring work, ensure that power to the circuit is turned off. This can be done by switching off the main breaker or turning off all devices connected to the circuit. Once you have confirmed that there is no power flowing through the wires, you can start connecting them to their respective terminals on the breaker. Proper wire connection techniques should be followed to avoid loose or incorrect connections that can lead to dangerous conditions.
It is essential to use only high-quality wires for your installation project and ensure that they are of appropriate gauge size for your system. Additionally, when connecting wires, keep them organized and secured properly with cable ties or clamps. Lastly, after completing the wire connections, before turning on power supply again, double-check all connections and fix any issues immediately if found. By following these guidelines and safety measures during wiring work for installing a new circuit breaker, you’ll ensure a safe and reliable electrical system for years to come.
Testing The Meter Connection
After connecting the electric meter, it is essential to test the connection to ensure that it is functioning correctly. Testing the meter connection involves checking the voltage, current, and resistance levels to verify that the system is working according to specifications. This process requires specialized equipment that can measure these parameters accurately.
Before conducting any tests on the meter connection, it is crucial to take safety measures. The first step in ensuring safety is disconnecting the power source from the meter box. This step prevents electrocution and makes it safe to handle the wiring inside the box. Additionally, one should wear protective gear such as gloves and goggles when handling live wires. These measures are necessary to prevent electrical accidents during testing.
Meter connection troubleshooting involves identifying and correcting problems with the connection. Common issues include loose or corroded connections, damaged wiring, or faulty meters. Troubleshooting helps restore functionality of an electric meter by pinpointing where problems exist in its operation. It is important to address any issues immediately since they can interfere with accurate readings leading to overbilling or underbilling customers for electricity usage.
Moving onto troubleshooting common installation issues, it is essential to check for proper grounding of the electric meter and tightness of all wire connections within the panel before assuming a problem exists with any component of an installed electrical system. Properly grounding an electrical system ensures maximum safety for users while also preventing damage caused by lightning strikes or other power surges that could occur outside normal usage patterns. Tightening all wire connections within a panel reduces resistance throughout circuits allowing for more efficient energy transfer between components which translates into lower energy costs over time without sacrificing performance capabilities at peak demand periods such as during heavy appliance use or storms where electricity usage may spike considerably higher than usual levels due primarily due weather events beyond control . This not only benefits the end user by providing consistent and reliable power supply, but also benefits the environment by reducing the carbon footprint associated with traditional power generation methods. Additionally, the use of smart grid technology allows for better tracking and management of energy usage, which can lead to more efficient and cost-effective energy distribution and consumption.
Troubleshooting Common Installation Issues
After testing the meter connection, it is possible to encounter common installation issues that can hinder the functionality of the electric meter. One of these issues is a power outage. When a power outage occurs, it is important to troubleshoot and identify if the issue is coming from the electric meter or not. If the meter has been installed correctly, then it will not be responsible for the power outage. In this case, it is essential to check with your energy provider for any known issues in your area.
Another common issue that can occur after connecting an electric meter is incorrect readings on the device. It is important to check meter readings regularly to ensure that they reflect accurate energy consumption data. To do this, you must first understand how to properly read an electric meter and know what each number represents. This will help you detect any discrepancies in energy usage and allow you to take corrective measures if necessary.
In summary, installing an electric meter involves more than just connecting wires and plugging in devices. Troubleshooting common installation issues such as power outages and inaccurate readings requires a basic understanding of how these devices operate. By taking time to learn about how your energy consumption is measured, you can save money on utility bills and prevent future problems from arising. The next section will provide insight into understanding meter readings and billing so that you can stay on top of your energy usage.
Understanding Meter Reading And Billing
Meter reading and billing are integral parts of the electric meter installation process. Understanding the accuracy of your meter is crucial to ensure that you are billed correctly. An accurate meter will report your electricity usage in kilowatt-hours (kWh) which is used to calculate your bill. The meter reports this information to the utility company, who then calculates your monthly bill based on your usage.
In some cases, customers may dispute their bills if they believe their meter has not accurately reported their usage. If you have a billing dispute with your utility company, it is important to know how to resolve it. The first step is to contact your utility company and explain the situation. They should be able to provide you with an explanation of how they calculated your bill and address any concerns you may have. If the issue cannot be resolved, you can file a complaint with the regulatory agency that oversees the utility company in your area.
Understanding meter accuracy and billing disputes resolution are important aspects of being a responsible electric customer. By staying informed about these issues, you can ensure that you are being charged fairly for the electricity you use each month. In our next section, we will discuss how to maintain your electric meter and keep it in good working order.
Maintaining Your Electric Meter
After understanding how to read and interpret your electric meter, it is crucial to learn about its maintenance. Proper maintenance ensures the accurate measurement of electricity consumption and prevents damage to the meter. Electric meter maintenance involves regular cleaning, inspection, and troubleshooting techniques.
Regular cleaning of the electric meter is essential to prevent dirt and debris from accumulating on it. Accumulated dirt can cause inaccurate readings or even damage the meter’s delicate components. Inspecting the meter regularly for signs of wear and tear is also important. Any visible damages should be addressed immediately by a professional.
Troubleshooting techniques can help identify any issues with the electric meter. If you notice unusual readings or suspect a malfunction in your electric meter, contact a professional for assistance. They can diagnose and fix any problems promptly, ensuring that your electric bill remains accurate.
Upgrading your electric meter is a great way to improve energy efficiency in your home or business. An upgraded meter provides more precise readings that can help identify areas where energy consumption can be reduced. Additionally, an upgraded electric meter may offer advanced features such as remote monitoring or time-of-use pricing options. Contact an installation expert to learn more about upgrading your electric meter today.
Upgrading Your Electric Meter
An electric meter is an essential component of every household as it measures the amount of electricity consumed and determines the charges that are levied on consumers. As technology continues to advance, upgrading your electric meter can help you keep up with the latest innovations while improving energy efficiency and reducing costs. However, before embarking on the upgrading process, it is crucial to understand what is involved in the installation process to ensure a smooth transition.
The first step in upgrading your electric meter is to determine the cost estimation for the project. The cost of upgrading your meter may differ depending on various factors such as location, complexity of installation, and type of electric meter. Before initiating any work, it is advisable to contact a professional installer who will provide you with a detailed cost breakdown based on your specific requirements.
Once you have determined the cost estimation for upgrading your electric meter, the next step is to proceed with the installation process. This involves disconnecting power from the main switchboard and removing the old electric meter before installing a new one. It is important to note that only licensed professionals should carry out this process as working with electricity can be hazardous if not done correctly.
Conclusion: Benefits of DIY Electric Meter Installation
Upgrading your electric meter can be a daunting task; however, with careful planning and execution by licensed professionals, it can be an effective way to improve energy efficiency while reducing costs. For those who are more hands-on and have some electrical experience, DIY electric meter installation may seem like an attractive option. In our subsequent section about ‘conclusion: benefits of diy electric meter installation,’ we will explore this option further and provide useful insights into whether this approach might be suitable for you.
Conclusion: Benefits Of Diy Electric Meter Installation
As we have just learned in the previous section, upgrading your electric meter can be a significant undertaking. However, connecting an electric meter can be equally challenging and requires a certain level of expertise. Nonetheless, with the right guidance and tools, it is possible to carry out the installation process successfully.
Before you begin the installation process, it is crucial to consider both the pros and cons of connecting an electric meter. On one hand, installing your electric meter can save you money on installation fees and potentially reduce your energy bills. On the other hand, there are risks involved in DIY installations that may lead to costly mistakes or safety hazards.
When comparing costs between professional installation and DIY methods, it is essential to weigh all factors. While hiring a professional may seem more expensive initially, they have specialized knowledge and experience that can ensure proper installation and prevent any potential damages or hazards. Ultimately, deciding whether to install your electrical meter yourself or hire a professional will depend on your confidence in your abilities and willingness to take on potential risks.
- Some key factors to consider when deciding whether to install an electric meter yourself include:
- Your level of electrical knowledge
- The complexity of the installation process
- When considering hiring a professional electrician for installation:
- Research their qualifications and experience
- Ask for referrals or references from past clients
As experts in electrical meter installations, we recommend careful consideration before attempting this task on your own. Remember that while there are benefits to installing an electric meter yourself, there are also risks that should not be taken lightly. It may be worth investing in a professional who has the knowledge and expertise necessary to ensure proper installation without putting anyone at risk.
Conclusion
Electric meter installation can be a daunting task, but with the right tools, knowledge, and safety precautions, it is possible to complete the process yourself. Understanding electrical safety measures is crucial before starting any electrical work. Gathering the necessary tools and materials and selecting the correct type of electric meter are also essential steps in installing an electric meter.
Choosing the right location for your electric meter and understanding single-phase vs three-phase meters are important factors that should not be overlooked. It’s also important to understand how meter reading and billing works to ensure accurate billing. Regular maintenance of your electric meter can help prevent issues and extend its lifespan. Finally, upgrading your electric meter can improve efficiency and potentially save you money in the long run.
By following these steps, you can successfully install an electric meter on your own. However, it’s important to remember that if you’re unsure about any aspect of the installation process or feel uncomfortable working with electricity, seek professional help. The benefits of DIY electric meter installation include cost savings and a sense of empowerment knowing that you completed the project yourself. With proper planning and execution, this task can be accomplished safely and easily by anyone who has basic electrical knowledge.
Image Credits
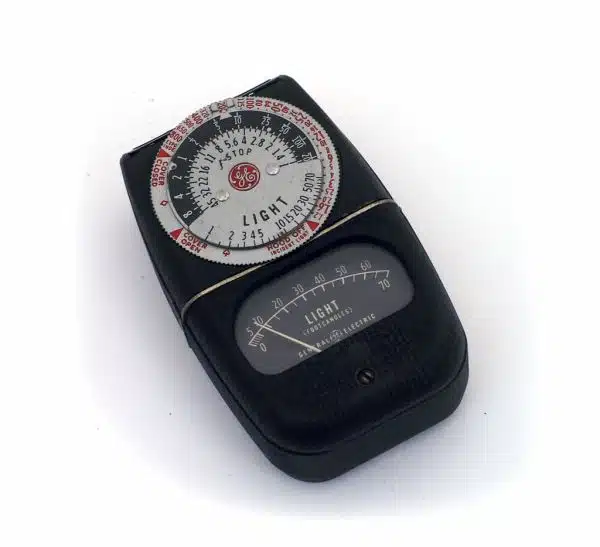
- “General Electric DW-68 Exposure Meter” by Capt Kodak (featured)











![How To Replace A Single-Pole Wall Switch 26 '... All in all it's just another [switch] in the wall.' ...](https://green-life.blog/wp-content/uploads/2023/05/17xmP5qMtVjq-150x150.jpg.webp)


