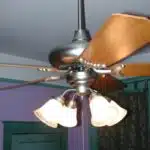
As an electrician or electrical engineer, replacing a ceiling light fixture can be a routine job to accomplish. However, for those who are not familiar with electrical wiring, it can seem daunting and dangerous. Nevertheless, replacing a ceiling light fixture is a task that can be accomplished with the right tools and knowledge.
In this article, we will provide step-by-step instructions on how to replace a ceiling light fixture safely and efficiently. Whether you are replacing an outdated fixture or installing a new one, our guide will ensure that you have the necessary information to complete the job with confidence. By following our instructions carefully, you will not only improve the aesthetics of your home but also ensure that your electrical system is functioning properly.
Tools And Materials You Will Need
Replacing a ceiling light fixture can be a daunting task, but with the right tools and materials, it can be done safely and efficiently. Choosing appropriate fixtures is key when replacing a ceiling light. Consider the size of the room and the amount of light needed when selecting a new fixture. Additionally, make sure to choose a fixture that is compatible with your wiring setup and electrical box.
Tips for handling fragile materials are also important to keep in mind when replacing a ceiling light fixture. Fragile materials such as glass shades or delicate wiring require extra care during installation. Be sure to handle these materials gently and avoid applying too much pressure that could cause damage. It may also be helpful to have an extra set of hands available for assistance during installation.
Before beginning any work on your ceiling light fixture, it is crucial to turn off power to the fixture at the circuit breaker. This step will ensure your safety while working with electrical components. Once the power has been turned off, you can begin safely removing the old fixture and installing the new one. Remember to always follow manufacturer instructions for proper installation procedures.
Turning Off Power To The Fixture
Before starting any electrical work, it is important to turn off the power to the fixture. Failure to do so can result in serious injury or death. Therefore, it is essential that you follow these steps for turning off power safely before beginning the replacement process.
Firstly, locate the circuit breaker box and identify which circuit breaker controls the light fixture you will be working on. Turn off this circuit breaker by flipping the switch to the “off” position. If your home does not have a circuit breaker box, locate and turn off the main power switch.
Secondly, use a non-contact voltage tester to check for live wires before starting the replacement process. This tool detects electrical current without making direct contact with wires, ensuring that there is no electricity flowing through them. Hold the tester close to each wire and wait for it to beep or light up if it detects voltage.
Lastly, after turning off power and checking for live wires, use a screwdriver to remove the cover plate of the old fixture and carefully lower it down from its mount. Keep in mind that even with power turned off, wires may still be hot if they were recently in use. Always handle wires with caution and avoid touching them directly as much as possible.
With power turned off and live wires checked for safety, you are now ready to move onto removing the old fixture and installing a new one.
Removing The Old Fixture
Imagine you’re preparing to replace an old fixture that has been hanging from your ceiling for years. The fixture has served its purpose, but it’s time for a change. Like a caterpillar shedding its cocoon to become a butterfly, removing the old fixture is the first step in transforming your space into something new and beautiful.
Proper disposal of the old fixture is essential. Disposing of electrical fixtures improperly can cause harm to both people and the environment. Fortunately, there are recycling options available that can help reduce waste and minimize negative environmental impacts. It’s important to research local recycling facilities or contact a professional electrician who can dispose of the old fixture safely.
When removing the old fixture, it’s crucial to turn off power at the circuit breaker before beginning any work. This will prevent any shocks or electrocution while working on the wiring. Once you’ve turned off power, unscrew and remove any screws or bolts securing the fixture to the ceiling plate. Carefully lower the fixture down and disconnect any wires connected to it before proceeding with further installation steps.
With proper disposal options in mind, safely removing and disconnecting wires from an old light fixture is one of the most important steps when replacing it with something new.
Disconnecting The Wires
To replace a ceiling light fixture, it is crucial to disconnect the wires properly. Failing to do so may lead to electrocution or damage to the new fixture. Before starting, make sure that electricity supply is turned off by switching off the circuit breaker or removing the fuse.
To safely handle electrical wires, wear rubber gloves and use insulated tools. Identify which wire is neutral (white) and which one is live (black or red) before disconnecting them. If the wires are not color-coded, use a voltage tester to determine which wire is hot. Once identified, loosen the screws holding the wires in place and gently pull them apart.
If there are more than two wires connected to the fixture, take note of their positions and connections by taking a picture or labeling them with tape or markers. This will ensure that reconnecting them later will be easier. Lastly, after disconnecting all wires, remove any mounting screws or brackets that hold the old fixture in place before proceeding to attach the new one.
Transition into subsequent section: Now that you have disconnected all wires safely, you can proceed with attaching the mounting bracket for your new ceiling light fixture.
Attaching The Mounting Bracket
Picture this: you have just purchased a new ceiling light fixture and are eager to install it in your home. However, before you can enjoy the new lighting, you need to attach the mounting bracket. This step is crucial as it ensures that your fixture is securely attached to the ceiling, preventing any accidents or damage.
To start, gather the necessary tools such as a screwdriver and screws provided with the mounting bracket. First, hold up the bracket against the electrical box on the ceiling and check if it aligns properly. Ensure that all screw holes on both the bracket and electrical box match up perfectly. If they do not, readjust accordingly until they do.
Next, take two screws and insert them through any two of the available screw holes on both the electrical box and mounting bracket. Use a screwdriver to tighten them securely. Make sure that no wires or other obstacles interfere with attaching screws in their designated spots. Repeat this process for all remaining screw holes until all are tightened down.
Now that you have successfully attached the mounting bracket, your new ceiling light fixture is ready to be installed! The next step will involve connecting wires from your electrical system to those of your new fixture for power supply purposes. But first, make sure everything is secure before proceeding to avoid any possible hazards or malfunctions later on down the road.
Transitioning into connecting wires to your new fixture may seem daunting at first but following these steps will ensure success without added stress or confusion along the way.
Connecting The Wires To The New Fixture
After attaching the mounting bracket, it’s time to connect the wires to the new fixture. The first step is to strip the insulation off the ends of each wire. This will expose about 1/2 inch of bare copper wire that can be used for connecting to the new fixture. Once you’ve done this, you’ll need to use wire nuts to make connections.
Using wire nuts correctly is essential for safety and ensuring a proper connection. First, twist together the exposed copper wires from the ceiling and fixture. Then, insert them into a properly sized wire nut and tighten by twisting clockwise until it is snugly secured. Avoid over-tightening as this can cause damage or breakage in both the wire and nut.
Proper grounding techniques are also important when connecting your new fixture. Make sure that there is a grounding wire present in your electrical box and that it’s properly connected to your fixture’s grounding screw or wire. If there isn’t a grounding wire present in your electrical box, consult an electrician before proceeding with installation.
- Double-check your connections before turning on power.
- Test your circuit using a circuit tester.
- Consider using a voltage detector to ensure all current has been turned off.
- Always follow manufacturer installation instructions for specific requirements.
Moving forward with attaching the new fixture to the mounting bracket requires attention to detail and patience. With proper technique, however, you can have confidence in completing replacement of your ceiling light fixture safely and efficiently.
Attaching The New Fixture To The Mounting Bracket
To attach the new fixture to the mounting bracket, start by aligning the screw holes on the bracket with those on the fixture. Use screws of appropriate length and tighten them securely. It’s important to ensure that the bracket is level before proceeding. Common mistakes include rushing through this step or not double-checking alignment, which can result in a wobbly fixture that won’t sit flush against the ceiling.
To avoid these common mistakes, take your time and don’t rush through this process. Use a level to ensure that everything is aligned correctly before tightening any screws. If you’re unsure about how to use a level, there are many helpful tutorials available online or at your local hardware store. Additionally, make sure to use screws of appropriate length for your specific fixture and ceiling type.
Tips for alignment include using a pencil or marker to mark where the screw holes should be on both the mounting bracket and new fixture beforehand. This will help ensure that everything lines up correctly when it comes time to attach them together. Another tip is to enlist the help of a friend or family member to hold up the fixture while you align and tighten the screws. With these tips in mind, attaching your new light fixture should be a breeze.
Moving on to installing light bulbs…
Installing Light Bulbs
As the new fixture is attached to the mounting bracket, there are still a few steps that must be taken before it can be fully operational. One of these steps includes selecting and installing appropriate light bulbs. The type of bulb required will depend on the wattage specifications provided by the fixture’s manufacturer. Choosing an incorrect bulb can lead to issues with brightness, flickering, or even overheating.
Once appropriate bulbs have been selected and installed, it’s important to troubleshoot any issues that may arise. If the bulbs do not turn on after installation, check that they are securely screwed in and that power is reaching the fixture. If flickering occurs, double-check that bulbs are correctly seated in their sockets and ensure that they match each other in terms of wattage and color temperature.
Testing the fixture is the final step in ensuring its proper operation. Turn off power at the breaker before touching any wires or performing tests. Once power has been disconnected, test each bulb individually to ensure they work properly. Then turn on power at the breaker and flip the switch for your new fixture. If all goes well, you should see a bright light shining from your newly installed ceiling light fixture!
Testing The Fixture
After installing a new ceiling light fixture, it is crucial to test the fixture to ensure that it is functioning properly. The testing process consists of turning on the power supply and checking if all components are functioning correctly. It is essential to follow safety protocols during this phase by ensuring that the power supply is turned off before conducting any tests.
Common problems during testing include flickering lights or dimming, which may indicate a loose connection or faulty wiring. If there are no visible problems with the wiring or connections, then it may be necessary to replace the bulb or ballast. Another common problem is overheating due to incorrect wattage usage. It is essential to verify that the wattage rating of the bulb matches that of the light fixture.
Testing ensures that any issues are identified and fixed before finishing touches and cleanup. It ensures that the ceiling light fixture will operate efficiently and safely for an extended period. Once testing has been completed, you can move on to finishing touches and cleanup, where you can install decorative elements such as shades or covers to enhance your newly installed ceiling light fixture’s aesthetic appeal while ensuring its functionality.
Finishing Touches And Cleanup
After testing the new fixture, it is important to clean up and dispose of the old one properly. Begin by turning off power to the circuit at the breaker box. Remove any debris or dust that may have accumulated during the installation process using cleaning supplies such as a broom or vacuum.
When disposing of the old fixture, separate any metal components for recycling and discard non-recyclable materials according to local regulations. Avoid throwing away hazardous materials like fluorescent bulbs or ballasts in regular trash bins. Contact your local waste management facility or environmental agency for proper disposal options.
Now that you have successfully replaced your ceiling light fixture, it is important to be aware of common issues that may arise with your new installation. These include flickering lights, dimming lights, buzzing sounds or loose connections. Troubleshooting these issues requires careful attention to detail and knowledge of electrical wiring principles. In the next section, we will discuss how to identify and fix these common problems to ensure optimal performance from your new fixture.
Troubleshooting Common Issues
When replacing a ceiling light fixture, it is common to encounter wiring issues that may prevent the new fixture from functioning properly. One common issue is mismatched wiring, where the wires from the old fixture do not match those of the new one. This can lead to improper connections and potentially hazardous conditions. To troubleshoot this issue, it is important to check for any discrepancies in the wiring colors and ensure that they are properly connected.
Another common issue when replacing a ceiling light fixture is compatibility with the existing electrical system. Some fixtures may require additional wiring or a different voltage than what is currently present in the ceiling box. It is important to read the instructions carefully and verify that the new fixture is compatible with your electrical system before installation. Failure to do so can result in damage to your electrical system or even cause a fire hazard.
When addressing these issues, it is crucial to take safety precautions such as turning off power at the circuit breaker and using appropriate safety gear such as gloves and eye protection. In addition, it may be helpful to consult with an electrician or other qualified professional if you are unsure about how to address these issues safely and effectively. By taking these precautions and troubleshooting any issues that arise during installation, you can enjoy a safe and functional lighting solution in your home for years to come.
Transition: Now that we have covered some potential issues you may encounter when replacing a ceiling light fixture, let’s turn our attention to some important safety precautions you should take during the installation process.
Safety Precautions To Take
- When replacing a ceiling light fixture, it is essential to ensure that the power is turned off.
- Wearing protective gloves is a necessary precaution to protect against electric shock or injury.
- The use of a ladder when performing the replacement is essential to ensure a safe working environment.
- Care should be taken to identify and test the circuit before proceeding with the replacement.
- The use of a voltage tester is recommended to ensure that the electrical circuit is properly de-energized before proceeding with the replacement.
- All electrical components should be handled with care and all safety protocols should be adhered to.
Turn Off Power
Before replacing a ceiling light fixture, it is important to take safety precautions to avoid any potential hazards. One of the most critical safety precautions is to turn off power to the fixture. This ensures that no electricity is running through the wires, reducing the risk of electrocution or electrical burns.
To turn off the power, locate your circuit breaker panel and find a labeled switch for the room where you will be working. Turn off this switch completely to cut power to the entire room. Alternatively, you may use a non-contact voltage tester to confirm that there is no electricity flowing through the wires before starting work.
One of the most common mistakes people make when replacing a ceiling light fixture is failing to turn off power beforehand. It may be tempting to rush through this step, especially if you are familiar with electrical work. However, even experienced electricians can make mistakes that lead to serious injury or damage. Always prioritize safety precautions and take your time when replacing a ceiling light fixture.
Wear Gloves
Another important safety precaution to take when replacing a ceiling light fixture is to wear gloves. Gloves can protect your hands from cuts, scrapes, and other injuries that may occur while handling sharp or rough materials. Additionally, wearing gloves can reduce your risk of exposure to hazardous chemicals or substances that may be present in the wiring or insulation.
When choosing gloves for electrical work, there are several considerations to keep in mind. First and foremost, make sure that the gloves are rated for electrical use and are designed to provide protection against electric shock. You should also choose gloves that fit well and allow you to maintain dexterity and grip while working.
After completing the job, it is important to properly dispose of your gloves. Do not simply throw them away with your regular trash; instead, place them in a plastic bag and tie it securely before disposing of them according to local regulations. By taking these steps to wear gloves during your project and properly dispose of them afterward, you can help ensure the safety of yourself and others who may come into contact with the material.
Use A Ladder
When it comes to replacing a ceiling light fixture, safety should always be the top priority. One important safety precaution to take is using a ladder. Choosing the right ladder is crucial in ensuring that you can complete your task safely and efficiently.
When selecting a ladder for electrical work, consider its height, weight capacity, and stability. Choose a ladder that is tall enough to reach the ceiling without standing on the top rung or overreaching. Also, ensure that it can support your weight along with any tools or materials that you may need. Furthermore, make sure the ladder has non-slip feet and is placed on stable ground before climbing up.
To use the ladder safely, follow these tips: position it properly away from doors or areas where people may pass by; secure it against the wall or ceiling when possible; do not stand on the top rung or lean too far to either side; keep both hands on the rails while climbing up or down; and avoid carrying heavy items up or down with you. By following these safety measures, you can minimize your risk of falls and other accidents while working at heights.
In conclusion, using a ladder is an essential safety precaution when replacing a ceiling light fixture. By choosing the right ladder and following safety tips for using it, you can ensure that your project goes smoothly and without incident. Always prioritize safety in every electrical project to prevent injuries and accidents from happening.
Knowing Your Home’s Electrical System
Understanding circuits is an essential part of knowing your home’s electrical system. A circuit is a path that electricity follows, and every home has several circuits that distribute power throughout the house. Each circuit runs through a breaker or fuse in the electrical panel, which regulates the amount of electricity flowing through the circuit. Understanding how circuits work is crucial for replacing a ceiling light fixture or any other electrical work in your home.
Electrical safety tips are also essential to keep in mind when working with electricity. First and foremost, always turn off the power at the breaker or fuse before starting any electrical work. Use insulated tools and wear rubber-soled shoes to reduce the risk of electric shock. Never touch plumbing pipes or gas lines while working on electrical systems as they can conduct electricity. If you have any doubts about your ability to safely complete an electrical project, it’s best to call a professional electrician.
Knowing your home’s electrical system can help you with DIY projects like replacing a ceiling light fixture, but sometimes it’s best to hire a professional electrician. If you’re unsure about any aspect of an electrical job or don’t feel comfortable doing it yourself, call an electrician. They have the training and experience necessary to complete any project safely and efficiently. By hiring a professional electrician, you can ensure that your home’s electrical system remains safe and up-to-code for years to come.
Hiring A Professional Electrician
While replacing a ceiling light fixture may seem like a simple task, it can be dangerous and complicated for those without the proper knowledge and experience. Hiring a professional electrician has both pros and cons to consider.
One of the main advantages of hiring an electrician is their expertise in the field. They have the necessary knowledge, skills, and tools to replace your ceiling light fixture safely and efficiently. Furthermore, they can identify any underlying issues with your electrical system that could cause problems in the future.
However, one downside of hiring a professional electrician is the cost. The price to replace a ceiling light fixture will vary depending on several factors such as location, time of day or week, and complexity of the job. It is important to do a cost analysis before making a decision to ensure you are getting fair pricing.
Pros:
Expertise in the field
Ensures safety
Identifies underlying issues with electrical system
Cons:
Higher cost compared to DIY
Cost varies based on location and complexity of job
May need to schedule an appointment
Overall, hiring a professional electrician has its advantages and disadvantages. While it may be more expensive than doing it yourself, it ensures safety and helps prevent potential issues in the future. A thorough cost analysis can help determine if hiring an electrician is worth the investment.
With this in mind, now let’s move on to frequently asked questions (FAQs) about replacing ceiling light fixtures.
Frequently Asked Questions (Faqs
As an electrician or electrical engineer, it is common to receive inquiries from homeowners seeking advice on how to replace a ceiling light fixture. This task may seem simple, but there are common mistakes that homeowners often make when attempting to replace their own fixtures. For instance, failing to turn off the circuit breaker before beginning work poses a risk of electrocution or fire.
Another common mistake is not considering the cost of the new light fixture and its installation. Some homeowners may opt for cheaper options without factoring in the expertise required for proper installation. It is important to remember that a poorly installed fixture can lead to safety hazards and damage to your home’s wiring system. Therefore, it is worth investing in quality fixtures and seeking professional help if necessary.
In conclusion, replacing a ceiling light fixture requires careful planning and execution. As an electrical professional, it is important to educate homeowners about common mistakes and cost considerations. By doing so, we can ensure that they have the knowledge needed to make informed decisions about their home’s electrical systems and avoid potential hazards down the line. Remember, safety should always come first when working with electricity!
Conclusion
Replacing a ceiling light fixture might seem daunting at first, but with the right tools and knowledge, it can be a straightforward process. It is crucial to turn off power to the fixture before starting any work and following safety precautions throughout the installation. Disconnecting wires and attaching a mounting bracket are essential steps in replacing the old fixture.
It is also important to know your home’s electrical system before attempting any DIY electrical work. If you are unsure or uncomfortable with electrical work, hiring a professional electrician is always an option. Remember that safety should always come first when working with electricity.
One anticipated objection to this guide may be that replacing a ceiling light fixture seems too complex for someone without prior electrical experience. However, with proper research and preparation, anyone can successfully replace their own ceiling light fixture. As an electrician or electrical engineer would say, it’s all about understanding the process and taking the necessary safety precautions. By following this guide, you can confidently replace your ceiling light fixture and enjoy improved lighting in your home.
Image Credits
- “Ceiling beams and light fixtures” by litlnemo (featured)







![How To Replace A Single-Pole Wall Switch 15 '... All in all it's just another [switch] in the wall.' ...](https://green-life.blog/wp-content/uploads/2023/05/17xmP5qMtVjq-150x150.jpg.webp)
