Electrical outlets are essential components of any modern home or office, providing a source of power for powering electronic devices. However, electrical outlets may sometimes malfunction due to various reasons such as wear and tear, overloading or short circuiting. In such instances, it is crucial to fix the outlet promptly to prevent electrical hazards such as electric shock or fire accidents. While calling an electrician is the safest option, fixing an electrical outlet by oneself can be a rewarding experience that saves time and money.
As an electrical engineer, I understand the importance of electrical safety in every household and workplace. Therefore, in this article, I will provide you with step-by-step guidelines on how to fix an electrical outlet safely and effectively. Whether you are a homeowner or an office worker seeking to troubleshoot your outlet problems, this guide will equip you with the necessary knowledge to tackle common issues like loose wires, faulty switches or tripped breakers. By following these instructions carefully, you can restore power to your devices without risking your safety or damaging your property.
Gathering The Necessary Tools And Materials
Have you ever experienced an electrical outlet not working? It can be frustrating, especially if you rely on it to power your electronics. However, fixing an electrical outlet is not as complicated as it may seem. With the right tools and materials, you can successfully repair it yourself.
Choosing the right tools is crucial when it comes to repairing an electrical outlet. You will need a voltage tester, screwdrivers (flathead and Phillips), wire strippers, needle-nose pliers, and a wire cutter. These tools will help you detect any electrical current and safely remove any wires or screws without damaging them. It’s important to invest in high-quality tools that will last a long time, which will save you money in the future.
Finding affordable materials is also important when repairing an electrical outlet. You will need to purchase a replacement outlet and cover plate. When purchasing these items, make sure they are compatible with your current wiring system. Also, consider buying in bulk or finding discounts online to save money on these items.
Now that you have gathered the necessary tools and materials for fixing your electrical outlet, it’s important to ensure your safety by turning off the power before beginning any repairs.
Turning Off The Power
- The first step in turning off the power is locating the breaker box. This can usually be found in a utility area and is typically labeled as such.
- Once the breaker box has been located, the next step is to shut off the power. To do this, the main power switch must be flipped to the off position.
- If the main power switch is not clearly labeled, it is important to determine which switch controls the power to the outlet. This can be done by testing the outlets before and after each switch.
- Care should be taken when testing the outlets, as there is a risk of electric shock if the power is still on. It is recommended to use a voltage tester to ensure safety.
Locating The Breaker Box
To fix an electrical outlet, the first step is to locate the breaker box. This is where you can turn off the power supply to the outlet before attempting any repairs. To identify which breaker switch controls the outlet in question, start by checking the labeling on each switch. If there are no labels, systematically flip each switch until you find the one that turns off power to the outlet.
Once you have identified the correct breaker switch, turn it off and check that power flow has been cut to the outlet using a voltage tester or multimeter. It is important to ensure that there is no power running through the wires before attempting any repairs. If you are unsure about how to use these tools, consult a professional or refer to instructional manuals.
In addition to turning off power to the outlet, it is also important to take safety precautions such as wearing rubber-soled shoes and avoiding contact with metal objects while handling electrical components. By taking these steps and checking for power flow before proceeding with repairs, you can ensure your own safety and successfully fix an electrical outlet without needing professional assistance.
Shutting Off The Power
When it comes to electrical work, safety should always be the top priority. One of the most important steps in fixing an electrical outlet is shutting off the power supply. This can be done by identifying and turning off the circuit breaker that controls the outlet in question. To do this, start by checking the labeling on each switch in the breaker box. If there are no labels, systematically flip each switch until you find the one that turns off power to the outlet.
Once you have identified the correct circuit breaker switch, turn it off and check that power flow has been cut to the outlet using a voltage tester or multimeter. These tools are essential for ensuring your own safety and preventing potential electrical hazards. If you are unsure about how to use these tools, refer to instructional manuals or seek assistance from a professional.
It is important to take all necessary precautions when handling electrical components, including wearing rubber-soled shoes and avoiding contact with metal objects. By checking voltage and identifying circuit breakers before proceeding with repairs, you can ensure your own safety and successfully fix an electrical outlet without risking injury or damage to your home’s electrical system.
Removing The Outlet Cover
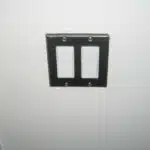
To begin fixing an electrical outlet, the first step is to remove the outlet cover. This process may seem simple, but it requires a certain level of caution and precision to avoid any accidents or damage. Before starting, make sure that you have the proper tools and technique.
Safety tips should be taken into consideration when removing an outlet cover. Always ensure that the power supply to the outlet is turned off before starting any work. It is also recommended to use rubber gloves and safety glasses during this process to protect yourself from any potential electrical hazards. Additionally, it is crucial to handle all tools with care and avoid using damaged or faulty equipment.
Proper tools and technique are necessary for safely removing an outlet cover. The essential tools needed include a flathead screwdriver and needle-nose pliers. Begin by inserting the tip of your screwdriver into one of the screws located on either side of the outlet cover plate. Turn your screwdriver counterclockwise until it stops turning, then gently pull outwards on the screwdriver while holding onto the plate with your other hand. Repeat this process on the second screw until both screws are removed. Afterward, carefully detach the plate from the wall using your needle-nose pliers.
By following these safety tips and using proper tools and techniques, you can safely remove an electrical outlet cover without causing any damage or harm. The next step in fixing an electrical outlet involves examining its wiring to determine whether there are any issues or damages present that need attention.
Examining The Wiring
As we delve deeper into the process of fixing an electrical outlet, it is important to first understand electrical currents. An electrical current is a flow of electrons through a conductor, which in this case would be the wiring that connects your outlet to the rest of your home’s electrical system. When there is faulty wiring, this flow can be disrupted and lead to issues such as power outages or even fires.
Identifying faulty wiring can be a difficult task, but it is crucial to ensuring your safety and the proper functioning of your outlet. One common issue is loose or frayed wires, which can lead to sparking and short circuits. Another issue might be damaged insulation on the wires, which can cause exposed wires and increase the risk of electrocution.
As an electrical engineer, it is important to approach this task with caution and attention to detail. Carefully inspect all wiring for any signs of damage or wear, using appropriate tools such as wire strippers or pliers. Once you have identified any issues with the wiring, move on to tightening loose wires and repairing any damaged insulation in order to restore proper function and ensure safety for yourself and others.
Tightening Loose Wires
To properly tighten loose wires in an electrical outlet, you must first turn off the power supply to the outlet. This is done by switching off the circuit breaker that controls the outlet or unplugging any devices connected to it. Once you have ensured that there is no electricity flowing to the outlet, remove the faceplate covering the outlet and use a screwdriver to loosen the screws holding the wires in place.
After loosening the screws, carefully pull out each wire and inspect them for any signs of damage such as fraying or discoloration. If you notice any damage, it is recommended that you replace the entire wire instead of attempting to repair it. Once you are sure all wires are in good condition, wrap each wire clockwise around its respective terminal and tighten each screw securely.
To prevent loose wires in electrical outlets, there are a few tips you can follow. Firstly, make sure all connections are tight when installing new outlets or switches. Secondly, avoid using backstab wiring connections as they tend to loosen over time and can cause electrical hazards. Lastly, periodically check all your outlets and switches for signs of wear or damage and fix any issues immediately to prevent further damage. By following these tips, you can ensure a safe and functional electrical system in your home.
Transition: Now that we have discussed how to properly tighten loose wires in an electrical outlet and some tips for preventing future issues with your electrical system, let’s move on to replacing faulty switches if necessary.
Replacing Faulty Switches
Moving on from tightening loose wires, we now turn our attention to replacing faulty switches. Often times, a switch may fail to operate properly due to a damaged or worn out switch cover. In such cases, the first step is to remove the cover plate using a screwdriver and inspect the switch wiring for any signs of damage or wear.
Troubleshooting switch wiring can be daunting, but with the right tools and knowledge, it can be done easily. Begin by turning off the circuit breaker that supplies power to the switch you want to replace. Next, remove the old switch by loosening the screws that hold it in place and disconnecting the wires attached to it. Before installing your new switch, carefully read its instructions to ensure that you are connecting all wires correctly.
Once your new switch is installed and working properly, it’s time to replace the cover plate. Choose a cover plate that matches your decor and install it securely with screws. With these simple steps, you’ll have replaced a faulty switch in no time at all.
Moving forward, let’s explore how resetting tripped breakers can solve common electrical outlet issues.
Resetting Tripped Breakers
When an electrical outlet suddenly stops working, the cause may be a tripped breaker in your electric panel. Common causes of tripped breakers include overloading, short circuits, and ground faults. Overloading occurs when too many devices are plugged into a single outlet or circuit. Short circuits happen when wires touch each other, causing an overload of current flow. Ground faults occur when the electricity flows through a ground wire instead of the intended path.
To troubleshoot a tripped breaker, start by locating your electric panel and checking if any switches have flipped to the off position. If you find a switch that has tripped, turn it off first before flipping it back on. This will reset the breaker and restore power to your electrical outlet. If the breaker trips again immediately after resetting it, you may have a more serious issue that requires professional assistance.
Remember these key points when resetting a tripped breaker:
- Always turn off the device or appliance that caused the trip before resetting the breaker.
- Do not attempt to reset any breakers that feel hot to the touch.
- Be sure to replace any damaged electrical cords or appliances before using them again.
In order to ensure that power has been fully restored to your outlet, it is important to test it with a voltage tester. This will help you verify that there is no voltage present in your circuit before proceeding with further repairs or replacements. By following these steps and safety precautions, you can easily troubleshoot and fix most electrical outlet issues on your own without requiring an electrician’s assistance.
Testing The Outlet With A Voltage Tester
As an electrical engineer, it is well-known that electrical outlets are the most common source of household fires. With this in mind, testing your outlet with a voltage tester is essential to ensure that it’s working correctly and safely. Before proceeding with any repairs, you must first determine if the outlet is receiving power.
To properly use a voltage tester, you must first turn off the circuit breaker that controls the outlet’s electricity supply. Then remove the cover plate from the outlet to expose the wiring and terminals. Insert one prong of the voltage tester into the smaller slot of the outlet and then place the other prong on the larger slot. If your voltage tester indicates zero volts, it means no power is flowing through your outlet.
Common issues found during voltage testing include reversed polarity, open grounds, open neutrals, and faulty wiring connections. These issues can cause electrical shock or damage to appliances and electronics connected to them. Therefore, if any issue arises during voltage testing, it’s best to consult with a licensed electrician for repair or replacement.
With proper knowledge of how to use a voltage tester and what common issues may arise during testing, you can now proceed with confidence in repairing your electrical outlet. The next step would be replacing damaged outlets which we will discuss in detail in our subsequent section.
Replacing Damaged Outlets
Identifying Damaged Outlets: Electrical outlets that are not functioning correctly should be inspected thoroughly to determine the cause of the problem. Gathering Supplies: Before attempting to replace a damaged outlet, the necessary supplies should be gathered, including the replacement outlet, electrical tape, and a screwdriver.
Identifying Damaged Outlets
As an electrical engineer, it is important to know how to identify damaged outlets. Checking for hazards is the first step in ensuring that your outlet is safe and functional. Hazards can include frayed wires, loose connections, or burn marks on the outlet. It is crucial to address these issues as soon as possible to prevent any potential danger.
There are common causes of outlet damage that should also be taken into consideration when inspecting your outlet. One of the most common causes is overloading the circuit with too many appliances or electronics plugged in at once. This can cause overheating and damage to the outlet. Another cause could be physical damage from something hitting or crushing the outlet, which can result in cracks or breaks in the plastic housing.
In summary, identifying damaged outlets involves checking for hazards and understanding common causes of damage. As an electrical engineer, it is important to prioritize safety when dealing with electrical systems. By regularly inspecting your outlets and addressing any issues promptly, you can ensure that your home remains a safe environment for you and your family.
Gathering Supplies
When dealing with damaged outlets, it is important to know how to identify them and address any hazards promptly. However, in some cases, repairing the outlet may not be enough and replacement may be necessary. Gathering supplies is a crucial step in the process of replacing a damaged outlet.
Common mistakes when gathering supplies include purchasing the wrong type of outlet or not having all of the necessary tools on hand. It is important to do research beforehand and make sure you have everything you need before beginning the replacement process. DIY projects can be satisfying, but it is also important to know when professional help may be needed, particularly for more complex electrical issues.
When gathering supplies for replacing a damaged outlet, it is essential to have basic tools such as wire cutters, pliers, and a screwdriver. Additionally, choosing the correct type of outlet for your specific needs is crucial for ensuring proper functionality and safety. For example, there are different types of outlets for outdoor use versus indoor use. If you are unsure about which type of outlet or tools to purchase or how to properly replace an outlet, seeking professional help from an electrician may be the safest option.
Upgrading Outdated Outlets
Upgrading outdated outlets can significantly improve energy efficiency in your home while adding convenience when it comes to smart home integration. The electrical outlets found in older homes may not be designed to accommodate the power demands of today’s modern appliances and devices. By replacing these outdated outlets with newer models, you can enjoy a more efficient and cost-effective electrical system.
One of the best options for upgrading your outlets is to install smart outlets that are designed to work with your home automation system. These devices can be controlled remotely using a smartphone app, allowing you to turn off lights or appliances when they’re not in use. You can also set schedules or timers for specific devices, ensuring that you’re never wasting energy unnecessarily.
Another option for upgrading your electrical outlets is to install USB charging ports in place of traditional electrical sockets. This will make it easier for you and your family members to charge phones, tablets, and other mobile devices without having to search for an available outlet. With these options for upgrading outdated outlets, you can enjoy greater energy efficiency and convenience throughout your home while reducing your overall energy costs.
Transition: Now that we’ve covered how to upgrade outdated outlets for improved energy efficiency and smart home integration, the next step is to ensure added safety by installing GFCI outlets.
Installing Gfci Outlets For Added Safety
Upgrading outdated outlets is a crucial step towards ensuring the safety and efficiency of your electrical system. However, installing GFCI (Ground Fault Circuit Interrupter) outlets can take your electrical safety to the next level. For instance, if you accidentally drop an appliance into water while it’s connected to a GFCI outlet, the outlet will automatically cut off the power supply and prevent electrocution.
There are several benefits of installing GFCI outlets in your home. First, they provide a higher level of protection against electrical shocks and fires caused by faulty wiring. Second, they can detect even small imbalances in current flow and shut off power within milliseconds. Finally, they’re ideal for areas that are exposed to moisture such as bathrooms, kitchens, and outdoor outlets.
While installing GFCI outlets is relatively simple, it’s important to avoid common installation mistakes such as getting the wiring wrong or leaving wires exposed. Always follow manufacturer instructions carefully or hire a professional electrician to do it for you. Once installed correctly, be sure to test them regularly using the built-in TEST button on each outlet to ensure that they’re working correctly.
To further ensure your safety when dealing with electrical systems at home, securing the outlet cover is critical. The cover not only protects the wiring from damage but also prevents accidental contact with live wires by children or pets. Ensure that all screws are tightly secured and replace any missing covers immediately. By following these steps, not only will you have improved safety assurance but also peace of mind knowing that your electrical system is up-to-date and operating efficiently.
Securing The Outlet Cover
After successfully installing the new electrical outlet, the next step is to secure the outlet cover. To do this, turn off the power supply and remove the old cover carefully. Ensure that there are no wires or screws that might be left behind before proceeding to replace it with a new one.
When purchasing a new cover, ensure that it matches the specifications of your outlet. Most covers come in standard sizes, but you can also customize them according to your preference. If you opt for customization, ensure that the measurements are accurate and that it fits perfectly with your outlet.
Once you have secured the new cover, you can turn on the power supply and test if everything is working correctly. It is essential to check if there are any sparks or unusual sounds coming from the outlet as this may indicate an issue with wiring or installation. If everything is in order, then you have successfully fixed your electrical outlet!
Turning The Power Back On
Imagine a house as a complex machine, with each room as a component that cannot function properly without the others. When an electrical outlet malfunctions, it’s like a cog in the system breaking down, causing inconvenience and potential danger to the household. Therefore, it’s essential to turn the power back on safely and efficiently.
Before turning the power back on, it’s crucial to recheck all connections thoroughly. Any loose or damaged connection can cause further issues when electricity flows through them. Make sure that all wires are securely connected to their respective terminals and that there is no exposed copper wire showing. Additionally, check if there are any signs of overheating or damage around the outlet.
If everything looks fine but you still encounter issues after turning the power back on, don’t panic. Troubleshooting issues may seem daunting at first, but it’s necessary to ensure that your electrical system is functioning correctly. Check for other faulty outlets in nearby rooms or circuits that might be affecting your outlet’s performance. You can also use an electrical tester to identify whether there is an open circuit or short circuit present.
With these steps completed, you can now proceed to turn the power back on with confidence knowing that you’ve taken all necessary precautions. However, before testing the outlet again, double-check all connections once more for safety reasons. Once you’re sure everything is securely connected and that there are no visible damages or hazards present around the outlet, move forward with caution and test your electrical outlet again.
Testing The Outlet Again
After turning the power back on, it’s time to test the outlet again and see if it’s now working. If it still doesn’t work, there could be some common issues that are preventing it from functioning properly. It’s important to troubleshoot these issues before deciding whether to fix the outlet yourself or hire an electrician.
One of the most common issues with electrical outlets is a loose connection. This can happen if the wires inside the outlet become loose over time, causing a poor connection and preventing electricity from flowing through. To fix this issue, turn off the power to the outlet and remove the cover plate. Then, tighten any loose screws or wires and replace the cover plate before turning the power back on.
If you’ve tried troubleshooting and still can’t get your electrical outlet to work properly, it may be time to consider whether you should tackle this DIY project or hire an electrician. While fixing an electrical outlet may seem like a simple task, there are many safety precautions that need to be taken into account to avoid electrocution or other accidents. If you’re not comfortable working with electricity or don’t have experience in electrical repairs, it’s always best to call in a professional.
When dealing with electrical outlets, safety precautions are essential to keep in mind at all times. Always turn off the power before attempting any repairs or troubleshooting. Be sure to wear protective gear such as gloves and goggles when working with electricity, and never touch live wires or bare conductors with your bare hands. By following these safety guidelines, you can ensure that your DIY electrical repair project is completed safely and successfully.
Safety Precautions To Keep In Mind
Worrying about fixing an electrical outlet by yourself can be daunting, but with the right knowledge and precautions, you can do it safely. Before starting any electrical work, it is important to understand electrical currents and how they work. An electrical current is simply the flow of electric charge from one point to another. It’s important to note that electricity always seeks the path of least resistance.
Using proper protective gear while fixing an electrical outlet is crucial for your safety. Protective gear such as rubber gloves, safety glasses, and a face mask will minimize the risk of electrocution or injury from flying debris. Before starting any work on an outlet or switch, make sure to turn off the power supply from the circuit breaker panel. If you are unsure which circuit controls the outlet you are working on, use a voltage tester to check and ensure that there is no electricity flowing through it.
To ensure maximum safety when fixing an electrical outlet by yourself, consider these five precautionary measures:
- Always read instructions carefully before attempting any repairs.
- Work in a well-lit area where you can clearly see what you’re doing.
- Use only high-quality tools designed specifically for electrical work.
- Never touch metal parts of tools with bare hands while working on live wires.
- Do not attempt any repairs if you are not comfortable or confident in your abilities.
By following these basic steps and using proper protective gear when fixing an electrical outlet by yourself, you can ensure your own safety and get the job done efficiently. Remember to always exercise caution and never take unnecessary risks when working with electricity.
Conclusion
In conclusion, fixing an electrical outlet is a task that can be accomplished by a homeowner with the right tools and precautions. It is important to gather the necessary materials, turn off the power, examine and tighten loose wires, secure the outlet cover, turn on the power and test the outlet again. Safety should always be at the forefront of any DIY electrical repair project.
According to a study by Electrical Safety Foundation International (ESFI), there are an estimated 51,000 home electrical fires each year in the United States alone. These fires result in hundreds of deaths and thousands of injuries annually. The majority of these fires could have been prevented through proper installation and maintenance of electrical outlets. It is crucial to take action when an outlet shows signs of damage or malfunction to prevent potentially deadly consequences. As electrical engineers, we must stress the importance of following safety guidelines when working with electricity to avoid tragic outcomes.
Image Credits
- “electrical outlet” by grendelkhan (featured)




![How To Replace A Single-Pole Wall Switch 8 '... All in all it's just another [switch] in the wall.' ...](https://green-life.blog/wp-content/uploads/2023/05/17xmP5qMtVjq-150x150.jpg.webp)

