Dryer vent installation is an essential task that ensures proper ventilation of hot air from your dryer. A well-installed vent promotes efficient drying and reduces the risk of fire hazards caused by clogged vents. However, installing a dryer vent in a tight space poses a significant challenge for most homeowners. The limited space restricts the placement of the vent, making it difficult to achieve optimal performance. In this guide, I will provide you with expert advice on how to install a dryer vent in a tight space while adhering to safety measures and achieving maximum efficiency.
When installing a dryer vent in a tight space, it is vital to consider several factors, including the type of material used for the ductwork and the distance between the dryer and the exterior wall. Additionally, you need to ensure that there are no sharp bends or kinks in the ductwork as this may cause airflow restrictions leading to poor performance and potential hazards. This guide will take you through all these steps and offer valuable insights into how you can overcome any challenges you may encounter during installation. So if you’re looking to install a dryer vent in a tight space but don’t know where to start, sit tight as we explore everything that goes into achieving optimal performance while keeping your home safe from potential hazards.
Understanding The Importance Of Proper Dryer Ventilation
Proper dryer ventilation is critical for the safety of your household. A clogged dryer vent can lead to a fire hazard, as it significantly reduces the airflow necessary for your dryer to function correctly. In addition, if your dryer vent is not cleaned regularly, it can negatively impact the efficiency of your dryer and increase your energy bills.
One of the most common signs of a clogged dryer vent is when it takes longer than usual for your clothes to dry. This happens because there is not enough airflow to remove moisture from the clothing effectively. Another sign is when you notice a burning smell coming from the lint filter or around the dryer area. If you experience any of these signs, it’s essential to have your dryer vent inspected and cleaned by a professional.
It’s crucial to understand that proper ventilation goes beyond just cleaning your lint filter after every use. You should also inspect and clean your dryer vent at least once a year or more frequently if you use your dryer frequently or have pets that shed hair. By doing so, you will ensure that you prevent any potential hazards from occurring while prolonging the lifespan of your appliance.
For identifying the right location for your dryer vent, consider several factors such as where you would like it to exit outside and where there are no obstructions in its path.
Identifying The Right Location For Your Dryer Vent
1.The placement of a dryer vent is an important factor to consider when installing a dryer in a tight space. 2.Careful measurements must be taken to ensure the dryer vent is properly sized for the given space. 3.Uneven walls or ceilings can complicate the installation of a dryer vent in a tight space. 4.Specific tools and materials must be used to properly secure a dryer vent in a tight space. 5.In some cases, a dryer vent may need to be extended to reach the outside of a building. 6.Additional safety measures may need to be taken to prevent a fire hazard when installing a dryer vent in a tight space.
Dryer Vent Placement
As a dryer vent installation expert, it is important to understand the significance of proper dryer vent placement. Not only does it affect the efficiency of your dryer, but it also impacts the safety and health of your home. When dealing with a tight space, alternative venting options may need to be considered. Ventless dryers or indoor dryer vents are viable options for those who cannot install a traditional outdoor vent.
However, if an outdoor vent is feasible, ventilation regulations must be followed. The location of the vent should be at least three feet away from any combustible material and should not be near any windows or doors that could allow exhaust fumes back into the home. Additionally, the vent should be installed in a vertical position and have minimal bends to ensure proper airflow.
In conclusion, when installing a dryer vent in a tight space, alternative options such as indoor vents can be considered. If an outdoor vent is possible, ventilation regulations must be adhered to for safety and efficiency purposes. Proper placement will not only provide optimal performance for your dryer but also guarantee the safety and well-being of your family and home.
Measuring For Vent Space
When it comes to identifying the right location for your dryer vent, space restrictions may come into play. It is crucial to measure the available space and ensure that there is enough room for the vent installation. Measuring techniques such as using a tape measure or laser level can be used to determine the exact dimensions needed for the vent. This step is essential in determining whether an indoor or outdoor vent is feasible.
In addition to measuring the available space, it is also important to consider any potential obstructions that may affect proper airflow. These obstructions could include walls, cabinets, or other appliances. If these obstacles cannot be moved, alternative ventilation options may need to be considered. However, with proper measurement and planning, it is possible to find a suitable location for your dryer vent even in tight spaces.
Ultimately, identifying the right location for your dryer vent requires careful consideration of space restrictions and potential obstructions. Proper measurement techniques should be utilized to ensure that there is enough room for installation and optimal airflow. By taking these factors into account, you can ensure that your dryer operates efficiently and safely in your home.
Installing Vent In Tight Spaces
When it comes to dryer vent installation, identifying the right location can be a challenge, especially when dealing with tight spaces. Venting challenges such as limited room for airflow and obstructions like walls and cabinets can make the process difficult. However, with proper planning and consideration of alternative solutions, it is possible to install a dryer vent in even the smallest of spaces.
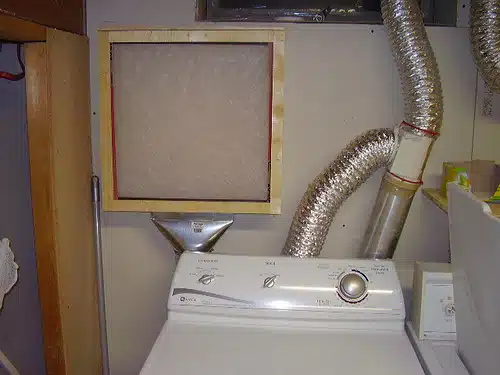
In situations where space restrictions are a concern, an indoor vent may be the best option. Indoor vents work by collecting moist air from the dryer and filtering it through a lint trap before releasing it into the room. While this method may not be as efficient as outdoor ventilation, it can still provide adequate airflow for your dryer without the need for extensive ductwork or modifications to your home’s exterior.
If indoor ventilation is not feasible due to limited space or other factors, alternative solutions such as using a periscope-style vent kit or installing a vent box may be necessary. Periscope-style vents are designed to fit between wall studs and can be adjusted to achieve optimal airflow. Vent boxes are another option that can help maximize space utilization by allowing you to install your dryer closer to the wall while still maintaining proper ventilation.
In conclusion, installing a dryer vent in tight spaces requires careful consideration of alternative solutions and proper planning. By understanding your options and working with an experienced installer, you can ensure that your dryer operates safely and efficiently in even the smallest of spaces. Remember that proper ventilation is essential for preventing fires and maintaining optimal drying performance, so take the time to identify the best location for your dryer vent before beginning installation.
Measuring The Space For Your Dryer Vent
Before installing a dryer vent in a tight space, it is important to measure the area where you plan to install it. A proper measurement will ensure that your dryer vent fits perfectly and functions efficiently. To get an accurate measurement, you can use several measuring techniques such as a tape measure or a laser measure.
Here are some space saving solutions that you should consider when measuring for your dryer vent:
- Determine if you need a vertical or horizontal installation.
- Measure the distance from the center of the dryer vent outlet to the exterior wall.
- Calculate the length of ductwork needed to connect the dryer vent to the outside of your home.
- Make sure to account for any turns or bends in the ductwork.
When measuring for your dryer vent, keep in mind that you want to maximize your available space while ensuring proper ventilation for your dryer. By using space saving solutions and accurate measuring techniques, you can install a functional and efficient dryer vent in even the tightest spaces.
Transition into Selecting the Right Duct Material for Your Vent: Now that you have measured your space accurately, it’s time to select the right duct material for your vent.
Selecting The Right Duct Material For Your Vent
After measuring the space for your dryer vent, the next step is to select the right duct material. Choosing the correct diameter of duct is important to ensure proper airflow and prevent lint buildup. The most common diameters are 4 inches and 6 inches, but it’s important to check your dryer manufacturer’s recommendations before making a final decision.
When comparing flexible and rigid ducts, there are pros and cons for each option. Flexible ducts are easier to install in tight spaces since they can bend around corners, but they can also sag over time which can restrict airflow. Rigid ducts provide better airflow and are less likely to accumulate lint, but they require more space for installation and may require additional fittings to navigate through tight spaces.
Ultimately, the type of duct you choose will depend on your specific installation needs. Consider the space available, manufacturer recommendations, and any local building codes or regulations before making a final decision on which type of duct to use for your dryer vent installation.
Tools You’ll Need For Installing Your Dryer Vent
To install a dryer vent in a tight space, it’s important to have the right tools. Here are some of the tools you’ll need for installing your dryer vent:
Drill – You’ll need a drill with a long bit to make holes in the wall for the vent.
Screwdriver – A screwdriver will be used to attach the vent hood to the exterior of your home.
Duct tape – This will be used to seal any gaps between the vent and the wall or floor.
Measuring tape – Measure twice, cut once! You’ll need this to measure the length of ductwork needed.
Pliers – These may come in handy when attaching clamps or bending ductwork.
It’s important to avoid common mistakes when installing your dryer vent, especially if you’re doing it yourself rather than hiring a professional. One mistake is not using enough duct tape or sealant, which can cause air leaks and reduce efficiency. Another mistake is not cleaning out lint from both ends of the duct before installation, which can also lead to reduced efficiency and even fire hazards.
While DIY installation may seem like a cost-effective option, it’s important to consider whether you have the necessary skills and experience for the job. Improper installation can lead to safety hazards and damage to your home or appliance. Hiring a professional may ultimately save you time and money by ensuring proper installation and reducing potential problems down the line.
Before beginning installation, it’s important to prepare the area properly by clearing any obstructions and ensuring there’s enough space around your appliance for safe operation. In order to do this, follow these steps…
Preparing The Area For Installation
Although installing a dryer vent in a tight space can be challenging, with the right tools and preparation, it is achievable. One common mistake that people make when installing a dryer vent in a tight space is not taking proper measurements. Before beginning the installation process, ensure that you have accurate measurements of the area where you plan to install the vent.
To prepare for the installation, clear out any debris or obstructions from the area where you plan to install the vent. You should also turn off your dryer and disconnect it from its power source before starting any work on the vent. Additionally, if you are working with a gas dryer, it is crucial to shut off the gas supply before proceeding with installation.
When cutting into your wall or ceiling to create an opening for your dryer vent, be sure to use caution and take appropriate safety measures. This step requires precision and careful attention to detail. You will need to cut through drywall or another similar material using either a reciprocating saw or a jigsaw. For best results, mark out your cutting lines beforehand and proceed slowly and methodically as you cut into the surface material. With these tips in mind, cutting a hole for your dryer vent can be done safely and effectively.
Cutting A Hole For Your Dryer Vent
Before you start cutting, make sure to locate the closest exit point outside your home. This will help you determine the shortest and most efficient path for your ductwork. If you are working with a tight space, it is important to measure the exact dimensions of your vent hole before making any cuts. Use a template or a pencil to mark the outline of your hole on the wall or ceiling.
Once you have marked your hole, it’s time to cut. You can use a reciprocating saw or a jigsaw to make precise cuts in drywall, wood, or masonry. Make sure to wear protective gear such as gloves and goggles when cutting through materials that produce dust or debris. If you don’t feel comfortable cutting through walls, consider hiring a professional installation service.
Alternative materials such as flexible ducts can be used in tight spaces where rigid metal ducts cannot fit. However, it is important to note that flexible ducts are more prone to kinks and blockages over time, which can affect the efficiency of your dryer and even pose fire hazards. Therefore, it is recommended that you consult with an expert before choosing alternative materials for your installation needs.
As you finish cutting your hole for the dryer vent, take some time to clean up any debris or dust left behind from the process. This will ensure that your ductwork remains unobstructed and functional throughout its lifetime. Next up on our installation guide is connecting your ductwork – stay tuned!
Connecting Your Ductwork
When connecting your ductwork, the first step is to choose the right vent pipe for your dryer. Consider the size of the space and the materials needed for the job. Then, make sure the pipe is securely attached to the dryer and the wall or floor. After that, install the hose connector to the wall or floor using screws and a power drill. Be sure to connect the vent pipe firmly to the connector to ensure a good seal. Finally, make sure all your connections are tight and secure. With the right materials and a bit of elbow grease, you can successfully install a dryer vent in a tight space.
Choosing A Vent Pipe
Selecting appropriate materials for your dryer vent is crucial in ensuring its efficiency and safety. When choosing a vent pipe, it’s essential to consider the material’s durability and heat resistance. The most commonly used materials are aluminum, galvanized steel, and flexible plastic. Aluminum is lightweight and easy to work with, while galvanized steel is more durable. Flexible plastic is relatively easy to install but may not be as long-lasting as other options.
Aside from material, airflow resistance also plays a significant role in selecting the right vent pipe. The more turns or bends in the ductwork, the higher the resistance will be. This means that you’ll need to choose a larger diameter pipe to compensate for this added resistance. Remember that airflow resistance can lead to decreased efficiency and even fire hazards if not appropriately addressed.
In summary, when selecting a vent pipe for your dryer installation, it’s essential to consider both material and airflow resistance. Choose a durable material like aluminum or galvanized steel that can withstand high temperatures without leaking or rusting. Additionally, ensure sufficient airflow by selecting an appropriate diameter pipe that can handle any turns or bends in your ductwork without causing excessive resistance.
Securing The Pipe
Connecting your ductwork is a crucial step in installing your dryer vent. After selecting the appropriate material and ensuring sufficient airflow, it’s time to secure the pipe in place. One common method of securing the dryer vent is by using brackets. Brackets are essential in holding the pipe firmly in place, preventing it from moving or sagging over time. When installing brackets, make sure to space them out evenly along the length of the ductwork for maximum support.
Aside from using brackets, applying sealant is also an essential part of securing your dryer vent. Sealant helps to prevent air leaks and keeps moisture out of the ductwork, which can cause rust and other damage over time. To apply sealant, simply use a brush or applicator to cover any gaps or joints in your ductwork thoroughly. Allow ample time for the sealant to dry before turning on your dryer.
In conclusion, securing your dryer vent is just as important as selecting appropriate materials and ensuring sufficient airflow. Use brackets to hold the pipe firmly in place and apply sealant generously to prevent air leaks and moisture buildup. Remember that proper installation not only ensures efficiency but also promotes safety at home.
Installing The Hose Connector
Connecting the ductwork for your dryer vent involves several essential steps to ensure optimum performance and safety. We have already discussed the importance of selecting appropriate materials, ensuring sufficient airflow, and securing the pipe using brackets and sealant. However, another crucial step in this process is installing the hose connector.
The hose connector is a component that joins the dryer exhaust port to the ductwork, allowing hot air and moisture to escape from your home. To secure the hose connector in place, use metal clamps or adjustable straps that fit tightly around both ends of the connector. Make sure to tighten these clamps securely but not too tight as they could damage or deform the connection points.
Troubleshooting hose connection issues is also an essential part of installing your dryer vent. One common problem that homeowners face is a loose or leaking hose connection, which can cause poor airflow and increase energy consumption. If you notice any gaps or leaks in your hose connection after installation, use foil tape or heat-resistant silicone caulk to seal them up effectively. In case of severe damage or deterioration in your hose connector, it may be necessary to replace it with a new one to maintain proper ventilation and prevent potential hazards.
By following these guidelines for securing your hose connector and addressing any troubleshooting issues promptly, you can ensure that your dryer vent functions efficiently and safely over time. Remember always to check for proper ventilation before turning on your dryer and seek professional assistance if needed for complicated installations.
Securing Your Dryer Vent In Place
Vent securing techniques are essential for ensuring a safe and long-lasting dryer vent installation. Once you have installed your dryer vent, it is important to secure it into place to prevent any movement or disconnection. One way to do this is by using metal clamps that tighten around the vent pipe and attach it securely to the wall or floor. Another option is to use screws and anchors, which can be drilled directly into the wall or floor and provide a strong hold for the vent.
DIY vent installation tips can help ensure that your dryer vent is properly secured in its designated space. Before beginning your installation, make sure to measure and mark where the vent will be placed, taking into account any obstacles or tight spaces. It’s also important to use the correct materials, such as rigid metal ducting instead of flexible plastic hose, which can sag and create lint buildup over time. Additionally, always follow manufacturer instructions for both the vent itself and any tools used during installation.
Properly securing your dryer vent not only ensures its longevity but also helps prevent common installation mistakes. By avoiding these mistakes, you can save yourself from potential hazards and costly repairs down the line. For example, never install a dryer vent that exhausts into an attic or crawlspace as this can lead to mold growth and fire hazards. Additionally, make sure your vent has proper clearance from combustible materials such as wood or insulation.
Transitioning into our next section about tips for avoiding common installation mistakes, there are several key factors to consider when installing a dryer vent in a tight space.
Tips For Avoiding Common Installation Mistakes
Accurate measurements are essential when installing a dryer vent in a tight space. An adjustable elbow is a key component to ensure a secure fit without compromising the airflow of the dryer vent. After the dryer vent installation is complete, it is important to test the fit and ensure there are no leaks. The adjustable elbow should be the correct size for the space and vent pipe, to ensure a good seal. It is recommended to use metal duct tape rather than plastic to secure the adjustable elbow, as metal tape is more secure and resistant to heat. Finally, an additional precaution is to check for any gaps in the connection to the dryer and vent pipe, to ensure a safe and secure connection.
Measure Space Accurately
Accurately measuring the space for a dryer vent installation is crucial in avoiding common mistakes. It may be tempting to eyeball the area or take rough estimates, but this can lead to improper fitting and an inefficient ventilation system. Therefore, it is essential to take precise measurements of the space where you intend to install your dryer vent.
One important measurement is the distance between the dryer and the outside wall. This measurement will help determine how much ductwork you need for your installation. Another crucial measurement is the size of the hole that needs to be cut into the wall for venting purposes. Accurately measuring these dimensions will ensure that your dryer vent fits correctly and functions efficiently.
In conclusion, taking accurate measurements of your space is imperative in ensuring that your dryer vent installation goes smoothly without any hiccups. Measuring twice before making any cuts or installing any ductwork will save time and money in the long run. By avoiding common mistakes such as estimating measurements, you can have a well-functioning dryer vent system installed in even tight spaces.
Use An Adjustable Elbow
When it comes to dryer vent installation, one of the most common mistakes is not being able to accommodate vents in narrow spaces. This can be a problem when traditional ductwork and fittings are used, as they often require a lot of space for proper installation. Fortunately, there are alternatives that can help you avoid this issue.
One of the best alternatives for installing a dryer vent in tight spaces is to use an adjustable elbow. These elbows can be adjusted to the desired angle and orientation, making them ideal for installations where space is limited. They also come in different sizes and materials, so you can choose one that fits your specific needs.
If an adjustable elbow is not an option for your installation, there are other alternatives you can consider. For instance, you could use flexible ductwork or offset fittings that allow you to make sharp turns without compromising airflow. However, these options may not be as efficient as using an adjustable elbow, so it’s important to weigh the pros and cons before making a decision.
In conclusion, if you’re facing challenges with installing a dryer vent in a narrow space, using an adjustable elbow or alternative fittings can help you avoid common mistakes and ensure proper ventilation. By considering all your options and taking accurate measurements of your space beforehand, you can have a well-functioning dryer vent system installed even in tight areas without compromising efficiency or safety.
Check For Leaks
When it comes to installing a dryer vent, checking for leaks is an important step that should not be overlooked. Leaks can occur in different parts of the system, such as the ductwork, fittings, and connections. These leaks can result in reduced airflow, increased energy consumption, and potential fire hazards. Therefore, it’s crucial to check for leaks during and after installation.
One way to check for leaks is to use a smoke test. This involves using a smoke pencil or similar device to detect any air leakage by observing the movement of smoke around the ductwork and fittings. Another method is to use a manometer or pressure gauge to measure the air pressure inside the vent system. If there are significant drops in pressure, this may indicate a leak.
Common leak prevention techniques include using high-quality materials that are resistant to wear and tear, sealing all connections with foil tape or mastic sealant, and avoiding sharp turns or bends that can cause airflow restrictions. It’s also important to regularly clean and maintain the dryer vent system to prevent clogs and buildup that can lead to leaks over time.
In summary, checking for leaks is an essential part of dryer vent installation that helps ensure proper ventilation and prevent safety hazards. By using appropriate testing methods and following common leak prevention techniques, you can avoid common mistakes that may compromise your system’s efficiency and longevity. Always prioritize safety when installing a dryer vent system in your home or commercial space.
Testing Your Dryer Vent For Proper Airflow
Imagine you’re driving a car with a dirty air filter. The engine struggles to get enough air, and your gas mileage suffers as a result. Just like your car’s engine, your dryer relies on proper airflow to function efficiently. A clogged dryer vent can cause your appliance to work harder and take longer to dry clothes, leading to higher energy bills and potential safety hazards.
Proper ventilation maintenance is crucial for maximizing the lifespan of your dryer and ensuring it runs safely and effectively. One of the most important steps in maintaining your dryer vent is regular cleaning. Over time, lint and other debris can accumulate in the vent, blocking airflow and increasing the risk of fire. In fact, according to the National Fire Protection Association, failure to clean dryer vents is one of the leading causes of house fires.
To keep your dryer vent working properly, it’s recommended that you have it cleaned at least once a year by a professional dryer vent cleaning service or do-it-yourself with specialized tools designed for this purpose. Additionally, be sure to inspect the outside vent periodically for blockages caused by leaves or other debris. By taking these simple steps to maintain proper ventilation for your dryer, you’ll not only save energy and money but also reduce the risks associated with faulty equipment.
As important as it is to install a quality dryer vent in a tight space, equally vital is ensuring that it functions optimally over time through regular maintenance. Proper ventilation maintenance will help maximize efficiency while minimizing safety hazards such as fires caused by blocked vents. By following these guidelines for maintaining your dryer vent for optimal performance, you’ll ensure peace of mind knowing that you’re doing everything possible to keep your home safe while saving energy and money in the process.
Maintaining Your Dryer Vent For Optimal Performance
Once your dryer vent is properly installed, it’s important to regularly maintain it for optimal performance. One of the most crucial aspects of maintaining your dryer vent is cleaning it regularly. A clogged dryer vent can not only lead to decreased efficiency and longer drying times but also poses a serious fire hazard. It’s recommended that you clean your dryer vent at least once a year or more frequently if you use your dryer frequently.
There are several signs that indicate your dryer vent may be clogged and in need of cleaning. One such sign is when your clothes take longer than usual to dry or when the outside of your dryer feels hot to the touch. You may also notice excess lint buildup around the lint trap or a burning smell coming from your dryer. If you notice any of these signs, it’s important to have your dryer vent inspected and cleaned as soon as possible.
Regularly maintaining and cleaning your dryer vent not only ensures optimal performance but also promotes safety in your home. By taking preventative measures and keeping an eye out for potential issues, you can avoid costly repairs and dangerous situations down the line. In the next section, we will discuss common ventilation issues that homeowners may encounter with their dryers and how to troubleshoot them effectively.
Troubleshooting Common Ventilation Issues
- Blocked vents can be caused by an accumulation of lint or debris, resulting in a decrease in airflow.
- Poor airflow can be attributed to inadequate sizing of the vent and ducts, or even a kink in the venting system.
- Loose connections can create air leaks, reducing the efficiency of the venting system.
- In order to address blocked vents, the lint or debris must be removed to allow for proper air flow.
- When installing a dryer vent in a tight space, it is important to ensure the sizing of the ducts and venting system is adequate to ensure proper airflow.
- To prevent loose connections, it is important to ensure that all connections are securely fastened and sealed.
Blocked Vents
As an experienced dryer vent installation expert, I have encountered various ventilation issues, and one of the most common problems is a blocked vent. This can be caused by debris buildup in the ductwork, leading to restricted airflow and overheating of the dryer. When your dryer is not functioning correctly, checking for a clogged vent should be your first course of action.
Clearing debris from your dryer vent can be done through DIY solutions or professional services. One way to do it yourself is by disconnecting the duct from the back of the dryer and using a lint brush or vacuum to remove any accumulated lint or dust. However, if you are unsure how to proceed or if there are multiple blockages along the ductline, it is best to contact a professional to assess and clear the obstruction safely.
Ignoring a blocked dryer vent can lead to severe consequences like increased risk of fire hazards and decreased energy efficiency. Therefore, regular maintenance checks and cleaning are recommended to prevent any potential issues that may arise. By keeping your dryer vents clean and clear regularly, you can ensure optimal performance and extend its lifespan while reducing energy consumption.
Poor Airflow
As a professional in the field of dryer vent installation, it is common to encounter issues with poor airflow. Poor airflow can result in decreased efficiency and increased energy consumption, leading to higher utility bills. One of the signs of poor airflow is when your clothes take longer than usual to dry or if you notice that the exterior of your dryer feels hot to the touch during operation.
There are several ways to improve the airflow in your dryer vent system. First, ensure that there are no obstructions or blockages in the ductwork and clean out any accumulated debris regularly. Secondly, check that the ventilation system is adequately sized for your dryer’s needs and avoid using plastic or foil ducts as they can easily become crushed, leading to restricted airflows. Finally, ensure that all connections and joints are properly secured and sealed as leaks can cause reduced airflow.
It is crucial to address poor airflow issues promptly since ignoring them can lead to more severe problems like overheating and potential fire hazards. If you are unsure how to proceed or suspect that there may be an underlying issue causing reduced airflow, it is best to contact a professional for an assessment and repairs. By taking proactive steps towards maintaining optimal airflow in your dryer vents, you can extend its lifespan while reducing energy costs.
Loose Connections
Common causes of poor airflow in dryer vent systems include obstructions, inadequate ventilation sizing, and loose connections. Loose connections can occur between the ductwork and the dryer or between sections of ductwork. These connections can become loose over time due to vibration or movement during routine maintenance or cleaning.
Loose connections can lead to reduced airflow, which can result in longer drying times and increased energy consumption. Additionally, loose connections can be a fire hazard as hot air may escape from the vent and come in contact with flammable materials. Therefore, it is crucial to address any loose connections promptly to ensure optimal airflow and prevent potential safety hazards.
Solutions for loose connections include tightening screws or clamps that secure the connection points. It is also essential to check that the ductwork is properly aligned with the dryer’s exhaust port and that there are no kinks or bends in the ducts that could cause restricted airflow. Regular inspections by a professional dryer vent installation expert can help identify any potential issues with loose connections before they become major problems affecting the efficiency of your ventilation system.
Safety Precautions To Keep In Mind During Installation
As the process of installing a dryer vent can pose various safety risks, it is essential to keep some precautionary measures in mind. The first and foremost step is to wear appropriate safety gear that includes gloves, goggles, and a respirator mask. This will protect you from inhaling harmful particles and debris that may cause respiratory issues.
Moreover, handling hazardous materials such as insulation fibers or sharp metallic edges should also be done with care. Make sure to dispose of them properly and away from children’s reach. Additionally, ensure that the power supply to the dryer vent is turned off before initiating any installation process.
Lastly, always remember that prevention is better than cure. It is advisable to hire a professional dryer vent installer who has adequate knowledge and proper equipment for installation purposes. Although installing a dryer vent may seem like an easy task, it involves potential fire hazards if not executed correctly. Therefore, hiring an experienced professional will not only guarantee your safety but also save you from future expenses and damages.
Transitioning into the subsequent section about ‘hiring a professional dryer vent installer: is it necessary?’, it is crucial to understand the benefits of having an expert handle this task. While some may opt for DIY methods, it is vital to note that improper installation can lead to significant safety risks such as house fires or carbon monoxide poisoning. Hence, in the following section, we will discuss why hiring a professional for this job might be necessary in certain circumstances.
Hiring A Professional Dryer Vent Installer: Is It Necessary?
Having discussed the importance of safety precautions during dryer vent installation, let us now consider whether it is necessary to hire a professional installer. While DIY enthusiasts may be tempted to install their own dryer vents, there are both pros and cons to this approach.
One advantage of hiring a professional is that they have the expertise and experience necessary to complete the job quickly and efficiently. They will also have access to specialized tools and equipment that may not be readily available to amateurs. Additionally, professional installers typically offer warranties or guarantees on their work, giving homeowners peace of mind in case anything goes wrong.
On the other hand, the cost of hiring a professional can be a significant factor for many homeowners. Depending on the complexity of the installation and local labor rates, hiring an expert could cost several hundred dollars. In some cases, it may make more financial sense for homeowners to install the dryer vent themselves or with the help of friends or family members who have construction experience.
Ultimately, whether or not to hire a professional depends on a cost analysis and consideration of individual circumstances. While going the DIY route can save money in certain situations, it is important to weigh this against possible risks such as improper installation leading to fire hazards or damage to property.
Conclusion
Proper dryer ventilation is critical to the safety and efficiency of your home. When installing a dryer vent in a tight space, it’s important to identify the right location, measure the space accurately, choose the appropriate duct material, and use the necessary tools. It’s also essential to maintain your dryer vent regularly and troubleshoot any issues that may arise.
One important consideration is safety. Make sure to take all necessary precautions during installation, such as wearing protective gear and using proper ventilation. If you’re unsure about how to install a dryer vent in a tight space or encounter any difficulties during installation, consider hiring a professional installer.
In conclusion, installing a dryer vent in a tight space requires careful planning and attention to detail. By following these guidelines and taking appropriate measures for safety, you can ensure that your dryer operates efficiently and safely. Remember: “Measure twice, cut once.” This age-old saying reminds us of the importance of accuracy and precision when working on any home improvement project.
Image Credits
- “In house dryer vent filter 1” by ehud42 (featured)

