Laundry chutes are an excellent addition to a home, providing a convenient and efficient way to transport clothes from upper levels to the laundry room. Installing a laundry chute may seem like a daunting task, but with the right tools and knowledge, it can be accomplished easily. This article will provide step-by-step instructions on how to install a laundry chute in your home.
Before beginning the installation process, it is important to consider the location of the laundry chute and its size. The ideal location for a laundry chute is in an area that is easily accessible from all levels of the home. Additionally, the size of the chute should be determined based on how much laundry you plan on transporting through it. Once these considerations have been made, it is time to gather materials and begin installation. By following these instructions carefully, you can successfully install a laundry chute in your home and enjoy its many benefits for years to come.
Choosing The Right Location For Your Laundry Chute
Choosing the right location for your laundry chute is an important decision that requires careful consideration. There are several factors to consider before making a final decision. One of the most critical factors is the location of your current laundry room or area. You want to place the chute in a location that makes it easy and convenient to access from your laundry room.
Another factor to consider is the layout of your home. If you have a multi-level home, you’ll want to find a central location where all floors can access the chute easily. Additionally, you’ll need to make sure there’s enough space available in the walls for installation without interfering with any existing plumbing or electrical systems.
One of the most common mistakes homeowners make when installing a laundry chute is failing to account for future renovations or changes to their homes. Before proceeding with installation, it’s essential to think about any potential remodeling projects that may affect the placement or function of your laundry chute. By doing so, you can ensure that your laundry chute will remain functional and accessible for years to come.
With these factors in mind, it’s time to start measuring the space for your laundry chute.
Measuring The Space For Your Laundry Chute
After choosing the right location for your laundry chute, the next step is to measure the space where you plan to install it. Measuring accuracy is crucial in this process to ensure that your laundry chute fits perfectly. It is essential to take accurate measurements of the width, height, and depth of the space before proceeding with any installation.
One common mistake when measuring for a laundry chute is not taking into account the necessary space required for framing and insulation. Remember that you need to add at least two inches to both the width and depth measurements to accommodate these materials. Failure to do so will result in an ill-fitting laundry chute that can cause problems later on.
Another common mistake is not taking into account obstructions such as pipes or ductwork when measuring for a laundry chute. Make sure to identify any potential obstacles beforehand and adjust your measurements accordingly. Taking note of all these factors will help ensure a smooth installation process without any hiccups along the way.
To ensure a successful installation, gathering the necessary tools and materials is crucial. In the next section, we will discuss what you need in detail and provide some tips on how to choose quality materials that will last for years to come.
Gathering The Necessary Tools And Materials
Cost considerations should be one of the initial steps in preparing to install a laundry chute. It is important to consider how much you are willing to spend on this project before you begin. One way to save money is by using PVC piping instead of metal, which can be more expensive. Additionally, purchasing a pre-made laundry chute kit may be more costly than creating your own from scratch.
Safety precautions should also be taken into account during the installation process. Make sure all power tools are used with caution and that you have protective gear such as gloves and safety glasses. It is also crucial to ensure that the area where the laundry chute will be installed is clear of any potential hazards such as electrical wires or pipes. If necessary, consult with a professional before beginning the installation process.
Before beginning the installation process, it is important to gather all necessary materials including measuring tape, saws for cutting holes in walls or floors, screws and brackets for securing pipes in place, and sealing materials such as caulking or foam insulation. Once all materials have been gathered, it is time to prepare the area for installation by clearing out any debris or clutter that may obstruct progress.
Preparing The Area For Installation
Before you can install a laundry chute, it’s important to properly prepare the area where it will be installed. This involves taking accurate measurements of the space and ensuring that all necessary safety precautions are in place.
To begin, gather your measuring tools, which may include a tape measure, level, and square. Measure the height of the ceilings and the distance between floors to determine the length of your chute. Additionally, measure the width and depth of the wall where you plan to install the chute. Be sure to take accurate measurements multiple times to ensure accuracy.
Next, it’s important to take safety precautions before installing your laundry chute. Wear appropriate protective gear such as gloves and safety glasses when handling tools or materials. Additionally, make sure that any electrical or plumbing lines in the wall are properly marked and avoided during installation. Finally, ensure that there is proper ventilation in the room where you will be working.
By taking precise measurements and implementing necessary safety precautions, you can ensure that your laundry chute installation goes smoothly. Once these steps are completed, you’ll be ready to move on to cutting a hole for your chute in the next section.
Cutting The Hole For Your Laundry Chute
Now that you have decided on the location of your laundry chute, it’s time to cut the hole. Before you start cutting, make sure that there are no electrical wires or plumbing pipes in the area. Also, ensure that the wall is not load-bearing. If you are unsure about any of these factors, consult with a professional before proceeding.
To cut the hole for your laundry chute, use a reciprocating saw to cut through the drywall or plaster. Start at one corner and work your way around the perimeter of the hole. Once you have cut through all four sides, remove the section of drywall or plaster. Be sure to wear protective gear such as safety goggles and a dust mask when cutting and removing the material.
Common mistakes when cutting a hole for a laundry chute include not measuring correctly or not leaving enough space for installation. Safety precautions should also be taken seriously to avoid injury. Always follow manufacturer instructions on how to properly install your chosen laundry chute type and read up on proper handling techniques to avoid accidents during installation.
Next up is installing the chute door.
Installing The Chute Door
- When planning to install a laundry chute, the first step is to choose the door that will fit the desired space.
- It is important to measure the space carefully and select a door that will fit securely and fit the overall aesthetic of the home.
- The door should be securely attached to the wall with screws and other necessary attachments.
- Once the door is installed, it is important to ensure that all necessary seals and gaskets are present to ensure proper air flow and safety.
Choosing The Door
Choosing the door for your laundry chute is an important decision in the installation process. There are various door styles and material options to choose from, each with their own advantages and disadvantages. It is important to consider your specific needs and preferences when selecting a chute door.
One popular option for laundry chute doors is a hinged door. This style allows for easy access to the chute while also providing a secure seal when closed. Another option is a sliding door, which can be more space-efficient but may not provide as tight of a seal as a hinged door. When choosing the material for your chute door, common options include wood, metal, or plastic. Each material has its own strengths and weaknesses, such as durability or aesthetic appeal.
Ultimately, the choice of door style and material will depend on your individual needs and priorities. Consider factors such as ease of use, maintenance requirements, and overall aesthetic appeal when making your decision. With careful consideration and thoughtful selection, you can install a laundry chute with a suitable and functional door that will make household tasks much easier.
Installing The Door
Once you have chosen the door design for your laundry chute, it is time to move on to the next step of installation: installing the door itself. This process involves attaching the door frame to the wall and ensuring a secure fit for your chosen door style. Depending on your selected material, you may also need to paint or finish the door frame to match your home’s interior design.
When installing the door frame, it is important to measure carefully and ensure that it is level before securing it in place. Hinged doors will require hinges and a latch mechanism, while sliding doors may require additional hardware such as tracks or runners. Once installed, test your door’s functionality and make any necessary adjustments for a smooth open and close.
If painting or finishing your door frame, be sure to select appropriate materials for durability and aesthetic appeal. Consider coordinating with other elements in your laundry room or choosing a contrasting color or finish for added visual interest. With careful attention to installation details and finishing touches, you can create a functional and attractive laundry chute that will serve your household needs for years to come.
Securing The Chute To The Wall
When installing a laundry chute, it is important to secure the chute to the wall. This can be done through wall bracketing, which involves installing brackets onto the wall and attaching them to the chute. There are various fastener options available for this purpose, including screws, bolts, and anchors.
Before beginning the installation process, it is essential to determine the appropriate location for the wall brackets. This will depend on factors such as the position of the chute and the type of wall material. Once this has been determined, the brackets can be installed using a drill and appropriate fasteners. It is important to ensure that the brackets are securely attached to both the wall and the chute.
When choosing fastener options for securing the laundry chute to the wall, it is important to consider factors such as weight capacity and durability. Screws are a popular choice for light-duty applications, while bolts may be necessary for heavier chutes or materials such as concrete. Anchors can also provide additional support in situations where there may be limited space or uneven surfaces. By carefully considering these factors and selecting an appropriate fastener option, homeowners can ensure that their laundry chute is securely attached to the wall for years to come.
Transition: Now that we have discussed how to secure your laundry chute to the wall with proper bracketing and fasteners, let’s move on to adding in your chute elbow and straight pipes.
Adding The Chute Elbow And Straight Pipes
After securing the chute to the wall, it’s time to add the chute elbow and straight pipes. Proper elbow placement is crucial in ensuring that your laundry chute functions properly. The elbow should be positioned at a 45-degree angle to funnel clothes down into the straight pipe. This will prevent clothes from getting stuck or jammed in the chute.
Maximizing space is also important when installing a laundry chute. The straight pipes should be cut to fit between floor joists and run as vertically as possible to save space. Plan out your installation carefully to ensure that you’re not sacrificing too much valuable square footage.
Once you’ve added the chute elbow and straight pipes, it’s time to consider insulating your laundry chute. This will help reduce noise and prevent hot or cold air from escaping through gaps in the walls. In addition, insulation can help prevent condensation buildup which leads to mold growth. In the next section, we’ll cover how to properly insulate your laundry chute for maximum efficiency and comfort.
Insulating Your Laundry Chute
If you want to make sure your laundry chute is working efficiently, insulating it is one of the best ways to do it. Insulation will keep the air inside the chute from escaping or entering your home, which can help save you money on energy bills and make your home more comfortable. Finding the best insulation for your laundry chute can be tricky, but there are some cost-effective options available that will do the job.
One of the best insulation options for a laundry chute is fiberglass batts. Fiberglass insulation is relatively cheap and easy to install, making it an attractive option for many homeowners. It’s also highly effective at reducing heat loss and noise transmission, which can be especially important if your laundry room is close to bedrooms or other living areas in your home. Another option is spray foam insulation, which creates a tight seal around the interior of the chute and helps reduce heat loss even further.
Cost-effective options for insulating your laundry chute include using recycled materials such as old blankets or clothing. This method may not be as effective as fiberglass or spray foam insulation, but it is a great way to reuse items that would otherwise go to waste. You could also consider using draft stoppers or weatherstripping around the edges of your chute door to help prevent air leaks. Whatever insulation option you choose, make sure it fits tightly against the walls of your chute and doesn’t leave any gaps.
With proper insulation installed in your laundry chute, you’ll enjoy increased comfort and energy savings in no time. Once you’ve insulated your chute, you’re one step closer to completing this home improvement project – next up: installing the chute exit door!
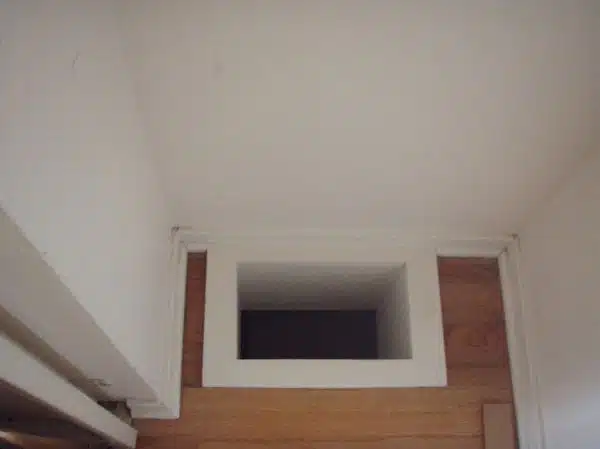
Installing The Chute Exit Door
After properly insulating your laundry chute, the next step is to install the chute exit door. This door will serve as the opening for your clothes to slide down through the chute and into your laundry room. Door material and size are crucial factors to consider when installing a laundry chute exit door.
When it comes to door material, ensure that you choose a sturdy and durable option that can withstand frequent use. Common materials used for laundry chute doors include steel, wood, or plastic. The size of your door should also be appropriate for the size of your laundry chute, ensuring a seamless transition from the chute to the exit door.
Door placement is also important in ensuring that your laundry chute functions optimally. The ideal placement would be in an area with ample space for easy access and installation. Additionally, installing a proper handle on your laundry chute exit door is essential for smooth operation. Ensure that you choose a handle that is comfortable to grip and easy to use.
Now that you have successfully installed your laundry chute exit door, testing its functionality is crucial before using it regularly. Ensure that all parts are securely fastened and there are no obstructions in the pathway of clothes sliding down the chute. Testing also allows you to make adjustments if necessary before regular use of your new laundry chute system.
Testing Your Laundry Chute
Before using your newly installed laundry chute, it is crucial to test it thoroughly to ensure its safety and functionality. It is recommended to test the chute frequently, especially after any maintenance or repair work. To begin testing, first make sure that the bottom of the chute is clear of any obstructions or debris.
Next, drop a few small items down the chute, such as socks or washcloths, to see how they travel through the chute and if they get stuck anywhere along the way. If everything appears to be working properly, try dropping larger items down the chute, such as towels or bedding. This will give you a better idea of how well your laundry chute can handle heavier loads.
It is important to take safety precautions when testing your laundry chute. Wear gloves to protect your hands from any sharp edges and make sure that children are supervised at all times during testing. Additionally, never test your laundry chute by dropping anything heavy or dangerous down it, such as glass bottles or knives. With proper testing and safety precautions in place, you can enjoy the convenience of a functioning laundry chute in your home for years to come.
As you wrap up your testing phase for the laundry chute installation project, you can now move on to finishing touches and clean-up. This includes painting or staining any exposed wood around the opening of the chute and ensuring that all screws and bolts are securely tightened. Once everything is in place and secure, clean up any remaining debris from installation before fully utilizing your new laundry chute system.
Finishing Touches And Clean-Up
After testing your laundry chute, it’s time to move on to the finishing touches and clean-up. One important aspect of installing a laundry chute is ensuring that it fits seamlessly into your home’s design. This means decorating the entrance in a way that complements the surrounding space. For example, if your laundry room has a rustic theme, consider using reclaimed wood for the entrance door or adding some vintage signage to make a statement.
Tips for cleaning the laundry chute:
- Use a long-handled brush to remove any debris that may have accumulated in the chute.
- Avoid using harsh chemicals that may damage the chute or its interior surface.
- Consider lining the inside of the chute with a washable fabric to make cleaning easier.
- Clean the entrance regularly with a damp cloth or disinfectant spray to prevent mold or mildew buildup.
- Encourage family members to shake out their clothing before placing it in the chute to minimize dust and dirt.
Once you’ve finished decorating and cleaning your laundry chute, it’s important to maintain it properly in order to ensure its longevity. Regular care and maintenance can help prevent costly repairs down the line. Some simple steps you can take include inspecting the chute periodically for any signs of wear and tear, such as cracks or holes. Additionally, be sure to lubricate any moving parts on a regular basis to keep them functioning smoothly.
As with any home improvement project, installing a laundry chute requires careful planning and attention to detail. By following these tips for cleaning and maintenance, you can enjoy your laundry chute for years to come without worrying about costly repairs or replacements.
Maintenance And Care For Your Laundry Chute
Laundry chutes are a convenient addition to any home, providing an efficient way to transport dirty laundry from upper floors to the laundry room. However, like any other household feature, they require regular maintenance to function properly. Neglecting proper cleaning and upkeep can lead to unpleasant odors, clogs, and even safety hazards.
To keep your laundry chute in good working condition, it is important to establish a regular maintenance routine. This includes removing any lint or debris that may have accumulated in the chute over time. A long-handled brush or vacuum extension can be used for this purpose. In addition, you should periodically wipe down the inside of the chute with a damp cloth or disinfectant spray to prevent the growth of mold and bacteria.
When it comes to cleaning tips for laundry chutes, there are several things you can do to prevent buildup and maintain optimal performance. One effective method is to use a vinegar and water solution as a natural cleaner. Simply mix equal parts vinegar and water in a spray bottle and apply it liberally throughout the chute. This will help dissolve any buildup of soap scum or other residue that may be clinging to the walls of the chute. Another option is using baking soda as an abrasive cleaner. Sprinkle baking soda into the chute and let it sit for a few minutes before scrubbing with a brush or cloth.
In summary, proper laundry chute maintenance is essential for maintaining its functionality and prolonging its lifespan. By establishing a regular cleaning routine and utilizing natural cleaners such as vinegar and baking soda, you can prevent unpleasant odors and keep your chute running smoothly. In the next section, we will discuss common issues that may arise with your laundry chute and how to troubleshoot them effectively.
Troubleshooting Common Issues With Your Laundry Chute
Back in the day, laundry chutes were considered a luxury item, but nowadays they are a practical addition to any modern home. You can save time and energy by installing a laundry chute that connects your upstairs laundry room directly to your basement or garage. However, it’s important to keep safety in mind when using a laundry chute.
Laundry chute safety should be a top priority for anyone who has installed one in their home. It’s important to ensure that the chute is securely fastened to the wall and that there are no sharp edges or protrusions that could cause injury. Additionally, make sure that children cannot access the laundry chute as it poses a potential hazard.
Troubleshooting chute blockages is another common issue that homeowners face with their laundry chutes. If you notice water backing up into your laundry room or if clothes get stuck in the chute, it’s likely due to an obstruction somewhere along the line. One tip is to use a plumbing snake or auger to clear any clogs. Another solution is to install a lint trap at the bottom of your chute, which will help prevent blockages caused by lint buildup.
With proper installation and regular maintenance, you can enjoy the convenience of your new laundry chute without worrying about safety hazards or frustrating blockages. Remember to prioritize safety first and troubleshoot any issues promptly to ensure smooth operation of your new home improvement feature.
Enjoying The Convenience Of Your New Laundry Chute
Now that your laundry chute is installed, you can enjoy the convenience it provides. However, there are some design options to consider before using it on a regular basis. One option is to choose a door that matches the aesthetic of your home, whether it be wood or metal. Another option is to add a lock for safety purposes, especially if you have young children in the house.
Incorporating your laundry chute into your home’s decor can also enhance its functionality. For instance, you can install the chute near your laundry room so that dirty clothes can easily be tossed into the chute from various parts of the house. You could also place a hamper at the bottom of the chute for easy access when doing laundry.
Overall, a laundry chute is not only functional but can also add value to your home. With proper planning and execution, incorporating this feature into your home will provide years of convenience and ease when doing household chores.
Conclusion
In conclusion, installing a laundry chute can be a convenient addition to any home. Choosing the right location and measuring the space accurately are crucial steps in ensuring a successful installation. Gathering the necessary tools and materials beforehand will make the process smoother and less stressful.
Preparing the area for installation is essential to avoid any damage or accidents during the process. Cutting the hole for your laundry chute requires precision and attention to detail. Once installed, proper maintenance and care will ensure it lasts for years to come.
With these tips and tricks, troubleshooting common issues with your laundry chute should be a breeze. Enjoying the convenience of your new laundry chute is just a few steps away! Remember, careful planning and execution will result in a well-functioning addition to your home.
Image Credits
- “Laundry Chute” by PinkMoose (featured)

