Replacing an interior slab door is a task that homeowners may need to undertake from time to time. While some may choose to hire a professional, replacing a slab door can be completed by a DIY enthusiast with the right tools and knowledge. Whether you are replacing an outdated or damaged door or simply looking to update the look of your home, this guide will provide you with the necessary steps to complete the job.
Replacing an interior slab door requires attention to detail and precision. Before beginning the process, it is important to have all necessary tools and supplies on hand. This includes measuring tape, a saw, replacement door hardware, and any additional materials needed for finishing touches. By following these steps carefully and using proper techniques, you can replace your interior slab door with confidence and achieve a professional-looking result.
Choosing The Right Door For Your Home
As you embark on the journey of replacing your interior slab door, it’s important to choose the right door for your home. When selecting a new door, there are several types of interior doors to consider. You can opt for traditional solid wood doors, modern glass panel doors, or even pocket doors that slide into the wall. Each type of door has its own unique benefits and drawbacks, so it’s essential to weigh your options carefully.
Factors to consider when choosing a door include the style of your home, the level of privacy you desire, and your budget. Solid wood doors offer a timeless aesthetic and excellent soundproofing capabilities. Glass panel doors allow natural light to flow through your space but may be less private than solid options. Pocket doors are perfect for small spaces but can be more expensive than other options due to installation costs.
Ultimately, the choice of an interior door comes down to personal preference and practicality. By considering factors such as style, privacy needs, and budget, you’ll be able to select a door that’s perfect for your home. Once you’ve chosen the right type of door for your space, it’s time to measure your door frame to ensure a proper fit.
Measuring Your Door Frame
Before purchasing a new interior slab door, it is essential to measure the door frame accurately to ensure a perfect fit. Measuring accuracy is crucial as even small discrepancies can cause problems during installation. For instance, if the door is too big, it may not fit in the frame, while if it’s too small, it will leave gaps that compromise insulation and security.
To measure your door frame accurately, follow these steps:
- Measure the height of the doorway from the floor to the top of the existing door jamb. Take measurements at three points: left side, right side, and center.
- Measure the width of your doorway from one side stud (the vertical frame) to another on either side of the opening. Ensure you take measurements at three points: top, middle, and bottom.
- Check that your measurements are accurate by finding their average value.
- Double-check all measurements to avoid common mistakes such as incorrect rounding or measuring from a skewed angle.
Measuring your door frame correctly will save you time and money in purchasing or cutting an appropriately sized slab door for your home improvement project. Inaccurate measurements often lead to costly mistakes in purchasing materials that do not fit or require additional modifications before installation. Now that you have taken precise measurements of your doorway dimensions let us move onto gathering necessary tools and supplies for replacing an interior slab door.
Gathering The Necessary Tools And Supplies
As we’ve established in the previous section, measuring your door frame is crucial before replacing an interior slab door. Now that you have accurate measurements, it’s time to gather the necessary tools and supplies. But before we get into that, let’s talk about choosing hardware and selecting finish.
When it comes to hardware, there are several options available. You’ll need to decide on the type of doorknob or lever you prefer, as well as hinges and a latch plate. It’s important to choose hardware that fits the style of your home and complements other features like light fixtures and cabinet handles. Additionally, selecting a finish for your hardware is equally important. Whether you prefer brushed nickel or antique brass, make sure the finish complements the overall look of your home.
Once you have all the necessary tools and supplies, it’s time to remove the old door. This step can be a bit tricky depending on how the old door was installed. However, with patience and some elbow grease, anyone can successfully remove an interior slab door. In the next section, we’ll go over how to properly remove an old door so you can move onto installing your new one.
Removing The Old Door
- Prior to removing the old door, it is imperative to shut off power to the door’s location to ensure safety.
- All hardware must be disconnected from the door, including hinges, locks, doorknobs, and any other attachments.
- Careful removal of the door is then required to ensure that any damage to the door frame is minimized.
- Finally, the door should be set aside for disposal or repurposing as deemed necessary.
Shut Off Power
As a home improvement specialist, it’s important to emphasize the importance of safety when removing an old door. Shutting off power is a crucial step that should never be overlooked. This is especially true if you’ll be using power tools or working near electrical wires.
Before proceeding with the installation process, make sure to take the necessary steps for shutting off power. Start by turning off the circuit breaker that controls the area where the door is located. If you’re unsure which circuit breaker to turn off, consider hiring an electrician or consulting your local hardware store for guidance.
Once you’ve successfully shut off power, it’s safe to proceed with removing the old door. Remember, taking these precautions can prevent accidents and ensure a successful installation process. By prioritizing safety and following these simple steps, you can replace your interior slab door with confidence and ease.
Disconnect Hardware
As a home improvement specialist, you know that removing an old door is a crucial step in upgrading your interior space. To ensure that the installation process goes smoothly, it’s important to take the necessary precautions. One of the most important steps to follow is disconnecting hardware from the old door.
Before you begin this process, make sure to gather all of the necessary tools. This may include a screwdriver and pliers. Once you have everything you need, start by removing any screws or bolts that are holding the hardware in place. Be careful not to damage the surrounding surfaces as you remove each piece.
Once all of the hardware has been removed, take some time to clean the surfaces where the old door was attached. This will help ensure a smooth installation process for your new door. By following these simple steps and taking care when removing hardware and cleaning surfaces, you can successfully upgrade your interior space with ease and peace of mind.
Preparing The Door Frame
Before installing the new interior slab door, it is essential to prepare its frame. The first step in preparing the door frame is repairing damages. Check for any cracks, dents, or holes and repair them using wood filler. Ensure that the wood filler is dry before sanding the area smooth.
Once you have repaired all damages, it’s time to reinforce the door frame. Start by checking if it’s level and plumb. If not, use shims to make necessary adjustments. Next, install a door jamb reinforcement plate around the latch area to strengthen the lockset and prevent forced entry. You can also add extra screws around the hinges to secure them better.
Preparing a solid door frame will ensure that your new interior slab door functions well for years to come. In the next section, we will discuss how to install hinges on your new door seamlessly. With these simple steps, you’ll be able to complete this home improvement project quickly and efficiently!
Installing The Hinges
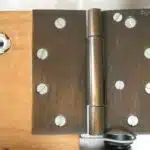
As you move on to the next step of installing your interior slab door, it is time to focus on attaching the hinges. First, start by drilling pilot holes for the screws. This will help prevent any splitting or cracking in the wood and ensure a secure fit for your hinges. Aligning screws with these pilot holes is crucial to get a perfect placement for your hinges.
Next, attach the hinges onto the door using screws that are long enough to securely fasten them into place. Afterward, hold the door up against the jamb to test its swing and adjust its fit as needed. You can do this by slightly adjusting each hinge until you get an even gap between the door and jamb.
Lastly, make sure to tighten all of the screws once you have tested and adjusted your door’s swing and fit. This will ensure that everything stays in place during use. With this step completed, you can now move on to attaching the door handle and lock which will be covered in detail in our subsequent section.
Attaching The Door Handle And Lock
After installing the hinges, we can now move on to attaching the door handle and lock. But before we do that, let’s talk about door hardware options. There are various styles of door handles and locks available in the market today, so it’s important to choose one that complements the overall style of your home. Whether you’re going for a modern or traditional look, there’s a door hardware option out there for you.
Once you’ve chosen your door handle and lock, it’s time to install them. First, ensure that the holes for the lock and handle are drilled into the door at the correct height and distance apart. Then, attach the latch plate to the edge of the door using screws provided with your handle set. After this, slide in your lock mechanism and screw it into place as per manufacturer instructions. Finally, attach both sides of your handle onto either side of your new door.
If you encounter any issues while attaching your new lock or handle such as difficulty turning or latching properly, don’t fret. Troubleshooting lock problems is a common issue when installing new hardware on doors. One thing you can try is lubricating all moving parts of your lock mechanism with graphite powder or spray lubricant to ensure smooth operation. If this doesn’t work, consult with a professional locksmith who can provide additional solutions.
Moving forward from attaching the door handle and lock, our next step is hanging the new door itself.
Hanging The New Door
- When replacing an interior slab door, it is important to ensure that the space is properly prepared before starting the work.
- The door frame should be securely mounted to the wall and the door jamb should be level and plumb before the door is installed.
- The door should then be hung in the frame, ensuring that the hinges are properly aligned and secured.
- All necessary hardware should be attached to the door, including the lockset and door knob.
- The door should be checked to ensure that it swings correctly and that there is a consistent gap between the door and the door frame.
- Minor adjustments may need to be made to ensure that the door is properly installed and functioning correctly.
Preparing The Space
Replacing an interior slab door can be a great way to update the look of a room and improve its functionality. However, it requires careful planning and preparation to ensure that the new door fits properly and operates smoothly. One important step in preparing the space for hanging the new door is measuring accuracy.
To begin with, it is essential to measure the existing door frame accurately. This will help you determine what size of door you need to purchase, as well as any adjustments that may need to be made to the frame. Use a tape measure to get precise measurements of both the width and height of the opening, taking into account any irregularities or variations in size.
Another aspect of preparing the space involves inspecting the door frame for any repairs that may be needed. Check for cracks, holes, or other damage that could affect how well the new door hangs. If necessary, make any necessary repairs before proceeding with installation. By taking these steps to prepare your space correctly, you can ensure that your new interior slab door will fit perfectly and function flawlessly for years to come!
Installing The Frame
Installing a new interior slab door involves several steps, and one of the most crucial ones is installing the frame. The right type of frame will ensure that your new door fits well and functions properly. There are different types of frames available, such as pre-hung frames and split-jamb frames. Pre-hung frames come with the hinges and latch already attached to the frame, while split-jamb frames need to be assembled before installation. Choosing the right type of frame depends on your specific needs and preferences.
Installing the frame requires careful attention to detail to avoid any issues during installation or later use. One common issue during installation is an uneven or out-of-square opening, which can cause problems with how well the door hangs or latches. To troubleshoot this issue, use shims to adjust any gaps between the frame and wall until it is level and square. Another issue that may arise is a gap between the door jamb and wall, which can cause air leaks or difficulty in closing the door properly. To fix this problem, use foam insulation or weatherstripping around the perimeter of the jamb.
Overall, proper installation of the frame is essential for hanging a new interior slab door successfully. By choosing the right type of frame and troubleshooting any issues that arise during installation, you can ensure that your new door fits perfectly into its space and operates smoothly for years to come.
Hanging The Door
After installing the frame, the next crucial step in hanging a new interior slab door is hanging the door itself. This involves carefully aligning the hinges and ensuring that the door swings smoothly and latches properly. Measuring accuracy is essential during this process, as even small deviations can cause issues with how well the door operates.
To hang the door, you will need proper tools such as a drill, screws, and a level. Start by placing the door on sawhorses or another stable surface, then attach the hinges to the door using screws. Next, hold the door up to the frame and align it with the hinges attached to the frame. Use shims if necessary to adjust any gaps between the frame and wall until it is level and square.
Once you have properly aligned and secured the hinges, test how well the door swings open and closed. If there are any issues with how it operates or latches, make adjustments as needed until everything functions correctly. With proper installation of both the frame and door, your new interior slab door should provide years of smooth operation and enhance your home’s overall appearance.
Adjusting The Door For Proper Fit
After installing the new interior slab door, it’s important to ensure that it fits properly in the frame. To adjust the height of the door, use a hand plane or belt sander to remove small amounts of material from the bottom edge of the door. Be careful not to remove too much material at once, as this may cause unevenness or make the door too short.
If the door is too wide for the frame, sand down one or both edges until it fits snugly. Use a sanding block and begin with coarse grit sandpaper before switching to finer grits. Take care not to round off any corners or edges while sanding. It’s always better to take a little bit off at a time and check frequently than to oversand and have an ill-fitting door.
Once you’ve adjusted the height and width of your interior slab door, test it by closing and opening it several times. The door should move smoothly without scraping against the frame or jamb. If necessary, continue making adjustments until you achieve a proper fit. Next up is installing the strike plate which will be discussed in detail in our subsequent section.
Installing The Strike Plate
As we continue with our metaphorical journey of replacing an interior slab door, let us now focus on installing the strike plate. The strike plate is like a puzzle piece that completes the function of your door lock. Just like how a missing puzzle piece can ruin the whole picture, a poorly installed strike plate can compromise your home’s security. Therefore, it is crucial to ensure that the strike plate is accurately fitted into its designated area.
Adjusting alignment is essential in installing the strike plate. When not correctly aligned, the latch will not fit into the opening and consequently prevent you from locking or unlocking your door. To adjust this, place the strike plate over its designated area and mark where you need to chisel out some wood to make way for the latch. After chiseling out enough wood, test if the latch fits smoothly into the opening without any obstructions.
Testing the latch should be done thoroughly once everything is put in place. Close your door and test if it latches well by turning your doorknob and ensuring that it does not open until you turn it again. If there are issues with locking or unlocking your door, then chances are there are problems with your installation process that need attention. Take note of these issues and address them accordingly before adding finishing touches to complete this project.
Adding Finishing Touches
It is important to properly paint a new interior slab door for a polished, unified look. When installing an interior slab door, the casing should be properly attached to the door jamb for a well-fitted look. Additionally, the trim should be measured and cut to fit the door jamb and door. Once the casing and trim are installed, hardware such as hinges, doorstops, doorknobs, doorbells, and door knockers should be chosen to match the overall aesthetic. After the hardware is installed, sealant and weatherstripping should be used to ensure the door is airtight and secure. Lastly, thresholds, door sweeps, decorative molding, and house numbers can be added for an extra sense of style.
Painting
To give your interior door a fresh new look, painting is a great option. Before starting the process, make sure to remove the door from its hinges and place it on a flat surface. This will allow you to properly sand and prime the door before applying the paint.
When priming your slab door, be sure to use a high-quality primer that is compatible with your chosen paint. This will ensure that the paint adheres well and provides an even finish. Sanding is also crucial as it helps to create a smooth surface for the primer and paint to adhere to. Once these steps are complete, you can begin painting your door.
Choosing the best paint color for your interior door can be challenging but considering factors such as the room’s overall design scheme, natural lighting, and personal preferences can help narrow down options. It is also important to consider the type of paint finish you want, such as gloss or matte. With these tips for priming, sanding, and painting a slab door, along with careful consideration of paint color and finish options, you can create a beautiful new look for your interior doors that complements your home’s style.
Casing
Now that you have painted your interior door, it’s time to add the finishing touches by installing casing around the door frame. Casing is a decorative element that covers the gap between the wall and the door frame, giving your doorway a polished look. There are different types of casing styles to choose from, such as traditional, modern, or craftsman. The type of casing you choose will depend on your personal preference and the overall style of your home.
To install casing around a door frame, start by measuring the length and width of each side of the doorway. Cut your pieces of casing to fit these measurements using a saw or miter box. Then, use a nail gun or hammer and nails to attach the casing to the door frame. Make sure to use wood glue on any joints for extra stability.
Once all sides are attached, fill any gaps with wood filler and sand down any rough edges for a smooth finish. You can then paint or stain the casing to match your interior decor. Installing casing can be a simple yet effective way to elevate the look of your interior doors while adding value to your home.
Trim
Now that you’ve installed casing around your interior door, it’s time to move on to the next step in adding finishing touches – trim. Trim is a decorative element that enhances the look of your walls and windows. There are different types of trim to choose from, such as crown molding, baseboards, and chair rails. The type of trim you choose will depend on your personal preference and the overall style of your home.
Before installing trim, measure the length and width of each wall or window frame where you want to add trim. Use a saw or miter box to cut your pieces of trim to fit these measurements. Once you have cut all the pieces, sand down any rough edges for a smooth finish.
Next, it’s time to paint or stain the trim before installing it. Apply painter’s tape along any areas where you don’t want paint or stain to get on your walls or floors. Then, use a brush or roller to apply the desired color onto each piece of trim. Allow enough time for drying before continuing with installation.
To install the trim, use a nail gun or hammer and nails to attach it to the wall or window frame. Make sure to use wood glue on any joints for extra stability. Once all pieces are attached, fill any gaps with wood filler and sand down any rough edges for a smooth finish. Installing trim can be an easy yet effective way to elevate the look of your walls and windows while adding value to your home.
Painting Or Staining The Door
After successfully replacing your interior slab door, it’s now time to give it a fresh look by painting or staining it. Before starting, make sure that the door is clean and free from any dirt or dust particles. You can use sandpaper to smooth out any rough spots and create an even surface for painting.
When choosing between painting techniques or staining options, consider the style of your home and the overall aesthetic you want to achieve. Painting allows for a wide range of color choices and can provide a sleek, modern look. On the other hand, staining can enhance the natural beauty of wood grain while giving a warm, rustic feel.
To ensure a professional-looking finish, follow proper application techniques such as using thin coats of paint or stain and allowing each layer to dry completely before adding another one. Remember to also pay attention to drying times and ventilation requirements. With careful attention to detail and patience in applying multiple layers, you can transform your new interior slab door into a stunning focal point in your home.
Now that you have completed painting or staining your new interior slab door, it’s important to clean up the work area properly. Remove any tape or protective coverings used during the process and dispose of them appropriately. Wipe down any tools used with a damp cloth and store them in their designated place. Finally, take some time to admire your newly transformed door!
Cleaning Up The Work Area
After painting or staining the door, it’s time to move on to the next step of replacing an interior slab door. Before starting this task, it is necessary to organize all the tools and materials required. Tools such as a drill, screwdriver, hammer, sawhorses, leveler and measuring tape are commonly needed for this project. It’s important to ensure that everything is within reach before beginning work.
Once all the tools are organized and ready for use, it’s time to dispose of the old door. The old door can be heavy and difficult to move around. Therefore, it’s important to have a disposal plan in place before starting any demolition work. Contact your local waste management company for proper disposal instructions and schedule a pick-up if necessary.
After disposing of the old door, you can now proceed with installing the new one. However, just like any home improvement project, there may be some common issues that arise during installation such as uneven gaps between the door and frame or difficulty in aligning hinges. Troubleshooting these issues is an important part of any DIY project. In the next section, we will discuss some common problems that may arise when replacing an interior slab door and how to troubleshoot them effectively.
Troubleshooting Common Issues
When a door is not closing properly, it is important to check the alignment of the door in the frame, and adjust the hinges as necessary. If a door is jammed, first check if the frame is out of square and if the door is binding. If the door is loose, it may be due to stripped screws or loose hinges, which can be tightened with a screwdriver. If the door is sticking, it may be due to an unlevel or warped door, which can be corrected by shimming or planing the door, respectively.
Door Not Closing
As a home improvement specialist, it’s important to know that one of the most common issues with interior slab doors is that they don’t close properly. This can be due to a variety of factors, including poor door alignment and hinge adjustment. It’s essential to troubleshoot this issue in order to ensure that the door functions smoothly and securely.
To begin addressing this problem, the first step is to check the alignment of the door. If the door is rubbing against the frame or dragging on the floor, it may need to be realigned. This can typically be done by adjusting the hinges – loosening or tightening them as needed until the door sits correctly within its frame. It’s important to make small adjustments at a time and check for progress regularly.
If adjusting the hinges doesn’t solve the issue, then it may be necessary to try other methods of troubleshooting, such as sanding down any areas where the door is rubbing against its frame or installing weatherstripping around the edges of the door. By taking these steps, you’ll ensure that your interior slab doors function smoothly and efficiently, providing greater security and privacy within your home.
Door Jammed
Troubleshooting common issues with interior slab doors is crucial for ensuring that they function smoothly and securely. One of the most frustrating issues that homeowners may encounter is a jammed door. This problem can occur due to a variety of reasons, including poor alignment or damaged hinges.
To begin fixing a jammed door, it’s important to troubleshoot the alignment. If the door is not sitting correctly within its frame, this could be causing it to become stuck. Adjusting the hinges may be necessary to realign the door and prevent it from jamming again in the future. It’s essential to make small adjustments at a time and test the results regularly until the desired outcome is achieved.
If adjusting the hinges doesn’t solve the problem, then other troubleshooting methods should be considered. Sanding down any areas where the door is rubbing against its frame or installing weatherstripping around its edges could help prevent future jams. By taking these steps, homeowners can ensure that their interior slab doors function efficiently and provide greater security and privacy within their homes.
Enjoying Your Newly Replaced Door!
As you stand in front of your newly replaced door, it’s easy to feel a sense of accomplishment. But don’t let that feeling fade away just yet! There are still some things you can do to make sure that your investment lasts for years to come.
First and foremost, make sure to keep up with regular maintenance. This means cleaning the door periodically with a mild soap and water solution, and checking for any signs of wear or damage. If you notice any issues, address them promptly before they become bigger problems down the line.
Another great way to get the most out of your new door is by decorating it to suit your personal style. Whether you prefer a classic look or something more modern, there are plenty of ways to add some personality to your entryway. Consider adding a wreath or other decorative element, or even painting the door itself for an eye-catching pop of color.
Incorporating these tips into your routine will not only help keep your new door looking great, but also ensure that it functions properly for years to come. So go ahead – enjoy the fruits of your labor! With just a bit of care and attention, your newly replaced interior slab door will continue to serve as a beautiful and functional addition to your home for many years to come.
Conclusion
Replacing an interior slab door may seem daunting, but with the right tools and techniques, it can be a manageable DIY project. Start by selecting the right door for your home and measuring your door frame accurately. Gather all necessary tools and supplies before removing the old door and preparing the frame for installation.
Once you have successfully mounted your new door, take some time to paint or stain it to match your existing decor. Always remember to clean up any debris and troubleshoot any issues that may arise during installation. By following these steps, you can enjoy a newly replaced interior slab door that not only enhances the aesthetics of your home but also improves its functionality.
As a home improvement specialist, I strongly recommend homeowners to consider replacing their interior slab doors as a cost-effective way of upgrading their living spaces. With careful planning and execution, this project can be completed without professional assistance, saving you money in the long run. So why not give it a try? You might just surprise yourself with what you can accomplish with a little bit of effort and determination!
Image Credits
- “Desain Kamar Mandi Komposisi Shower Tray Wastafel dan Toilet Marmer Slab” by Gambar Rumah + Desain Interior ANNAHAPE GALLERY (featured)


