As a door repair technician, I have seen my fair share of sagging doors. A sagging door can be a frustrating issue for homeowners as it can affect the functionality and security of their homes. A door that does not close properly can cause drafts, allow pests to enter the home, and compromise the safety of the occupants inside.
Fortunately, fixing a sagging door is not as difficult as it may seem. With some basic tools and a little bit of know-how, homeowners can easily fix their own sagging doors without having to call in a professional. In this article, we will discuss the common causes of sagging doors and provide step-by-step instructions on how to fix them. By following these simple guidelines, homeowners can save money on costly repairs and restore the functionality and security of their doors in no time.
Identifying The Signs Of A Sagging Door
As a door repair technician, it is essential to identify the signs of a sagging door. A sagging door is one that no longer fits well in its frame and may not close properly. Common causes of this issue include worn hinges, loose screws, or settling foundations. Additionally, doors made from heavy materials such as wood are more prone to sagging than those made from lighter materials.
Prevention tips can help prolong the lifespan of your doors and prevent them from sagging prematurely. One way to prevent this issue is to regularly inspect and maintain the hinges with oil or lubricants. It is also crucial to ensure that all screws are tightly fastened and replace any that are missing or damaged. Lastly, consider installing additional support, such as a door stopper or brace, to help distribute weight evenly across the doorframe.
Understanding the anatomy of a door is crucial when it comes to fixing a sagging door. By knowing the various components that make up your door, you will be better equipped to diagnose and repair any issues that arise. The next section will delve deeper into understanding the anatomy of a door to provide you with an in-depth understanding of how doors work.
Understanding The Anatomy Of A Door
- There are several types of door locks that can be used, including deadbolts, knob locks, and lever handle locks.
- Door hinges are an important consideration in door repair, as they are used to connect the door to the door frame.
- Door locks and hinges should be inspected regularly to ensure that they are in proper working order and that the door is properly secured.
- Door locks and hinges should also be checked for signs of wear and tear and replaced as needed to ensure the door operates correctly and safely.
Types Of Door Locks
As a door repair technician, I understand the importance of having a secure door lock. It is crucial to ensure that your home or business is safe and protected from theft and burglary. Different types of door locks are available in the market, and it’s essential to choose the right one based on your security needs.
When choosing a door lock, several factors should be considered. The location of your property, its value, and the type of door you have will all influence which lock is best for you. Deadbolts are an excellent option if you’re looking for maximum security, while latch bolts are ideal for interior doors. Smart locks are becoming increasingly popular as they provide advanced features like remote access control.
There are other types of door locks available such as knob locks, lever handle locks, mortise locks, and cylinder deadlocks. Each has its own strengths and weaknesses that must be considered when making a decision. As a door repair technician, I can help you determine which lock would be best suited for your specific needs. By taking into account all these factors, we can work together to ensure that your property is secure with the right type of door lock installed.
Door Hinges
As a door repair technician, it’s essential to understand the anatomy of a door to provide comprehensive services to clients. One crucial component of a door is its hinges. Hinges are what allow a door to swing open and closed while staying attached to the frame. However, hinges can become damaged or wear out over time, leading to issues with the door’s functionality.
One common problem with hinges is that they can become stiff or squeaky due to lack of lubrication. If ignored, this can lead to further damage and even cause the hinge to break altogether. As a technician, I often recommend regular maintenance by lubricating hinges to prevent this from happening. It’s a simple but effective solution that can extend the lifespan of your door and save you money in the long run.
If hinges have already suffered significant damage or wear and tear, replacing them might be necessary. This is especially true if the door has become misaligned or doesn’t close properly. Replacing hinges might seem like a daunting task for some homeowners, but it’s something that I specialize in as a technician. With my expertise and knowledge, I can help clients choose the right type of hinge for their specific needs and ensure proper installation for optimal performance.
Gathering The Necessary Tools
Choosing the right tools is critical when fixing a sagging door. It is essential to have the correct equipment on hand to ensure that the repair process runs smoothly. The following are some of the required tools: a level, a drill, screws, pliers, and a hammer.
Safety precautions must be taken when using these tools. Before beginning any repairs, make sure you have read and understood all of the manufacturer’s instructions for each tool. Always wear protective gear such as gloves and safety glasses to protect yourself from flying debris or accidental injury.
With the proper tools and safety precautions in place, repairing a sagging door can be accomplished safely and effectively. In the next section, we will discuss how to prepare your work area for optimal results.
Preparing The Work Area
- It is important to have the necessary tools on hand before beginning a door repair project. A hammer, screwdriver, drill, saw, and level are all essential.
- It is important to clear the area surrounding the door to ensure that there are no obstacles in the way.
- Make sure that the door is secured to the wall frame and cannot move during the repair process.
- Measure the door and frame to ensure that the door is a standard size and can be easily replaced.
Gather Tools
As a door repair technician, it is important to prepare the work area before starting any repair work. One of the initial steps in preparing for repairing a sagging door is to gather the necessary tools. There are various types of tools that one might need, including a level, screwdriver, drill, wood filler, and shims. It is important to ensure that all the required tools are easily accessible and in good working condition.
In addition to gathering the appropriate types of tools, tool maintenance is also crucial. Regular maintenance ensures that the tools are in excellent working condition when they are needed. For example, ensuring that screwdrivers have sharp tips and drill bits have not dulled can save time during repairs. Proper tool maintenance also prolongs the life of the tool and saves money on replacement costs.
Overall, having all the necessary tools in good working condition is essential for fixing a sagging door successfully. Without proper preparation and access to adequate tools, repairing a sagging door can be a frustrating task. In summary, taking the time to gather appropriate types of tools and maintaining them properly will help ensure success in repairing a sagging door.
Preparing The Space
As a door repair technician, creating a workspace that is conducive to repairs is an essential step in repairing a sagging door. The first step in creating this workspace is clearing any obstructions that may hinder the repair process. This includes removing any furniture or objects near the door, ensuring there is enough space to move around and access all necessary tools.
Once the space has been cleared, it’s important to ensure adequate lighting is available to work efficiently. Natural light from windows or artificial light from lamps can be used. Proper lighting ensures that the technician can see what they are doing and identify any potential issues with the door.
Another aspect of preparing the space is protecting surfaces around the work area. This can be achieved by laying down protective sheets or tarps on floors and surrounding walls to prevent damage from dust or debris during repairs. By taking these steps, a door repair technician can create a safe and efficient workspace for repairing a sagging door, which will lead to success in completing their task effectively.
Removing The Door From Its Hinges
To remove a sagging door from its hinges, start by ensuring that the door is fully open. This will make it easier to access the hinges. Next, locate the hinge pins and use a hammer and nail to tap them out of place. Once all of the hinge pins have been removed, you can carefully lift the door off of its hinges.
It’s important to note that before removing a door from its hinges, you should take some time to inspect them for any damage or wear and tear. If your hinges are damaged or in need of repair, removing your door could cause further damage or make it difficult to re-hang the door properly. As part of your regular door maintenance routine, be sure to keep an eye on your hinges and address any issues as soon as they arise.
By following these simple steps for removing a door from its hinges, you’ll be able to take care of any necessary repairs or maintenance without causing further damage. With proper care and attention, you can ensure that your doors remain functional and secure for years to come. In the next section, we’ll discuss how to inspect your hinges for damage and wear so that you can better understand how to keep your doors in top condition.
Inspecting The Hinges For Damage
- The first step in assessing the need for repair to a sagging door is to identify the hinges.
- Inspect the hinges for damage, such as rust or misalignment, and determine if the hinges are still securely attached to the door frame and door.
- Check for loose screws or bolts, as well as any signs of warping, corrosion, or rust.
- Look for gaps between the door and the frame that indicate the hinges have shifted.
- If the hinges are severely damaged, they may need to be replaced with new ones.
- If the hinges are just loose or misaligned, they can often be re-tightened or adjusted to restore the door to its proper position.
Identifying The Hinges
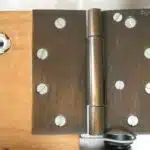
To properly fix a sagging door, it is important to first identify the hinges. Hinges are the metal pieces that attach your door to the frame and allow it to swing open and closed. They can be found on both the door and the frame, and there are typically two or three of them depending on the size of the door. To locate them, simply look for the metal plates that are screwed into the wood.
Once you have identified your hinges, it’s important to inspect them for damage. Over time, hinges can become loose or damaged, causing your door to sag or not close properly. To prevent this from happening in the future, make sure to maintain your hinges by lubricating them with oil or WD-40 every six months. This will help keep them functioning properly and prevent wear and tear over time.
In addition to regular maintenance, there are also tips for maintaining your door hinges to prevent sagging. One of these tips is to tighten any loose screws on your hinge plates using a screwdriver. Another tip is to adjust your hinge pins by tapping them gently with a hammer until they sit flush with the hinge plate. By following these simple steps, you can ensure that your hinges remain strong and secure, preventing any future issues with sagging doors.
Inspecting For Damage
As a door repair technician, it is imperative to inspect the hinges for damage when fixing a sagging door. Common causes of door sagging include loose or damaged hinges, which can cause misalignment and make it difficult for the door to close properly. To ensure that your door is functioning as it should be, inspecting for damage is crucial.
When inspecting the hinges for damage, begin by examining the hinge plates and screws. Loose screws can cause the hinge to become unstable and eventually lead to sagging. Check for any corrosion or rust on the hinge plates as well, as this can also contribute to a weakened hinge. If you notice any significant damage or wear and tear on the hinge plates or screws, replacement may be necessary.
In addition to examining the hinge plates and screws, it’s important to check the actual hinge itself for any cracks or warping. A damaged hinge can cause misalignment and make it difficult for your door to function properly. If you notice any signs of damage on your hinges during inspection, replacing them with new ones may be necessary to prevent future issues with sagging doors.
Assessing Repair Needs
As a door repair technician, assessing the repair needs of a sagging door is crucial to ensure that it functions properly. One essential step in assessing the repair needs of a sagging door is inspecting the hinges for damage. This inspection should be done using an inspection checklist to make sure that no critical components are overlooked.
Common causes of sagging doors include loose or damaged hinges, which can cause misalignment and make it difficult for the door to close correctly. When inspecting the hinges for damage, it’s essential to check not only the hinge plates and screws but also the actual hinge itself for any cracks or warping. Properly assessing these damages can help determine whether replacement or repair is necessary.
Assessing the repair needs of a sagging door is vital in ensuring that your customers’ doors function as they should be. By thoroughly inspecting all components, including hinges, you can identify any issues that could lead to future problems and address them promptly. As a door repair technician, taking this extra step can save time and money in repairs down the line while providing excellent service to your clients.
Tightening Loose Screws And Nails
As a door repair technician, I often compare a sagging door to a person suffering from an injury. Just as a person needs proper care and attention to heal, a sagging door requires some repairs to function as it should. One of the most common culprits behind sagging doors is loose screws and nails.
To fix this issue, it’s essential to tighten any loose screws or nails that are holding the hinges in place. Here are four steps you can follow to accomplish this task:
- Identify the loose screw or nail by gently pushing the door back and forth while examining the hinges.
- Use a screwdriver or hammer (depending on whether it’s a nail or screw) to tighten the hardware.
- If the hole has become too large for the hardware, use toothpicks or wooden dowels mixed with wood glue to fill in the gap before tightening.
- Once all screws and nails are adequately tightened, test your door again.
While tightening loose hardware may solve your problem temporarily, it’s crucial to keep in mind that over time, even well-maintained doors may require more extensive repairs, such as reinforcing the door frame or replacing worn or damaged hinges. In our next section, we’ll discuss how to replace worn or damaged hinges for those who need further repairs beyond just tightening their screws and nails.
Replacing Worn Or Damaged Hinges
After tightening loose screws and nails, if your door is still sagging, the issue may lie with worn or damaged hinges. In this section, we will discuss how to replace these hinges.
When it comes to replacing hinges, you have two options: DIY or hiring a professional. If you have experience with home repairs and own the necessary tools, it may be possible to replace the hinges yourself. However, if you are unsure of your abilities or do not have the proper equipment, it is best to hire a professional to ensure that the job is done correctly.
Before replacing your hinges, it is important to choose the right type for your door. There are various types of hinges available in different sizes and finishes. Some popular options include butt hinges, continuous/piano hinges, and concealed/hidden hinges. Each type has its pros and cons depending on factors such as weight capacity, security needs, and aesthetic preferences. It’s important to research thoroughly before making a purchase. You can find suitable replacement hinges at hardware stores or online retailers.
Adjusting The Hinges To Level The Door
- To begin, it is necessary to inspect the hinges to see if they are aligned properly, and if they have been damaged or loosened.
- If any of the screws holding the hinges in place are loose, they should be tightened with a screwdriver.
- If the hinges are not properly aligned, they can be adjusted by loosening the screws and then repositioning the hinges.
- Finally, the screws should be tightened again to secure the hinges in the new position.
Checking The Hinges
As a door repair technician, I understand the frustration of dealing with a sagging door. One of the first steps to fixing this problem is checking the hinges. Hinges are crucial in supporting the weight of the door and if they are not functioning properly, the door will not be level. Common hinge problems include rust or wear and tear, which can cause the hinge to become stiff and prevent it from moving smoothly.
To check your hinges, start by examining them for any visible damage or signs of wear. If you notice any rust or corrosion, try lubricating the hinges with oil or a silicone spray. This can help loosen up stiff hinges and make them easier to move. If lubrication doesn’t solve the problem, you may need to replace the hinge altogether.
It’s important to note that not all doors have visible hinges – some may be concealed within the frame of the door. If you’re having trouble locating your hinges, consult your manufacturer’s instructions or seek assistance from a professional. Checking your hinges is just one step in fixing a sagging door, but it’s an important one that could save you time and money in the long run.
Adjusting The Hinges
As a door repair technician, I know that adjusting the hinges is one of the most important steps in leveling a sagging door. Hinges hold the weight of the door and ensure that it opens and closes smoothly. However, over time, hinges can become damaged or wear out due to rust or lack of maintenance. Neglecting to adjust them can lead to further problems such as cracks in the frame or damage to the door.
One common mistake people make when trying to level a sagging door is not properly adjusting the hinges. Simply tightening screws can seem like an easy fix, but it may not solve the problem in the long run. In fact, it could make matters worse by damaging the hinge or causing misalignment. A better solution involves using lubrication techniques such as oil or silicone spray to loosen up stiff hinges before adjusting them.
To adjust your hinges, start by removing any excess paint or debris from around them. Then, use a level to check if your door is properly aligned. If not, loosen the screws on your hinge slightly and adjust them until your door is level again. Remember to use lubrication techniques on stiff hinges before making any adjustments.
By following these simple steps and avoiding common mistakes, you can effectively adjust your hinges and level your sagging door. As always, if you’re having trouble with this process or are unsure about anything related to repairing doors, don’t hesitate to seek assistance from a professional for expert advice and guidance.
Checking The Alignment Of The Strike Plate
Is your door still sagging despite fixing the hinges? It’s time to check the alignment of the strike plate. A misaligned strike plate can cause a door to sag and make it difficult to close properly. Here’s how you can check for alignment issues:
- Check for wear: Over time, the strike plate can become worn down, making it difficult for the latch to engage properly. Look for signs of wear or damage on the strike plate.
- Test with paper: Close the door and insert a piece of paper between the frame and the strike plate. If you can easily pull out the paper without tearing it, then the strike plate is misaligned.
If you’ve determined that your strike plate is misaligned, then adjusting it may help solve your sagging door problem. In our next section, we’ll cover how to adjust the strike plate for a better fit.
As a door repair technician, ensuring proper alignment of doors is crucial to ensure customer satisfaction. Checking for wear and testing with paper are simple yet effective ways to diagnose a misaligned strike plate. By incorporating these steps into your regular maintenance routine, you can save yourself time and money in future repairs. Stay tuned for our next section on how to adjust the strike plate for a better fit and get that door back in tip-top shape!
Adjusting The Strike Plate For A Better Fit
After checking the alignment of the strike plate, the next step is adjusting it for a better fit. This is an essential part of fixing a sagging door because it ensures that the latch bolt can smoothly slide into the strike plate. However, there are some common mistakes that people make when adjusting the strike plate.
One mistake is not tightening all of the screws on the plate. If even one screw is loose, it can cause misalignment and prevent the door from functioning correctly. Another mistake is not using a chisel or file to adjust the size of the mortise. It’s crucial to ensure that the mortise matches the shape and size of the latch bolt so that it can slide in easily.
If you’re having trouble adjusting the strike plate, there are several troubleshooting tips you can try. For example, you can use a piece of paper to test where the latch bolt hits against the strike plate. Place a piece of paper between them and close the door – if there are any markings on it, then you know where to adjust. Additionally, you can use a shim or cardboard to help align and support the strike plate during adjustment.
Now that you’ve adjusted your strike plate for a better fit, it’s time to move on to rehanging your door and testing for functionality.
Rehanging The Door And Testing For Functionality
- The first step in rehanging a sagging door is to remove the existing hinges and screws.
- Once the old hinges are removed, the new hinges should be properly installed in the same positions as the old ones.
- The new hinges should be firmly secured with the appropriate screws.
- After installation, the door should be tested to ensure its functionality and that it opens and closes properly.
- The door should also be inspected to ensure that it is hung level and that it is not sticking at any point.
- If necessary, the door can be adjusted by loosening or tightening the screws on the hinges until the door hangs correctly.
Removing Old Hinges
To rehang a sagging door, one of the first steps is to remove the old hinges. Before replacing hardware with newer ones, take note of the size and type of hinge currently installed. It is essential to choose a matching set that will fit correctly in the existing recesses on both the door and frame. Once you have identified which hinges you need, use a screwdriver or power drill to unscrew the screws holding them in place.
When reinstalling the door, make sure to align it correctly using shims if necessary. Check that the gap between the door and frame is even on all sides. Then, attach the new hinges firmly with screws to ensure stability. With both hinges securely attached, test for functionality by opening and closing the door. If there are any issues like rubbing or sticking, adjust the placement of shims and screws until they are resolved.
In summary, removing old hinges is an essential step when rehanging a sagging door. Make sure to choose replacement hardware that matches what was previously installed and fits correctly in existing recesses. After reinstalling the door with new hinges, test for functionality by checking for even gaps and smooth operation. By following these steps carefully, you can successfully fix a sagging door without needing professional assistance.
Installing New Hinges
After removing the old hinges, the next step in rehanging a sagging door is to install new ones. Upgrading hardware can provide better support and improve the overall functionality of the door. However, choosing the right hinges is crucial to ensure that they fit correctly in existing recesses on both the door and frame.
When selecting new hinges, it is essential to consider factors such as size, material, weight capacity, and type of swing. Choosing hinges that are too small or weak may not provide enough support for the door, while those that are too large may be difficult to install or cause rubbing against the frame. In addition, different types of doors may require specific types of hinges, such as ball bearing hinges for heavy-duty commercial doors or spring-loaded hinges for self-closing residential doors.
Once you have chosen the right hinges, installation involves aligning them with existing recesses on both the door and frame and attaching them securely with screws. It is crucial to ensure that they are level and evenly spaced to prevent any rubbing or sticking when opening or closing. After installing new hinges, test for functionality by checking for even gaps around the edges of the door and smooth operation when opening and closing. With proper installation and testing, your rehanged door should function properly without any professional assistance needed.
Testing The Door
With the new hinges securely installed, the next step in rehanging a door is to test it for functionality. This process involves checking for any sticking or rubbing when opening and closing the door. One of the most common causes of these issues is uneven gaps around the edges, which can be caused by an incorrect hinge placement or an uneven door weight. Therefore, it is essential to ensure that the hinges are level and evenly spaced before testing.
Another crucial factor to consider when testing a rehanged door is hinge durability. Over time, hinges can wear out or become loose, which can cause sagging and misalignment. Therefore, it is important to choose high-quality hinges that can withstand the weight of the door and provide reliable support for years to come. Additionally, regular maintenance such as lubricating and tightening screws can help prolong their lifespan.
In conclusion, rehanging a door involves not only installing new hinges but also ensuring proper functionality through thorough testing. By carefully aligning and securing the hinges and checking for even gaps and smooth operation, you can ensure that your newly-hung door will function properly for years to come. Choosing durable hinges that can withstand the weight of the door and performing regular maintenance can also help extend their lifespan and prevent future issues with sagging or misalignment.
Applying Lubrication To The Hinges
One of the most effective ways to fix a sagging door is by lubricating its hinges. Not only does this make the door easier to open and close, but it can also prevent future damage from occurring. The benefits of lubricating hinges are numerous, and it should be a regular part of any homeowner’s maintenance routine.
When it comes to choosing the best lubricant for door hinges, there are several options available. Some people prefer using traditional oils such as WD-40 or 3-in-1 oil, while others opt for silicone spray or white lithium grease. Each has its own set of advantages and disadvantages, and it ultimately comes down to personal preference.
Regardless of which lubricant you choose, applying it correctly is essential. To begin, remove any dirt or debris from the hinge with a clean cloth. Then, apply the lubricant directly onto the hinge pin or into the crevices surrounding it. Be sure not to overapply as excess lubricant can attract dust and dirt which can lead to further problems down the line.
Regularly lubricating your hinges can go a long way in preventing future sagging issues. However, there are other steps you can take as well to ensure your doors stay in top condition. In the next section, we will discuss these preventative measures in more detail.
Preventing Future Sagging With Regular Maintenance
Just like any other mechanical object, doors require regular maintenance to prevent sagging. Neglecting maintenance can lead to the door becoming misaligned and ultimately sagging, which can cause a lot of inconvenience and safety hazards. As a door repair technician, I recommend that homeowners take proactive measures to prevent future sagging by performing regular maintenance.
One effective way of preventing future sagging is by checking for loose screws or bolts regularly and tightening them when necessary. Loose screws and bolts can cause the door to shift out of alignment, leading to sagging over time. Additionally, lubricating the hinges with oil or grease helps reduce friction and prevents wear and tear on the hinges.
Another technique for maintaining door alignment is ensuring that the frame is square, level, and plumb. This involves measuring the frame’s diagonals to ensure they are equal in length and checking that the jamb is sitting flush with the wall. Once you have verified that the frame is aligned correctly, you can proceed with hanging the door using shims to adjust its position if necessary.
Preventing future sagging requires regular maintenance through simple techniques like tightening screws or ensuring proper alignment during installation. Taking preventive measures can help avoid costly repairs down the line while keeping your home safe and secure. In our next section, we will discuss knowing when it’s time to call a professional for any door-related issues you might be facing.
Knowing When To Call A Professional
To prevent future sagging, regular maintenance is essential. However, sometimes the damage has already been done, and the door needs repair. If you’ve tried all the DIY methods and your door still sags, it’s time to evaluate whether you need professional help or not.
Knowing When to Call a Professional is critical when it comes to fixing a sagging door. The first sign that you might need professional help is if you have tried all the DIY methods and nothing has worked. Additionally, if your door is old and has received multiple repairs over time, it may be time to call in a professional.
The Cost of Professional Help vs. DIY should also be factored into your decision-making process. While hiring a professional can be more expensive than doing it yourself, they have the expertise and experience necessary to fix your sagging door correctly. On the other hand, DIY methods may seem like an attractive option due to their low cost, but they can often lead to further damage or even injury if done incorrectly. It’s important to weigh both options carefully before making a decision.
- Three things to consider when deciding between DIY or hiring a professional:
- Your level of experience with home repairs
- The severity of the damage
- Your budget for repair expenses
As a door repair technician, I highly recommend seeking professional help for severe cases of sagging doors. While minor repairs can be done by yourself with proper knowledge and tools, significant damage requires specialized expertise that only professionals can provide.
Remember that your safety should always come first when dealing with home repairs. Consider all factors involved carefully before deciding whether to tackle this project alone or hire someone who knows what they’re doing!
Conclusion
In conclusion, fixing a sagging door can be a simple task if approached with the right tools and understanding of the door’s anatomy. Identifying the signs of a sagging door is crucial in determining the extent of the repair required. Gathering necessary tools and preparing the work area will ensure a smooth process.
Removing the door from its hinges, rehanging it, and testing for functionality are all steps that must be taken with precision to avoid further damage. Applying lubrication to hinges and regularly maintaining them will prevent future sagging. As a door repair technician, I liken fixing a sagging door to realigning one’s posture – both require attention to detail and regular maintenance to maintain proper function. Regular maintenance is key to ensuring your doors remain functional for years to come.
Image Credits


