Removing a doorknob may seem like a daunting task, but it is actually a relatively simple process that can be accomplished in just a few steps. Whether you are replacing an old and worn out doorknob or just need to remove it temporarily for painting or other maintenance tasks, the process can be completed with minimal tools and expertise.
In this article, we will provide you with step-by-step instructions on how to remove a doorknob safely and efficiently. From identifying the type of doorknob you have to disassembling and removing both the knob and latch mechanism, we will cover all the necessary aspects of this DIY task. By following these instructions, you will not only save time and money but also gain valuable knowledge that can be applied to future home improvement projects.
Identifying Your Doorknob Type
Doorknobs are one of the most essential items in any home, and they come in a variety of styles and materials. Identifying your doorknob type is crucial before attempting to remove it. Doorknobs are manufactured by different brands, including Kwikset, Schlage, Baldwin, and more. Each brand has its unique design and installation process.
Doorknob materials include brass, bronze, stainless steel, glass, ceramic, crystal, nickel-plated brass, and chrome-plated brass. The material used to make the doorknob determines its durability and lifespan. Common doorknob materials like brass and bronze are sturdy and long-lasting but may tarnish over time. Glass or ceramic doorknobs are fragile but add an elegant touch to any door.
It is vital to identify your doorknob type before removing it because each design requires a specific removal process. Understanding the type of doorknob you have will make the removal process easier and prevent damage to your door or hardware. After identifying your doorknob type, gather the necessary tools for removing it safely from your door.
Gathering The Necessary Tools
Before attempting to remove a doorknob, it is important to gather the necessary tools. While some may think that all doorknobs are created equal, there are actually different types of doorknobs that require specific tools for removal. It’s essential to have the correct tools on hand to avoid damaging the door or hardware.
To start, you’ll need a screwdriver that corresponds with the screws holding the doorknob in place. If you’re unsure which type of screwdriver to use, check the manufacturer’s instructions or consult with an expert at your local hardware store. You’ll also want to have pliers on hand for any stubborn screws or parts that won’t budge. Finally, consider using a protective cloth or drop cloth to protect the floor and surrounding area from scratches or debris.
Gathering these tools before beginning will not only save time but will also help prevent common mistakes when removing a doorknob. One of these errors is not having the right equipment on hand and trying to improvise with whatever is available. Doing so can lead to damaged hardware or even personal injury. Another mistake is rushing through the process without proper preparation, leading to frustration and possible damage as well. By taking the time to gather all necessary tools and materials beforehand, you’ll be setting yourself up for success in removing your doorknob safely and efficiently.
Moving forward into preparing your work area, it’s important to keep these tips in mind for a successful project outcome. Remember not to rush through any steps and take care when handling both the door and its hardware. With this said, let’s move onto preparing your work area so that you can begin removing your doorknob safely and effectively.
Preparing Your Work Area
After gathering all the necessary tools, it’s important to prepare your work area before starting the process of removing a doorknob. The first step is clearing clutter from around the door and ensuring there is enough space to move around comfortably. This not only allows for greater ease of movement but also reduces the risk of accidents or damage to surrounding objects.
Once the area is clear, it’s time to organize your tools in a way that will make them easily accessible during the process. Consider using a tool belt or apron to keep your tools close at hand and prevent them from getting lost or misplaced. Additionally, take some time to familiarize yourself with each tool and its purpose, so you can use them effectively and efficiently.
Properly organizing your workspace and tools can save you valuable time and effort when removing a doorknob, allowing you to focus on the task at hand. But before diving into the removal process, it’s important to know how to remove the plate cover without causing any damage. This will be covered in the next section, where we’ll discuss how to safely remove the plate cover without compromising its integrity or functionality.
Removing The Plate Cover
Removing the Plate Cover is the first step in removing a doorknob. This plate cover is usually located just behind the knob on one side of the door. The plate covers are designed differently depending on the type of doorknob you have. Common plate styles include round, square, or oval shapes. To remove this plate cover, use a flathead screwdriver to pry it off gently.
Some screws may be tricky to remove when trying to take off the plate cover. If they are stripped or rusted, try using a penetrating oil like WD-40 to loosen them. If this fails, try tapping lightly on the screw with a hammer to break up any rust that may be holding it in place. For stubborn screws, you can also try using pliers or vice grips to get a better grip and turn them counterclockwise.
Once all screws have been removed from the plate cover, you should be able to easily remove it from the door. This will expose the mounting screws that hold the doorknob in place. Now that you’ve successfully removed your doorknob’s plate cover, it’s time to move on to loosening these screws for complete removal of your old doorknob hardware – which we’ll discuss in our next section!
Loosening The Screws
After successfully removing the plate cover, you may find that the screws that are holding the doorknob in place are tightly screwed and difficult to turn. This can be frustrating, especially when you’re eager to complete your doorknob removal project. However, there is no need to worry as there are alternative methods for loosening screws without damaging them.
One effective way of loosening tight screws is by using a lubricant. A penetrating oil or a WD-40 spray can work wonders in helping to loosen stubborn screws. Simply spray the lubricant onto the screw head and wait for a few minutes before attempting to turn it with a screwdriver. The oil will seep into the threads, easing off any rust or grime that might be causing the resistance.
If using a lubricant doesn’t work, you can try other approaches such as using heat or cold temperatures. Applying heat directly on the screw head with a hairdryer or heating tool can cause expansion, which might help loosen it up. On the other hand, placing an ice pack over the screw for several minutes can cause contraction and make it easier to remove.
Now that you have successfully loosened the screws, it’s time to detach the knob from the door completely. But how do you go about this? Read on to find out!
Detaching The Knob From The Door
- The process of removing a doorknob involves undoing the screws that secure it in place and releasing the latch.
- To begin, use a screwdriver to remove the screws that hold the doorknob in place.
- The screws may be exposed or hidden behind a plate, depending on the door.
- Once the screws have been removed and the knob is loose, locate and release the latch.
- This can be done by using a flathead screwdriver to pry the latch back until it releases the knob.
- The knob is now free and can be pulled away from the door.
Removing The Knob
When it comes to fixing or replacing a doorknob, one of the first steps is to remove the knob itself. This may seem like a simple task, but there are some common issues that can arise. For example, some knobs may have hidden screws or be secured with a set screw that requires an Allen wrench to loosen. It’s important to take the time to carefully examine the knob and determine the best method for removal.
One alternative method for removing a doorknob is to use a paperclip or small tool to push in the release button on the side of the knob. This will typically allow you to pull off the knob and access the screws holding it in place. If there are no visible screws, you may need to use a flathead screwdriver or other tool to gently pry off any decorative covers and reveal hidden screws underneath.
Another common issue when removing doorknobs is stripped or damaged screws. If this happens, it can be difficult if not impossible to remove the knob without causing further damage. In these cases, it may be necessary to drill out the screw or even replace part of the door itself. As always, take care when working with power tools and seek professional help if needed.
In summary, removing a doorknob can be more complicated than it seems at first glance. By being patient and careful, examining all parts of the knob thoroughly before beginning removal, trying alternative methods like using a paperclip or small tool for release buttons or prying off decorative covers, and seeking professional help if necessary when dealing with stripped or damaged screws – you should be able successfully detach your doorknob from its door without too much difficulty!
Undoing The Screws
When it comes to detaching a doorknob from the door, one of the most common methods is by undoing the screws. This can be done using a screwdriver and examining the different types of screws and their uses in doorknobs. Before starting this process, it’s important to make sure that all visible screws on the knob have been located.
Using a screwdriver, gently turn counterclockwise to loosen the screws on the doorknob. It’s important not to use too much force as this may cause damage to both the knob and door. Sometimes there may be more than one set of screws, so make sure to locate all of them before attempting to remove the knob. Once all screws have been removed, gently pull off both sides of the knob from either side of the door.
Different types of screws may be used in doorknobs such as slotted or Phillips head screws. These are designed for specific purposes such as securing handles or locking mechanisms. It’s important to examine which type is being used before attempting to remove them as using an incorrect tool can lead to stripping or damage. By following these steps carefully, you should be able to successfully detach your doorknob from its door without causing any further damage or issues.
Releasing The Latch
When it comes to detaching a doorknob from the door, there are several steps that need to be followed. After removing the screws, the next step is releasing the latch. This is an important step as it ensures that the knob can be removed without causing any damage to the door or other components. In this subtopic, we will discuss how to effectively release the latch and troubleshoot any issues that may arise.
Before attempting to release the latch, it’s important to ensure that it is properly lubricated. Over time, dirt and debris can accumulate in the latch mechanism, leading to friction and difficulty in operating the door. By applying a small amount of lubricant such as WD-40 or silicone spray directly onto the latch mechanism, you can help reduce friction and make it easier to operate.
If you’re experiencing issues with releasing the latch, there may be several potential causes. One common issue is that the latch may not be aligned properly with its strike plate on the frame of the door. This can cause resistance when attempting to open or close the door. Another potential issue is that there may be worn components within the latch itself, resulting in difficulty when releasing or turning it. By troubleshooting these issues and taking appropriate action, you can effectively release your doorknob’s latch and detach it from its door without causing further damage or complications.
Removing The Latch Mechanism
After removing the doorknob, the next step is to remove the latch mechanism. This part can be tricky, but with some patience and care, it can be done easily. Begin by inspecting the area around the latch mechanism for any screws or bolts that need to be removed. Once you have located them, use a screwdriver or wrench to loosen and remove them.
Once all of the screws or bolts have been removed, you can begin to remove the latch mechanism from its housing. Carefully pull it out and set it aside on a clean surface. Before installing a new latch mechanism or re-installing the old one, it is important to lubricate the mechanism with a suitable lubricant. This will ensure that it operates smoothly and does not get stuck.
If you are replacing the latch mechanism with a new one, make sure that it is compatible with your door and that all of its parts fit properly into place. If you are re-installing the old one, inspect it carefully for any signs of damage or wear and tear. Make sure that all of its parts are clean and free from debris before putting it back in place. In our next section, we will discuss how to disassemble the latch mechanism in more detail, so stay tuned!
Disassembling The Latch Mechanism
- To begin disassembling the latch mechanism, first unscrew the doorknob with a Phillips head screwdriver.
- Next, remove the strike plate by loosening the screws that secure it to the door jamb.
- After the strike plate is removed, the latch bolt should become visible and can be removed by unscrewing the retaining screws.
- If the latch bolt is stuck, it can be wiggled out with a flat head screwdriver.
- Once the latch bolt is out, the latch mechanism is effectively removed from the door.
- Finally, the doorknob should come off easily by pulling it away from the door.
Unscrewing The Knob
To begin disassembling the latch mechanism of a doorknob, the first step is to unscrew the knob. This may seem like an easy task, but there are some common mistakes to avoid. The first mistake is using the wrong type of screwdriver. It’s important to use a screwdriver that fits snugly into the screw head to prevent stripping or damaging it. Another mistake is not holding onto the knob while unscrewing it, which can cause it to fall and potentially damage other parts of the mechanism.
An alternative method for unscrewing the knob is to use pliers or a wrench if there are no visible screws on the knob. First, cover the knob with a cloth or tape to protect it from scratches, then use the pliers or wrench to twist and turn the knob until it comes loose. This method is especially useful for older or rusted knobs that may be difficult to remove with a screwdriver.
In summary, unscrewing the doorknob is an essential step in disassembling the latch mechanism. Avoid common mistakes such as using the wrong screwdriver or not holding onto the knob while unscrewing it. Alternatively, use pliers or a wrench if there are no visible screws on the knob. By following these tips, removing a doorknob can be done efficiently and without causing any unnecessary damage.
Removing The Strike Plate
After successfully unscrewing the doorknob, the next step in disassembling the latch mechanism is to remove the strike plate. This may seem like a simple task, but it requires some careful attention and precision. The strike plate is the metal piece attached to the door frame that catches the latch when the door is closed. It’s important to remove this piece carefully to avoid damaging it or the surrounding wood.
To remove the strike plate, start by removing any screws holding it in place. If there are no visible screws, use a chisel to carefully pry it away from the frame. Be sure to work slowly and gently to prevent any damage. Once it’s removed, set it aside in a safe place until you’re ready to reinstall it.
When reinstalling the strike plate, make sure it lines up properly with the latch and that all screws are tightened securely. Test the door several times to ensure that it closes smoothly and latches securely. By following these steps carefully, you can easily remove and reinstall the strike plate without causing any damage or issues with your door’s functionality.
Removing The Latch Bolt
To fully disassemble the latch mechanism, it’s important to also remove the latch bolt. The latch bolt is the part that extends into the strike plate to keep the door closed. Over time, this piece can become worn or damaged, leading to issues with your door’s functionality. Before removing the latch bolt, it’s a good idea to inspect it for any signs of wear or damage.
If you notice any issues with your latch bolt, such as difficulty turning or sticking, it may simply need some lubrication. Apply a small amount of penetrating oil or graphite powder to the mechanism and work it in by turning the knob back and forth. This should help smooth out any rough spots and resolve minor issues with the latch bolt.
If lubrication doesn’t solve your problem, you may need to troubleshoot further by inspecting other parts of the latch mechanism. Check for any loose screws or misaligned components that could be causing issues with the latch bolt. By systematically working through each part of the mechanism, you can identify and address any underlying issues that may be affecting your door’s performance.
Removing The Screws From The Latch Plate
After disassembling the latch mechanism, it’s now time to move on to the next step in removing a doorknob. This involves removing the screws from the latch plate. But don’t get too excited just yet – this step can be trickier than it seems.
Using a screwdriver, carefully unscrew each of the screws holding the latch plate in place. Take care not to strip any of them, as this can make removal even more difficult. If you encounter resistance, try applying pressure with your other hand while turning the screwdriver. If that doesn’t work, you may need to try an alternative method.
Alternative methods for removing screws from a stubborn latch plate include using pliers or a pair of vice grips to grip and turn each screw. However, these methods should only be used as a last resort, as they can damage both the screws and the surrounding hardware. With patience and persistence, though, you’ll eventually be able to remove all of the screws and proceed with removing the latch plate from the door.
Removing The Latch Plate From The Door
Once the doorknob has been removed, the next step is to take out the latch plate. This is the metal piece that sits on the edge of the door and keeps it closed when the knob is turned. To remove it, use a screwdriver to take out the screws that hold it in place. Once they’re out, you should be able to pull the latch plate away from the door.
If you’re planning on replacing your doorknob entirely or want to clean and lubricate its components, now is a good time to focus on the latch mechanism. Take a look at it and see if there’s any buildup of dirt or debris that could impede its movement. If so, use a soft-bristled brush or cloth to gently clean it off. It’s also important to lubricate this component with graphite powder or silicone spray to ensure smooth operation.
Replacing the latch mechanism can be done if necessary by purchasing a new one at your local hardware store. To install it, simply slide it into place where the old one used to be and secure it with screws. Make sure everything lines up properly before tightening them down. With these steps completed, you can now move on to inspecting and cleaning other components of your doorknob.
Inspecting And Cleaning The Components
After removing the latch plate from the door, it’s time to move on to removing the doorknob. Before you start, make sure you have the right tools for the job. You’ll need a screwdriver and possibly pliers or a wrench depending on the type of knob.
Once you have your tools ready, start by locating any screws holding the doorknob in place. These are usually located on either side of the knob itself or on the collar around it. Use your screwdriver to remove these screws, being careful not to damage them in the process.
With the screws removed, you should be able to separate the two sides of the doorknob and remove it from the door entirely. Take this opportunity to inspect all components of the doorknob for any signs of wear or damage. If necessary, clean these components thoroughly before reassembling everything back together.
Reassembling The Latch Mechanism
Replacing the latch requires the removal of the door knob and the door plate to access the actual latch mechanism. Once exposed, the old latch must be removed and replaced with a new one. Reassembling the latch housing requires that the door plate be reattached to the door frame and the door knob be securely fastened to the latch housing. Aligning the latch and the door knob is key to successful reassembly of the latch mechanism.
Replacing The Latch
Replacing the latch is a crucial step in reassembling the latch mechanism of a doorknob. It requires careful attention to detail and proper lubrication techniques to ensure smooth operation. Common latch problems that may necessitate replacement include wear and tear, damage from misuse, or corrosion due to exposure to moisture.
Before replacing the latch, it is important to assess the extent of the problem. If the issue is minor, such as a misaligned strike plate or a loose screw, simple adjustments may suffice. However, if the latch itself is damaged beyond repair, replacement is necessary. When selecting a new latch, make sure it matches the dimensions and specifications of your current one.
Once you have obtained a new latch, apply lubricant to all moving parts before installation. This will help prevent future problems with sticking or jamming. After installing the new latch, test it several times to ensure proper functioning before reattaching the doorknob and strike plate. With these tips in mind, replacing the latch can be an easy and effective way to fix common doorknob problems and restore smooth operation to your doors.
Reassembling The Latch Housing
Now that the latch has been replaced, it’s time to reassemble the latch mechanism. Before doing so, it is important to clean and polish all of the components to ensure smooth operation. Using a soft cloth and polishing compound, gently clean any rust or corrosion from the latch housing and other parts. This will help prevent future problems with sticking or jamming.
Once the components have been cleaned and polished, it’s time to lubricate all moving parts before reassembly. Applying a silicone-based lubricant to the latch and other moving parts will help keep them operating smoothly for years to come. Be sure to apply the lubricant sparingly, as too much can attract dirt and debris.
After lubricating all moving parts, carefully reassemble the latch mechanism. Make sure all components are properly aligned before tightening any screws or bolts. Once everything is in place, test the doorknob several times to ensure proper functioning. With these steps completed, your doorknob should be back in working order and ready for use once again.
Reattaching The Knob To The Door
Once the doorknob has been removed, it’s time to reattach it to the door. The first step is to inspect the knob and ensure that it’s in good condition. If there are any defects or damages, you may need to replace the knob entirely. Once you’re sure that the knob is in good shape, you can proceed with reattaching it.
Proper lubrication is key when reattaching a doorknob. Apply a small amount of lubricant to the inside of the knob before sliding it onto the spindle. This will ensure that the knob rotates smoothly and won’t get stuck or squeak over time. Be careful not to use too much lubricant as this can attract dust and debris, making your doorknob harder to turn in the future.
One common mistake people make when reattaching a doorknob is not properly aligning the screw holes on either side of the door. It’s important to take your time and make sure that both knobs are lined up correctly before tightening any screws. Failure to align these holes properly can result in a crooked or wobbly doorknob which can be frustrating and even dangerous if not fixed promptly.
As you finish up this step, keep in mind that securing the plate cover is also an important part of reattaching a doorknob. By following these simple steps and avoiding common mistakes, you’ll have your doorknob back in working order in no time!
Securing The Plate Cover
Once the screws have been removed, you can now move on to securing the plate cover. This part of the process is essential because it ensures that the doorknob stays in place and functions properly. To secure the plate cover, simply align it with the holes on the door and screw it back on.
Alternative methods for securing the plate cover include using adhesive or double-sided tape. However, these methods are not recommended as they may not provide enough stability and could result in a loose or wobbly doorknob. It’s best to stick with traditional methods of securing the plate cover with screws.
One common mistake people make when securing the plate cover is over-tightening the screws. This can cause damage to both the doorknob and door itself, so be sure to tighten them just enough to secure the knob in place without causing any damage. Once you’ve secured everything properly, you can move on to testing your doorknob’s functionality.
As you move into testing your doorknob’s functionality, ensure that all parts are securely fastened before proceeding further. Testing will give you an idea if all components are working correctly or if there is an issue that needs attention. In case there are problems in functionality, go back through each step carefully and check for any mistakes made along the way before proceeding further.
Testing The Functionality Of Your Doorknob
After securing the plate cover, you can now proceed to remove the doorknob. However, before doing so, it is essential to identify common issues with doorknob functionality. These issues could include a loose or stuck latch, a misaligned strike plate, or a broken spring mechanism.
To fix these issues and avoid the need for professional help, there are DIY solutions available. These solutions could involve lubricating the latch or strike plate with graphite powder or replacing the spring mechanism altogether. It is crucial to have the necessary tools and equipment on hand and follow proper safety procedures when attempting to fix a faulty doorknob.
Once you have identified any potential issues and attempted DIY solutions, you can then proceed to remove the doorknob. This process may vary depending on the type of doorknob, but generally involves removing screws from either side of the door and gently pulling apart each knob. Be sure to keep track of all parts and screws during this process for easy reassembly.
- Don’t panic if your doorknob is malfunctioning – there are often simple DIY solutions available.
- Regularly maintaining your doorknobs can prevent common issues from occurring in the first place.
- Taking on simple home improvement tasks like fixing a faulty doorknob can save you time and money in the long run.
- Remember to always practice proper safety procedures when attempting any DIY project.
- If all else fails, don’t hesitate to seek out professional help for more complex issues.
By identifying common issues with doorknob functionality and utilizing DIY solutions where possible, you can easily maintain your home’s security without breaking the bank. Remember to take your time during each step of the process and have patience as you work through any potential challenges.
Conclusion
In conclusion, removing a doorknob may seem like a daunting task, but with the right tools and preparation, it can be easily accomplished. Begin by identifying your doorknob type and gathering the necessary tools. Make sure to prepare your work area before starting the removal process.
Next, remove the plate cover and loosen the screws to access the latch mechanism. Remember to reassemble the latch mechanism correctly before reattaching the knob to the door. Finally, secure the plate cover and test the functionality of your doorknob. With these simple steps, you’ll have successfully removed your doorknob in no time.
So why wait? Give it a try yourself and impress your friends with your newfound DIY skills. As they say, “a stitch in time saves nine,” so don’t put off fixing that pesky doorknob any longer!
Image Credits
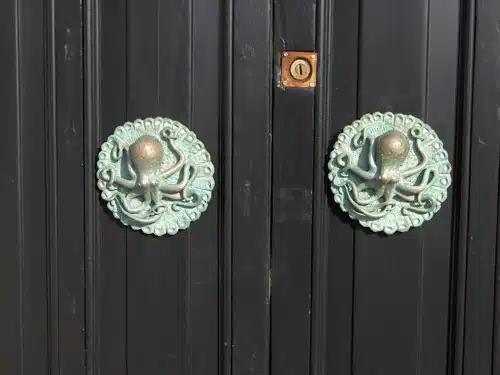
- “Octopus Doorknobs” by danja. (featured)

