Cabinet doors that won’t close properly or hang unevenly can be frustrating for homeowners. Whether it’s due to wear and tear, changes in temperature or humidity, or improper installation, adjusting cabinet doors is a task that many homeowners encounter at some point in their home maintenance journey. Fortunately, with the right tools and techniques, adjusting cabinet doors can be a relatively easy DIY task.
As a cabinet installation and repair expert, I have encountered countless situations where a simple adjustment of cabinet doors can make all the difference in the functionality and appearance of a kitchen or bathroom. In this article, I will provide step-by-step instructions on how to adjust cabinet doors to ensure they are level, properly aligned, and close smoothly. By following these tips and tricks, homeowners can save time and money by avoiding costly repairs or replacements while also improving the overall look and feel of their living space.
Identifying The Problem With Your Cabinet Doors
Common issues with cabinet doors can be frustrating to deal with, but they are not uncommon. Many homeowners experience problems such as sagging doors that don’t close properly, uneven gaps between the doors and the frame, or doors that won’t stay closed. These issues can be caused by a number of factors, including changes in humidity or temperature, worn-out hinges, or loose screws.
DIY solutions for fixing these problems are available, but it’s important to understand when it’s time to call a professional. For example, if the problem is due to a damaged or warped frame, it may be best to replace the entire cabinet rather than try to fix it yourself. Similarly, if you’re not comfortable working with power tools or if you don’t have access to the necessary equipment, it may be better to hire a professional.
Cost considerations also come into play when deciding whether to tackle cabinet door repairs yourself or hire a professional. DIY solutions can save money on labor costs but may require purchasing specialized tools or materials. On the other hand, hiring a professional can ensure that the job is done correctly and efficiently but will usually come at a higher cost. With these factors in mind, homeowners should weigh their options before deciding how to proceed with cabinet door repairs.
To begin fixing your cabinet doors, you’ll need to gather the necessary tools and materials.
Gathering The Necessary Tools And Materials
Identifying the problem with your cabinet doors is important before you can adjust them. Once you’ve identified the issue, the next step is to gather the necessary tools and materials for adjustment. Choosing appropriate tools is essential for achieving success in adjusting your cabinet doors.
For this task, you will need a screwdriver, drill, masking tape, pencil or marker, and a measuring tape. These tools are essential in providing accurate measurements and making adjustments that will last longer. You should also ensure that the screws holding your cabinet doors are tight enough so that they don’t loosen after making adjustments.
Preparing the cabinet for adjustments is also crucial before starting any adjustment work on your cabinet doors. Begin by removing all items from inside the cabinets to avoid any damage or obstruction during adjustment work. Use masking tape to protect surrounding areas of your cabinets from scratches or marks while adjusting the doors. With these preparations made, you’re now ready to move on to measuring and marking door placement.
Measuring And Marking The Door Placement
Measuring accuracy is essential when it comes to adjusting cabinet doors. To ensure that your cabinet doors are level and straight, you need to take precise measurements and mark the placement of the door on the cabinet frame. When measuring your door, use a tape measure to get an accurate reading of the height, width, and depth of each door. Afterward, mark these measurements on a piece of paper so that they can be easily referenced later.
Next, use door placement techniques to determine where the hinges will go on the cabinet frame. One way to do this is by using a pencil to mark where the hinges will be placed on both the cabinet door and frame. Once you have marked these areas, place the hinge onto the marks and drill pilot holes with a small drill bit. This ensures that your screws will not strip or loosen over time.
When marking your door placement, it’s important to take into consideration any obstacles like trim or molding that may interfere with how far your doors can open. Make sure you measure from any obstructions before determining where your hinges should go. With careful attention to detail and patience when taking measurements, you can ensure that your cabinet doors are placed correctly for optimal functionality and appearance. In the following section, we’ll discuss how to adjust the hinges so that your cabinet doors open smoothly without any issues.
Adjusting The Hinges
After identifying the problem with a cabinet door that won’t close properly, the next step is to adjust the hinges. Before starting the adjustment process, it’s important to note that not all cabinet hinges are adjustable. In this case, replacing the hinges may be necessary.
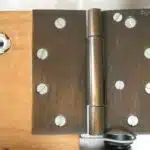
If your cabinet hinges are adjustable, start by examining each hinge and determining which direction needs to be adjusted. Hinges can be adjusted up and down, left and right, or in and out. Once you’ve identified the direction of adjustment needed, use a screwdriver to turn the appropriate screws until the door is level.
To ensure that your cabinet doors continue to function smoothly after adjusting the hinges, it’s important to take care of them properly. One way to do this is by lubricating the hinges regularly. This will help reduce friction between moving parts and prevent wear and tear over time. Additionally, if you notice any loose screws during the adjustment process, be sure to replace them promptly as they can cause further damage if left unattended.
- To replace screws:
- Identify which screws need to be replaced
- Remove old screws using a screwdriver
- Lubricating hinges:
- Choose an appropriate lubricant such as WD-40 or silicone spray
- Apply lubricant sparingly to hinge joints
By following these steps for adjusting cabinet door hinges and properly caring for them afterwards, you can ensure that your cabinets will operate smoothly for years to come. Next up: tightening loose screws.
Tightening Loose Screws
When adjusting cabinet doors, it’s common to encounter loose screws. This is especially true for older cabinets or those that have been frequently used. Tightening these screws can be a simple fix and prevent future issues with door alignment.
To tighten loose screws, you’ll need a screwdriver or power tool appropriate for the screw type. If using power tools, be sure to adjust the torque setting appropriately to avoid stripping the screw or damaging the surrounding wood. It’s also important to check if any of the screws are stripped before attempting to tighten them. Stripped screws will require a different approach to remove or replace.
Preventing future loosening can also be done by using thread-locking adhesive on the screw threads before tightening them. This adhesive will help keep the screw in place and resist loosening over time. Another option is to use longer screws that go deeper into the wood for a more secure hold. By taking these steps, you can ensure your cabinet doors stay aligned and functional for years to come.
When dealing with worn or broken hinges, there are several steps you can take to address the issue. The first step is identifying whether it’s just one hinge causing the problem or if multiple hinges need attention. From there, you may need to adjust or replace the hinges entirely depending on their condition and age. Properly functioning hinges are crucial for maintaining door alignment and preventing further damage to your cabinets.
Replacing Worn Or Broken Hinges
After tightening loose screws, it’s important to consider the overall condition of your cabinet doors. If you find that your cabinet doors are not functioning as they should, there may be an issue with the hinges. In some cases, replacing worn or broken hinges may be necessary to ensure proper functionality.
Replacing hinges can be a DIY project for those who are comfortable with basic carpentry skills and have access to the necessary tools. However, if you’re unsure about your ability or lack the tools needed, it’s best to hire a professional. A professional can ensure that the hinges are installed correctly and provide any necessary adjustments for optimal performance.
When choosing the type of hinge for your cabinets, there are two main options: concealed or visible. Concealed hinges are hidden from view when the cabinet is closed, while visible hinges remain visible even when closed. Concealed hinges offer a cleaner look but may be more difficult to install and adjust, while visible hinges may be easier to work with but may detract from the overall aesthetic of your cabinets.
- Check the size and weight capacity of your current hinge before purchasing a replacement.
- Determine whether you prefer concealed or visible hinges based on aesthetic preferences.
- Consider hiring a professional if you’re uncomfortable with DIY projects.
- Purchase quality hinges for long-lasting results.
- Keep extra screws and hardware on hand in case of unforeseen issues during installation.
In summary, replacing worn or broken hinges is an important step in ensuring proper functionality of your cabinet doors. DIY is an option for those comfortable with basic carpentry skills, but hiring a professional is recommended for those who lack experience or tools. When choosing between concealed or visible hinges, consider both aesthetic preferences and practicality.
Aligning The Doors With The Cabinet Frame
To properly align cabinet doors with the frame, it is important to follow a few key steps. First, make sure that all hinges are securely attached to the cabinet and the door. Loose hinges can cause misalignment, so tighten any screws or bolts as necessary. Next, check that the doors are level with each other. If one door is lower or higher than the other, adjust the hinge accordingly until they are even.
It is also important to check for common mistakes when aligning cabinet doors. One mistake is not checking for gaps between the door and frame. If there are gaps, adjust the hinge until the gap is eliminated. Another mistake is not testing the doors after adjustments have been made. Always open and close the doors several times to ensure they are properly aligned.
If you encounter any issues while aligning your cabinet doors, there are troubleshooting tips that can help. For example, if a door won’t close completely, try adjusting the hinge screws or moving the entire hinge up or down slightly until it fits properly in the frame. If a door won’t stay closed, make sure that both hinges are tightly secured and aligned correctly.
Next on our list of adjustments is adjusting the height of your cabinet doors.
Adjusting The Height Of The Doors
One of the most important aspects of cabinet installation and repair is ensuring that the doors are properly aligned and adjusted. Even a small misalignment can cause frustration and inconvenience for homeowners, making it difficult to access their stored items or even causing damage to the cabinet itself over time. As a cabinet expert, it is crucial to understand how to adjust the height of doors in order to provide your clients with a fully functional and aesthetically pleasing finished product.
Measuring accuracy is key when adjusting the height of cabinet doors. It is essential to use a level to ensure that both doors are perfectly aligned, as even minor discrepancies can lead to major problems down the line. Additionally, using shims effectively can make all the difference when adjusting door height. Shims are small pieces of wood or plastic that can be used to fill gaps between the door hinges and the cabinet frame, allowing for precise adjustments without damaging either component.
When adjusting door height, it is important to keep in mind that proper clearance must also be maintained in order for the doors to open and close smoothly. This means ensuring that there is enough space between the doors themselves as well as between each door and any adjacent cabinets or walls. By taking these factors into account and using careful measurements along with shims where necessary, you can achieve a perfectly aligned set of cabinet doors that will provide your clients with years of trouble-free storage and convenience.
Checking For Proper Clearance
Accurate measurements of the door clearance are essential for proper door swing mechanics. To ensure adequate clearance, measurements of the door must be taken from the top, bottom, and sides of the cabinet opening. Door swing mechanics should be considered when measuring the distance between the cabinet door and the opening for proper clearance. The distance should allow the cabinet door to swing freely without rubbing against the frame or adjacent cabinets.
Measuring Distance
Achieving proper clearance is crucial in ensuring that cabinet doors operate smoothly and look aesthetically pleasing. One important aspect of checking for proper clearance is measuring distance accurately. As a cabinet installation/repair expert, I cannot stress enough the importance of precision when it comes to measuring. Even the slightest miscalculation can result in poorly aligned doors that stick or won’t close properly.
To ensure measuring accuracy, it’s essential to use the right tools such as a tape measure or a ruler. However, even with the correct equipment on hand, common mistakes can still happen. Not holding the tape measure straight or not accounting for any obstructions can lead to incorrect measurements and ultimately cause problems down the line. Taking your time and double-checking measurements will save you from having to redo work or make costly mistakes.
In conclusion, measuring distance accurately is vital when checking for proper clearance in cabinet door adjustment. As an expert in this field, I encourage taking extra care when using tools and being mindful of common mistakes that can occur during measurement taking. By doing so, you’ll ensure that your cabinet doors function correctly while looking great for years to come.
Door Swing Mechanics
Proper clearance in cabinet door adjustment is essential to ensure doors operate smoothly and look aesthetically pleasing. Measuring distance accurately is one important aspect of checking for proper clearance, but it’s not the only factor to consider. Door swing mechanics also play a crucial role in achieving optimal cabinet door alignment.
Door swing mechanics refer to the way a door moves when opened or closed. The hinge adjustment determines the direction in which the door swings, and whether it opens fully or partially. Adjusting hinges is an essential step in ensuring proper clearance for cabinet doors. Misaligned hinges can cause doors to bind or rub against the cabinet frame, resulting in damage over time.
To achieve optimal clearance, it’s necessary to understand how door swing mechanics affect cabinet door alignment. Proper hinge adjustment can help prevent issues such as sagging or sticking doors, which can be frustrating and costly to repair. As a cabinet installation/repair expert, I recommend taking the time to check both measurement accuracy and hinge adjustment when assessing proper clearance for cabinet doors. By doing so, you’ll ensure that your cabinets function correctly while looking great for years to come.
Using Shims To Level The Doors
After checking for proper clearance, the next step in adjusting cabinet doors is to use shims to level them. Shims are small wedges that can be placed between the cabinet and the door hinges to adjust their height and position. There are many types of shims available, including plastic, metal, and wood shims.
When using shims, it’s important to do so effectively. The first step is to determine how much adjustment is needed by measuring the gap between the door and the cabinet frame at various points. Then, choose the appropriate type of shim based on the amount of adjustment needed. It’s important to use a shim that won’t compress over time or shift out of place.
To use shims effectively, start by removing any old or damaged shims from behind the hinge plates. Then, insert one or more new shims behind each hinge plate until the desired adjustment is achieved. Be sure to tighten all screws securely and check again for proper clearance. With some patience and attention to detail, using shims can be an effective way to adjust cabinet doors for a perfect fit.
Next, we will discuss how to adjust warped doors without having to replace them entirely.
Adjusting For Warped Doors
Warped cabinet doors are characterized by a misalignment of the door’s edges, resulting in an uneven fit when closed. Identification of the problem can be done by running a straight edge along the door’s edge and noting any misalignment. Warped doors can be rectified by careful adjustment of the door’s hinges, or by replacing the door if the warping is too severe. Finally, the door can be reinforced with a small shim, to ensure that the door will stay properly aligned over time.
Identifying Warped Doors
Are you having trouble closing or opening your cabinet doors? One of the possible reasons for this could be warped doors. Identifying causes of warped doors is the first step in addressing this issue. The most common cause is humidity and temperature changes. Wood absorbs moisture, causing it to expand, and when the environment becomes dry, wood contracts. This results in warping and twisting of cabinet doors.
Preventive measures can be taken to avoid warped doors in the future. One solution is to maintain a consistent temperature and humidity level in the house by using a dehumidifier or air conditioner. Additionally, sealing wooden surfaces with a high-quality sealant can also reduce moisture absorption and prevent warping. Regular inspection of cabinets is also recommended to catch any early signs of warping before it gets worse.
Identifying warped cabinet doors is important because it affects not only their functionality but also their appearance. If left unattended, it can lead to further damage that may require replacement of the entire cabinet door. Taking preventive measures can save time and money in the long run while ensuring that your cabinets remain functional and aesthetically pleasing for years to come.
Rectifying Warped Doors
After identifying the causes of warped cabinet doors and taking preventive measures, it’s time to address the issue and rectify it. The first step is to determine the extent of warping. Minor warping can be corrected by adjusting the hinges or sanding the affected areas. However, if the warping is severe, replacement may be necessary.
To correct minor warping, start by loosening the hinges and adjusting them to align with the frame. If this doesn’t work, removing excess paint from both sides of the door using a scraper or sander may help. Afterward, use wood filler on any cracks or gaps caused by warping and sand down until smooth.
For severe warping, it may be necessary to install new hinges or even replace the entire door. When installing new hinges, make sure they are aligned with each other and flush with the frame. Afterward, sand down any rough edges and apply a coat of sealant to prevent moisture absorption in the future.
In conclusion, rectifying warped cabinet doors involves different approaches depending on the extent of damage. Adjusting hinges or sanding down affected areas can correct minor warping while severe cases may call for replacement or installation of new hinges. Regardless of which approach you take, always remember to seal wooden surfaces to prevent further damage caused by humidity changes.
Lubricating Hinges And Moving Parts
When it comes to maintaining the functionality of your cabinet doors, lubricating hinges and other moving parts is an essential task. Applying lubricant prevents unnecessary friction, which can cause wear and tear on the hardware and lead to squeaky or stiff doors. Additionally, regular maintenance reduces the chances of rust buildup that can damage the hinges.
To begin lubricating your cabinet hinges, remove any debris or dirt that may have accumulated around them. Then apply a small amount of lubricant directly onto the hinge pin and into the gaps between its parts. Wipe off any excess with a clean cloth to prevent accumulation of dust or dirt in the future.
Preventing rust buildup is another key factor in maintaining the functionality of your cabinet doors’ hardware. Rust can make hinges difficult to open or close, causing them to become stuck or even break. Using a rust inhibitor spray can help protect your hardware from corrosion and keep it functioning smoothly for years to come.
In preparation for testing your cabinet doors for proper functionality, making sure they are properly lubricated and free from rust buildup will go a long way in ensuring their smooth operation. By following these simple maintenance steps regularly, you’ll be able to keep your cabinet hardware working like new for years to come without having to replace any damaged components prematurely.
Testing The Doors For Proper Functionality
- In order to ensure that cabinet doors are properly functioning, it is necessary to test their alignment and stability.
- Testing door alignment involves verifying that the doors meet in the center with even gaps on each side, and that the doors close properly.
- Testing door stability requires checking the internal components for proper tension, and any screws for proper placement and tightness.
- Adjustments may be necessary to correct any alignment or stability issues, such as adjusting hinges, door handles, and door catches.
Testing Door Alignment
When adjusting cabinet doors, it is crucial to test their alignment to ensure proper functionality. Common problems that occur with cabinets include uneven gaps between doors, doors that won’t close completely, or doors that overlap each other. These issues can cause frustration and inhibit the overall look of your kitchen or bathroom. However, with DIY solutions available, homeowners can easily adjust their cabinet doors without having to enlist professional services.
To test door alignment, start by examining the gap between the two doors when they are closed. A small gap is usually acceptable, but if there is a noticeable difference in the size of the gap at the top and bottom of the door, then adjustment may be necessary. Next, check for overlap; if one door overlaps another when closed, it may need to be adjusted so that both doors sit flush against each other. Finally, check for any sticking or difficulty in opening and closing the door; this could indicate hinge issues or improper alignment.
While many homeowners are capable of making minor adjustments to their cabinet doors themselves, some may prefer to hire a professional for more complicated repairs. In terms of cost analysis, hiring a professional can range from $50-$150 per hour depending on location and complexity of repair needed. Ultimately, whether you choose to make DIY adjustments or enlist professional help will depend on your level of comfort with tools and budget constraints.
In conclusion, testing door alignment is an essential step in ensuring proper functionality and aesthetics in your cabinets. With common problems such as uneven gaps or overlapping hinges being easily fixable through DIY solutions or by hiring a professional for more complex repairs at varying costs – it’s important not to let these issues persist and instead address them promptly for maximum satisfaction with your cabinets!
Testing Door Stability
When it comes to ensuring proper functionality of cabinet doors, testing for door alignment is just one aspect that needs attention. Another important factor to consider is door stability testing. Common issues with unstable doors include wobbling, sagging, or even completely falling off the hinges. These issues can be both frustrating and dangerous for homeowners, as they can cause damage to the cabinets or even injury if a heavy door falls on someone. Therefore, it’s crucial to test for door stability regularly.
To test for door stability, start by examining the hinges and screws holding the doors in place. If any screws are loose or missing, tighten or replace them immediately. Next, check for any warping or damage to the actual door; this could indicate it’s time for a replacement. Finally, open and close the door slowly while observing its movement; if there is any wobbling or tilting as the door moves, it may need additional support from brackets or reinforcements.
Testing for proper functionality of cabinet doors doesn’t end at alignment alone – door stability testing is equally important to ensure safety and longevity of your cabinets. By addressing common issues such as loose screws or warping doors through regular maintenance and inspection, homeowners can prevent costly repairs down the line and enjoy their cabinets worry-free.
In summary, taking a proactive approach to testing cabinet doors for proper functionality includes not only checking alignment but also assessing door stability regularly. Common issues such as loose screws or warping doors can compromise both safety and aesthetics of your cabinets – therefore, it’s crucial to address these issues promptly through DIY solutions or professional services if necessary. By doing so, homeowners can prolong the lifespan of their cabinetry while enjoying peace of mind knowing they are safe and functional!
Finishing Touches And Cleaning Up
After testing the doors for proper functionality, it’s time to adjust them as needed. Cabinet doors that are misaligned or uneven can cause frustration and damage over time. To adjust cabinet doors, start by checking the hinges for any loose screws or damage. Tighten any loose screws with a screwdriver and replace damaged hinges if necessary.
Next, use a level to determine if the cabinet doors are properly aligned. If not, adjust the hinges by loosening the screws slightly and moving the door up or down until it is level. Use shims to help with alignment if needed. Once the door is in the desired position, tighten the screws back in place. Repeat this process for each door until they are all properly aligned.
Now that your cabinet doors are adjusted and functioning properly, it’s important to give them some finishing touches and clean them up before use. Choosing cleaning products and polishing techniques can depend on the material of your cabinets, but generally speaking, using a soft cloth and mild cleaner should do the trick. Avoid harsh chemicals or abrasive materials that could damage your cabinets.
Maintaining your cabinets for longevity is important to keep them looking great and functioning properly for years to come. In addition to regular cleaning, consider applying a protective coating such as wax or varnish to help prevent wear and tear over time. Additionally, keeping an eye out for any signs of damage or wear can help you catch potential issues early on before they become bigger problems. By taking good care of your cabinets, you’ll be able to enjoy their beauty and functionality for many years to come.
Maintaining Your Cabinets For Longevity
Ironically, the easiest way to extend the longevity of your cabinets is to maintain them properly. Yet, many homeowners fail to do so. As a cabinet installation/repair expert, I can tell you that cleaning your cabinets regularly is crucial to their long-term health.
Cleaning tips for cabinets are simple yet effective. Use a mild soap and water solution or a non-abrasive cleaner to wipe down the exterior and interior of your cabinets. Make sure to dry them thoroughly afterward. Avoid using harsh chemicals or abrasive sponges that can damage the finish or cause scratches.
Preventative measures also play a significant role in maintaining your cabinets’ longevity. If you have young children, consider installing child safety locks on your cabinet doors to prevent them from opening and potentially causing damage. Additionally, avoid hanging heavy items on cabinet doors as this can loosen hinges over time. By taking these simple steps, you can ensure that your cabinets remain in excellent condition for years to come without needing costly repairs or replacements.
Conclusion
Adjusting cabinet doors may seem like a daunting task, but with the right tools and techniques, it can be easily done. Begin by identifying the problem with your cabinet doors and gathering the necessary materials. Measuring and marking the door placement is crucial before adjusting the hinges, tightening loose screws, and lubricating hinges and other moving parts. Testing the doors for proper functionality is important to ensure that they are aligned correctly. Finally, finish off with some cleaning up and maintenance tips to keep your cabinets in top shape.
Did you know that according to a recent survey conducted by The Home Depot, 43% of Americans have never adjusted their cabinet doors? This statistic highlights the importance of regular maintenance to ensure long-lasting functionality of your cabinets. Neglecting adjustments can lead to wear and tear on moving parts, which can ultimately result in costly repairs or replacements down the line.
As a cabinet installation/repair expert, I strongly recommend that homeowners take care of their cabinets by regularly assessing their functionality and making adjustments as needed. By following these simple steps outlined above, you can save yourself time and money in future repairs while prolonging the life of your cabinets. Remember to always measure twice before making any adjustments, tighten all loose screws, lubricate hinges regularly, and perform regular maintenance checks to ensure long-lasting durability for your cabinets.
Image Credits
- “Pull handle for cabinet doors and drawers” by Creative Tools (featured)

