As a professional cabinet painter, I have come across many homeowners who dread the thought of sanding their cabinets before painting them. Sanding is a tedious and time-consuming process that requires patience and skill. Fortunately, there are ways to paint cabinets without sanding, making the process much easier and less daunting.
In this article, I will share my knowledge and experience on how to paint cabinets without sanding. We will explore different methods and techniques that can be used to achieve a smooth and durable finish without the need for sandpaper. Whether you are a DIY enthusiast or a homeowner looking to revamp your kitchen cabinets, this article will provide you with valuable insights on how to achieve professional-grade results with minimal effort. So let’s get started!
Assessing The Condition Of Your Cabinets
As a professional cabinet painter, assessing the condition of your cabinets is crucial before beginning any painting project. Think of it as a doctor examining a patient before administering treatment. Take the time to evaluate the cabinet’s condition, necessary repairs, and compatibility with paint to ensure the best outcome.
Start by evaluating the cabinet’s overall condition. Look for any structural damage such as cracks or dings that need to be repaired before painting. Check for loose hinges or handles that need tightening or replacement. Take note of any discoloration or staining on the cabinets that may require special attention.
Next, assess the material of your cabinets to determine which type of paint will work best. Cabinet materials vary from wood to laminate and require different types of paint preparation and application techniques. Knowing what type of material you are working with can help determine which primer and paint products are compatible with your cabinets.
By thoroughly assessing your cabinets’ condition and material, you can determine what repairs are necessary and which paints will work best for your project. The next step is choosing the right paint and supplies to ensure a successful outcome.
Choosing The Right Paint And Supplies
When it comes to choosing the right paint and supplies for painting cabinets without sanding, there are a few things to keep in mind. First and foremost, you’ll need to select a paint that is specifically designed for use on cabinets or other high-use areas. Fortunately, there are many options available on the market today, ranging from traditional oil-based paints to water-based acrylics.
Paint color options are also important to consider when planning your cabinet painting project. While neutral colors like white and gray remain popular choices for cabinetry, bold hues like navy blue and forest green can add a dramatic touch to any kitchen or bathroom. Before making your final selection, be sure to test out a few different shades in your space to ensure that they complement your existing decor.
In addition to selecting the right paint color, it’s essential that you have all of the necessary painting tools on hand before beginning your project. Essential painting tools include items like brushes, rollers, painter’s tape, and drop cloths. Depending on the size of your cabinet surfaces, you may also want to invest in a small sprayer or airless paint gun for more efficient application. With the right tools in place and a well-chosen paint color at hand, you’ll be well-equipped for a successful cabinet painting project that doesn’t require any sanding or stripping.
As you move forward with your cabinet painting project, it’s important to remember that proper cleaning and prepping of your cabinets is key to achieving long-lasting results. In our next section, we’ll explore some of the steps involved in cleaning and preparing your cabinets before you begin painting. By following these steps carefully and taking the time needed to get everything just right, you can help ensure that your finished cabinets look beautiful and last for years to come.
Cleaning And Prepping Your Cabinets
To achieve a smooth and long-lasting finish on your cabinets, proper cleaning and preparation are essential. One of the first steps is to choose the best cleaners for the job. You want to select products that will remove any grease, dirt, or grime buildup without damaging the surface of your cabinets.
Effective prepping also involves removing all hardware from your cabinets, including handles, knobs, hinges, and screws. This ensures that every inch of your cabinet can be cleaned and painted evenly. After removing the hardware, begin by wiping down each cabinet thoroughly with a damp cloth to remove any surface dust or debris.
Once you have wiped down your cabinets and they are free of any visible dirt or grime, it is time to move on to deeper cleaning methods. This can include using a degreaser or a solution of warm water and mild soap to clean the surfaces thoroughly. Be sure to rinse off any cleaning solution residue with clean water and dry completely before moving on to the next step in painting your cabinets.
- Four items for effective prepping:
- Choose high-quality cleaning products.
- Remove all hardware from cabinets.
- Thoroughly wipe down each cabinet with a damp cloth.
- Use deep cleaning methods such as degreasers if necessary.
With proper cleaning and preparation techniques in place, you can ensure that your cabinets will look beautiful for years to come. In order to achieve this goal effectively, it is important not only to use high-quality cleaning products but also take the time required for thorough prepping before painting begins. Next up: removing cabinet hardware!
Removing Cabinet Hardware
After cleaning and prepping your cabinets, the next step is to remove the hardware. This includes knobs, handles, and hinges. Removing these items makes painting easier and allows you to apply paint evenly without getting it on the hardware. Use a screwdriver or drill to remove the screws holding the hardware in place. Place them in a small plastic bag so you don’t lose any pieces.
One common problem when painting cabinets is dust getting onto wet paint and ruining the finish. To prevent this, create a dust-free environment when removing hardware and applying paint. Close any nearby doors and windows, turn off fans, and cover nearby furniture with drop cloths. If possible, work outside or in a well-ventilated area with minimal foot traffic.
Once you have removed the hardware and created a dust-free environment, it’s time to apply a deglosser to your cabinets. A deglosser removes any sheen from your cabinets’ existing finish so that new paint can adhere properly. Follow the instructions carefully when using a deglosser as they can be harsh chemicals that require proper ventilation and protective gear such as gloves and goggles. Allow ample time for drying before proceeding to paint application.
Transition sentence: Now that we have removed the hardware and created an optimal environment for painting let’s move on to applying a deglosser.
Applying A Deglosser
Using a deglosser is an effective way to prep cabinets for painting without sanding. A deglosser works by chemically breaking down the existing finish of the cabinet, creating a surface that is ready for paint. One of the pros of using a deglosser compared to sanding is that it saves time and energy. Sanding can be a tedious, messy process that requires more effort than using a deglosser.
Another advantage of using a deglosser is that it doesn’t create as much dust as sanding does. This makes it easier to clean up after prepping the cabinets and ensures that there isn’t any leftover residue on the surface before painting. However, one possible downside to using a deglosser is that it can be harsh on skin and eyes, so proper precautions should be taken when applying it.
Overall, using a deglosser is an efficient method for prepping cabinets for painting without having to sand them down. It’s important to weigh the pros and cons before deciding which method to use based on personal preferences and safety considerations. The next step in this process would be filling in any damaged areas on the cabinet before moving onto priming and painting.
Filling In Any Damaged Areas
Although painting your cabinets without sanding can save you time and effort, there are still some challenges that you need to overcome. One of these is repairing any damages or filling in holes before you start painting. If your cabinets have scratches, dings, or other imperfections, they can be unsightly and affect the final look of your newly painted cabinets.
To repair damages on your cabinets, start by cleaning the affected areas with a mild detergent and water. Allow them to dry thoroughly before proceeding. Then, use wood filler to fill in any holes or scratches on the surface of the cabinet. Apply it evenly using a putty knife, making sure to smooth out any excess filler. Allow it to dry completely before sanding down with fine-grit sandpaper until the surface is smooth.
After filling in damaged areas on your cabinets, it’s essential to prime them properly before painting. Priming helps ensure that the paint adheres correctly and provides an even finish. In addition, it can cover up stains or discolorations that might show through when painting over them directly. In the next section, we’ll discuss how to prime your cabinets effectively for a professional-looking finish that will last for years to come.
Priming Your Cabinets
Assessing the durability of your cabinets is an essential step in the priming process. The type of material and the amount of wear and tear on your cabinets can impact the effectiveness of your primer. Cabinets in high-use areas, such as the kitchen or bathroom, may require a more durable primer to ensure long-lasting results.
Choosing the right priming product is crucial to achieving a smooth and even finish. Look for products labeled specifically for use on cabinets, as these will provide better adhesion and coverage. Oil-based primers are often recommended for their superior bonding properties, but water-based options are also available and offer quick drying times.
When applying primer to your cabinets, it’s best to work in sections rather than attempting to cover the entire surface at once. Start with the backside of cabinet doors and work your way around to the front. Use a brush or roller to apply a thin coat, being careful not to leave any brush marks or streaks. Allow adequate drying time between coats as per manufacturer’s instructions before sanding lightly (if needed) for a smooth finish.
Now that you have assessed durability and chosen your priming products, it’s time to move onto using chalk paint for an easy finish.
Using Chalk Paint For An Easy Finish
- Prior to painting, ensure the cabinets are clean and free of dust to ensure a smooth finish.
- The use of chalk paint is recommended for cabinets as it does not require sanding or priming.
- Apply the paint in thin, even coats, allowing for adequate drying time between coats.
- To create a distressed look, sand the cabinets lightly after the paint is dry.
- To seal the cabinets, apply a thin layer of wax with a clean cloth, allowing it to dry overnight.
- To finish, buff the cabinets with a soft cloth to create a glossy, protective layer.
Preparing The Cabinets
Assessing the condition of your cabinets is crucial before starting any painting project. Inspect the cabinets for any scratches, dents, or damages that may need repair. Consider the age and type of wood used in making the cabinets to determine if they are suitable for a paint job without sanding. Cabinets that have been previously painted or coated with glossy finishes may require additional steps for surface preparation.
Cleaning the cabinets is a vital step in preparing them for painting. Clean all surfaces thoroughly using a degreaser to remove any dirt, grime, or grease buildup. Wipe down each cabinet with a damp cloth to remove any remaining residue after cleaning. Make sure all surfaces are dry before proceeding with painting.
After assessing and cleaning the cabinets, it’s now time to prime and paint them using chalk paint. Chalk paint adheres well to most surfaces and is ideal for painting kitchen cabinets without sanding. Apply two coats of chalk paint using a brush or roller, allowing each coat to dry completely before applying the next one. Finish off by adding a layer of wax on top of the dried paint for added protection and durability. With these simple steps, you can give your old kitchen cabinets new life without having to go through the tedious process of sanding them down first.
Painting With Chalk Paint
When it comes to painting kitchen cabinets, using chalk paint is one of the easiest and most popular techniques available. Chalk paint is a versatile medium that adheres well to most surfaces, making it an ideal choice for transforming outdated cabinets without the need for extensive preparation work. In this subtopic, we will discuss the benefits of using chalk paint techniques for cabinet painting, as well as how to select the right colors to achieve your desired look.
To begin with, chalk paint is known for its ease of use and versatility. Unlike traditional paints that require sanding and priming before application, chalk paint can be applied directly onto most surfaces with minimal preparation work. Additionally, chalk paint dries quickly and provides a smooth finish that can be easily distressed or waxed to create a unique look. This makes it an excellent choice for homeowners who want to update their cabinets quickly and easily.
When selecting colors for your chalk paint project, there are several factors to consider. First and foremost, you should choose a color that complements your existing decor and personal style. Neutral shades like white, gray, or beige are timeless options that work well in any kitchen setting. Alternatively, bold hues like navy blue or emerald green can add a pop of color and personality to your space. Whatever color you choose, be sure to test it out on a small area before committing to painting all of your cabinets to ensure that it looks just as you imagined.
In conclusion, using chalk paint techniques for cabinet painting is an excellent way to achieve an easy finish without sacrificing quality or durability. Whether you’re looking to update outdated cabinets or give your kitchen a fresh new look, chalk paint offers endless possibilities for customization and creativity. By selecting the right colors and following best practices when applying the paint, you can transform your old cabinets into beautiful focal points that will enhance the overall aesthetic of your home.
Finishing With Sealing Wax
When it comes to achieving a vintage look for your cabinets, using sealing wax is an excellent technique to consider. Sealing wax can add depth and dimension to your chalk paint finish, creating a beautiful aged appearance that is both stylish and timeless. However, applying sealing wax requires some skill and attention to detail to ensure that the finish looks even and professional.
To start, it is essential to choose the right type of sealing wax for your project. There are several options available, including clear, dark, or colored waxes that can enhance the color of your paint or create a unique effect. It’s best to experiment with different types of wax on a small area before committing to the entire surface to determine which one works best for your specific needs.
When applying sealing wax, it’s crucial to work in small sections and use a clean cloth or brush to spread the wax evenly over the surface. Take care not to apply too much pressure or leave any streaks behind as this could result in an uneven finish. Additionally, be sure to buff the surface with a clean cloth after applying the wax to remove any excess and create a smooth texture overall. By following these tips for applying sealing wax evenly, you can achieve a beautiful vintage look that will enhance the overall aesthetic of your cabinets.
Spraying Your Cabinets For A Professional Look
Like a skilled artist with a paintbrush, a professional cabinet painter wields their spray gun with precision and finesse. With the right technique, they can achieve a smooth and even finish that gives your cabinets a brand new look. Before you begin, it’s important to choose the right color for your cabinets. In recent years, neutral colors like white, gray, and beige have been popular choices for kitchen cabinets, but brighter hues like navy blue and forest green are also on-trend.
When it comes to spraying your cabinets, there are several techniques that can help you achieve a professional-looking finish. First, make sure that your spray gun is set up correctly and that you’re using the right type of paint for your cabinets. You’ll also want to practice your technique on a piece of cardboard or scrap wood before you start working on your cabinets. Hold the spray gun about 6-8 inches away from the surface of the cabinet and use long, sweeping strokes to apply the paint evenly.
If you’re not confident using a spray gun or don’t have access to one, don’t worry – there are other ways to paint your cabinets without sanding them down first. In the next section, we’ll discuss how to use a brush or roller to achieve great results without all the fuss and mess of sanding.
Using A Paint Roller Or Brush
After discussing the benefits of spraying your cabinets, let’s explore another option: using a paint roller or brush. While spraying may be quicker and provide a smoother finish, using a paint roller or brush is a great alternative that doesn’t require as much equipment or setup time.
Here are some pros and cons to consider when deciding whether to use a paint roller or brush:
- Paint Roller Pros:
- Can cover large areas quickly
- Provides an even coat of paint
- Leaves minimal brush marks
- Easy to use for beginners
Cons:
- May not reach tight corners and crevices
- Can leave bubbles if not applied correctly
- Requires multiple coats
- Can result in drips if overloaded with paint
- Brush Pros:
- Can easily reach tight corners and crevices
- Provides greater control over painting detail
- Requires fewer coats than a roller
- Less likely to drip than a roller
Cons:
- Takes longer to apply than a roller
- May leave visible brush marks
- More difficult for beginners 4.Requires more frequent cleaning
In summary, choosing between a paint roller and brush depends on your preferences and the type of project you’re tackling.
When painting cabinets, it’s important to remember that applying multiple coats is key for durability and ensuring an even finish overall without any blotches or unevenness in color distribution between different areas of the cabinet surface being painted.
Applying Multiple Coats For Durability
As a professional cabinet painter, I think of painting cabinets as a journey. Just like any journey, it requires time, patience, and effort. To achieve durable and long-lasting results, applying multiple coats is crucial. Think of each coat as a step towards your destination – the perfect finish for your cabinets.
To ensure durability and longevity, it’s essential to use high-quality paint products that are specifically formulated for cabinetry. In addition to using the right paint, alternative painting techniques such as spraying or rolling can also enhance the final outcome. Spraying gives an even finish with no brush strokes or roller marks while rolling can give good coverage in less time.
Once you have applied at least two coats of paint, it’s time to add a protective top coat. Top coat options vary from clear lacquer to polyurethane finishes. A clear lacquer gives a natural look but may yellow over time while polyurethane finishes provide excellent protection against scratches and are easy to clean. Adding a top coat not only protects the painted surface but also enhances its durability and longevity, giving you peace of mind knowing that your investment will last for years to come.
Transitioning into the next section about ‘adding a protective top coat,’ it’s important to note that this step should not be skipped as it is crucial in achieving long-lasting results for your newly painted cabinets.
Adding A Protective Top Coat
Top coat options are an important consideration when painting cabinets without sanding. A protective layer can help to prevent scratches, stains, and chipping. There are several top coat options available, such as polyurethane, wax, or varnish.
Polyurethane is a popular choice for a protective top coat due to its durability and resistance to water and chemicals. It is available in both oil-based and water-based formulations. Wax is another option that provides a natural look and feel to the cabinets while also providing protection. However, it may need to be reapplied periodically depending on usage.
Adding a protective layer has numerous benefits for your newly painted cabinets. It not only adds durability but also helps to enhance the appearance of the paint job by adding depth and shine. A top coat can also make the cleaning process easier by creating a smooth surface that resists dirt and grime buildup. Overall, adding a protective layer will extend the life of your painted cabinets and save you time and money in the long run.
When it comes time to reinstall cabinet hardware, it’s important to take care not to damage the newly painted surface. To avoid scratches or chips from hardware screws or other metal pieces, use a screwdriver with a soft grip or wrap it with masking tape before tightening screws into place. Additionally, consider using felt pads on any areas where metal might come in contact with the cabinet surface when opening or closing doors or drawers. This will help keep your newly painted cabinets looking great for years to come.
Reinstalling Cabinet Hardware
Now that you’ve successfully painted your cabinets without sanding, it’s time to move on to reinstalling the hardware. This is where the real fun begins! Choosing hardware can be overwhelming, but don’t worry, I’m here to help. First, consider the style of your cabinets and choose hardware that complements it. If your cabinets are modern and sleek, go for something simple and minimalist. If they’re more traditional or rustic, try something with a bit more detail.
Updating hardware can completely transform the look of your cabinets and give them a fresh new feel. Don’t be afraid to get creative with your choices! There are so many options out there, from classic knobs and handles to unique pulls and decorative hooks. Just be sure to choose hardware that is functional as well as beautiful – after all, you want your cabinets to open smoothly and easily.
Once you’ve chosen the perfect hardware for your cabinets, it’s time to install them. This is a fairly easy process that requires only a few basic tools. Simply remove the old hardware (if necessary), align the new hardware in its place, and screw it in securely. And voila! Your cabinets now look brand new with their updated hardware. Now that you’ve finished reinstalling your cabinet hardware, let’s move on to cleaning up any remaining messes and adding those finishing touches that will make your newly painted cabinets truly shine.
Cleaning Up And Finishing Touches
Once you have finished painting your cabinets, there are a few cleaning and finishing touches that can really make them shine. Firstly, it’s important to clean up any messes or spills that may have occurred during the painting process. DIY cleaning hacks such as using vinegar and water or baking soda can help remove any stubborn paint stains. Be sure to also wipe down the cabinets with a damp cloth to remove any dust or debris.
Next, consider updating the hardware on your cabinets for an added decorative touch. There are many options available, from sleek modern handles to vintage knobs. Choose something that complements the style of your kitchen and adds a pop of personality. Installing new hardware is an easy DIY project that can be completed in just a few hours.
Finally, take a step back and enjoy your newly painted cabinets! Admire how they brighten up your space and give it a fresh new look. With proper care and maintenance, your cabinets will stay looking great for years to come. And if you ever want to switch things up again, remember that painting them without sanding is always an option!
Enjoying Your Newly Painted Cabinets!
According to a survey conducted by Houzz, 43% of homeowners who renovated their kitchen updated their cabinets. Painting cabinets can be a cost-effective way to update your kitchen without the expense of completely replacing them. Now that you have successfully painted your cabinets without sanding, it’s time to enjoy the fruits of your labor!
One tip for maintaining your newly painted cabinets is to avoid using abrasive cleaners or harsh chemicals. Instead, use a gentle cleaner and a soft cloth to wipe down your cabinets regularly. Additionally, be mindful of any scratches or chips in the paint and touch them up as needed.
After painting your cabinets, consider creative ways to decorate them. Add decorative knobs or pulls for an extra pop of style. You can also add open shelving or glass-fronted doors to showcase your favorite dishes or accessories. Another fun idea is to add wallpaper or a bold color inside the cabinet for an unexpected surprise.
Remember, maintaining and decorating your newly painted cabinets is just as important as the painting process itself. With these tips and creative ideas, you can enjoy your newly updated kitchen for years to come!
Conclusion
Assessing the condition of your cabinets is crucial before starting any painting project. It’s important to choose the right paint and supplies that will work best for your specific cabinets. Cleaning and prepping your cabinets is also vital in achieving a successful outcome. Removing cabinet hardware, applying a deglosser, adding a protective top coat, and reinstalling cabinet hardware are all steps that should be carefully followed.
According to a study by Houzz, 43% of homeowners who updated their kitchen cabinets painted them as part of their renovation. Painting cabinets without sanding can save time and effort while still achieving a beautiful result. By following the proper steps and using high-quality products, you can transform the look of your kitchen without breaking the bank. As a professional cabinet painter, it’s important to stress the importance of preparation and attention to detail in order to achieve a flawless finish.
Image Credits
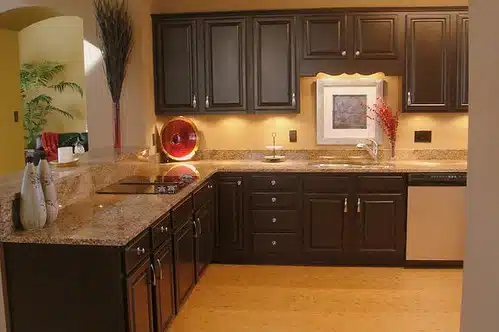
- “Kitchen Makeover with Black Cabinets” by champagne.chic (featured)

