As a wood staining expert, I have come across many homeowners who want to update the look of their kitchen cabinets without having to replace them. Staining wood cabinets is an affordable and effective way to achieve this goal. However, it requires proper preparation and execution to ensure that the end result is both beautiful and long-lasting.
In this article, we will discuss the step-by-step process of how to stain wood cabinets. We will cover everything from selecting the right type of stain for your cabinets to properly sanding and preparing the surface for staining. By following these guidelines, you can transform your old and tired-looking cabinets into a beautiful focal point in your kitchen.
Assessing Your Cabinets
Before you start staining your wood cabinets, it is important to assess the space where they are located. Measuring the area will help you determine how much stain and other materials you will need. You should also consider the lighting in the room and how it affects the color of your cabinets.
In addition to measuring space, analyzing the color scheme of your cabinets is crucial in achieving a desired look. Take note of any undertones or dominant colors in your cabinets that may affect how the stain looks after application. It is also important to consider if you want a uniform look or if you prefer a more natural, rustic appearance.
By taking these factors into consideration, you can ensure that your staining project will be successful. The next step is gathering materials and tools necessary for this process such as sandpaper, brushes, and stain.
Gathering Materials And Tools
Assessing your cabinets is an important step in preparing to stain wood cabinets. Now that you have assessed your cabinets, it’s time to gather the necessary materials and tools for the staining process. This step is crucial because having the right materials and tools will help ensure a successful staining process.
Pre-stain prep is essential before applying any stain on wood cabinets. Start by cleaning your cabinets thoroughly with a cleaner that’s compatible with the type of wood you’re working with. Sand your cabinets lightly, following the grain, and be sure to remove any dust or debris before applying any stain. Safety precautions should be taken when sanding; wear gloves, goggles, and a mask to protect yourself from dust particles.
To make the staining process easier and more enjoyable, consider investing in high-quality materials and tools. Here are three items that can make a significant difference in achieving the perfect finish:
- High-quality brush: A good brush will ensure an even application of stain on your cabinets.
- Stain conditioner: This product helps to reduce blotching on porous woods such as pine, cherry or maple.
- Finishing wax: Applying finishing wax after staining protects the surface of your cabinets from scratches and other damage.
Choosing the right stain can be overwhelming due to the variety of options available in stores today. However, it’s important to remember that not all stains are created equal – some work better than others depending on what you’re trying to achieve with your project. In our next section, we’ll discuss how to choose the right stain for your wood cabinets without wasting time or money!
Choosing The Right Stain
To achieve the desired look for your wood cabinets, choosing the right stain color is crucial. When selecting a stain color, it is important to consider the wood type you are working with. Some woods, such as oak and pine, take stains more evenly than others like cherry or maple. Depending on the wood type, you may need to apply a pre-stain conditioner to ensure an even application of the stain. In addition, some woods have natural undertones that can affect how the stain appears on them.
To help determine which stain color will work best for your cabinets, it is helpful to create a sample board using the same type of wood as your cabinets. This will allow you to see how different stains will look on the actual wood and make adjustments accordingly. Keep in mind that colors can appear differently depending on lighting conditions and other factors, so be sure to view your samples in various lighting situations.
When selecting a stain color for your wooden cabinets, it’s important to remember that there are no hard and fast rules. Ultimately, you should choose a color that complements your personal style and fits with the overall aesthetic of your home. By considering different options and testing out various stains on a sample piece of wood first, you’ll be well on your way to achieving beautiful and long-lasting results for your cabinet staining project.
Testing The Stain On A Sample Piece
Like testing the waters before diving in, testing the stain on a sample piece is an essential step in achieving the desired outcome in staining wood cabinets. This step is like a compass that guides you towards the perfect stain color for your cabinetry. A sample piece can be any leftover piece of wood, preferably of the same kind as your cabinet doors and drawers.
Before applying the stain to your sample piece, it is crucial to prepare it correctly to achieve accurate results. Start by sanding it evenly with fine-grit sandpaper, wiping off any dust with a clean cloth, and then applying a pre-stain conditioner to prevent blotches or streaks. This conditioning also helps the wood absorb the stain more uniformly.
When you have prepared your sample piece and ensured that it resembles your cabinets’ condition, try out different stains and compare them side by side on the sample’s surface. You can use a small brush or sponge applicator to apply each stain to different parts of the wood surface. Observe how each stain color interacts with your wood’s unique grain patterns and whether they complement your overall kitchen design. With this testing process, you can confidently choose your preferred stain color before proceeding with the actual staining process.
Now that you have found your ideal stain color for your cabinets from testing on a sample piece let us move onto another vital step: removing cabinet hardware for seamless staining application.
Removing Cabinet Hardware
Before you begin staining your wood cabinets, it is essential to remove the cabinet hardware. This step will allow you to stain the wood surface evenly and avoid staining any metal parts accidentally. Before removing any hardware, make sure to label each piece according to its location. This way, you can easily reinstall them once the staining process is complete.
Preparing the surface and protecting surrounding areas are essential before starting this process. Cover all nearby surfaces with drop cloths or newspaper to prevent any accidental spills or stains. Gather all necessary tools like screwdrivers, pliers, and a container for screws so that they do not get lost or mixed up during removal.
There are alternative methods for removing cabinet hardware such as chemical stripping agents that dissolve paint and varnish from wood surfaces. However, these chemicals can be hazardous if not used correctly and require proper ventilation when in use. If you choose this method, follow the manufacturer’s instructions carefully, wearing gloves and protective gear while handling these agents.
When it comes to preparing your wood cabinets for staining, removing cabinet hardware is a crucial first step. Once completed, you are ready to move on to sanding the cabinets down to their raw wood state for optimal staining results without any remaining finish getting in the way of achieving a beautiful result.
Sanding Cabinets
Imagine walking into a kitchen with beautiful wood cabinets that have been stained to perfection. The natural grains of the wood stand out, creating a warm and inviting atmosphere. Achieving this look requires proper preparation, such as sanding the cabinets before staining them. Sanding is an important step in the process because it helps remove any existing finish or imperfections on the surface of the wood.
When sanding cabinets, it’s essential to select the right type of sandpaper. Depending on the condition of your cabinets, different grits of sandpaper will be needed. For example, if you’re working with new cabinets or ones that are in good condition, you may only need to use a fine-grit sandpaper (220-320). However, if your cabinets are damaged or have an existing finish, you may need to start with a coarser grit (80-120) and work your way up to finer grits.
Techniques for sanding also play an important role in achieving a smooth and even surface. Always sand with the grain of the wood to avoid scratching it. Use a light touch when sanding and apply even pressure across the entire surface area. Be sure to check your progress often by rubbing your hand over the surface; if it feels smooth and free from imperfections, you can move on to cleaning the surface before staining.
Transition: Now that we’ve discussed techniques for sanding your wood cabinets, it’s time to move onto cleaning the surface before applying stain.
Cleaning The Surface
- Grease can be removed from wood cabinets by cleaning with a degreasing solution.
- Dust can be removed from wood cabinets with a soft cloth or vacuum.
- Sanding is necessary before staining wood cabinets in order to create a smooth and even surface.
- For best results, use an orbital sander with a medium-grit sandpaper.
- During sanding, be sure to move in the direction of the wood grain.
- Sanding should be done until the wood surface is smooth and free of imperfections.
Removing Grease
As a wood staining expert, one of the essential steps in preparing wood cabinets for staining is to ensure that the surface is clean and free from grease. Grease buildup can cause adhesion issues, leading to an uneven finish or peeling after the stain has been applied. Therefore, it’s crucial to take a proactive approach by removing as much grease as possible before beginning the staining process.
There are various degreasing techniques you can use to remove stubborn grease stains on your wood cabinets. One option is to use a strong detergent solution mixed with warm water and apply it to the affected areas using a soft-bristle brush. For tougher stains, you may need to use a solvent-based cleaner such as mineral spirits or denatured alcohol. Make sure you follow all safety precautions when working with solvents and work in a well-ventilated area.
Lastly, preventing future buildup of grease is just as important as removing existing stains. After cleaning your wood cabinets, be sure to dry them thoroughly to prevent moisture from accumulating on the surface. Additionally, avoid using abrasive cleaners or scrubbers that can scratch the surface and create small crevices where grease can accumulate. By taking these preventative measures, you’ll ensure that your wood cabinets remain free from grease buildup and ready for staining whenever needed.
Dusting
Maintaining a clean and well-maintained surface is crucial when preparing wood cabinets for staining. Apart from removing grease buildup, dusting the surface is also an essential step that must not be overlooked. Dust can accumulate on the surface over time, making it difficult for the stain to adhere to the wood’s pores evenly. As a wood staining expert, I highly recommend incorporating dusting into your cleaning routine.
The benefits of dusting are numerous when it comes to preparing wood cabinets for staining. It helps remove accumulated dirt, debris, and other particles that may hinder proper adhesion of the stain to the wood’s surface. Dusting also helps prevent scratches on the surface by removing abrasive materials that can scratch or damage it. Moreover, it helps improve air quality by reducing allergens present in the environment.
When it comes to dusting, there are several best practices you can follow to ensure effective results while minimizing damage to the surface. One of these techniques is using a soft-bristle brush or microfiber cloth designed specifically for cleaning surfaces without scratching them. Be gentle while dusting and avoid applying too much pressure as this can cause damage to delicate surfaces. Lastly, always use a clean cloth or brush so that you do not reintroduce dirt and debris back onto your wood cabinets’ surface.
Sanding
In addition to dusting, sanding is another crucial step in preparing wood cabinets for staining. Sanding helps remove any rough spots, scratches, or imperfections on the surface, allowing the stain to penetrate evenly into the pores of the wood. There are different types of sandpaper that you can use depending on your needs and preferences. Fine-grit sandpaper, such as 220-grit, is ideal for removing minor scratches and smoothing out surfaces. On the other hand, coarse-grit sandpaper like 80-grit is suitable for stripping off old paint or varnish.
When it comes to sanding techniques, it’s essential to start with a coarse grit and work your way up gradually to a finer grit. This will ensure that you don’t remove too much material from the surface and end up with an unevenly sanded finish. Additionally, always sand along the grain of the wood to avoid leaving visible marks or damaging the surface. Once you’ve finished sanding with your desired grit, make sure to thoroughly clean up any remaining dust and debris before proceeding with staining.
In conclusion, maintaining a clean and well-sanded surface is crucial when preparing wood cabinets for staining. By incorporating proper cleaning and sanding techniques into your routine, you can achieve a smooth and even finish that enhances the natural beauty of your wood cabinets. Remember to take your time when sanding and always follow best practices to avoid damaging or scratching the surface.
Applying Stain
When it comes to applying stain to wood cabinets, there are several techniques to consider. One popular method is using a brush, which allows for more control over the application process. Another option is using a rag or cloth, which can result in a more natural and blended look. Regardless of the technique chosen, it’s important to apply the stain evenly and avoid leaving any excess or puddles.
Color mixing is another important aspect to consider when staining wood cabinets. Mixing stains can allow for a wider range of color options and can even help achieve a custom shade. To mix colors effectively, start with small amounts of each color and gradually add more until the desired shade is achieved. It’s also important to keep track of the ratios used in case touch-ups are needed in the future.
Overall, successful stain application requires attention to detail and patience. Take your time when applying the stain and ensure that all areas are covered evenly. With proper technique and color mixing tips, your wood cabinets will have a beautiful and long-lasting finish.
Moving on from applying stain, removing excess stain is an essential step in achieving a professional-looking finish.
Removing Excess Stain
Now that you have made the effort to stain your wood cabinets, it’s time for the next step: removing excess stain. This step is essential in achieving a flawless finish. Ironically, too much of a good thing can ruin the whole project. Excess stain left on the surface will not only make the wood appear blotchy and uneven but also prevent it from absorbing the sealer properly.
To remove excess stain, use a blotting technique using a clean cloth or rag. Press down firmly on the surface and wipe off any excess stain that comes off. Keep repeating this process until all excess stain is removed. Be careful not to rub too hard as this may damage the wood grain.
After removing excess stain, you can proceed with sanding options. Sanding will help remove any remaining unwanted marks or blemishes left behind by the blotting technique or previous sanding phases. You may choose either sandpaper or a sander based on your preference and cabinet size. Use fine-grit sandpaper for light touch-ups or coarse grit for deeper scratches and stains.
Now that we have removed all excess stain and sanded our cabinets, it’s important to let them dry before proceeding with sealing or applying another coat of stain. The drying time will depend on various factors like humidity levels and temperature conditions of your workspace. In general, it takes about 24 hours for wood cabinets to dry completely after staining them. During this time, avoid touching or bumping into them as this might cause damage to their freshly stained surfaces.
Drying Time
Once the staining process is complete, it’s important to let the cabinets dry completely before proceeding with any other steps. The drying time for wood cabinets can vary depending on a few factors such as temperature, humidity, and ventilation. Under optimal conditions, wood cabinets should be allowed to dry for at least 24 hours.
Stain application can take anywhere from a few minutes to several hours depending on the size of the cabinets and the number of coats being applied. Once the final coat has been applied, it’s important to allow ample time for the stain to settle into the wood fibers before attempting to move or touch anything. Touching or moving the cabinets too soon may result in smudging or uneven coloring.
Optimal conditions for drying include a temperature range of 60-90 degrees Fahrenheit and humidity levels between 50-70%. Adequate ventilation is also key in ensuring that moisture is able to escape from the surface of the cabinets during drying. In cases where drying conditions are less than ideal, additional drying time may be necessary before moving on to applying a finish coat or sealant.
Applying A Second Coat (Optional)
After allowing the first coat of stain to dry completely, you may opt to apply a second coat for added depth and richness. The benefits of applying a second coat are plenty. First, it helps to even out any areas that may have absorbed more stain than others during the first application. Second coats also allow you to darken the wood, making it richer in color and giving it a more uniform look. Additionally, adding a second coat provides an added layer of protection against wear and tear.
When applying a second coat, it’s important to avoid common mistakes that can ruin all your hard work. One mistake is not waiting long enough for the first coat to dry before applying the second. Rushing this step can cause the stain to become tacky or unevenly applied, resulting in an unsatisfactory finish. Another mistake is over-applying the stain on the second coat in an attempt to darken the wood too quickly; this can lead to blotchiness and streaks.
Overall, applying a second coat of stain is highly recommended for anyone looking to achieve rich and long-lasting results on their wooden cabinets. Keep in mind that patience and attention to detail are key when working with wood stains. After completing this step successfully, we will move on to sealing the cabinets for added protection and longevity.
Sealing The Cabinets
After applying a second coat, it is important to let it dry completely before proceeding with the next step of sealing the cabinets. The sealer will not only protect the stain but also enhance its appearance by giving it a glossy or matte finish. There are two main types of sealers: polyurethane and lacquer.
Polyurethane sealers are known for their durability and resistance to scratches, heat, and water. They come in both oil-based and water-based formulations. Oil-based polyurethane provides a warm amber tone to the wood while water-based ones are clear and do not yellow over time. Lacquer sealers, on the other hand, are quick-drying and easy to apply with a spray gun. They offer a hard, smooth surface that is resistant to chemicals and abrasion.
When applying sealer to wood cabinets, it is important to follow the manufacturer’s instructions carefully. Some sealers require multiple coats while others need sanding between each coat. It is also recommended to use a high-quality brush or sprayer for even coverage. Take care not to leave any drips or bubbles as they can ruin the final result. Once the sealer has dried completely, inspect the cabinets for any imperfections and touch up as needed.
Now that your cabinets are fully sealed, you can move on to reinstalling cabinet hardware such as knobs, handles, hinges, and pulls. Make sure they are clean and free from any residue before attaching them back onto the doors and drawers. This is also a good time to replace any damaged or outdated hardware with new ones that complement your newly-stained cabinets. With proper maintenance and care, your stained wood cabinets will continue to look beautiful for many years to come.
Reinstalling Cabinet Hardware
To complete the process of staining your wood cabinets, it is now time to reinstall the cabinet hardware. This step is crucial in ensuring that your cabinets look and function as good as new. Choosing the right hardware can be a daunting task, but with a few tips, you can make the process easier.
When choosing hardware, consider the style and color of your cabinets. If you have dark-stained cabinets, consider using brushed nickel or chrome hardware for a modern look. For lighter-stained cabinets, opt for bronze or brass hardware for a classic touch. Make sure to also choose hardware that fits the existing holes on your cabinets to avoid any unnecessary drilling.
Installing hardware may seem like a simple task, but it requires attention to detail. Before installing, ensure that all screws and bolts are tightened properly for durability. Use a level tool to ensure that each piece is installed straight for aesthetic purposes. Finally, test each piece before finishing up to ensure that they open and close smoothly.
Now that you have successfully reinstalled the cabinet hardware, it’s time to clean up any remaining debris from the staining process. This includes wiping down all surfaces with a damp cloth and vacuuming any remaining dust particles from around the area. With these final steps complete, your newly stained wood cabinets are ready to be admired and enjoyed for years to come.
Cleaning Up
After successfully reinstalling your cabinet hardware, the next step in staining wood cabinets is to prepare the surface for staining. This involves applying a pre-stain treatment to ensure that the stain will be absorbed evenly and thoroughly. Without this important step, the stain may penetrate unevenly or leave blotches on the surface.
To apply a pre-stain treatment, start by cleaning the cabinets thoroughly with a mild detergent and water. Then, use a fine-grit sandpaper to smooth out any rough spots or imperfections in the wood. Once you have finished sanding, wipe down the surface with a clean cloth to remove any dust or debris.
When it comes to staining wood cabinets, there are several common mistakes that can be easily avoided. One of these is failing to properly prepare the surface for staining, as mentioned above. Another mistake is not allowing enough time for each coat of stain to dry before applying another. It’s important to read and follow the instructions on your particular brand of stain carefully to avoid these types of errors. With proper preparation and attention to detail, you’ll be able to achieve beautiful results that will last for years to come.
Transition: Now that you’ve taken all of the necessary steps for preparing your cabinets and avoiding common mistakes during the staining process, it’s time to focus on cleaning up and enjoying your newly stained cabinets.
Enjoying Your New Cabinets
As you bask in the glory of your newly stained wood cabinets, it’s important to know how to maintain their shine and avoid common mistakes that could damage them. Keeping your cabinets looking as good as new requires some effort, but with the right approach, you can keep them looking pristine for years to come.
To maintain the shine of your new cabinets, start by wiping them down regularly with a dry cloth. This will help remove any dust or dirt that may have accumulated on the surface. Avoid using harsh chemicals or abrasive cleaning tools, as these can scratch or damage the finish. Instead, use a mild cleaner specifically designed for wood surfaces.
One of the most common mistakes people make when it comes to maintaining their stained wood cabinets is exposing them to excessive moisture. Be sure to keep your cabinets away from sources of moisture such as sinks or dishwashers, and wipe up spills immediately if they occur. Additionally, avoid placing hot items directly on the surface of your cabinets, as this can cause discoloration and damage over time. By following these simple tips and tricks, you can enjoy your beautiful new cabinets for many years to come.
- Nested bullet point list:
- Maintaining Shine
- Wipe down regularly with a dry cloth
- Use a mild cleaner specifically designed for wood surfaces
- Avoiding Common Mistakes
- Keep away from sources of moisture such as sinks or dishwashers
- Avoid placing hot items directly on the surface
Conclusion
Staining wood cabinets can be a satisfying DIY project for homeowners looking to update their kitchen or bathroom. However, it is important to assess the condition of your cabinets before beginning the staining process and gather all necessary materials and tools. Choosing the right stain for your cabinets is also crucial, as well as testing it on a sample piece first to ensure you achieve your desired color. Removing cabinet hardware and properly sealing the cabinets are also essential steps in achieving a professional-looking finish.
As a seasoned wood staining expert, I recommend taking the time to follow each step carefully and avoid rushing through any part of the process. Remember, a little patience goes a long way in achieving beautiful, long-lasting results. And while cleaning up may not be the most exciting part of staining your cabinets, it’s important to do so thoroughly and enjoy your new cabinetry for years to come.
As the old adage goes, “measure twice, cut once.” Similarly, taking time to properly assess and prepare your cabinets before staining will save you time and frustration down the line. So gather your materials and tools, choose your stain wisely, test on a sample piece first, remove cabinet hardware, seal properly, reinstall hardware, clean up thoroughly – then sit back and enjoy your beautifully stained wood cabinets.
Image Credits
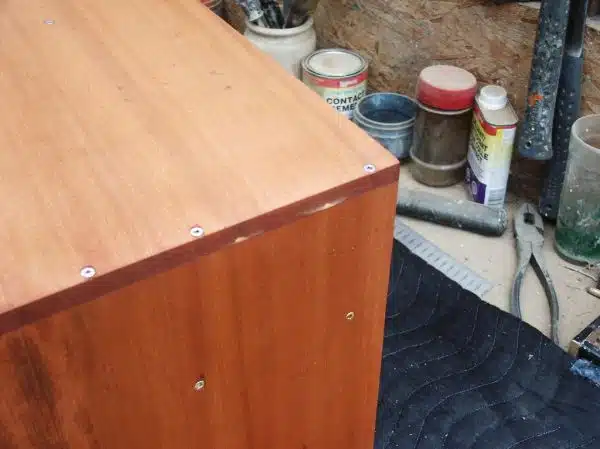
- “Cabinet – Stain Screw-up” by afrowolf (featured)













![How To Repair Rotted Wood 22 Texture : Altario Buick Estate Wagon : Rotting Faux Wood Paneling [1 of 2]](https://green-life.blog/wp-content/uploads/2023/05/z1CersK-gCjq-150x150.jpg.webp)


