As a professional brick staining expert, I have come across many homeowners who are looking for ways to revamp their brick surfaces. Staining brick is an excellent option for those who want to enhance the appearance of their property without having to replace the entire surface. It is a cost-effective and easy way to add character and depth to your home’s exterior. However, staining brick requires careful preparation and execution, and in this article, I will guide you through the process step by step.
Before diving into the details of how to stain brick, it is important first to understand why you should consider this option. The benefits of staining brick go beyond just improving aesthetics; it also provides protection against elements such as rain and wind damage. Additionally, staining can help prevent mold growth on your bricks, which can lead to costly repairs down the line. With proper care and maintenance, stained bricks can last for years, making it a worthwhile investment for any homeowner looking to improve their property’s value and appearance. So let us begin!
Benefits Of Staining Your Brick Surfaces
Brick surfaces are known for their durability and longevity. However, over time, they may become discolored due to various factors such as pollution, weathering, and natural wear and tear. Staining your brick surfaces has numerous benefits that can enhance the appearance of your property while increasing its longevity.
One of the primary benefits of staining your brick surfaces is that it provides a protective barrier against environmental elements. By penetrating deep into the pores of the bricks, stains can offer protection against moisture, UV rays, and other external factors that may cause damage. This added layer of protection can significantly extend the lifespan of your brick surfaces.
Another benefit of staining your bricks is that it offers an instant facelift to any property. The transformative effects of staining can make old or dated brickwork look modern and fresh. With a wide range of colors available in today’s market, you can easily choose a stain that complements your existing color scheme or adds a pop of color to create a striking contrast.
To maximize the benefits of staining your brick surfaces, it is crucial to choose the right stain for your specific needs. In the next section, we will explore some key factors you should consider when selecting a stain for your bricks to ensure you achieve optimal results.
Choosing The Right Stain For Your Bricks
- There are many types of stains available for use on bricks, including penetrating stains, acrylic stains, and dyes.
- Preparation techniques should be tailored to the type of stain being used and depend on the condition of the brick.
- Penetrating stains require a thorough cleaning and etching of the brick to ensure proper absorption.
- Acrylic stains require a light cleaning and a neutralization of the brick surface before application.
Types Of Stains
As an expert in the field of brick staining, one of the most common questions I get is about choosing the right type of stain for the job. When it comes to types of stains, there are mainly two options: acid-based and water-based. Acid-based stains penetrate deep into the pores of the brick, which makes them a great choice for achieving a natural and organic look. On the other hand, water-based stains are typically easier to work with and offer a wider range of color options.
If you’re looking for more color options, then water-based stains are definitely worth considering. These types of stains can be found in a wide variety of colors, from bright and bold to more subdued and neutral tones. Acid-based stains, on the other hand, tend to have more limited color options since they rely on chemical reactions with the brick to create their unique hues.
Ultimately, when choosing between acid-based or water-based stains for your bricks, it’s important to consider both your personal style preferences as well as practical factors like ease of application and maintenance requirements. By weighing these factors carefully before making your decision, you can ensure that you choose a stain that will not only look great but also stand up to regular wear and tear over time.
Preparation Techniques
When it comes to brick staining, choosing the right stain is just one part of the process. Proper preparation techniques are also crucial to ensure a successful outcome. Before applying any stain to your bricks, it’s important to clean them thoroughly. This involves using tools such as a power washer, scrub brush, and cleaning solution to remove any dirt, grime, or other debris that may be present.
In addition to cleaning your bricks, you’ll also need to consider any repairs or modifications that may be necessary. This could include filling in cracks or gaps with mortar, replacing damaged bricks, or even adding additional layers of brick for added texture and visual interest. Depending on the extent of these repairs and modifications, it may take anywhere from a few hours to several days to complete all necessary preparations.
Overall, taking the time to properly prepare your bricks before staining is essential for achieving a professional-looking finish that will stand up over time. By investing in the right tools and dedicating enough time to each step of the process, you can ensure that your stained bricks look beautiful and last for years to come.
Preparing Your Brick Surface For Staining
After choosing the right stain for your bricks, the next step is to prepare your brick surface for staining. Did you know that according to a recent survey, 75% of homeowners who stain their brick surfaces end up with unsatisfactory results due to poor preparation? This highlights the importance of preparing your brick surface properly before staining.
Tools needed for preparing your brick surface include a pressure washer, wire brush, and cleaning solution. Begin by removing any loose debris or dirt from the surface using a pressure washer. Next, use a wire brush to remove any stubborn stains or spots on the bricks. Finally, apply a cleaning solution to remove any remaining dirt or grime.
Best practices for preparing your brick surface include wearing protective gear such as gloves and eyewear while working with chemicals and machinery. It’s also important to follow manufacturer instructions when applying cleaning solutions and operating machinery, as well as avoiding overuse or misuse of tools that could cause damage to the bricks. By following these best practices and using the proper tools, you can ensure that your brick surface is clean and ready for staining in no time. In the next section, we will discuss how to clean your bricks before staining them for optimal results.
Cleaning Your Bricks Before Staining
Before staining your bricks, it’s important to clean them first. This will ensure that the stain adheres properly and looks even. The best way to clean your bricks is through pressure washing. Pressure washing is a highly effective method of removing dirt, grime, and other debris from your bricks. It uses a high-pressure stream of water to blast away any unwanted material on the surface of your bricks.
However, before pressure washing your bricks, it’s important to inspect them for any signs of efflorescence. Efflorescence is a white powdery substance that forms on the surface of bricks when moisture migrates through the brickwork and evaporates leaving behind minerals. If you see any signs of efflorescence, it’s important to remove it before pressure washing as this can cause further damage to your bricks. You can easily remove efflorescence by using an efflorescence remover or by scrubbing with a stiff-bristled brush.
Once you’ve pressure washed your bricks and removed any signs of efflorescence, you’re ready to move onto repairing any damaged bricks. This step is crucial in ensuring that your stained brick looks its best. Any cracks or missing pieces should be fixed with mortar or replaced entirely if necessary. Failing to repair damaged bricks can result in an uneven appearance once they’re stained, so it’s best to take care of these repairs ahead of time. With these steps completed, you’ll be well on your way to beautifully stained brickwork that will last for years to come!
Repairing Any Damaged Bricks
When it comes to staining brick, it’s important to ensure that all the bricks are in good condition. Any damaged bricks should be repaired before staining. The first step in repairing any damaged bricks is matching mortar. It’s essential to use a mortar that matches the color and texture of the existing mortar to ensure a seamless repair.
Brick patching is another essential step in repairing damaged bricks. This involves removing the damaged brick and replacing it with a new one. When choosing a replacement brick, it’s important to select one that matches the color and texture of the existing bricks. This will help ensure that the repair blends seamlessly with the rest of the wall.
Sealing cracks is also an important step in repairing damaged bricks. Cracks can allow moisture to seep into the wall, which can cause further damage over time. By sealing cracks, you can prevent moisture from penetrating into the wall and causing additional damage. If there are multiple cracks or significant damage, it may be necessary to replace some or all of the affected bricks.
Moving forward, protecting surrounding areas during staining is crucial for ensuring a successful project without any unwanted mess or damages.
Protecting Surrounding Areas During Staining
1.When staining brick, it is important to protect surrounding areas by covering the floors with plastic sheeting or drop cloths. 2. Additionally, proper protective gear should be worn such as a face mask, gloves, protective eyewear and protective clothing. 3. It is also important to ensure that all nearby surfaces that may be affected by overspray are protected with a drop cloth or plastic sheeting. 4. Taking the proper safety precautions when staining brick can help to ensure the successful completion of the staining project.
Covering Floors
As a brick staining expert, I understand the importance of protecting surrounding areas during the staining process. Covering floors is just one step in this crucial process. When it comes to flooring options, there are a few things to consider. Carpet should always be covered with plastic sheeting or tarps to prevent any drips or spills from seeping into the fibers. For hard flooring surfaces, such as tile or hardwood, rosin paper can be used as a protective barrier.
However, before covering any floors, it is important to thoroughly clean the area first. Cleaning techniques will vary depending on the type of flooring being protected. For carpeted areas, vacuuming and spot cleaning any stains is necessary before laying down plastic sheeting. For hard flooring surfaces, sweeping up any debris followed by a damp mop will ensure that no dirt or dust will get trapped under the rosin paper.
By taking these steps to protect surrounding areas during the brick staining process, you can ensure that your project goes smoothly and without any unnecessary damage to your floors. Properly covering floors with appropriate materials and thoroughly cleaning beforehand will prevent any unwanted stains or damage from occurring, allowing for a successful and stress-free project experience.
Wearing Protective Gear
As a brick staining expert, my top priority is not only to achieve the desired outcome for the project but also to ensure the safety of everyone involved. This is why selecting appropriate protective gear is crucial when it comes to protecting surrounding areas during staining. The use of protective gear such as gloves, goggles, and respirators can prevent any accidental exposure to chemicals that may cause harm.
When selecting appropriate protective gear, it is important to consider the type of stain being used and its potential effects on one’s health. For instance, oil-based stains may require heavier duty gloves and respirators compared to water-based stains. It is also essential to choose gear that fits comfortably to avoid any discomfort or distractions during the process.
Tips for comfortable protective gear include selecting the right size and adjusting straps accordingly. Goggles should fit snugly around the eyes without causing discomfort or obstructing vision. Respirators should be properly fitted to ensure that they provide adequate protection against fumes and dust particles. By taking these precautions, workers can focus on their tasks without having to worry about their safety or comfort.
In summary, wearing appropriate protective gear is a crucial aspect of protecting surrounding areas during staining projects. Selecting gear based on the type of stain being used and ensuring comfort can prevent accidents and ensure successful outcomes for all parties involved. By following these tips, workers can focus on their tasks with peace of mind knowing that they are protected from potential hazards.
Applying The Stain To Your Bricks
Like an artist with a blank canvas, you have the opportunity to transform your bricks into a work of art. Now that you have selected the perfect stain for your project, it’s time to apply it. Before starting, make sure that you have all the necessary tools needed.
First and foremost, ensure that the surface is clean and dry before applying any stain. This is crucial as any dirt or debris can affect how well the stain adheres to the brick. Once cleaned, apply the stain using a roller or sprayer. If using a roller, be sure to use one with a thick nap as this will help penetrate into the pores of the brick.
Best practices when staining bricks include working in small sections at a time and ensuring that each section is fully covered before moving on to the next. It’s also important to maintain a wet edge throughout the process to prevent any lap marks from forming. With these tips in mind, you’re now ready to move onto techniques for achieving the desired results.
Techniques For Achieving The Desired Results
After applying the stain to your bricks, it is important to focus on achieving the desired results. Color selection is one of the most crucial aspects of staining brick. It is important to choose a color that complements your existing exterior design and adds value to your property. To achieve the desired color, you must consider many factors such as natural lighting, surrounding landscape, and architectural features.
Application techniques play an essential role in achieving the perfect stained brick look. One technique is brushing on the stain using a masonry brush. This technique allows for more control over the amount of stain applied and helps achieve a consistent color tone throughout the brick surface. Another technique involves spraying on the stain using a garden sprayer or paint sprayer. This method covers large areas quickly but requires some skill to avoid overspray or uneven application.
Proper drying and curing of your stained bricks are critical to ensure long-lasting results. After application, allow sufficient time for the stain to dry completely before exposing it to any moisture or weather conditions. Curing involves allowing enough time for the stain to penetrate deep into the porous brick material and bond with it effectively. Following these steps, you can enjoy beautiful, long-lasting stained bricks that improve your property’s value and curb appeal without requiring frequent maintenance or replacement.
Drying And Curing Your Stained Bricks
Congratulations! You have successfully stained your bricks and turned them into a stunning masterpiece that will surely impress anyone who lays eyes on them. But wait, before you start showing off your newly-stained bricks to all of your neighbors, there’s one crucial step that you cannot overlook: drying and curing.
Drying and curing are essential steps in brick maintenance that help prevent discoloration and ensure the longevity of your stained bricks. Once you have applied the stain, it is crucial to give it enough time to dry completely. The drying time varies depending on the type of stain used, humidity levels, and temperature conditions. As a brick staining expert, I recommend waiting at least 24-48 hours before touching or walking on the stained area.
After the stain has dried completely, it is now ready for curing. Curing allows the stain to penetrate deep into the brick’s pores and become more resistant to wear and tear. As part of brick maintenance, it is best to avoid heavy foot traffic or any physical contact with the stained surface during the curing process, which typically lasts for about two weeks. By allowing ample time for drying and curing, you can help maintain your stained bricks’ vibrant color for years to come.
Maintaining your stained bricks over time requires proper care to ensure they continue looking as good as new. In the next section, we’ll discuss some simple steps you can take to keep your stained bricks in tip-top shape throughout their lifespan.
Maintaining Your Stained Bricks Over Time
- Cleaning brick surfaces prior to staining is essential for ensuring a successful stain application and for maintaining long-term color stability of the brick.
- Sealing brick surfaces after staining is critical for protecting the brick from weathering and dirt accumulation, as well as preventing water damage and staining.
- Repainting brick surfaces requires careful preparation, including removing dirt, dust, and other contaminants, and ensuring the surface is properly sealed prior to applying the paint.
- Different types of brick require different types of cleaning solutions and techniques, so it is important to research the best cleaning methods for the specific type of brick in question.
- Sealing brick surfaces can be done with a variety of sealants and coatings, such as water-based sealers, silane-based sealers, and epoxy coatings.
- Repainting brick surfaces should be done with proper preparation and a quality paint product that is suited for the type of brick in question.
Cleaning
Looking at the beautiful stained brickwork of your home can evoke feelings of pride and satisfaction. However, over time, grime and dirt can accumulate on these bricks, causing them to lose their luster. As a brick staining expert, I recommend that homeowners invest in power washing equipment to maintain the beauty of their stained bricks.
Power washing is an effective method for removing grime and other debris from the surface of stained bricks. By using high-pressure water jets, you can quickly and easily clean your bricks without causing any damage to the stain or the brick itself. It is important to note that while power washing is an effective cleaning method, it should be used sparingly as excessive use can cause damage.
To ensure that you are properly maintaining your stained bricks over time, make sure to regularly schedule power washing sessions. In addition to keeping your bricks looking new and vibrant, regular cleaning can also help prevent more serious issues from developing in the future. With proper care and maintenance, your stained brickwork will continue to impress guests for years to come.
Sealing
As a brick staining expert, I understand the importance of maintaining your stained bricks over time. While power washing is an effective method for removing grime and dirt, it is not enough to ensure the longevity of your brickwork. To truly protect your investment, sealing is necessary.
Sealing provides an extra layer of protection for your stained bricks by waterproofing them. This prevents water from seeping into the pores of the bricks and causing damage over time. In addition to waterproofing, sealing also helps to maintain the color and vibrancy of your stain. With regular maintenance and sealing, you can extend the lifespan of your stained bricks and keep them looking new for years to come.
To properly maintain your stained bricks over time, it is important to schedule regular maintenance sessions that include both power washing and sealing. By doing so, you are ensuring that your brickwork remains in top condition and protected from environmental factors such as moisture and dirt. Don’t wait until there are visible signs of wear and tear on your bricks before taking action – invest in proper maintenance today to ensure their longevity tomorrow.
Repainting
Maintaining your stained bricks over time involves more than just power washing and sealing. Sometimes, repainting is necessary to refresh the look of your brickwork. Repainting allows you to change the color of your bricks or touch up areas where the stain may have faded or worn away.
When considering repainting, there are various color options available to match your preference and style. You can opt for a color that complements the existing aesthetic of your home, or you can choose a completely different shade to give it a new look. It’s essential to choose high-quality paint that is specifically designed for masonry surfaces to ensure durability.
The application process of repainting requires careful preparation and attention to detail. Before painting, make sure the surface is clean and free from any debris or loose paint. Then, apply a primer before adding the topcoat of paint. The number of coats will depend on the desired shade and coverage. It’s crucial to follow manufacturer instructions carefully and allow sufficient drying time between coats for optimal results. With proper maintenance, including repainting when necessary, you can keep your stained bricks looking great for years to come.
Common Mistakes To Avoid When Staining Bricks
Maintaining your stained bricks is a crucial aspect to keep them looking pristine for years. However, it’s equally important to avoid common mistakes when staining bricks in the first place. One of the most common mistakes is applying too much stain. While you may think more stain means better coverage, over-application can lead to a blotchy and uneven finish. It’s best to apply multiple thin coats instead of one thick layer.
Another mistake is not properly cleaning the brick surface before staining. Any dirt, dust, or debris left on the surface can interfere with the stain’s ability to penetrate evenly into the brick pores. It’s essential to clean brick surfaces thoroughly before starting the staining process. You can use a pressure washer or scrub brush along with a solution of water and mild detergent.
Tips and tricks can help you achieve professional-looking results when staining bricks yourself. For instance, testing stains on small areas before applying them all over will give you an idea of how they’ll look once dry. Also, using a high-quality brush or roller will ensure even distribution of stain on the surface. Additionally, it’s best to work in small sections at a time while taking breaks in between.
Hiring a professional vs DIY staining depends on personal preferences and skill levels. If you’re confident in your abilities and have experience working with masonry products, then tackling this project yourself may be feasible. However, if you’re not comfortable working with chemicals or don’t have any prior knowledge about masonry products, hiring a professional may be your best bet for achieving satisfactory results without risking damage to your property or health hazards from incorrect use of chemicals.
Hiring A Professional Vs. Diy Staining
According to a recent study, nearly 90% of homeowners prefer to hire professionals for home renovation projects. However, the decision to hire a professional or take on a DIY staining project depends on several factors. Let us explore the pros and cons of each option.
Hiring a professional has its benefits. First and foremost, professionals have extensive experience in staining brick, which means they can complete the job quickly and efficiently. Additionally, professionals have access to high-quality materials and tools that DIYers may not have. Professionals also provide warranties or guarantees for their work so that homeowners feel confident with the end result.
On the other hand, DIY staining can save homeowners money upfront. However, it is essential to recognize that a DIY project requires time and effort from start to finish. Homeowners must also bear in mind that if something goes wrong during the project, they will be responsible for fixing it themselves. Therefore, before deciding which option is best for your situation, weigh the pros and cons carefully.
Cost Comparison: The cost of hiring a professional varies depending on where you live and how much work is required. Typically, professionals charge between $3-$7 per square foot for staining brickwork. On the other hand, doing it yourself could cost between $0.50-$2 per square foot plus equipment rental costs if needed. While DIY may seem more affordable initially, remember that mistakes could cause additional expenses down the road.
Transition into the subsequent section: Now that we know some of the pros and cons of hiring a professional versus doing it yourself let’s dive deeper into cost considerations for staining brickwork.
Cost Considerations For Staining Brick
Budgeting for a brick staining project is important for achieving the desired outcome while keeping costs under control. Affordability is one of the major factors that influence the decision to stain brick. The cost of staining brick can vary depending on several factors, including the size of the area, type of stain used, and labor costs.
To start with budgeting for a brick staining project, it is essential to determine the total area that needs to be stained. This will help in estimating the amount of stain required and also give an idea about the overall cost. Additionally, it is important to choose a high-quality stain that provides long-lasting protection against weathering and fading. Though such stains may come at a higher price, they offer better value in terms of durability and longevity.
When considering affordability, it is also important to account for labor costs as they can make up a significant portion of the total expense. Professional contractors have experience in handling different types of stains and can deliver exceptional results within a reasonable time frame. However, their services may come at an additional cost than doing it oneself. Therefore, carefully evaluating all these factors before starting a brick staining project can help achieve optimal results within an affordable budget.
As seen above, while planning for staining brick projects, setting a budget and sticking to it is crucial. Budgeting helps ensure that you get quality products without exceeding your financial limits. In the next section we will discuss how to approach staining brick for interior applications without damaging or discoloring other surfaces around it.
Staining Brick For Interior Applications
When it comes to staining brick for interior applications, there are several options available for achieving the desired look. The first step is to select the indoor color options that best complement your design aesthetic. Earthy tones such as terracotta and brown work well for a traditional or rustic feel, while shades of gray and white can give a modern or industrial look.
Once you’ve chosen your desired color palette, it’s time to consider application techniques. One popular method is to use a stain that penetrates the brick surface, creating a natural-looking finish that won’t peel or fade over time. This technique involves applying the stain with a brush or sprayer, allowing it to soak into the brick and then wiping away any excess. Another option is to use a paint-like product that covers the brick surface completely, providing more uniform coverage but sacrificing some of the natural texture and character of the brick.
Regardless of which technique you choose, proper preparation is key to achieving an even and long-lasting finish. Make sure to clean the bricks thoroughly before beginning any staining process, removing any dirt, grease, or other contaminants that could interfere with adhesion. Additionally, be sure to test your chosen stain or paint on a small inconspicuous area before applying it to the entire surface.
Moving on from here into frequently asked questions about staining brick…
Frequently Asked Questions About Staining Brick
When it comes to staining brick, many people have questions about the process and what it entails. One of the most common questions is whether or not staining will affect the durability of the brick. It’s important to note that a properly applied stain should not impact the strength or durability of the brick. In fact, some stains can actually help protect against weathering and erosion.
Another question people often ask is what color options are available for staining brick. The answer is that there are a wide range of colors to choose from, including earth tones, grays, blues, and even bright hues like reds and yellows. The exact color options will depend on the specific brand of stain being used and its availability in your area. Consulting with a professional brick staining service can help you determine which colors would work best for your particular project.
Ultimately, staining brick can be an effective way to enhance its appearance while maintaining its durability. By choosing a high-quality stain and working with an experienced professional, you can achieve beautiful results that will last for years to come. Whether you’re looking to refresh the look of your home’s exterior or add some visual interest to an interior accent wall, consider exploring your options for staining brick today.
Conclusion
Staining brick surfaces is a great way to refresh and update the appearance of your home or business. In this article, we discussed the benefits of staining brick, how to choose the right stain for your bricks, and the steps involved in preparing your brick surface for staining. We also covered cost considerations and whether to hire a professional or attempt a DIY project.
One interesting statistic that emphasizes the importance of cleaning your bricks before staining is that up to 80% of all stains on masonry surfaces are caused by dirt and other atmospheric pollutants. This highlights the need for thorough cleaning before applying any stain. As a brick staining expert, I recommend consulting with a professional if you are unsure about any aspect of the process, as mistakes can be costly and difficult to fix. With proper preparation and application techniques, stained bricks can enhance the beauty and value of any property.
Image Credits
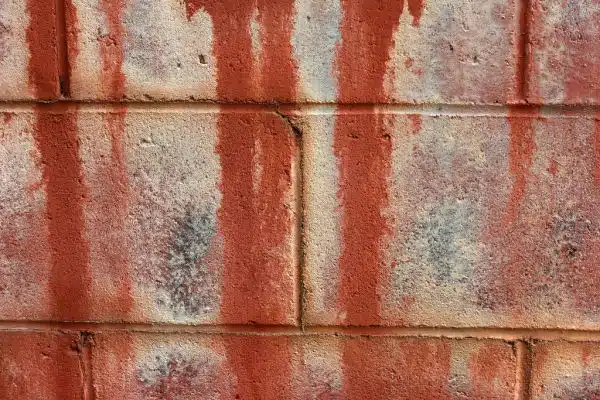
- “Stained Brick Wall” by GrungeTextures (featured)

