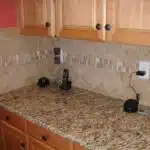
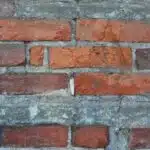
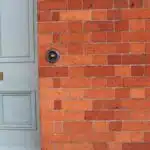
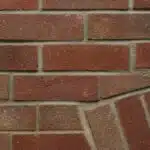
Installing a brick backsplash in your kitchen can add a rustic and charming touch to your home. This DIY project not only enhances the appearance of your kitchen, but it also serves as a protective barrier against stains and splatters from cooking activities. Brick backsplashes have become increasingly popular among homeowners due to their durability and low maintenance requirements.
Before you start this project, it is important to gather all the necessary tools and materials needed for the installation process. It is essential to have basic knowledge on how to handle power tools and follow safety precautions when working with them. In this article, we will guide you through the step-by-step process of installing a brick backsplash in your kitchen, providing you with tips and tricks that will make the installation process easier and more efficient.
Choosing The Right Type Of Brick
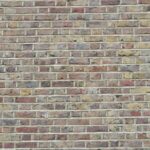
When it comes to choosing the right type of brick for your kitchen backsplash, there are a few things to consider. First and foremost, you’ll want to think about the color options available to you. Brick comes in a range of colors, from classic red to muted earth tones, so take some time to consider what will complement your kitchen’s decor best.
Another important consideration is your budget. While some types of brick can be quite affordable, others may be more expensive due to factors like rarity or manufacturing processes. It’s important to have a clear idea of how much you’re willing to spend before you start shopping around for your materials.
Ultimately, the right type of brick for your kitchen backsplash will depend on your personal taste and preferences as well as practical considerations like budget and durability. By taking the time to carefully consider these factors upfront, you can ensure that you end up with a high-quality backsplash that looks great and stands the test of time. In the next section, we’ll discuss how to measure and calculate the amount of brick needed for your project.
Measuring And Calculating The Amount Of Brick Needed
Accurately measuring wall space is crucial for ensuring the correct amount of brick needed for a kitchen backsplash installation. Calculating brick coverage, or the amount of space each brick will cover, is the next step in determining the necessary number of bricks. Estimating brick quantities requires taking into account both the wall’s measurements and the coverage of each brick to ensure that the correct amount of brick is purchased for the project. Brick coverage can generally be calculated by taking the length of the brick and dividing it by the length of the wall. Brick quantity can be estimated by multiplying the wall area by the coverage of each brick. It is also important to take into account the necessary spacing between bricks when calculating quantities. Finally, a professional should always be consulted to ensure that the correct amount of brick is purchased and used.
Measuring Wall Space
Achieving a stunning kitchen backsplash involves meticulous attention to detail. Measuring accuracy is essential in ensuring that the amount of brick needed matches the wall space. Before you begin, take time to carefully measure the area where you plan to install the brick backsplash.
Start by measuring the height and width of your wall surface. Ensure that your measurements are accurate to avoid any wastage or shortage of materials. After taking these initial measurements, factor in any obstacles such as electrical outlets, light switches, and windowsills.
Once you have taken all necessary measurements, it’s now time to prepare your wall surface for installation. Wall surface preparation is vital in ensuring that your brick backsplash adheres correctly and remains intact over an extended period. Clean the surface thoroughly to remove any debris or grease that can hinder proper adhesion. Additionally, inspect the surface for any cracks or unevenness and address them before proceeding with installation. With proper measurement accuracy and wall surface preparation, you’re well on your way to installing a beautiful brick backsplash in your kitchen!
Calculating Brick Coverage
Now that you have accurately measured your kitchen wall surface and prepared it for installation, the next step is to calculate the amount of brick needed. Calculating brick coverage involves estimating quantities and determining the appropriate brick size that will fit your wall space seamlessly.
Before purchasing any bricks, it’s essential to know the exact dimensions of each brick you plan to use. This information will help you determine how many bricks you’ll need to cover your wall surface accurately. Additionally, it’s vital to factor in a percentage of extra bricks in case of breakages or errors during installation. A standard rule of thumb is to add an extra 10% to 15% of the total number of bricks required.
To calculate the amount of brick needed, multiply the height and width measurements of your wall surface. This calculation gives you the square footage required for installing your brick backsplash. Next, divide this square footage by the area covered by one brick (brick size plus grout joint). The answer gives you an estimate of how many bricks are needed for your project.
By carefully calculating brick coverage, you can ensure that you purchase just enough materials without overspending or underestimating. With this knowledge, you’re ready to move on to the next step in creating a stunning kitchen backsplash – laying out and installing the bricks!
Estimating Brick Quantities
After accurately measuring your kitchen wall surface and preparing it for installation, the next step is to estimate the amount of brick needed. The process of calculating brick coverage will help you determine the appropriate size and quantity of bricks required for your project.
To begin, it’s essential to know the exact dimensions of each brick that you plan to use. This information will enable you to calculate the number of bricks needed accurately. Additionally, it’s crucial to factor in a percentage of extra bricks in case of breakages or errors during installation. A standard rule is to add an extra 10% to 15% of the total number of bricks required.
Once you have determined the brick size and added an allowance for wastage, you can proceed with calculating the amount of brick needed by multiplying the height and width measurements of your wall surface. This calculation gives you the square footage required for installing your brick backsplash. Next, divide this square footage by the area covered by one brick (brick size plus grout joint). The answer gives you a rough estimate of how many bricks are needed for your project. Remember that different brick colors may have different sizes, so ensure that all measurements are accurate before making any purchases.
Gathering The Necessary Tools And Materials
After calculating the amount of brick needed, the next step is to choose the color that suits your kitchen. When choosing brick colors, consider the theme of your kitchen and the overall design. You want to ensure that the color you choose complements other elements in your kitchen. For instance, if you have a modern kitchen with stainless steel appliances, you may want to go for a lighter color brick backsplash to create contrast.
Once you have chosen the brick color, the next step is finding affordable materials. You can source bricks from local home improvement stores or online retailers. It’s important to get high-quality bricks that are durable and easy to clean. Additionally, you’ll need adhesive mortar and grout for installation. Make sure that you purchase enough materials to cover your entire backsplash area.
Now that you have all your materials ready, it’s time to prepare the surface for installation. The surface should be clean and free from grease or debris. If necessary, use a degreaser or cleaner before wiping down with a damp cloth. Allow it to dry completely before proceeding with installation. A smooth and even surface will ensure that the bricks adhere properly and prevent any gaps between them during installation.
Preparing The Surface For Installation
Cleaning and prepping the surface is crucial before installing a brick backsplash in your kitchen. This step ensures that the surface is free from dirt, grease, and other substances that may affect the adhesion of the mortar. You can use a mixture of warm water and dish soap to clean the surface thoroughly. Make sure to rinse it with clean water and let it dry completely before moving on to the next step.
Once you have cleaned the surface, it’s time to prime it. Applying a primer helps create a strong bond between the surface and the brick tiles. There are various primers available in hardware stores, but for best results, choose one that is recommended for your specific type of wall. For example, if you have drywall or plaster walls, a latex-based primer is ideal because it adheres well to these surfaces.
After priming, sealants can be applied to further strengthen the bond between the surface and brick tiles. Sealants also prevent moisture from seeping through small gaps between tiles over time. However, make sure to choose a sealant that is compatible with both your chosen primer and mortar type.
Now that you have understood the importance of cleaning and prepping surfaces for brick backsplash installation, let’s move on to applying mortar to the wall.
Applying Mortar To The Wall
Before applying mortar to the wall, it is important to ensure that the surface is clean and free of debris. Any loose paint or wallpaper should be removed, and the wall should be thoroughly cleaned with a mild detergent solution. This will help to ensure a strong bond between the mortar and the wall.
When mixing the mortar, it is important to follow the manufacturer’s instructions carefully. Adding too much water can cause the mortar to become too thin, while adding too little can make it difficult to spread. Tips for consistency include adding small amounts of water at a time and using a mixing paddle attached to a power drill for thorough mixing.
Common mistakes when applying mortar to the wall include spreading too much at once, which can cause it to dry out before you have a chance to place bricks on it. It’s also important not to leave any gaps between the bricks as this can weaken their structural integrity. How to properly clean and maintain the mortar tools used during installation includes rinsing them with warm water immediately after use and wiping them down with a clean cloth before storing them in a dry place.
As you prepare for placing the first row of bricks, take your time and work in small sections. Starting from one end of the wall, apply an even layer of mortar using a trowel. Then use another trowel or flat object like a straight piece of wood or metal rule (called screeding) held against either side of this layer as you scrape excess off so that only an even thickness remains on your brickwork surface- this will create lines/ridges perfect for holding each brick in place without slipping down over time!
Placing The First Row Of Bricks
Accurately measuring the space for the brick backsplash is the first step in the installation process. To ensure a proper fit, use a measuring tape to determine the width and height of the wall space you intend to cover with the brick. Once the measurements have been taken, the bricks can be placed in the desired pattern. During installation, it is important to make sure to leave a small amount of space between each brick. This will help ensure that the bricks are properly aligned with each other. Additionally, it will also create a more aesthetically pleasing look. Finally, in order to ensure that the bricks are placed correctly and securely, use a spirit level to ensure that each row is level and even.
Measuring The Space
Accuracy in measuring the space for your brick backsplash is crucial to ensure that the installation will go smoothly. Before you begin placing the first row of bricks, measure the length and width of your wall accurately. Use a tape measure to take measurements at different points along the wall, including any uneven areas. This will help you determine how many bricks you need and how they should be positioned.
Dealing with uneven walls can be challenging when installing a brick backsplash. To overcome this issue, use a level to determine whether there are any high or low spots on the wall. If there are high spots, use a grinder or sander to smooth them down. For low spots, apply extra mortar or adhesive to level out the surface before placing your first row of bricks.
Measuring accuracy and dealing with uneven walls are two critical factors when it comes to placing the first row of bricks for your kitchen backsplash. By taking accurate measurements and addressing any unevenness in the wall beforehand, you can ensure that your brick backsplash installation will go smoothly and look professional. Remember to double-check all measurements before beginning installation to avoid costly mistakes down the road.
Placing The Bricks
Now that you have accurately measured your wall and addressed any unevenness, it is time to start placing the bricks for your kitchen backsplash. Before you begin, decide on the brick pattern options that will best suit your design. You can choose from a variety of patterns such as running bond, herringbone, or basket weave. Each pattern will give your backsplash a unique look and feel.
When placing the first row of bricks, ensure that they are level and straight by using a level and string line. Start at one end of the wall and work your way to the other end. Apply mortar or adhesive to the back of each brick before pressing it firmly onto the wall. Use spacers between each brick to maintain an even gap between them. Once you have completed the first row, allow it to dry completely before moving on to the next row.
After all rows have been placed, it is time to grout the bricks. Grouting techniques vary based on personal preference and design choice. You can use traditional grout in a color that complements your backsplash or opt for a more modern look with white or black grout. Whichever option you choose, be sure to follow proper grouting techniques for a clean and professional finish. By following these simple steps for placing the bricks and choosing the right grouting technique, you can achieve a stunning brick backsplash in no time!
Spacing Bricks
Now that we have discussed the importance of accurate measurement and addressing wall unevenness, it’s time to talk about spacing bricks. Proper spacing is crucial for achieving a professional finish and ensuring the longevity of your kitchen backsplash. When laying bricks, use spacers to maintain an even gap between each brick. The size of the spacer will depend on the brick pattern you choose, but typically ranges from 1/8 inch to 3/8 inch.
When selecting a brick pattern for your backsplash, consider your design style and personal preference. There are many options available such as running bond, herringbone, or basket weave. Each pattern will provide a unique look and feel to your kitchen. Once you have decided on the pattern that best suits your design needs, begin placing the first row of bricks using a level and string line to ensure they are straight and level.
After placing all rows of bricks, it’s time to grout them. Grouting is essential for filling in gaps between bricks and providing structural support for your backsplash. Consider traditional grout in a color that complements your design or opt for a modern look with white or black grout. Whatever option you choose, be sure to follow proper grouting techniques for a clean and professional finish. By following these tips for spacing bricks and choosing the right grouting technique, you can achieve an exquisite brick backsplash that will enhance the beauty of your kitchen.
Cutting Bricks To Fit Around Outlets And Edges
Now that the first row of bricks is in place, it’s time to focus on cutting bricks to fit around outlets and edges. Outlet placement can be a challenge when installing a brick backsplash. It’s important to carefully measure and mark where the outlets are located before starting to lay additional rows of bricks. This will prevent any unnecessary cutting or adjustments later on.
When it comes to edging techniques, there are several options to choose from. One popular method is using corner pieces specifically designed for brick installation. These pieces provide a clean and finished look to the corners of the backsplash. Alternatively, you can use a technique called mitering, which involves cutting two bricks at an angle and joining them together at the corner. This method requires more precision but can result in a seamless appearance.
As you continue laying additional rows of bricks, keep in mind the importance of maintaining levelness and uniformity throughout the entire process. Take your time with each row, making sure everything is properly aligned before moving on to the next one. With careful attention to detail and proper techniques for outlet placement and edging, your brick backsplash will soon become a beautiful focal point in your kitchen.
Continuing To Lay Additional Rows Of Bricks
Despite the potential for a visually stunning outcome, laying brick backsplash can be an intimidating task for most DIY enthusiasts. One of the common challenges faced when laying additional rows of bricks is achieving a consistent brick layout. An uneven or unaligned layout will not only adversely affect the aesthetic value but also result in weak spots within the structure.
To ensure a uniform layout, one must start by measuring and marking out the area where the next row of bricks will be placed. A chalk line can be used to create a straight line across the surface along which the bricks can be laid. It is important to remember that each row should be offset from its adjacent rows to create a more visually appealing pattern.
Another crucial aspect when continuing to lay additional rows of bricks is getting the mortar consistency right. The ideal mortar consistency should neither be too dry nor too wet. A consistency similar to peanut butter is recommended as it ensures that each brick adheres properly and remains in place without slipping before it sets. After spreading out an even layer of mortar, gently press each brick into place, leaving no gaps between them.
Choosing grout color and maintenance tips are other aspects that should not be overlooked when installing brick backsplash. A color that complements your kitchen decor can enhance the overall impact of your project. Additionally, cleaning with mild soap and water regularly will help maintain its pristine appearance over time.
Now that we have mastered how to lay additional rows with precision and get our mortar consistency right, filling in gaps with mortar becomes essential for creating a smooth finish on our backsplash.
Filling In Gaps With Mortar
Continuing to lay additional rows of bricks can be a daunting task, but it is important to keep in mind the end goal. It’s essential to take your time and ensure that each brick is laid accurately. This will help avoid any issues that may arise later on during the installation process. Once you have completed laying all the bricks, it’s time to move onto filling in gaps with mortar.
When it comes to filling gaps, there are different types of mortar available in the market. You can use sanded or unsanded grout depending on your preference. Sanded grout is ideal for wider gaps, while unsanded grout is perfect for smaller gaps between bricks. Before applying the mortar, make sure that the surface is clean and free from any debris or dust.
Tips for achieving a smooth mortar finish include mixing the mortar according to instructions and using a trowel to apply it evenly between each brick. After applying the mortar, use a damp sponge or cloth to wipe off any excess from the surface of the bricks. This will help create a clean and polished look for your backsplash. With these tips in mind, you can achieve a professional-looking finish for your brick backsplash project. In the next section, we will discuss how to clean up excess mortar after filling in all those gaps.
Cleaning Up Excess Mortar
- Removing excess mortar can be accomplished by using a damp sponge to wipe away fresh mortar.
- After mortar has dried, a wire brush can be used to gently scrape away the hardened material.
- To clean mortar from tools, warm soapy water can be used to break down the mortar material.
- To ensure complete cleaning of mortar residue, a soft brush and vinegar can be used to reach into crevices and cracks.
- For larger areas, a pressure washer may be used to quickly clear away mortar residue.
- After cleaning, all tools and surfaces should be allowed to dry thoroughly before continuing with the project.
Removing Excess Mortar
Removing mortar residue is an essential step in ensuring that your brick backsplash looks neat and tidy. Once you have applied the mortar and placed the bricks, allow it to dry and set for about 24 hours. After this period, you can start removing the excess mortar from the surface of your tiles. Use a trowel or a scraper to remove as much of the dried-up mortar as possible.
When removing excess mortar, always remember to work with caution so as not to damage your newly installed brick backsplash. You can use a damp sponge or cloth to wipe off any remaining residue on the tiles. Be sure to rinse your cleaning tools often, particularly if you are using a sponge, so as not to spread the residue around.
Finally, once you have removed all visible traces of excess mortar, inspect your brick backsplash thoroughly for any residue that may still be present. If there are any spots left behind by dried-up mortar, repeat the cleaning process until all surfaces are clean and free of debris. Remember that taking care of your cleaning tools is just as important as removing excess mortar from your brick backsplash – clean them thoroughly after use to ensure they last longer and perform optimally during future projects!
Cleaning Mortar From Tools
Once you have removed excess mortar from your brick backsplash, it is essential to clean your tools properly. Cleaning techniques for different types of tools may vary, and it is crucial to know the right methods for each one. For instance, if you are using a trowel or scraper, use a wire brush to remove any remaining mortar and then rinse with water. On the other hand, if you are using a sponge or cloth, make sure to wring them out thoroughly after each use and wash them in warm soapy water.
Proper disposal of excess mortar is also an important aspect of cleaning up after installing a brick backsplash. It is not recommended to dispose of dried-up mortar in regular trash cans as it can clog pipes and cause plumbing issues. Instead, put the excess mortar in a plastic bag and dispose of it at your local landfill or recycling center.
Remember that maintaining your cleaning tools is just as important as cleaning up excess mortar from your brick backsplash. After every project, clean your tools thoroughly to ensure they last longer and perform optimally during future projects. By following these simple steps for cleaning up excess mortar and taking care of your tools, you can ensure that your brick backsplash looks neat and tidy for years to come!
Drying Mortar Residue
Removing excess mortar from a brick backsplash requires attention to detail and careful consideration for the tools used. However, it is equally important to prevent residue buildup by allowing the mortar to dry properly. Drying mortar residue can be challenging, but there are several ways to do it effectively.
One way to dry mortar residue is by using a stiff-bristled brush or scraper to remove any excess while it is still wet. This method can be time-consuming but is effective in preventing residue buildup. Another option is to use a damp cloth or sponge to wipe away any excess before it dries. However, this method requires more effort as the cloth must be rinsed regularly.
If you missed removing excess mortar and it has already dried, there are still methods that you can do. You may use an acid solution like muriatic acid and mix it with water in a 1:10 ratio. Apply this solution on the dried-up mortar and let it sit for around 15 minutes before washing off with water. Another option is to use sandpaper or a wire brush to remove the dried-up mortar manually carefully.
Preventing residue buildup takes patience and consistency in cleaning up after every project. By taking care of your tools and cleaning up excess mortar properly, you can avoid having issues with dried-up residue buildup that may cause problems in the future.
Letting The Brick Set Overnight
The process of installing a brick backsplash is akin to building a sturdy foundation for your kitchen. Just like constructing a house, the key to ensuring the longevity and durability of your brick backsplash lies in taking the time to let it set overnight. Patience is essential when it comes to this step, as allowing your mortar to dry overnight can make all the difference in achieving your desired results.
Benefits of Letting Brick Set Overnight:
- Allows for proper bonding of bricks with mortar
- Prevents shifting or slippage during installation
- Increases overall strength and durability of the backsplash
Tips for Handling Wet Mortar During Brick Setting:
- Use gloves to protect hands from irritation caused by mortar
- Avoid applying too much pressure when setting bricks to prevent cracking or breakage
- Keep a damp cloth on hand to wipe away excess mortar as needed
While it may be tempting to rush through this step, taking the time to properly let your brick set overnight is crucial for achieving long-lasting results. Remember, building a strong foundation is key in any home improvement project. In the next section, we will discuss how to seal your brick backsplash for added protection and durability.
Sealing The Brick For Protection
One of the most important steps in installing a brick backsplash in your kitchen is to seal the brick for protection. Sealing the brick will protect it from moisture, stains, and other damage that can occur over time. There are many benefits to sealing the brick, including extending its lifespan and maintaining its appearance.
When it comes to selecting the best sealant options for your brick backsplash, there are several factors to consider. The first thing you should look for is a sealant that is specifically designed for use on brick surfaces. These types of sealants are formulated to penetrate deeply into the pores of the brick, providing superior protection against moisture and other types of damage.
In addition to selecting a high-quality sealant, it’s also important to follow proper application techniques. Make sure you thoroughly clean and dry the surface before applying the sealant. You may also need to apply multiple coats depending on the type of sealant you select and the condition of your bricks. By taking these steps, you can ensure that your brick backsplash will remain looking great for years to come.
With your bricks now sealed from moisture and stains, it’s time to move on to adding grout between them. But before we get into that step, let’s take a moment to appreciate how much better your kitchen looks with this beautiful new feature! By following these simple steps, anyone can install a stunning brick backsplash in their home – so why not give it a try today?
Adding Grout Between The Bricks
When installing a brick backsplash in the kitchen, it is critical to choose the right grout for the job. The grout should match the color of the tiles and the type of joint that will be filled. It is also important to ensure that the grout is applied properly. This includes making sure to use the correct grout consistency, filling the joints completely and wiping off any excess grout.
Choosing The Right Grout
When it comes to adding grout between the bricks of a brick backsplash, choosing the right grout is essential. Grout not only fills in the gaps between the bricks but also helps to secure them in place. There are several factors to consider when selecting grout, including its pros and cons and color options.
One of the main advantages of using grout is that it provides additional stability to the bricks. It also helps prevent moisture from penetrating into the wall behind the backsplash. However, one disadvantage is that grout can stain easily, especially if it’s a light color. To address this issue, homeowners can seal their grout periodically to protect it from discoloration.
When deciding on a color for your grout, be aware that there are multiple options available. You can either choose a color that matches your brick or select a contrasting shade for added interest. Keep in mind that some colors may require more maintenance than others; white grout will require frequent cleaning to maintain its brightness. Ultimately, the choice of color will depend on personal preference and design goals.
In conclusion, choosing the right grout is an essential step in installing a brick backsplash. By weighing the pros and cons and considering various color options available, homeowners can make an informed decision about which type of grout will work best for their specific needs. With careful planning and execution, anyone can create a beautiful and functional brick backsplash in their kitchen!
Applying Grout Properly
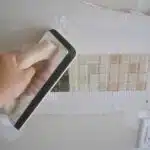
Now that you have selected the right grout for your brick backsplash, the next step is to apply it properly. Proper application of grout ensures that it fills in all the gaps between the bricks and creates a secure bond between them. To begin, mix your grout according to the manufacturer’s instructions, then apply it to the bricks using a rubber float. Be sure to work in small sections and scrape off any excess grout as you go.
Once you have applied the grout, allow it to dry for 10-15 minutes before wiping away any excess with a damp sponge. It’s important not to let the grout dry completely on the surface of the bricks, as this can make it difficult to remove later on. After wiping away any excess grout, use a clean cloth to buff away any haze left behind by the grout.
To maintain your newly installed brick backsplash, proper cleaning techniques are essential. Depending on your choice of grout color, regular cleaning may be necessary to keep it looking its best. For light-colored grouts like white or beige, frequent cleaning is recommended as they tend to show dirt and stains more easily than darker shades. Use a mild cleaner and avoid abrasive scrubbers when cleaning your backsplash.
In summary, applying grout properly is crucial when installing a brick backsplash. Working in small sections and removing excess grout promptly will ensure a smooth finish. Additionally, proper cleaning techniques will extend the life of your backsplash and help maintain its appearance over time. Remembering these tips will help you achieve a beautiful and functional brick backsplash that will be enjoyed for years to come!
Installing A Protective Sealant
You’ve finally completed the installation of your brick backsplash and it looks fantastic. However, before you start using your kitchen, it’s important to install a protective sealant to keep the bricks looking their best for years to come. This is an important step that should not be skipped.
One of the main benefits of sealant is that it helps prevent moisture from getting into the bricks and causing damage. This is especially important in areas like the kitchen where spills and splatters are common. A good sealant will also help protect against stains and make cleaning up messes easier. It can also give the brick a nice shine or matte finish depending on your preference.
When comparing different sealant options, there are a few things to consider such as durability, ease of application, and cost. Some popular options include acrylic sealants, urethane-based sealants, and epoxy sealants. Each one has its own set of pros and cons so be sure to do your research before making a decision.
By taking the time to install a protective sealant on your new brick backsplash, you’re making an investment in both its longevity and appearance. Don’t skip this important step as it can save you time and money in the long run. Now that your backsplash is fully protected, it’s time to sit back and enjoy your beautiful new kitchen feature!
Enjoying Your New Brick Backsplash!
Now that your brick backsplash is installed, it’s time to enjoy the fruits of your labor! There are many design ideas you can explore to make your new backsplash a focal point in your kitchen. Consider adding some contrasting colors or textures to create visual interest. You can also use lighting to highlight the texture and color of the bricks.
Maintenance tips are essential for keeping your new brick backsplash in great condition. Start by wiping down the surface with warm water and a mild detergent. Avoid using harsh chemicals or abrasive sponges as they can damage the bricks. Additionally, seal the bricks every few years to protect them from moisture and stains.
Remember, a brick backsplash is a timeless addition to any kitchen. With proper care and maintenance, it will last for years to come. So take some time to appreciate your new feature and consider how you can incorporate it into your overall kitchen design!
Conclusion
To conclude, installing a brick backsplash in your kitchen can be a rewarding and aesthetically pleasing project. It requires careful consideration of the type of brick to use, precise measurement and calculation of the required amount, gathering necessary tools and materials, preparing the surface for installation, applying mortar to the wall, sealing the bricks for protection, adding grout between them, and installing protective sealant.
Ultimately, this DIY project can provide a charming rustic touch to your kitchen while also protecting the walls from spills and splatters. With attention to detail and patience in execution, your new brick backsplash will impress friends and family alike. So why not take on this exciting challenge and transform your kitchen into an inviting space that you’ll enjoy for years to come?
Image Credits
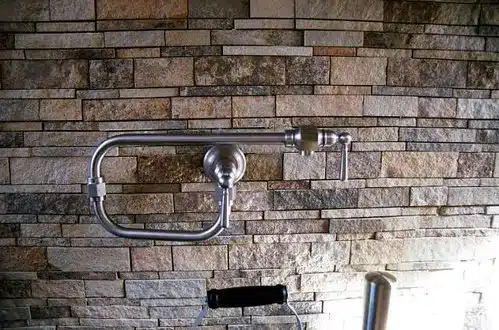
- “Stone Backsplash” by granite-charlotte (featured)

