As a brick veneer installation expert, I have had the privilege of transforming numerous exterior walls with this durable and timeless material. Brick veneer is a popular choice for homeowners and business owners alike due to its aesthetic appeal, low maintenance requirements, and durability against harsh weather conditions. If you are considering installing brick veneer on an exterior wall, it is important to understand the process involved to ensure a successful installation.
Installing brick veneer on an exterior wall involves several steps that require attention to detail and precision. It is crucial to prepare the surface properly before beginning the installation process to ensure the bricks adhere correctly. Additionally, choosing the right type of mortar and tools for the job can make all the difference in achieving a professional-looking finish. In this article, we will explore the necessary steps involved in installing brick veneer on an exterior wall and provide tips for ensuring a successful project outcome.
Assessing The Wall Surface
As a brick veneer installation expert, I know that the first step in any project is wall preparation. Before you begin installing brick veneer on an exterior wall, you must assess the surface to ensure it can support the weight of the bricks and provide a secure base for them. This involves checking for any damage or defects that need to be repaired before installation can proceed.
Surface assessment is crucial because any imperfections in the wall’s surface can cause problems later on when it comes time to install the bricks. In particular, you should look for cracks, holes, and other signs of wear and tear that could affect the integrity of the wall. You’ll also want to check whether the surface is level and flat, as these factors can influence how well the bricks adhere to the wall.
Once you’ve assessed the surface of your exterior wall, you can move on to measuring and ordering materials. This involves taking accurate measurements of your wall so that you know how many bricks you’ll need to order and what sizes they should be. By following these steps carefully, you’ll be well on your way to a successful brick veneer installation project.
Measuring And Ordering Materials
- Accurate measurements of the wall area are essential for calculating the material requirements of a brick veneer installation.
- It is important to take into account the length, width, and any angles of the wall to accurately determine the total wall area.
- Once the wall area is calculated, it is necessary to calculate the number of bricks and other materials required for the installation.
- The number of bricks must include the additional number of bricks needed for any curved or angled sections of the wall.
- Once the material requirements are calculated, an order for the supplies should be placed with the supplier.
- It is important to order an extra 10-15% of the estimated need to account for any losses due to breakage or incorrect measurements.
Measuring Wall Area
Calculating materials is a fundamental step in installing brick veneer on an exterior wall. To determine the amount of brick veneer needed, measuring the wall area is crucial. The first step involves measuring the height and width of each wall section that requires brick veneer installation. A laser level or plumb line can be used to ensure accurate measurements. It’s essential to take into account any openings such as windows and doors and subtract their respective areas from the total wall area.
Wall preparation techniques are also important before calculating materials for brick veneer installation. The surface must be clean, dry, and structurally sound before installing the brick veneer. Any damaged or rotten wood must be replaced, and cracks filled with mortar. Additionally, it’s necessary to apply a weather-resistant barrier on top of the sheathing before installing the metal lath over it.
After measuring the wall area accurately and preparing the surface, it’s time to calculate the amount of materials needed for proper installation of brick veneer. An expert installer should consider factors such as waste allowance, material thickness, corner treatment, and joint spacing while ordering materials. It’s better to order extra material than fall short during installation because some materials may not be available later on in case of shortage or damage during transit. Proper measurement techniques help ensure that enough material is ordered to complete the project successfully without causing delays or additional expenses due to underestimating needs for supplies during construction.
Calculating Material Requirements
Calculating brick quantities is an essential step in any brick veneer installation project. It’s crucial to have accurate measurements of the wall area and take into account any openings such as windows and doors. A laser level or plumb line can be used to ensure precise measurements, and it’s necessary to subtract the respective areas of these openings from the total wall area. Wall preparation techniques are also important before calculating materials for brick veneer installation.
Once the measurements are taken, it’s time to calculate the amount of materials needed for proper installation of brick veneer. An expert installer should consider factors such as waste allowance, material thickness, corner treatment, and joint spacing while ordering materials. Budgeting for material costs is crucial because underestimating needs for supplies during construction can cause delays or additional expenses. It’s better to order extra material than fall short during installation because some materials may not be available later on in case of shortage or damage during transit.
Proper measurement techniques help ensure that enough material is ordered to complete the project successfully without causing delays or additional expenses due to underestimating needs for supplies during construction. Calculating material requirements must be done meticulously by a skilled installer who has experience working with different types of bricks and building structures. By considering all factors involved in determining the amount of materials needed, an expert installer can order precisely what is required, ensuring that the project runs smoothly from start to finish.
Ordering Supplies
When it comes to brick veneer installation, measuring and ordering materials is a crucial step towards the success of any project. However, choosing suppliers and comparing prices is equally important as this affects the overall cost of the project. As an expert installer, it’s essential to have a list of reliable suppliers that offer competitive prices for quality materials. Before placing an order, it’s wise to compare prices from different suppliers to ensure that the budget is maximized.
Ordering supplies can be complicated due to various factors such as waste allowance, material thickness, and joint spacing. Therefore, it’s necessary to work with suppliers who understand these requirements and can help determine the exact amount of materials needed for the project. It’s also essential to consider lead times since some suppliers may take longer than others to deliver materials. Working with a reliable supplier ensures that materials are delivered on time so that construction schedules are not affected.
In conclusion, choosing reliable suppliers and comparing prices are critical steps when ordering supplies for brick veneer installation projects. Expert installers must work with suppliers who understand the specific requirements for each project and can provide quality materials on time at competitive prices. By following these guidelines, projects can be completed successfully without delays or additional expenses caused by poor material choices or unreliable suppliers.
Gathering Tools And Equipment
Selecting the appropriate tools and equipment is crucial when installing brick veneer on an exterior wall. The following are some of the essential items required for this project: a masonry trowel, level, hammer, chisel, measuring tape, safety goggles, dust mask, gloves, and a mortar mixing tub. It is vital to ensure that each tool you choose meets industry regulations and standards.
One of the most important safety precautions during brick veneer installation is to wear protective gear. Safety goggles protect your eyes from flying debris during cutting or chiseling while a dust mask can prevent inhalation of dust particles released during cutting or drilling. It is also essential to wear gloves to protect your hands from sharp edges and cuts.
In conclusion, choosing appropriate equipment and taking necessary safety precautions are key factors in ensuring a successful brick veneer installation. The next section will discuss how to prepare the mortar mix required for the project.
Preparing The Mortar Mix
For installing brick veneer on an exterior wall, the first step is to gather the necessary materials such as mortar, sand, and water.
It is important to accurately calculate the quantities of mortar, sand and water needed to achieve the desired strength and consistency of the mortar mix.
To mix the mortar, a wheelbarrow or other large container should be used to ensure the proper proportions of the ingredients are combined.
A hoe or other mixing tool should be used to blend the ingredients together until a uniform mixture is achieved.
The water content of the mortar mix should be monitored as too much water can weaken the mortar and affect its bonding capabilities.
The mortar should be mixed for a minimum of five minutes to ensure all ingredients are properly blended and the desired consistency is achieved.
Gathering Materials
As a brick veneer installation expert, one of the crucial steps in the process is gathering materials. This entails choosing materials and comparing costs to ensure that you get the best quality at an affordable price. To achieve this, it is essential to source suppliers who offer high-quality products at competitive prices.
When sourcing suppliers, it’s crucial to research and compare prices from different stores to find the best deal. Besides comparing costs, it’s also important to consider the quality of the materials being offered by each supplier. This will help you make an informed decision on which supplier to use for your project.
Once you have identified a reliable supplier, estimating quantities becomes paramount. It would be best if you had enough material to cover the entire surface area without running out of supplies mid-project. Accurate estimation helps avoid wastage and ensures that there are enough materials for unexpected contingencies. By following these steps in gathering materials for brick veneer installation, you can ensure that your project runs smoothly and efficiently.
Calculating Quantities
As a brick veneer installation expert, preparing the mortar mix is one of the most critical steps in the process. The mortar mix serves as the adhesive that holds the bricks in place, and it must be mixed to the right consistency and quantity for a successful installation. In preparing the mortar mix, calculating quantities is crucial to ensure that there is enough material and minimize waste.
Calculating quantities involves estimating how much mortar will be required for a given area. This estimation is based on factors such as wall height, width, length, and surface texture. Accurately calculating costs helps avoid wastage by ensuring that you have enough material to complete the project without running out mid-way through.
Material waste reduction is essential in brick veneer installation because it helps reduce costs and environmental impact. By accurately estimating quantities needed for each project, you can minimize waste by buying only what you need. Additionally, proper storage of materials ensures that they remain usable for future projects. As an expert in this field, I would recommend taking extra care when preparing your mortar mix to ensure that you have enough material without wasting any resources.
Mixing Mortar
After calculating the required quantities of mortar, the next step in preparing the mortar mix is to mix it properly. Mixing techniques and mortar consistency are critical factors that can affect the quality of the installation. As a brick veneer installation expert, I recommend using a mechanical mixer or mixing by hand with a trowel for smaller projects.
When mixing mortar, it is essential to ensure that it has the right consistency. The ideal mortar consistency should be similar to toothpaste, making it easy to spread but not too runny or thick. Adding water gradually while mixing helps achieve the desired consistency. Overly wet mortar will likely result in weaker adhesion and may cause bricks to slip out of place during installation.
By mastering proper mixing techniques and ensuring consistent mortar consistency, you can achieve a successful brick veneer installation project. It is crucial to pay attention to every detail, from calculating quantities to mixing techniques and maintaining appropriate consistency throughout the process. Proper preparation of materials helps reduce waste while ensuring that you have enough material for each project’s completion.
Laying The Foundation Row
According to recent surveys, brick veneer has become one of the most popular exterior finishes in North America. This is due to its durability, low maintenance, and aesthetic appeal. Installing a brick veneer on an exterior wall requires several steps, with each step building upon the previous one. One of the most critical steps is laying the foundation row.
Choosing mortar is an essential aspect of laying the foundation row. Mortar acts as a binding agent that holds the bricks together. When selecting mortar, it’s crucial to use a type that matches well with the existing mortar or brickwork. It’s also essential to select a mortar that will withstand weathering and provide sufficient support to the veneer.
Brick patterns can add visual interest and depth to your brick veneer installation project. When laying the foundation row, you have several options for brick patterns, including running bond, stack bond, herringbone, and basket weave. Each pattern has its unique look and feel that can complement your home’s overall style and architecture. By choosing a particular pattern that works best for your project, you can create a distinctive aesthetic appeal that sets your home apart from others in your neighborhood.
In setting up the foundation row on which all other rows will be built upon during your brick veneer installation project; choosing mortar that will match well with existing mortar or brickwork is essential as it provides support for bricks along with several options for brick patterns like running bond or herringbone among others which give your walls an attractive look while also providing strength to them. Now let’s move ahead with cutting these bricks down to size without compromising their integrity!
Cutting The Bricks To Size
One of the most important steps in installing brick veneer on an exterior wall is cutting the bricks to size. This can seem like a daunting task, but with the right tools and techniques, it can be done easily and accurately. The best tool for cutting brick veneer is a wet saw.
A wet saw uses water to cool the blade and prevent dust from getting into the air, which makes it a safer option than dry cutting. When choosing a blade for your wet saw, it’s important to select one that is specifically designed for cutting masonry materials. These blades are typically made of diamond or carbide and have a segmented edge that allows them to cut through tough materials like brick veneer.
To use the wet saw, first make sure you have all necessary safety gear including eye protection and gloves. Then, adjust the saw’s fence so that it lines up with your desired cut line. Turn on the saw and slowly feed the brick veneer into the blade while holding it securely with both hands. Take care not to force the brick too quickly through the blade as this can cause chipping or cracking.
Transition: Now that you’ve cut your bricks to size, it’s time to move onto applying mortar to their backsides. This step is crucial in ensuring a strong bond between your brick veneer and exterior wall surface.
Applying Mortar To The Back Of The Bricks
After cutting the bricks to size, it’s time to move on to an equally important step in installing brick veneer: applying mortar to the back of the bricks. This process is crucial for ensuring that the bricks adhere properly to the wall and remain in place for years to come. As a brick veneer installation expert, I have seen firsthand how improper mortar application can lead to significant problems down the line.
To ensure a successful mortar application process, there are several techniques you should keep in mind. First and foremost, always make sure that your mortar is mixed thoroughly and has a consistent texture throughout. Additionally, use the proper tools for applying mortar, such as a trowel or jointer. Finally, consider weather conditions when applying mortar – hot or cold temperatures can affect drying times and impact adhesion.
In addition to these techniques for mortar application, it’s also important to understand the concept of back buttering bricks. This involves spreading a layer of mortar onto the back of each brick before placing it on the wall. Back buttering helps ensure that there is enough moisture and adhesive material between the brick and wall for proper adhesion. Skipping this step can result in weak spots or even failure of the entire brick veneer installation. Remember – taking shortcuts during this process can lead to costly repairs in the future!
Placing The Bricks On The Wall
Brick placement techniques are crucial to achieving a professional-looking finished product. Before placing the bricks, it is essential to determine the pattern and layout of the veneer. This process involves marking out the location of the first course of bricks and ensuring that they are level, plumb, and straight. The remaining courses should follow this same pattern.
When placing each brick, it is vital to ensure that they are level and spaced evenly apart. To achieve this, use a spirit level to check each brick’s horizontal alignment and a spacer to maintain even gaps between them. Always start at one end of the wall and work your way towards the other end.
During brick installation, several common mistakes must be avoided. These include misalignment of the bricks, poor mortar application, improper spacing between bricks, and failure to correct errors in real-time. Proper planning and execution will ensure an excellent finished product that will last for years to come.
Creating A Level And Plumb Wall
- Prior to installing the brick veneer, it is necessary to frame the wall to provide a solid structure for the brick to be attached to.
- It is imperative to mark the levels of the wall to ensure that the brick veneer is straight and level when installed.
- Before laying out the brick, a level should be used to ensure that each course of brick is level with the course below it.
- To ensure that the brick veneer is plumb, a plumb line should be used to measure the vertical alignment of the brick.
Framing Wall
As an expert in brick veneer installation, it is important to understand the proper techniques for framing a wall before beginning the installation process. Wall framing techniques play a crucial role in ensuring your brick veneer installation turns out level and plumb. The first step in framing a wall is to create a bottom plate using lumber that is both straight and free from imperfections.
Common framing mistakes include using warped or bowed lumber, which can lead to uneven walls and difficulties during the installation process. It is essential to check each piece of lumber before use, as even small imperfections can cause major issues down the line. Additionally, it is important to ensure that all corners are square and that studs are spaced evenly, typically between 16-24 inches apart. Proper framing will provide a solid foundation for your brick veneer installation and help prevent any future issues.
In summary, taking the time to properly frame your exterior wall will pay off in the long run when installing brick veneer. Avoid common mistakes such as using warped lumber and take care to ensure each piece of material is straight and securely fastened. Utilizing proper framing techniques will provide a sturdy foundation for your brick veneer installation, ultimately resulting in a beautiful finished product that will last for years to come.
Marking Levels
Creating a level and plumb wall is crucial for any brick veneer installation. One key aspect of achieving this is marking levels accurately. To do this, you will need a few tools such as a level, chalk line, and measuring tape. The proper technique for marking levels involves using the level to ensure that the bottom plate is even before attaching it to the floor joists. From there, use the chalk line to mark a straight line along the top of the bottom plate. This line will be used as a guide for placing studs at the correct height.
Another important part of marking levels is ensuring that all walls are level with each other. This can be accomplished by using a long straightedge or laser level to check that all top plates are at the same height. It’s also important to make sure that each stud is cut precisely to fit between the top and bottom plates for an even finish.
In conclusion, taking the time to properly mark levels is essential for creating a level and plumb wall in preparation for brick veneer installation. Utilizing tools such as a level, chalk line, measuring tape, and straightedge or laser level can help ensure accuracy throughout the process. Following these proper techniques will ultimately lead to a successful brick veneer installation with precise and even results.
Adding Weep Holes For Drainage
Like a fortress guarding against the elements, a well-constructed exterior wall is essential for protecting the interior of any building. Moisture management in an exterior wall plays a crucial role in ensuring its longevity and durability. One important aspect of proper drainage for brick veneer installation is using weep holes.
Weep holes are small openings placed at the bottom of exterior walls to allow moisture to escape from behind the brick veneer and prevent water damage. Without weep holes, water can accumulate behind the veneer and seep into the interior walls, causing structural damage and health hazards. As a brick veneer installation expert, I cannot stress enough how crucial it is to incorporate weep holes into any project.
In addition to using weep holes, finishing the wall with mortar joints is also an essential step in proper moisture management for an exterior wall. The mortar acts as a barrier between the bricks while also allowing water to evaporate through its porous surface. With these measures in place, you can be confident that your brick veneer installation will stand strong against any weather conditions.
Finishing The Wall With Mortar Joints
After installing the brick veneer on an exterior wall, the next step is to finish the wall with mortar joints. The primary purpose of mortar joints is to secure the bricks in place and provide a watertight seal. Mortar joints also play a significant role in the aesthetics of a brick veneer installation project. Matching mortar colors to blend seamlessly with the bricks is essential for achieving a cohesive and visually appealing finish.
Creating a textured finish on your mortar joints can give your brick veneer installation project character and depth. A textured finish can be achieved by using different techniques such as raking, bagging, or striking. Raking involves removing excess mortar from between the bricks with a specialized tool, leaving behind shallow channels that create texture. Bagging involves applying wet mortar onto the wall using a burlap bag, creating a rough textured surface. Striking involves skimming over fresh mortar with a straight edge tool to create an even, consistent texture.
Matching mortar colors and creating textured finishes are crucial for achieving an eye-catching look for your brick veneer installation project. Properly finishing your walls with these techniques can make all the difference in the final outcome of your project. In our subsequent section, we will discuss cleaning your brick veneer to ensure it looks its best after installation.
Cleaning The Brick Veneer
After installing brick veneer, it is essential to clean it thoroughly to enhance its appearance and maintain its durability. Cleaning techniques vary depending on the type of stain on the brick veneer. Common stains include efflorescence, rust, and mildew.
Efflorescence is a white powdery substance that forms on brick veneer due to moisture intrusion. To remove efflorescence, use a stiff-bristled brush and clean water. Avoid using acid-based cleaners as they react with the efflorescence to create more stains.
Rust stains are caused by metal objects that have come into contact with the brick veneer. To remove rust stains, use a commercial rust remover. Follow the instructions carefully and rinse thoroughly with water. Mildew stains are caused by moisture accumulation in shaded areas. To remove mildew stains, use a solution of water and bleach in equal parts. Apply the solution with a brush and rinse thoroughly with water.
- Use protective gear such as gloves, goggles, and masks when cleaning brick veneer.
- Start cleaning from top to bottom to avoid streaking.
- Do not use pressure washers as they can damage the brick veneer.
- Test any cleaning solution on a small area before applying it to the entire surface.
Cleaning brick veneer is an essential maintenance practice that should be done regularly to keep your home’s exterior looking good. Proper cleaning techniques help remove common stains such as efflorescence, rust, and mildew while maintaining the structural integrity of the brick veneer. In the next section, we will discuss sealing techniques that help protect your brick veneer from future stains and damage without compromising its aesthetic appeal.
Sealing The Brick Veneer
When it comes to installing brick veneer on an exterior wall, sealing is a crucial step. Not only does it protect the brick from water damage and other natural elements, but it also enhances its appearance. There are different types of sealants available in the market, each with its unique features and benefits.
Silicone-based sealers are popular due to their durability and resistance to weathering. They create a protective layer over the brick that prevents moisture from penetrating the surface. Acrylic sealers, on the other hand, provide a glossy finish and can be tinted to match the color of the brick. It’s essential to choose a sealer that suits your specific needs.
It’s important to note that even with proper sealing, maintenance is still necessary for maintaining your brick veneer’s longevity. Regular cleaning and inspection can help identify any areas where damage or wear may have occurred. A yearly inspection by a professional installer can also be beneficial in identifying potential issues early on before they become more significant problems.
Transition: Now that you understand how vital sealing is for your brick veneer installation project, let’s move onto discussing how proper maintenance practices can extend its lifespan further.
Maintaining The Brick Veneer
As we seal the brick veneer, we ensure that it remains intact and protected from various elements. However, preventative measures are just as critical in maintaining the longevity of your exterior wall’s appearance. One way to do this is through regular cleaning. Dirt, grime, and other debris can accumulate on the brick surface over time and cause discoloration or even damage. It is essential to clean the surface with a mild detergent solution and a soft-bristle brush regularly.
Repairing damage is another crucial aspect of maintaining the brick veneer’s integrity. Regular inspection of the masonry for any signs of damage such as cracks or loose bricks can prevent further deterioration down the line. Once identified, damaged areas should be repaired immediately to avoid any water infiltration or structural issues. A professional contractor should handle any significant repairs to ensure proper installation and avoid future problems.
In case you encounter any issues with your brick veneer despite taking all these measures, troubleshooting common issues may be necessary. Some of these issues may include staining from rust or efflorescence caused by salt deposits on the surface. It would help if you did not attempt to remove these stains yourself since harsh chemicals can cause more harm than good. Instead, consult an expert who has experience dealing with such issues for safe and effective solutions that will leave your wall looking as good as new.
Transition: Now that we have covered preventative measures and repairing damage let us move on to troubleshooting common issues that may arise when installing brick veneer on an exterior wall.
Troubleshooting Common Issues
Common mistakes can occur during the installation of brick veneer on exterior walls. These mistakes can lead to structural issues and potential safety hazards. One common mistake is improper preparation of the wall surface. The wall must be clean, level, and free of debris before installation. Failure to do so can result in an uneven and unstable veneer.
Another common mistake is incorrect mortar mixing and application. Mortar should be mixed according to manufacturer instructions and applied evenly to prevent gaps or weak spots in the veneer. Incorrect mortar consistency or application can lead to cracking, shifting, or even falling of individual bricks.
To troubleshoot these issues, it is important to identify the root cause of the problem. In the case of improper wall preparation, the solution may involve removing the existing veneer and starting over with a properly prepared surface. In situations where mortar mixing or application is at fault, additional mortar may need to be applied in areas where gaps or cracks exist. It may also be necessary to reinforce areas with metal lath or other support structures.
In conclusion, troubleshooting common issues during brick veneer installation requires careful attention to detail and knowledge of proper techniques. By taking preventative measures such as thorough wall preparation and correct mortar mixing/application, many problems can be avoided altogether. However, when issues do arise, identifying the cause and implementing appropriate solutions promptly will ensure a safe and successful brick veneer installation project.
Conclusion
In conclusion, installing brick veneer on an exterior wall requires careful planning and execution. Assessing the wall surface and measuring materials accurately are crucial steps in ensuring a successful installation. Gathering the necessary tools and equipment, preparing the mortar mix, and laying the foundation row are all essential components of the process.
Once the brick veneer is installed, it is important to clean and seal it properly to protect it from damage caused by weather or other external factors. Maintaining the brick veneer regularly will help prolong its lifespan and ensure its durability over time.
However, even with proper planning and execution, issues can arise during installation. It is important to troubleshoot common issues such as unevenness or cracking before they become major problems. As a brick veneer installation expert, I have seen firsthand the importance of careful planning and attention to detail in ensuring a successful installation. So remember, when it comes to installing brick veneer on an exterior wall, don’t let your guard down – because you never know what may come crumbling down with it.
Image Credits
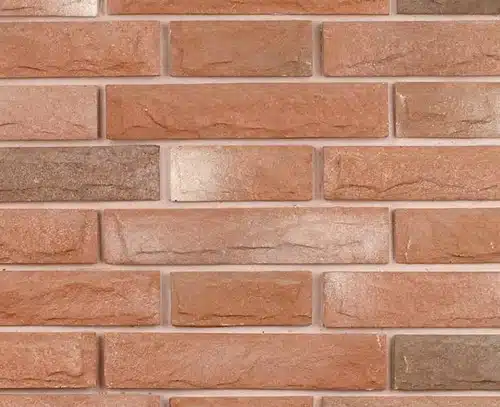
- “thin brick veneer 03101” by Navilla Stone (featured)

