Brick masonry is a fundamental part of construction, and it is a technique that has been used for centuries. Bricks are durable building materials that can withstand harsh weather conditions and provide an attractive finish to buildings. However, bricks may get damaged due to various reasons such as age, weathering, or impact from external sources. When this happens, it is crucial to replace the damaged bricks to maintain the structural integrity of a building.
Replacing damaged bricks may seem like a daunting task, but with proper knowledge and tools, it can be done effectively. As a brick masonry specialist, I have been involved in numerous repair projects where damaged bricks had to be replaced. In this article, I will share my expertise on how to replace damaged bricks. Whether you are a homeowner or a professional contractor, this guide will provide you with insights on the best practices and techniques for replacing damaged bricks.
Identifying Damaged Bricks
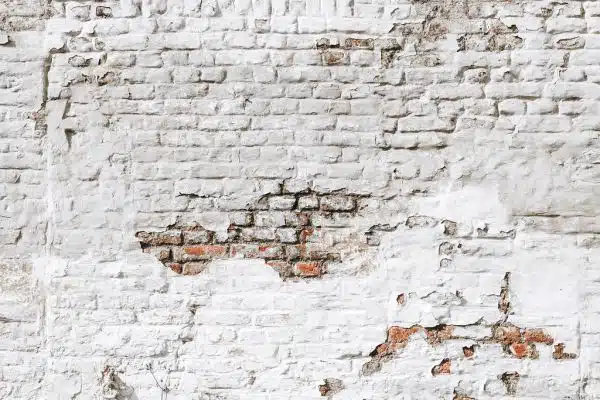
Brick damage is a common problem that most homeowners face at some point. It can occur due to various reasons such as harsh weather conditions, poor construction techniques, and natural wear and tear. Identifying damaged bricks is the first step towards repairing them. Some common signs of brick damage include cracks, chips, and missing pieces.
Before beginning any repair work, it is important to consider the cost involved. DIY brick repair may seem like an affordable option at first glance, but it can end up costing more in the long run if not done correctly. Hiring a professional for brick repair may seem expensive, but it ensures that the job is done efficiently and effectively.
When deciding between DIY or hiring a professional for brick repair, it is important to weigh the pros and cons of each option carefully. While DIY may seem like an easy way to save money, it should only be attempted by those with sufficient knowledge and experience in masonry work. On the other hand, hiring a professional ensures efficient repairs that will last longer than a DIY job. Ultimately, the decision depends on one’s skill level and budget constraints.
Moving forward onto safety precautions for brick replacement, it is crucial to take necessary measures before beginning any repair work to ensure minimal risk of injury or damage to property.
Safety Precautions For Brick Replacement
When performing brick replacement, it is essential to wear protective gear, such as a dust mask, gloves, and protective eyewear, to ensure safety. Additionally, ladders should be securely placed and tested for stability, and mortar strength should be tested before removal of the damaged bricks. It is also important to check for structural damage, moisture, and electrical wires, as well as to disconnect utilities if necessary. Finally, the work area should be clearly marked, tools should be kept sharp, debris should be disposed of properly, and replacement bricks should be installed in safe conditions.
Wear Protective Gear
Safety should be a top priority when it comes to brick replacement techniques. As a brick masonry specialist, I highly recommend that you wear protective gear before starting any repair work. It is essential to protect yourself from flying debris and dust.
One of the most important pieces of protective gear is safety glasses. These will protect your eyes from small chips and fragments of brick that can fly up while you are working. Additionally, you should wear gloves to protect your hands from cuts or scrapes caused by sharp edges of bricks. A dust mask is also crucial to avoid breathing in harmful particles that may cause respiratory problems.
In conclusion, it is important to take the necessary safety precautions when replacing damaged bricks. Wearing protective gear such as safety glasses, gloves, and a dust mask will help prevent injuries and ensure your health during the repair process. Remember, taking care of yourself is just as important as taking care of the job at hand.
Place Ladders Securely
Ensuring safety while working on brick replacement is crucial to avoid injuries and accidents. As a brick masonry specialist, I highly recommend securing ladders before starting any repair work. A ladder that is not properly secured can easily tip over and cause serious injuries.
To secure the ladder, make sure it is on level ground and its base is firmly planted. Extend the ladder at least three feet above the roofline or work surface to provide adequate stability. If you are using an extension ladder, make sure each section is securely locked in place. Additionally, tie off or brace the ladder to prevent it from sliding or tipping over during use.
When removing bricks from a structure, ensure that the ladder is positioned correctly to allow for easy access and support of your weight. Avoid leaning too far away from the ladder while holding heavy objects like bricks as this could affect your balance and cause you to fall. Always maintain three points of contact with the ladder – two hands and one foot or two feet and one hand- when climbing up and down to ensure maximum stability. By following these steps, you can secure ladders safely during brick removal techniques without risking harm to yourself or others around you.
Tools Needed For Brick Replacement
Safety precautions are always of utmost importance when working with bricks, especially when replacing damaged ones. Once all the necessary safety measures have been taken, the next step is to choose appropriate materials for the replacement. It is important to use bricks that match in size, type, and color to maintain the structural integrity and aesthetic appeal of the structure.
When it comes to tools needed for brick replacement, there are several common mistakes to avoid. One such mistake is not using a chisel that matches the width of the joint between bricks. This can cause damage to adjacent bricks which will only add to your repair list. Another mistake is not using a hammer with enough force or not positioning it correctly on the chisel. This can lead to inconsistent results and make your work more challenging than it needs to be.
In order to replace damaged bricks efficiently and effectively, one must first remove them properly. This requires precision and care as any damage caused during this process can lead to additional repairs down the line. The next section will cover how to remove damaged bricks safely without causing further damage or complications in the repair process.
Removing Damaged Bricks
Identifying cracks in bricks is crucial before any repair work can be initiated. In general, cracked bricks will exhibit signs such as visible cracks, chips or missing pieces, and in severe cases, the entire brick may be dislodged from a wall. Identifying these damaged bricks is a critical first step to ensure that the correct repair work can be planned and executed.
Once damaged bricks have been identified, repairing mortar joints may suffice to remedy the problem. Mortar joints are responsible for holding the bricks together, and when they deteriorate over time due to weathering or natural wear and tear, they can loosen up and cause damage to the surrounding bricks. Repairing mortar joints involves carefully removing the old mortar using specialized tools such as a tuck pointer or chisel and then reapplying fresh mortar in its place.
If repairing mortar joints doesn’t solve the issue of damaged bricks, it’s essential to replace them. Replacing damaged bricks requires careful planning to ensure that the replacement brick matches the existing ones in terms of size, color, and texture. Once you’ve identified a suitable replacement brick, you’ll need to prepare it for installation by carefully chiseling away any excess mortar or debris on its surface. With proper preparation techniques employed, replacing damaged bricks can be done seamlessly with minimal interruptions to your brickwork.
Transition: Now that we have discussed how to identify cracks and repair or replace them accordingly let’s move onto preparing replacement bricks so that they can be installed with ease.
Preparing The Replacement Bricks
To prepare the replacement bricks for damaged structures, it is crucial to start by sourcing materials that are similar in color, texture, and size to the original bricks. This ensures a seamless repair and enhances the overall aesthetic of the structure. Brick matching can be achieved through various means such as taking samples of the original brick to a brickyard or using digital imaging technology to analyze the brick’s characteristics.
Once appropriate replacement bricks have been sourced, they must be cleaned and prepared for installation. This involves removing any dirt or debris from the surface of the bricks and checking for any defects or irregularities that may affect their performance. It is essential to ensure that each replacement brick fits snugly into its designated space and aligns with adjacent bricks to prevent any structural issues.
In addition to ensuring proper fit and alignment, cutting bricks to size is another critical aspect of preparing replacement bricks. This process requires precision tools such as saws and hammers, as well as expertise in masonry techniques. Careful attention must be given to cutting angles and measurements to ensure that each brick fits correctly into its designated space, creating a strong bond between all parts of the structure.
Cutting Bricks To Size
Symbolism can be found in brick cutting techniques. Just as a sculptor must carefully choose the right tools to shape their material, a mason must select the proper blade for cutting bricks. The process of cutting bricks to size requires patience and precision to ensure that each piece fits seamlessly into place.
When choosing the right blade for brick cutting, there are several factors to consider. First, the type of blade will depend on the material being cut. For example, a diamond-tipped blade is best for cutting through hard, dense bricks. Additionally, the blade’s diameter and thickness should be chosen based on the size and depth of cuts needed.
Brick cutting techniques require specialized skills and equipment, but with practice and attention to detail, anyone can become proficient at this craft. By selecting the appropriate tools and taking care to make precise cuts, masons can achieve beautiful results that will last for years to come.
4 Items:
- Precision is key when it comes to brick cutting techniques.
- Choosing the wrong type of blade can result in damage to both materials and equipment.
- With practice and experience, one can become adept at brick cutting techniques.
- By taking care during the cutting process, masons can ensure seamless integration of replacement bricks into existing structures.
Transition: Once replacement bricks have been cut to size using proper brick cutting techniques and tools, it’s time to focus on mixing mortar for their secure installation.
Mixing Mortar For Brick Replacement
- Gathering the appropriate materials for brick replacement is a critical step in the process and ensures the quality of the repair.
- Mortar should be mixed using a combination of masonry cement, hydrated lime, and sand with a ratio of one part cement to one part lime to six parts sand.
- The mortar should be mixed to a consistency similar to that of peanut butter.
- The replacement brick should be dampened before mortar is applied to ensure a good bond.
- The mortar should be firmly packed into the joints, taking care to fill all gaps between the brick and the mortar.
- The excess mortar should be removed with a trowel before it has a chance to dry.
Gathering Materials
When it comes to replacing damaged bricks, proper preparation is vital to ensure a safe and long-lasting repair. Gathering the necessary materials is the first step towards achieving this goal. As a brick masonry specialist, I recommend sourcing supplies from reputable suppliers to guarantee their quality and reliability. This will help prevent any unexpected setbacks during the project.
One of the most crucial aspects of gathering materials for brick replacement is cost estimation. A thorough analysis of the required materials and their associated costs will help you determine a realistic budget for the project. Accurate cost estimation will also allow you to avoid overspending or underestimating expenses, which can lead to delays and added frustrations.
Sourcing supplies and estimating costs are essential steps that cannot be overlooked when mixing mortar for brick replacement. It is critical to procure all required materials before starting the project, as this will save time and minimize potential errors. With these preparations in place, you can confidently proceed with your repairs knowing that you have all necessary supplies at hand.
Preparing Mortar
As a brick masonry specialist, it is important to emphasize that proper preparation is key when mixing mortar for brick replacement. This involves understanding the different types of mortar available and selecting the appropriate one for your project. There are several types of mortar, including Type N, Type S, and Type M. Each type has its own unique properties and strengths that make it suitable for specific applications.
Another critical aspect of preparing mortar is determining the correct ratio of mortar mix to water. The ratio will depend on the type of mortar being used as well as the specific requirements of the project. It is crucial to follow the manufacturer’s instructions carefully when mixing mortar to ensure that the consistency is correct and that it adheres properly to the bricks.
In conclusion, properly preparing mortar is essential for ensuring successful brick replacement projects. As a brick masonry specialist, I recommend thoroughly researching and understanding the different types of mortar available and selecting the right one based on your specific needs. Additionally, following precise instructions when mixing the correct ratio of mortar mix to water is crucial in achieving a strong bond between bricks and ensuring a safe and long-lasting repair.
Applying Mortar
Properly mixing the mortar is only half the battle when it comes to brick replacement projects. Applying mortar onto the bricks is equally important in ensuring a successful repair. Common mistakes in applying mortar include using too much or too little, uneven application, and improper smoothing. These errors can compromise the strength of the bond between bricks and lead to further damage.
To avoid these common mistakes, it is important to follow best practices when applying mortar. One of the most important practices is to apply an even layer of mortar onto the entire surface of each brick before placing it into position. This ensures that there are no air pockets or gaps between the brick and surrounding mortar, which can weaken the bond. Additionally, smoothing out excess mortar with a trowel or jointing tool will ensure a clean finish and prevent water from seeping into any gaps.
Different types of mortar have varying uses when it comes to applying them onto bricks. For instance, Type N mortar is suitable for general purpose use and works well for above-grade applications such as chimneys and walls. Type S and M mortars are stronger and typically used for below-grade applications such as foundations or retaining walls. Understanding these differences will help determine which type of mortar is best suited for your specific project needs.
Applying Mortar To The Replacement Brick
Once you have removed the damaged brick, it is time to apply mortar to the replacement brick. The consistency of the mortar should be such that it can stick well to both the brick and the wall. A good technique for applying the mortar is to scoop up a small amount of mortar on your trowel, then spread it evenly onto the back of your replacement brick. The thickness of your mortar should be about 1/2 inch.
One common mistake that many people make when applying mortar is using too much water. This will cause the mortar to become weak and not adhere properly to the brick or wall. Another mistake is not mixing enough sand into the mixture, which can lead to cracking and shrinkage over time. Make sure you follow proper mixing instructions and use quality materials for best results.
In addition, take care not to leave gaps or air pockets in your application of mortar as this could lead to structural instability down the line. Once you have applied enough mortar, carefully press your replacement brick into place, making sure it is level with surrounding bricks. Allow sufficient time for drying before moving on to installing any additional bricks in order to ensure a strong foundation for future work.
Transition: With your new brick firmly in place, next we will move on to installing it securely within its designated location within the wall structure.
Installing The Replacement Brick
Applying mortar to the replacement brick is only the first step in replacing damaged bricks. Brick matching is crucial to ensure that the replacement brick seamlessly blends in with the rest of the structure. To accomplish this, it is important to find a brick that matches the size, shape, texture, and color of the original bricks.
Once you have found a suitable replacement brick, it’s time to install it using proper brick bonding techniques. The most common technique is called “stack bond,” where each row of bricks is stacked directly on top of the previous one. However, this method can weaken the structure over time if not reinforced by other methods such as “running bond” or “basket weave.” These techniques involve staggering each row of bricks to distribute weight more evenly and create a stronger bond.
After installing the replacement brick, it is essential to ensure that it is leveled and aligned with the surrounding bricks. This can be accomplished using a level tool and adjusting the height or angle of the brick as necessary. Proper alignment will prevent water from seeping through gaps between bricks and further damaging your structure.
Leveling And Aligning The Replacement Brick
Once the damaged brick has been removed, it is important to ensure that the replacement brick is properly leveled and aligned. To achieve this, brick alignment techniques must be utilized. One technique involves using a level and string line to ensure proper alignment with adjacent bricks. Additionally, shims may be used to adjust the height of the replacement brick.
Common mistakes in brick replacement include failure to properly align the replacement brick with adjacent bricks or failure to ensure that it is level with the surrounding surface. These errors can lead to structural issues as well as aesthetic concerns. It is important to take the time to properly level and align the replacement brick in order to avoid these problems.
Properly leveling and aligning the replacement brick is a crucial step in successful brick repair. By utilizing accurate techniques and avoiding common mistakes, you can ensure that your repair will be both structurally sound and visually appealing. Next, we will discuss finishing the replacement brick in order to complete the repair process seamlessly.
Finishing The Replacement Brick
According to a recent study, brick damage can occur due to various reasons such as natural disasters, structural issues, and age. It is important to address these damages immediately to prevent further deterioration and maintain the aesthetic value of the structure. When replacing damaged bricks, applying finishing touches is crucial in blending in new bricks with the old ones seamlessly.
To apply finishing touches, first ensure that the replacement brick is properly placed and leveled. Then, use a trowel to carefully apply mortar around the edges of the brick. The mortar should be slightly recessed from the surface of the brick so that it does not interfere with its appearance. After allowing the mortar to dry for a few minutes, use a stiff-bristled brush to lightly scrub away any excess or smudges on the surface.
Blending in new bricks requires careful attention to detail and patience. By taking time during each step of the process and ensuring consistency in color and texture, you can achieve an undetectable repair job. Once all replacement bricks have been installed and finished with mortar, allow ample curing time for the brick mortar before moving onto other repairs or maintenance tasks.
Curing Time For Brick Mortar
As a brick masonry specialist, it is important to understand the different types of brick mortar available in the market. The most common types include Type N, Type S, and Type M. Type N is suitable for general use while Type S is recommended for high-stress areas such as chimneys and foundations. Type M is ideal for load-bearing structures.
Before replacing damaged bricks, it is crucial to assess the extent of damage to determine whether replacement is necessary. If replacement is required, using a brick saw can help remove the damaged bricks without causing further damage to surrounding ones. After removing the damaged bricks, it is important to prepare fresh mortar and apply it evenly before fitting in new bricks.
To ensure that the mortar sets properly, it must be given enough time to cure before any additional work is done on the structure. The curing time depends on several factors such as temperature and humidity levels. Typically, one should allow at least 24 hours for each inch of thickness before applying any load on the newly replaced bricks.
- It’s essential to wear protective gear such as gloves and goggles when working with brick saws.
- Adding bonding agents such as liquid latex or acrylic fortifiers can improve the strength of mortar.
- Regular maintenance checks can help identify any potential issues with your brick structure.
In conclusion, understanding different types of brick mortars available in the market can help you choose the best one based on your project requirements. Using a brick saw can help you safely replace damaged bricks while minimizing damage to surrounding ones. Curing time must be taken into consideration before starting any additional work on your structure after replacing damaged bricks.
Cleaning Up After Brick Replacement
As a brick masonry specialist, it always amazes me how homeowners tend to overlook the importance of post-replacement cleanup. After all, it is not just about replacing the damaged bricks; it’s also about ensuring that your property remains clean and safe. With that said, let me share some tips on how to properly dispose of damaged bricks and clean up after a replacement job.
Firstly, you need to separate the damaged bricks from other waste materials. This will prevent any injuries or accidents while disposing of them. You can either use a wheelbarrow or a container to collect the damaged bricks and transport them to an appropriate disposal site. It is important to note that you should not mix these bricks with other recyclable materials such as plastic bottles or cardboard boxes.
Secondly, after disposing of the damaged bricks, you need to clean up the work area thoroughly. This includes sweeping away any loose debris or dust left behind by the replacement job. You may also need to wash down the affected area with water and soap to remove any stains or marks left by the old bricks. Once you are satisfied with the cleanliness of your property, you can move on to sealing and waterproofing your brick wall.
In summary, proper post-replacement cleanup is crucial in maintaining a safe and clean environment for your household. By following these steps for disposing of damaged bricks and cleaning up your work area, you ensure that everything is in order before moving on to sealing and waterproofing your brick wall. So let’s move forward into our next section where we discuss how best to seal and waterproof your newly replaced brick wall without delay!
Sealing And Waterproofing The Brick Wall
Sealing and waterproofing your brick wall is essential to prevent water damage, which can cause mold and mildew growth. Choosing the appropriate sealant for your brick wall is crucial in maintaining its longevity. There are two types of sealants: film-forming and penetrating. Film-forming sealants create a barrier on top of the brick wall, while penetrating sealants soak into the brick pores.
To choose the right sealant for your brick wall, you need to consider various factors such as climate, type of bricks, and desired finish. If you live in an area with heavy rain or snowfall, it is advisable to use a penetrating sealant since it provides better protection against moisture penetration. Conversely, if you desire a glossy finish for your brick wall, then a film-forming sealer would be more appropriate.
Preventing future brick damage is equally important in maintaining your brick walls’ structural integrity. Applying a water repellent coating can help prevent water absorption by forming a barrier on the surface of the bricks. This prevents moisture from seeping through small cracks and crevices that may exist within the brickwork. Additionally, regular inspections can help identify any potential issues that may arise before they become significant problems.
Incorporating these methods into your routine maintenance ensures that your brick walls remain strong and sturdy for years to come. However, it’s essential to note that no maintenance regimen can entirely eliminate all potential risks or guarantee complete protection against damage caused by natural elements or other circumstances beyond our control. The next section will discuss how to maintain your brick walls for longevity in more detail.
Maintaining Brick Walls For Longevity
As the old adage goes, “a stitch in time saves nine,” so too does regular maintenance save on costly repairs. Brick walls are durable and long-lasting, but they are not indestructible. Over time, weather and other elements can cause damage to bricks, leading to potential safety hazards if left unchecked. That’s why it is essential to perform regular inspections of brick walls and ensure that any issues are addressed promptly.
One critical aspect of maintaining brick walls is replacing damaged bricks as soon as possible. The table below outlines some common signs of brick damage and when replacement is necessary:
| Signs of Brick Damage | When Replacement is Necessary |
|---|---|
| Cracks | If wider than 1/8 inch or extending through entire brick |
| Spalling | If more than 1/2 inch deep or affecting more than one face |
| Efflorescence | If extensive or accompanied by crumbling |
| Discoloration | If caused by water infiltration or indicates underlying damage |
Regular inspection also involves checking for loose mortar joints, which can weaken the structure of the wall. Repointing, or filling in gaps between bricks with new mortar, can help prevent further damage. Additionally, keeping the wall clean with gentle cleaning solutions can prevent buildup of dirt and grime that can accelerate wear and tear.
In summary, maintaining a brick wall takes effort but pays off in longevity. Regular inspection and prompt replacement of damaged bricks are key components of keeping a wall structurally sound. Other tips include repointing loose mortar joints and keeping the wall clean. By taking these steps proactively, you’ll be able to enjoy your brick wall for years to come without worrying about costly repairs down the line.
Conclusion
Replacing damaged bricks in a wall is an essential skill that every brick masonry specialist should possess. Identifying and replacing damaged bricks can prevent further damage and maintain the integrity of the structure. Safety precautions must be taken to ensure that the brick replacement process is carried out effectively without any harm to anyone.
The tools required for brick replacement are not complicated, but they are necessary for a successful repair project. Removing the damaged bricks, preparing the new ones, and curing them correctly before fixing them in place is crucial for long-lasting results. Cleaning up after the repair work is just as important, as it ensures that there is no debris or mortar left behind that could cause future damage. Sealing and waterproofing the wall will also help to protect it from weather elements.
In conclusion, replacing damaged bricks requires knowledge of safety precautions, proper tools, and careful attention to detail. As a brick masonry specialist, you have a responsibility to ensure that every brick repair job you undertake meets professional standards and delivers reliable outcomes that will keep your clients’ structures safe and secure. Remember to maintain your clients’ walls regularly for maximum longevity, ensuring their durability over time. With these tips in mind, you can confidently tackle any brick replacement project with ease and precision.
Image Credits
- “Damaged white brick wall” by _hiresPIC (featured)

