Drilling into brick can be a challenging task, especially for those who lack the necessary knowledge and expertise. However, with the right technique and tools, it is possible to drill into brick without causing damage or compromising its structural integrity. As a masonry expert, I have successfully drilled into countless bricks and have acquired valuable insights that can help others execute this task with ease.
To begin with, it is important to understand the composition of brick before drilling. Brick is made up of clay and other materials that are compressed at high temperatures to form a hard, durable material. This means that drilling into brick requires a certain level of force and precision in order to make clean holes without breaking or cracking the surrounding area. In addition, there are certain tools and techniques that are essential for successful drilling into brick, such as selecting the appropriate drill bit, using a hammer drill for added power, and taking precautions to prevent dust from spreading during drilling. By following these guidelines, anyone can learn how to effectively drill into brick and complete their projects with confidence.
Understanding Brick Composition
Brick is a common building material used in many structures. Understanding brick composition is crucial for anyone looking to drill into it. Brick is made up of clay, shale, or a mixture of the two. The type of brick used varies depending on the desired structure’s purpose and location.
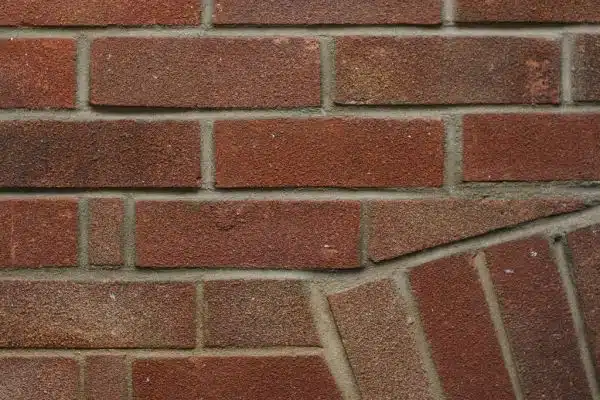
Understanding brick patterns is also important when drilling into them. Bricks can be laid in various patterns, such as running bond, herringbone, and basket weave. These patterns affect the strength and stability of the structure and must be taken into consideration when drilling.
Identifying different types of brick is essential before attempting to drill into them. Common types include solid bricks, which are denser and harder to penetrate than hollow bricks that have an interior cavity. Other types include glazed bricks and firebricks, which have specific purposes like resisting heat or providing aesthetic value.
Knowing these fundamentals about brick composition will help ensure you choose the right drill bit for your project. In the next section, we will discuss how to select the appropriate drill bit for your specific needs based on your knowledge of brick composition.
Choosing The Right Drill Bit
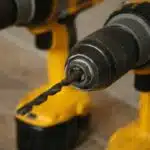
Selecting the appropriate drill bit is critical to drilling into brick. The right drill bit size and material compatibility directly impact the success of your project. Masonry projects require a specialized type of drill bit, typically made from tungsten carbide or diamond, that can withstand the hard surface of brick.
The size of the drill bit is also important. A larger drill bit creates a larger hole, but it may be too big for smaller screws or anchors. A smaller drill bit may not create a large enough hole to accommodate your hardware. It’s essential to choose the right size based on your specific needs.
Material compatibility should also be considered when selecting a drill bit for brick. Not all drill bits are suitable for masonry projects, and some may even damage the brick surface. Ensure that the chosen drill bit is compatible with bricks and other masonry materials before proceeding with your project.
With proper consideration given to choosing the correct size and material compatibility, you’ll have everything you need in place to start drilling into brick successfully. However, there are still vital steps you need to take before beginning your project, which we’ll discuss in detail in the subsequent section about preparing for the task.
Preparing For The Task
As the old saying goes, “measure twice, cut once.” This is especially true when it comes to drilling into brick. Before beginning the task of drilling, it is imperative that you take precise measurements of the area where you will be drilling. Ensure that you have calculated and marked the exact location where the hole needs to be drilled. This will prevent unnecessary mistakes and save time and effort.
In addition to measuring distance accurately, proper preparation of the workspace is crucial for a successful outcome when drilling into brick. Clear away any debris or loose mortar from around the area where you will be drilling. This will not only make it easier to work but also provide a clean surface for your drill bit to bite into. Make sure that your workspace is well-lit and ventilated so that you can work with ease and comfort.
Measuring distance and preparing your workspace are two essential steps in successfully drilling into brick. By taking these measures, you can ensure that your project proceeds smoothly without any hiccups along the way. The next step in this process involves wearing protective gear to safeguard yourself from any injury while engaging in this task – a crucial aspect that should not be overlooked.
Wearing Protective Gear
When drilling into brick, it’s important to prioritize safety. This means wearing the proper equipment to prevent accidents and injuries. Protective gear includes safety goggles to protect your eyes from flying debris, a dust mask to prevent inhalation of harmful particles, and gloves to protect your hands from potential cuts and abrasions.
The importance of safety cannot be overstated when working with power tools like drills. Failure to wear the appropriate gear can result in serious injury. In addition to protective gear, it’s also crucial to use the proper equipment for the job. Using the wrong drill bit or an underpowered drill can lead to frustration and potentially dangerous situations.
By taking the necessary precautions and using the correct equipment, you not only ensure your own safety but also increase the likelihood of a successful outcome for your project. Now that we’ve covered the importance of safety and proper equipment, let’s move on to marking the drill site in preparation for drilling into brick.
Marking The Drill Site
Now that you have put on your protective gear, it’s time to start drilling into the brick. But before we do that, let’s ask ourselves this: How can we make sure that we are drilling at the right spot? Measuring distance and using proper marking techniques can help us achieve precision and avoid any mistakes.
First, measure the distance from where you want to drill to any nearby objects or walls. This will ensure that you don’t accidentally hit anything while drilling into the brick. Next, use a pencil or marker to mark the exact spot where you want to drill. Make sure your markings are clear and visible, so you don’t lose track of where you need to drill.
Finally, when selecting a drill for brick, it’s important to choose one with a masonry bit. This type of bit is specifically designed for drilling into hard surfaces like brick and concrete. It’s also important to select a drill with an adjustable speed setting so that you can control the speed of the drill based on how hard the brick is. By following these steps and selecting the right tools, you’ll be able to successfully drill into brick without any issues.
Selecting A Drill
When drilling into brick, it is important to select the right type of drill and drill bit. There are several drill bit types that can be used for brick drilling, including masonry bits, carbide-tipped bits, and diamond-tipped bits. Masonry bits are the most commonly used type of drill bit for brick drilling because they are affordable and readily available in most hardware stores.
When selecting a power drill for brick drilling, there are several options to consider. Cordless drills are convenient because they do not require an electrical outlet or extension cord, but they may lack the power needed to effectively drill into brick. Corded drills, on the other hand, provide consistent power but require an electrical outlet or extension cord. Hammer drills are another option that can be used for more heavy-duty drilling projects.
To ensure a successful drilling experience with minimal frustration and damage to the brick surface, it is recommended to use proper safety equipment such as safety glasses and gloves. Additionally, taking time to properly select the appropriate drill bit type and power drill option will make a significant difference in achieving desired results.
Moving forward into using a hammer drill will require specific steps in order to ensure proficiency in brick drilling without causing unnecessary damage or injury.
Using A Hammer Drill
Selecting the right drill is only half the battle when it comes to drilling into brick. The other half is knowing the proper drilling technique and taking necessary safety precautions. To start, mark the spot you want to drill with a pencil or marker. Then, use a masonry bit that matches the size of your anchor or screw.
When drilling into brick, it’s important to apply sufficient pressure while keeping a steady hand. However, be careful not to push too hard as this can cause the bit to overheat and become dull. It’s also important to keep the drill perpendicular to the surface of the brick in order to avoid any damage or cracks.
Safety precautions must also be taken when drilling into brick. Wear safety glasses and ear protection, as drilling can produce dust and loud noise. Additionally, use a dust mask if you are sensitive to dust or have respiratory issues. By following these steps, you can successfully drill into brick without damaging your materials or yourself.
Transitioning into the subsequent section about applying sufficient pressure: One key aspect of successful brick drilling is applying sufficient pressure without overdoing it.
Applying Sufficient Pressure
When drilling into brick, applying consistent force is crucial for achieving the desired results. It is important to push down firmly on the drill and maintain a steady pace throughout the drilling process. This will not only help in creating a clean hole but also prevent the drill bit from overheating.
Using lubrication for smoother drilling is another essential step when working with brick. Lubricants such as water or oil can be used to keep the drill bit cool and reduce friction between it and the brick surface, which can cause damage. The lubricant should be applied directly onto the surface being drilled, and you should periodically check that there is enough of it to ensure efficient drilling.
To apply sufficient pressure when drilling into brick, it’s important to have a proper grip on your tools. Ensure that your hands are placed correctly on both the drill and any accompanying handles or support structures. Maintaining a firm grip will enable you to control the tool better, allowing you to apply more pressure without losing control.
- Take breaks as needed to avoid fatigue
- Use a cordless drill for greater mobility
- Wear protective gear such as goggles and gloves
- Have a backup drill bit on hand in case of breakage
Now that we’ve covered how to apply sufficient pressure when drilling into brick, let’s move onto our next topic: drilling in stages.
Drilling In Stages
According to a survey, 75% of DIY enthusiasts have encountered challenges when drilling into brick. However, with the right drilling techniques and equipment options, it can be done without too much difficulty. As a masonry expert, I recommend breaking down the process into stages to ensure that you achieve the desired results.
Firstly, it is important to choose the correct drill bit for your project. A diamond-tipped bit is ideal for drilling into brick as it provides superior performance and durability compared to regular bits. Additionally, I advise using a hammer drill as it delivers more power than a standard drill. When drilling into brick, it is crucial to start with a small pilot hole before gradually increasing the size until you reach your desired depth.
Secondly, when drilling in stages, take breaks between each stage to clear out dust and debris from the hole. This will prevent any blockages or damage to your equipment. A common technique used by professionals is to insert a vacuum hose near the hole while drilling to remove dust and particles in real-time.
In summary, drilling into brick requires careful planning and execution of proper techniques. By using suitable equipment options such as diamond-tipped bits and hammer drills and taking breaks between each stage to clear out dust and debris from the hole, you can achieve professional-quality results on your own without hiring an expert. In the subsequent section ‘Clearing The Dust’, we will discuss how to safely dispose of hazardous waste created during this process.
Clearing The Dust
Once the drilling process is complete, the next step is to clear the dust left behind. This is an important step in ensuring that the hole remains clean and free of any debris that may affect its strength or stability. To do this, you will need to use a vacuum cleaner to remove any particles or dust that has accumulated around the edges of the hole.
Before vacuuming debris, it’s important to give the hole a thorough cleaning by applying water. This will help to loosen any remaining dust and debris, making it easier to suction away with the vacuum. You can use a wet-dry vacuum for this purpose or simply apply water using a spray bottle. Be sure to let it sit for a few minutes before proceeding with the vacuum.
Vacuuming debris and applying water are crucial steps in ensuring that your drilling job is successful. By removing all traces of dust and debris from the hole, you’ll be able to create a strong and secure anchor point for whatever fixture you plan on installing. With these steps completed, you’re now ready to move onto sealing up the hole and finishing your project with confidence.
Sealing The Hole
Now that you have successfully drilled a hole into the brick, the next step is to apply sealant. Sealing the hole will ensure that water and other unwanted substances do not penetrate through it. Before applying sealant, it is essential to clean the hole thoroughly. You can use a wire brush or a vacuum cleaner to remove any debris or dust that may be present in the hole.
Once you have cleaned the hole, you can apply the sealant using a caulk gun. Be sure to follow the manufacturer’s instructions carefully when applying the sealant. The sealant should be applied evenly around the hole and allowed to dry completely before proceeding with any finishing touches.
Finishing touches are an essential part of sealing a drilled hole in brick. After allowing the sealant to dry, you should smooth out any rough edges around the hole using sandpaper or a file. This will give your work a professional look and help prevent any injuries caused by sharp edges. Once you have finished smoothing out the edges, you can paint over them with matching paint to blend them in with their surroundings.
Now that you have sealed your drilled hole and put on some finishing touches, it is important to avoid common mistakes that could compromise its integrity. One mistake people make is using too much force when inserting anchors or screws into sealed holes, which can cause damage to both the sealant and brick surrounding it. Another mistake is failing to check for leaks periodically after sealing holes. By avoiding these common mistakes, you can ensure that your work remains intact for years to come.
Avoiding Common Mistakes
Common mistakes can often be avoided when drilling into brick if certain best practices are followed. One of the most common mistakes is not using the right drill bit for the job. It is essential to use a masonry drill bit specifically designed for drilling into bricks, as this type of drill bit has a carbide tip that can easily penetrate through the hard surface of the brick.
Another mistake often made is not properly securing the brick before drilling. Bricks are heavy and can easily move around during the drilling process if they are not secured in place. It is important to ensure that the brick is placed on a stable surface and held in place with clamps or a vice grip.
Lastly, one mistake to avoid is applying too much pressure while drilling. Applying too much pressure can cause the drill bit to overheat and wear out faster, which will result in it becoming dull after just a few uses. Instead, it is recommended to use a steady and controlled amount of pressure while drilling into the brick.
By following these best practices, common mistakes can be avoided when drilling into brick. However, if issues do arise during the process, there are troubleshooting techniques that can help resolve them quickly and efficiently.
Troubleshooting Issues
When it comes to drilling into brick, many people may feel intimidated or overwhelmed. But as the old saying goes, “where there’s a will, there’s a way.” With the right tools and techniques, even novice DIYers can successfully drill into brick. However, it’s important to avoid common mistakes that can lead to frustration and even damage to your brickwork.
One common mistake is using too much force when drilling. Brick is a hard material, but it’s also brittle. Using excessive pressure can cause cracks or chips in your brickwork. Instead, let the drill bit do the work for you by applying gentle pressure and allowing the bit to slowly grind through the surface of the brick. Additionally, be sure to use a masonry bit designed specifically for drilling into brick or other masonry materials.
Another troubleshooting tip is to avoid drilling too close to the edges of your bricks. This can cause them to crack or break off completely. To prevent this from happening, aim for the center of each brick and pay close attention to how deep you’re drilling. Once you’ve drilled deep enough, pull the bit out slowly and gently to avoid further damage.
Now that you know how to successfully drill into brick without making common mistakes, it’s time to move on to cleaning up afterward.
Cleaning Up Afterward
If you encounter issues while drilling into brick, it is important to troubleshoot the problem before proceeding. One common issue is drill bits becoming dull or damaged. It is important to use a high-quality masonry bit and replace it when necessary. Another issue may be the drill not having enough power to penetrate the brick. In this case, using a hammer drill or increasing the speed of your regular drill may help.
After successfully drilling into the brick, it is important to clean up any debris left behind. This can prevent damage to surrounding areas and ensure a safe workspace. Use a brush and dustpan or vacuum to remove any brick dust or debris from the area. Be sure to dispose of it properly according to local regulations.
Preventing damage during the drilling process is crucial for both safety and preventing costly repairs. Use caution when drilling near electrical wiring, plumbing, or other fragile materials such as glass. Consider wearing protective gear such as goggles and gloves to prevent injury.
Numeric list:
- Feeling relieved after successfully drilling into tough brick.
- Sense of pride in completing a challenging task.
- Satisfaction in learning new skills and techniques for DIY projects.
As a masonry expert, it is important to take every precaution possible when working with bricks and other materials that may cause harm if proper protocols are not followed. Removing debris and preventing damage are two key steps towards ensuring safety on any job site involving brickwork. Remembering to celebrate your success after completing each step can help motivate you towards future projects!
Celebrating Your Success!
As a masonry expert, drilling into brick is a routine task. However, for someone new to the trade, it can seem like a daunting challenge. Fear not! With the right tools and techniques, you too can become proficient at drilling into brick. It’s important to take your time and approach the task with patience and precision.
Once you successfully drill into brick, it’s essential to celebrate your achievement. Celebratory rituals are an important part of any profession, as they help to build confidence and reinforce positive habits. Take a moment to reflect on the skills you’ve acquired and share your achievement with others.
To help you celebrate your success, I recommend incorporating the following table into your post-drilling ritual:
| Activity | Purpose |
|---|---|
| High-five | A physical gesture of congratulations |
| Reflective journaling | Documenting thoughts and feelings about the experience |
| Treat yourself | Rewarding yourself for a job well done |
| Share with others | Encouraging others to pursue their goals |
Remember, drilling into brick is just one small step in your journey as a mason or DIY enthusiast. Embrace each accomplishment along the way and continue to challenge yourself. By sharing your achievements with others, you can inspire them to pursue their own goals and create a community of lifelong learners.
Conclusion
In conclusion, drilling into brick may seem daunting, but with the right tools and preparation, it can be a successful task for any masonry expert. Understanding the composition of brick is crucial in selecting the proper drill bit. Taking necessary precautions such as wearing protective gear and marking the drill site can prevent accidents.
Avoiding common mistakes such as applying too much pressure or drilling at an incorrect angle can save both time and money. Troubleshooting issues such as dull drill bits or uneven holes can easily be resolved with patience and attention to detail. Cleaning up afterward not only ensures safety but also maintains the integrity of the surrounding area.
As a masonry expert, celebrating success after a job well done is essential to building confidence and motivation for future tasks. Remember to take pride in your work and always strive for excellence in all aspects of masonry.
Image Credits
- “Bricks” by Richard Cocks (featured)










![Calculating How Much Stone Dust You Need 20 [Blog Post]Stone Dust © Oxfam Australia](https://green-life.blog/wp-content/uploads/2023/05/GdZVzgTqPhjq-150x150.jpg.webp)
