As a home appliance repair technician, one of the most common issues that I encounter with washing machines is the need to drain excess water. Excess water can accumulate in a washer due to a variety of reasons, such as a malfunctioning pump or clogged drainage system. If left unaddressed, this can lead to damage to the machine and potential safety hazards.
In this article, we will explore how to properly drain a washer to prevent any further damage and ensure optimal performance. Whether you are dealing with a top-loading or front-loading machine, understanding the proper draining techniques can save you time, money, and frustration. So if you want to learn how to effectively address excess water in your washing machine, continue reading for our expert tips and advice.
Identifying The Problem
Imagine this scenario: you’re doing laundry, and suddenly you hear the sound of water overflowing. You rush to check on your washer, only to find out that it’s not draining properly. This can be a frustrating experience for anyone who depends on their washing machine to keep their clothes clean and fresh.
There are several common causes of a washer not draining correctly. One of the most frequent culprits is a clogged drain hose. Over time, dirt, lint, and other debris can build up inside the hose and prevent water from flowing out. Another common issue is a defective pump that fails to remove water from the washer’s tub. Additionally, an improperly installed or damaged drain hose can cause drainage problems.
To identify the root cause of the problem, a visual inspection is necessary. A home appliance repair technician would first check if there are any visible blockages in the drain hose or pump filter. If none are present, they would then inspect for signs of wear and tear on all drainage components. They may also use specialized equipment such as a multimeter to test electrical connections.
By understanding these common causes and performing a thorough visual inspection, one can determine why their washer is not draining properly. However, before attempting any repairs or maintenance procedures on your own, it’s crucial to take safety precautions to avoid injury or further damage to your appliance.
Safety Precautions
Identifying the problem with your washer can be a frustrating experience, but once you have determined that it needs to be drained, it is important to take the necessary safety precautions. Safety should always come first when working with any home appliance, and draining a washer is no different.
Importance of safety precautions:
- Protect yourself from burns or electric shock
- Prevent damage to the washer or surrounding area
- Avoid potential injury to others in the vicinity
- Ensure the job is done correctly and efficiently
Common misconceptions about draining a washer can lead to dangerous situations. Some people believe that simply unplugging the machine will prevent any electrical hazards. However, water may still be present in the machine and can cause an electrical shock if not handled properly. Another common misconception is that all washers drain automatically, but this is not always true. A manual drain may need to be initiated before attempting to remove any remaining water.
To prepare for draining a washer, gather the necessary tools such as a bucket or large container, towels, pliers, and gloves. It is important to wear appropriate clothing and use personal protective equipment such as eye protection and gloves to avoid potential injury. Always disconnect power sources before beginning any work on your washer.
Taking these necessary safety precautions will ensure that your experience with draining your washer goes smoothly and without incident. Remembering common misconceptions and gathering proper tools will help you complete this task like a professional repair technician while keeping yourself and others safe throughout the process.
Gathering The Necessary Tools
Picture yourself as a handyman trying to get the job done. You’re equipped with your trusty toolbox, ready to tackle whatever task comes your way. But before you start draining a washer, you need to choose the appropriate tools for the job. This means selecting the right wrenches and pliers that will help you remove hoses and other parts.
Tool maintenance is also essential when preparing to drain a washer. A well-maintained tool is much easier to use than one that’s been neglected. Make sure all your tools are clean, rust-free, and in good working order before starting any repairs or maintenance tasks.
To make things more engaging for our audience, let’s take a look at this table:
| Tool | Description |
|---|---|
| Pliers | Used to grip and turn nuts and bolts |
| Adjustable wrench | Used to tighten or loosen nuts and bolts of various sizes |
| Screwdriver set | Used for removing screws from panels or covers |
By choosing the appropriate tools and maintaining them properly, you’ll be able to work efficiently while keeping your workspace organized. In the next section, we’ll discuss turning off the power and water supply – an important step in draining a washer safely.
Turning Off The Power And Water Supply
Turning off the power and water supply is an essential step in draining a washer. Before proceeding with any repairs or maintenance on your washing machine, you will need to ensure that you have turned off the power source. This is important because it will prevent accidents and electrocution during the process. To turn off the power, unplug the machine from its electrical outlet or switch off the circuit breaker that controls its power supply.
After turning off the power, it’s crucial to shut off the water supply to prevent flooding or damage to your home. You can do this by locating the water valves behind your washing machine and turning them clockwise until they are fully closed. If you cannot find these valves, check behind nearby cabinets or walls for access points to your plumbing system. It’s important to note that some older models may not have a dedicated water valve, so you’ll need to shut off the main water supply valve for your entire home.
Turning off power and unplugging: why it’s important; shutting off water: how to do it safely — these are two critical steps that must be taken before attempting any repair or maintenance work on your washing machine. Failure to do so can result in serious injury or damage to both yourself and your home. Now that you have successfully turned off both the power and water supply, you can move on to locating the drainage system of your washer.
Locating The Drainage System
After turning off the power and water supply, the next step in draining a washer is to locate the drainage system. This can typically be found at the back of the washer near the bottom. It is important to note that some washers may have a separate pump for draining excess water, while others may use gravity to drain.
Once you have located the drainage system, it is important to check all connections before proceeding with draining. This includes checking for any leaks or loose connections in the drain hose and making sure that it is properly secured. It is also important to check that there are no blockages in the hose or drainage system that could impede proper draining.
In order to assist with checking connections, refer to the table below which outlines common drainage connection issues and their respective solutions:
| Issue | Solution |
|---|---|
| Leaking hose | Tighten connection or replace hose |
| Clogged drain | Clear blockage using a plumbing snake or remove debris from drain |
| Loose connection | Tighten connection or replace faulty part |
With these steps completed, you are now ready to proceed with draining excess water manually.
Draining Excess Water Manually
Draining excess water manually is a simple yet effective way of ensuring that your washer is free of any standing water. One of the most common methods of doing this involves vacuuming up the excess water using a wet/dry vac. To do this, simply plug in the vacuum cleaner and use it to suck up all the water from inside the machine.
If you do not have access to a wet/dry vac, you can also use a bucket to manually remove any standing water from your washer. Simply place the bucket underneath the drain hose and open it up by turning the valve. Once all the water has drained out, close the valve and dispose of the contents of the bucket appropriately.
It is important to remember that draining excess water manually is just one step in maintaining your washer’s functionality. It is crucial that you keep your machine clean and free of debris. This can be done by wiping down the interior with a damp cloth after each use and running cycles with vinegar or other cleaning agents on occasion.
Moving forward, using the drain hose is another effective method for draining excess water from your washer. By following these simple steps, you can ensure that your machine remains functional and efficient for years to come.
Using The Drain Hose
- The drain hose is typically located behind the washer, connected to the rear water outlet.
- The drain hose must be correctly connected to the drain outlet for efficient draining.
- It is important to ensure the drain hose is securely attached using a hose clamp.
- The seal between the drain hose and the drain outlet should be airtight.
- If the seal is not secure, the washer will not drain properly, leading to potential malfunction.
- It is important to regularly check the drain hose to ensure it is correctly connected and sealed.
Locating The Drain Hose
As a home appliance repair technician, it is important to know how to locate the drain hose of a washer. This is because it is an essential component that drains water from your washer during and after each cycle. To locate the drain hose, you need to look at the back of the washing machine. It is usually attached near the bottom of the washer’s back panel or on one side.
Drain hose maintenance is crucial to ensure that your washer functions effectively. You should regularly inspect the drain hose for any signs of damage such as cracks, splits, or leaks. If you notice any issues with the hose, replace it immediately to prevent water damage to your floors or walls. Additionally, make sure that the drain hose is not clogged with lint or debris which can cause blockages and lead to drainage problems. If you encounter any difficulties locating or maintaining your drain hose, consider seeking assistance from a professional.
While using a drain hose is a common method of draining water from your washer, there are alternatives available in case you encounter any issues with it. One alternative method involves manually scooping out excess water from your washer with a bucket. However, this can be time-consuming and messy. Another option is using a wet/dry vacuum cleaner which quickly removes water from your washer without creating a mess. Whatever method you choose, always make sure that safety precautions are taken when handling electrical appliances and water sources.
Connecting The Drain Hose
Now that we’ve discussed how to locate and maintain the drain hose, let’s move on to the proper installation of the hose. It is essential to make sure that the drain hose is installed correctly to ensure efficient water drainage. First, ensure that the hose is long enough to reach your home’s drain or standpipe. Hose length limitations can cause water backup and other issues if not adequately addressed.
Next, connect the drain hose securely to your washer’s back panel or side port. Most modern washers come with a clamp that secures the hose in place, but if yours does not have one, use a zip tie or wire clamp. Make sure that there are no kinks or twists in the hose as this can restrict water flow and cause blockages.
Finally, route the end of the drain hose into your home’s designated drain or standpipe. Make sure that it fits snugly into place and is not too far down the pipe as this can cause siphoning issues. Proper installation of the drain hose ensures smooth water drainage from your washer and prevents any potential damage caused by leaks or blockages.
As a home appliance repair technician, I cannot stress enough how important it is to follow these steps for proper installation of your washer’s drain hose. Failure to install it correctly can lead to costly repairs down the line. If you encounter any difficulties during installation or need assistance with replacing a damaged drain hose, seek professional help immediately. Remember, prevention is always better than cure!
Sealing The Drain Hose
Another essential aspect of using a washer’s drain hose is sealing it correctly. A poorly sealed hose can cause water leaks and flooding, leading to costly repairs. Therefore, checking for leaks and ensuring proper hose installation is crucial.
To seal the drain hose, start by attaching the hose to your washer’s back panel or side port securely. Use a clamp or zip tie to secure it in place and make sure there are no kinks or twists that could cause blockages. Next, route the end of the hose into your home’s designated drain or standpipe and ensure that it fits snugly into place.
Once you have connected the drain hose, check for any leaks before starting your washer. Turn on the water supply and allow it to fill up the tub while observing for any water drips or spills around the connection points. If you notice any leaks, turn off the water supply immediately and recheck the seal on your hose before proceeding. Proper sealing of your washer’s drain hose not only ensures efficient drainage but also prevents potential water damage caused by leaks.
Checking The Pump And Drain Filter
Next on the list is checking the pump and drain filter, which can often be the source of washer drainage problems. The pump is responsible for pushing water out of the machine and into the drain, while the filter catches any debris or objects that could cause a blockage. Over time, these parts can become clogged, leading to slow draining or even complete backup.
To start, locate the pump and filter by consulting your washer’s manual or doing an online search for your specific model. Once you’ve found them, unplug the washer and remove any excess water from inside the drum. Next, clean out the filter by removing it from its housing and rinsing it with warm water. If it appears damaged or worn down, you may need to replace it with a new one.
If cleaning the filter doesn’t solve your drainage issues, you may need to replace the pump itself. This is a more involved process that typically requires disconnecting hoses and wiring connections before removing the old pump and installing a new one. It’s important to follow your manual’s instructions carefully or seek professional help to ensure everything is done correctly and safely.
With these steps completed, you should have a better understanding of how to check and maintain your washer’s pump and drain filter. However, if you’re still experiencing slow draining or backup issues, it may be necessary to move on to clearing clogs in the drainage system itself.
Clearing Clogs In The Drainage System
After checking the pump and drain filter, the next step to draining a washer is to clear any clogs in the drainage system. This is important because a clog can prevent water from properly draining, leading to potential damage to the machine or even flooding.
To clear any clogs in the drainage system, you will need a few tools: a bucket, pliers, and a snake or wire hanger. First, locate the drainage hose at the back of the washer and detach it from the wall. Place your bucket underneath to catch any water that may spill out. Use your pliers to remove any visible debris from inside the hose. Then, use your snake or wire hanger to gently push through any remaining clogs.
Common causes of clogs include buildup of lint, soap scum, and other debris over time. It’s important to regularly clean out your washer’s drainage system to prevent these types of issues from occurring in the first place. By taking these steps to clear clogs in your washer’s drainage system, you can ensure that your machine is functioning properly and avoid costly repairs down the line.
To ensure that everything is working properly after clearing any clogs in the drainage system, it’s important to test the machine by running a cycle with hot water and no clothes inside. Check for any leaks or strange noises during this process. If everything seems normal, then you can rest assured that your washer is functioning as it should be.
Testing The Machine
One might assume that once the washer has been drained, it is automatically functional again. However, as a home appliance repair technician, I know that this is not always the case. Testing accuracy and assessing efficiency are crucial steps in ensuring that the machine is functioning properly before use.
To test accuracy, run a small load of laundry through the washer and observe how it operates. Does it spin correctly? Is there any unusual noise or vibration? These observations can help identify any potential issues with the machine. Assessing efficiency involves checking if the washer is using the appropriate amount of water and energy for each cycle. This step ensures that the machine is working efficiently and can save on utility costs in the long run.
It’s important to note that testing accuracy and assessing efficiency should not be skipped even if you think your washer is draining correctly. These steps can prevent future malfunctions or breakdowns. In addition to these testing methods, there are preventative maintenance tips that can keep your washer running smoothly.
Preventative Maintenance Tips
Preventative Maintenance Tips:
As a home appliance repair technician, I have seen many instances where simple preventative maintenance could have saved homeowners a lot of time and money. One of the most important things to keep in mind when it comes to your washer is the importance of frequency. Regular cleaning and maintenance will not only help prevent clogs in your washer’s drain, but it can also extend the lifespan of your machine.
One of the signs of a clogged washer that you should be on the lookout for is water pooling in your machine or around it. If you notice that your clothes aren’t getting as clean as they used to, or if you see an increase in lint buildup on your clothes after a wash cycle, these may also be indicators that there is a problem with your washer’s drainage system. Fortunately, there are several preventative measures you can take to avoid these issues.
To prevent clogs from forming in the first place, make sure to regularly remove any debris or lint that has accumulated in your washer’s drain. This can be done by using a lint brush or running hot water down the drain periodically. It’s also important to avoid overloading your machine with too much laundry at once, as this can put additional strain on its drainage system.
When it comes to maintaining your washer, prevention is always easier than cure. By keeping an eye out for any signs of trouble and taking proactive steps to keep your machine clean and functioning optimally, you can save yourself both time and money down the road. In our next section, we’ll discuss when it may be time to call in a professional for assistance.
When To Call A Professional
While DIY methods can be tempting and cost-effective, there are situations where it is best to call a professional for help in draining your washer. One such situation is when the cause of the blockage is not immediately identifiable. Trying to force the water out using DIY methods may only worsen the situation and lead to more costly repairs. Additionally, if the blockage is caused by damaged pipes or plumbing issues, attempting to fix it yourself may result in further damage or injury.
Another factor that may warrant calling a professional is the cost of repair versus replacement. If your washer is an older model or has other underlying issues, it may be more cost-effective to replace it rather than pay for expensive repairs. A professional technician can assess the situation and provide you with an honest recommendation on whether repair or replacement is the best option.
However, if you are confident in your abilities and have identified a simple blockage that can be easily fixed with DIY methods, then these alternatives may save you both time and money. Some common DIY options include using a plunger or drain snake to remove any debris causing the blockage. It’s important to note that these methods should only be attempted if you have experience with plumbing and feel comfortable doing so.
In summary, while DIY options can be effective for draining your washer, there are certain situations where calling a professional is necessary for safety reasons or due to cost considerations. If you decide to attempt DIY methods, make sure you have experience and knowledge about plumbing before proceeding. In the next section, we will discuss common mistakes people make when attempting to drain their washers themselves.
Common Mistakes To Avoid
After understanding when it’s necessary to call a professional, let’s now move on to the common mistakes to avoid when draining a washer. These mistakes can cause severe damage to your appliance and may lead to costly repairs or even replacement.
Common causes of blocked drains include clogs in the hoses, filters, or drain pump. Most of these issues can be easily resolved by checking and cleaning the filter or removing any visible debris from the hoses. However, some problems may require more extensive troubleshooting techniques.
Before attempting any troubleshooting tips, make sure to unplug your washer and turn off the water supply. If you’re unsure about how to resolve an issue, it’s always best to call a professional for assistance. With proper care and maintenance, you can prevent most drainage issues and ensure that your washer runs smoothly for years to come.
Troubleshooting Tips
Draining a washer is a common issue that many homeowners experience. There are various draining options that can be used to solve this problem. The first option is to check the drain hose for any blockages. If there is a blockage, it should be removed, and the hose should be reconnected securely.
The second option is to use gravity to drain the water. This can be done by placing the end of the drain hose into a bucket or sink positioned lower than the washer’s drum. The water will flow out of the washer and into the container through the hose due to gravity.
It is important to note that if not drained properly, water damage may occur. The accumulated water may cause structural damage to your home or lead to mold growth. Therefore, it is crucial to ensure that all water is drained from your washing machine before attempting any repairs or maintenance.
Moving on, let’s take a look at some frequently asked questions regarding draining washers.
Frequently Asked Questions
As you stand in front of your washing machine, you might notice that the water just won’t drain. This can be frustrating, especially if you have a load of laundry waiting to be washed. However, there are some troubleshooting tips that can help you solve this problem.
Common mistakes that people make when trying to drain their washer include not checking the drain hose for blockages and not properly securing the hose to the drain. These issues can cause water to back up into the machine and prevent it from draining properly. To avoid these problems, be sure to inspect the hose regularly and ensure that it is properly connected.
If you’re still having trouble draining your washer after checking for blockages and securing the hose, there may be a more significant issue at play. In this case, it’s best to contact a professional appliance repair technician who can diagnose and fix the problem for you. With their expertise and experience, they’ll be able to identify any underlying issues with your washer and provide effective solutions.
Nested bullet point list:
Troubleshooting Tips:
Check for blockages in the drain hose
Ensure that the hose is properly connected
Frequently Asked Questions:
Q: Why won’t my washer drain?
A: There may be a blockage in the drain hose or an issue with the machine’s internal components.
Q: How can I fix a clogged drain hose?
A: Try running hot water through it or using a plumber’s snake to remove any blockages.
As a home appliance repair technician, I understand how frustrating it can be when your washer won’t drain properly. However, by following these troubleshooting tips and seeking professional help when necessary, you can get your machine up and running again in no time. Remember to check for common mistakes like blocked hoses or improper connections before calling in an expert.
With our subconscious desire to serve others, we aim to provide you with the best possible solutions for your washer problems. Whether you’re dealing with a clogged drain hose or a more complex issue, we’re here to help. By taking a proactive approach and staying on top of maintenance, you can keep your washer running smoothly and avoid costly repairs down the line.
Conclusion
The proper draining of a washing machine is an essential task that every homeowner should know. Failure to do so can lead to serious problems that may require the services of a professional appliance repairman. Identifying the problem, following safety precautions, gathering necessary tools, turning off power and water supply, locating the drainage system, and troubleshooting tips are some of the steps that homeowners must follow.
For instance, Mrs. Johnson noticed that her washer was not draining water properly after she had finished doing laundry. She tried shaking it and even cleaned the lint filter but nothing worked. After following the above steps, she discovered that there was a blockage in the drainage system caused by accumulated debris from clothes. She used a plunger to remove the clog and successfully drained her washer.
In conclusion, knowing how to drain a washer is an essential skill for every homeowner. It saves money on repairs and prevents further damage to the appliance. Following safety measures and taking precautionary steps before attempting any repairs guarantees success without causing severe harm or additional damage. However, if you are unsure or uncomfortable with any step along the way, it’s best to call for professional help rather than risking further damage or injury to oneself or others.
Image Credits
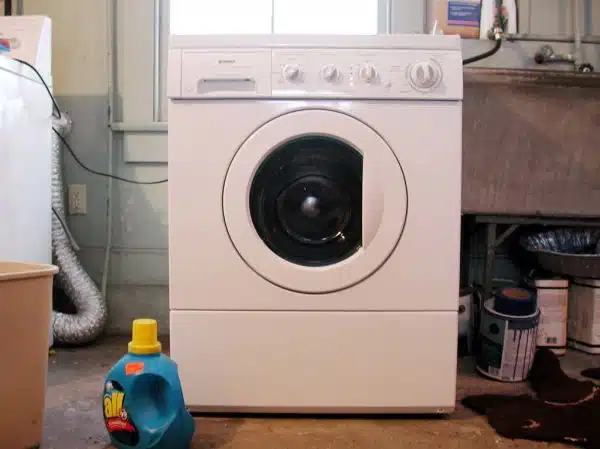
- “Washer” by Editor B (featured)



![How To Get Hair Out Of A Bathtub Drain 8 2/365 [Bathtub Drain]](https://green-life.blog/wp-content/uploads/2023/05/cOEu5edpkejq-150x150.jpg.webp)


![How To Replace A Bathtub Drain In A Mobile Home 19 2/365 [Bathtub Drain]](https://green-life.blog/wp-content/uploads/2023/05/3ft8KAJsNnjq-150x150.jpg.webp)


