As a landscape drainage expert, I have seen the damaging effects of water accumulation on properties. From flooded basements to eroded lawns, poor drainage can wreak havoc on your landscaping and property value. That’s why installing a French drain is an effective solution for redirecting excess water away from your property.
A French drain is a trench filled with gravel and perforated piping that redirects water away from your property. It works by allowing water to flow into the trench and through the perforations in the piping, which then directs it away from your property’s foundation. In this article, we will discuss step-by-step instructions for installing a French drain in your landscaping, so you can protect your investment and enjoy a dry and healthy yard.
Assessing Your Drainage Needs
Rainwater management is an essential aspect of landscape design, and it requires careful planning to achieve optimal results. To ensure that your yard’s drainage system works effectively, you must first assess your drainage needs. The first step in this process is to identify the areas where water tends to accumulate after rain or snow.
Once you have identified these areas, you should evaluate the severity of the drainage problem. Some yards may only require minor adjustments to their existing drainage systems, while others may need a complete overhaul. Factors such as soil type, slope, and proximity to water sources can all affect how water flows through your yard and affect the effectiveness of your drainage system.
To accurately assess your drainage needs, it may be helpful to consult with a professional landscaper or drainage expert. They can provide valuable insights into which solutions will work best for your specific situation and help you create a plan that addresses all of your concerns. By taking the time to assess your needs thoroughly, you can ensure that your French drain installation will be effective and long-lasting.
As you begin preparing for installing a French drain in your landscaping, choosing the right location is crucial for its success. The ideal spot for a French drain is an area where water accumulates frequently or where there is a high risk of flooding. In the next section, we will discuss how to choose the right location for your French drain installation and other factors that can impact its overall effectiveness.
Choosing The Right Location For Your French Drain
As the old saying goes, “an ounce of prevention is worth a pound of cure.” When it comes to landscaping design, this couldn’t be more true. Proper water management is crucial to maintaining a healthy and beautiful yard. Installing a French drain can be an effective solution for redirecting excess water away from your property.
Before you start digging, it’s important to choose the right location for your French drain. Consider the slope of your yard and where water tends to pool during heavy rain. A good spot will allow gravity to do its job and guide water away from your home’s foundation. Avoid areas with underground utilities or roots that could prevent proper drainage.
Once you have determined the ideal location for your French drain, it’s time to gather materials and tools. Here are five items you’ll need:
- Perforated pipe: This allows water to flow into the drain while keeping dirt and debris out.
- Gravel: The pipe should be surrounded by a layer of gravel, which provides additional drainage capacity.
- Landscape fabric: This helps prevent soil from clogging up the gravel or pipe over time.
- Shovel: You’ll need to dig a trench for the drain.
- Level: To ensure that the trench has consistent slope for proper drainage.
Now that you know what materials are needed, it’s time to roll up your sleeves and get started on installing your French drain.
Gathering Materials And Tools
Sourcing materials and gathering essential tools are critical steps in installing a French drain. This ensures that you have everything necessary on hand to complete the project efficiently. Essential materials include landscape fabric, gravel, PVC pipes, fittings, and couplings. You can purchase these materials from your local home improvement store or landscaping supplier.
When sourcing materials, consider the size of your yard and the area that requires drainage. Measure the length of the trench to determine how much material is needed to cover it. Choose high-quality materials that can withstand harsh weather conditions and resist erosion. This will ensure that your French drain lasts for many years without requiring frequent repairs.
In addition to sourcing materials, gathering essential tools is equally important. The necessary tools for installing a French drain include shovels, wheelbarrows, a level, measuring tape, a handsaw or pipe cutter, and safety gear such as gloves and safety glasses. Having all these tools ready before starting work saves time and minimizes interruptions during installation. With all the required tools and materials in hand, you’re now ready to proceed with digging the trench.
Digging The Trench
Just as a painter needs a canvas to create an artwork, so too does a landscaper need the right foundation to create a stunning outdoor space. Part of this process involves installing a French drain in your landscaping. Once you’ve gathered all the necessary materials and tools, it’s time to start digging the trench.
The depth and width of your trench will depend on various factors, such as soil type, climate, and drainage needs. As a general rule of thumb, the trench should be at least 12 inches deep and 6-8 inches wide. However, if you live in an area with heavy rainfall or have clay soil that doesn’t absorb water well, you may need to dig deeper or wider.
It’s important to maintain a consistent depth and width throughout the entire length of the trench. Use a measuring tape or string line to ensure accuracy. A sloping gradient will also be necessary for proper drainage; we’ll discuss this further in the next section. With these guidelines in mind, you’re now ready to start digging your trench with confidence and precision.
Creating A Slope For Proper Drainage
Proper grading is crucial when it comes to creating a slope for proper drainage in your landscaping. This is because water naturally flows downhill, meaning that the ground must be graded in such a way that water will flow away from your home or other structures. To create this slope, you can use a variety of tools, including a transit level or laser level.
Before you begin grading your landscape, it’s important to have a solid landscaping design plan in place. This should include an understanding of the natural topography of your property, as well as any existing drainage features. You’ll also need to take into account any future plans for landscaping changes or additions that may impact the overall grade of your property.
Once you have a solid plan in place, it’s time to begin grading your landscape. This typically involves removing excess soil and debris from high areas and redistributing it to lower areas. It’s important to take your time during this process and ensure that the grade is consistent across the entire area where you plan to install your French drain. By taking these steps and planning ahead, you can create an effective slope for proper drainage in your landscaping design.
To continue with the installation process, the next step after creating a proper slope would be laying the filter fabric.
Laying The Filter Fabric
When installing a French drain, the filter fabric should be chosen carefully. It should be permeable, durable, and resistant to UV damage. The surface should be prepared prior to laying the fabric, by removing any vegetation and using a rake to level the soil. Once the surface is ready, the fabric should be cut to fit and placed over the trench. If necessary, it should be secured in place with nails or stakes. Finally, the edges should be tucked under to prevent the fabric from being displaced.
Choosing The Fabric
Installing a French drain is an efficient way to manage water runoff in your landscaping. It involves creating a trench filled with gravel and covered by filter fabric, which allows water to flow through while preventing dirt and debris from clogging the system. Choosing the right filter fabric for your French drain is essential for its long-term effectiveness.
There are different types of filter fabrics available in the market, each with its advantages and disadvantages. The most commonly used filter fabrics are made of polypropylene or polyester materials, which are durable and resistant to UV rays. However, some homeowners opt for non-woven geotextiles that are stronger but more expensive than woven fabrics.
When comparing costs, it’s important to consider the overall quality of the fabric rather than just the initial price tag. Cheaper options may save you money initially but may not last as long as higher-priced ones, leading to costly repairs in the future. Therefore, investing in a high-quality filter fabric will ensure your French drain functions optimally and lasts longer without requiring frequent maintenance or replacement.
Preparing The Surface
Before laying the filter fabric in your French drain, it’s essential to prepare the surface properly. A crucial step in this process is measuring the incline of the land to ensure proper drainage. This can be done using a level or a laser level to determine the slope of the land and identify any low spots that need attention. Surface preparation also includes removing any debris, rocks, or plants that could obstruct water flow and cause clogging in the system.
Another critical aspect of preparing your surface is waterproofing it before laying down the filter fabric. The last thing you want is for water to seep into your basement or foundation, causing damage and costly repairs. To prevent this, experts recommend using a waterproofing membrane or coating on the surface before installing the French drain. This membrane can be applied using a brush or roller and should cover all areas where water might enter.
Once you have measured and waterproofed your surface, you are now ready to lay down your filter fabric for your French drain. Remember that choosing high-quality filter fabric is essential to ensure long-term efficiency and avoid frequent maintenance costs. Properly preparing your surface will help ensure optimal functioning of your French drain and provide effective management of water runoff in your landscaping.
Securing The Fabric
As a landscape drainage expert, I cannot emphasize enough the importance of properly securing the filter fabric in your French drain. Choosing the right type of fabric is just half the battle; you must also secure it correctly to ensure optimal functioning and longevity of your drainage system.
There are different types of filter fabric available in the market, but they all serve the same purpose: to prevent soil particles from entering and clogging up your drain pipes. Non-woven geotextile fabric is commonly used for French drains because it has high water permeability and excellent filtration properties. Woven fabrics, on the other hand, may have better strength and durability but may not be as effective in filtration. Regardless of which type you choose, make sure it meets industry standards and is suitable for your specific application.
Once you have chosen your filter fabric, it’s time to secure it properly. Start by laying it out flat over the prepared surface, making sure there are no wrinkles or folds that can compromise its effectiveness. Next, fold back one side of the fabric and dig a shallow trench along that edge. Then, place a few inches of gravel or crushed stone over that side to hold down and anchor the fabric securely. Repeat this process on the opposite side until you have fully secured your filter fabric in place.
Adding Gravel To The Trench
After excavating the trench for your French drain, it is time to add gravel to the trench. This layer of gravel serves as a filter and provides a pathway for water to flow into the perforated pipe. Gravel selection is an important consideration when installing a French drain. The ideal size for the gravel should be between 0.5 and 1 inch in diameter, with sharp edges that interlock together when compacted.
Proper placement of the gravel is essential for the proper functioning of your French drain. Start by adding a layer of gravel at least 2 inches deep at the bottom of the trench. Then, add another layer on top of that, making sure to spread it evenly across the entire length of the trench. Make sure not to overfill the trench with gravel; you want enough space left over so that you can lay down your perforated pipe without any issues.
When selecting your gravel, consider using pea gravel or river rock instead of crushed stone or limestone. Pea gravel and river rock do not pack down as tightly as crushed stone or limestone, which makes them more effective at filtering water and allows for better drainage. Additionally, they tend to be more visually appealing and can blend in better with natural surroundings.
Now that you have properly placed your layer of gravel in the trench, it’s time to move on to laying down the perforated pipe. This step is critical in ensuring that your French drain operates effectively and efficiently.
Laying The Perforated Pipe
The next step in installing a French drain is laying the perforated pipe. The pipe placement is crucial as it determines the drainage efficiency of the system. When placing the pipe, ensure that it’s sloped at least 1% (1/8 inch per foot) to allow for proper water flow.
The perforated pipe should be placed at the bottom of the trench on top of a layer of gravel, with another layer of gravel added around and on top of it. This will help to filter any sediment or debris that may enter the system and prevent clogging. Additionally, make sure that the perforations on the pipe are facing downwards to enable maximum water collection from all sides.
Properly laying out the perforated pipe is essential for an effective French drain system. In doing so, you’ll guarantee that water flows efficiently through your drainage system, leaving your landscape free from excess moisture. The next step involves connecting the various sections of pipes to complete your French drain installation process without any hitches.
Connecting The Pipe Sections
Gathering materials for a French drain installation requires the use of perforated pipes, gravel, soil, and filter fabric. Connecting the pipes for the French drain should be done by joining them together with couplings and adhering to the local building codes for drainage systems. Additionally, the gravel should be placed around the pipes in order to provide stability when the soil is put back into place. Finally, filter fabric should be placed over the gravel to prevent clogging of the drain.
Gathering Materials
When it comes to installing a French drain, gathering the appropriate materials is crucial for a successful installation. Cost estimation is an important factor in this process as it will determine the type and quality of materials used. It’s essential to consider material alternatives that are cost-effective yet durable for long-term use.
One of the most significant expenses in a French drain installation is the pipe sections. These pipes come in various diameters and materials such as PVC, corrugated plastic, and metal. PVC pipes are commonly used due to their durability and resistance to corrosion, but they can be costly. Corrugated plastic pipes are a cheaper alternative that works well for smaller projects or temporary installations. Metal pipes are also an option, but they tend to corrode over time and require replacement.
Aside from pipe sections, other necessary materials include landscape fabric, gravel or crushed stone, and fittings for connecting the pipe sections. Landscape fabric prevents soil from clogging up the drainage system while gravel or crushed stone provides a stable base for water collection. Fittings such as couplings and elbows ensure secure connections between pipe sections.
In summary, gathering appropriate materials is vital in installing a French drain successfully. Cost estimation plays a significant role in determining which materials to use, while considering material alternatives can help save on expenses without compromising quality. Pipe sections, landscape fabric, gravel or crushed stone, and fittings are among the necessary materials needed for installation.
Connecting The Pipes
Connecting the pipe sections is a crucial step in installing a French drain system. Proper connections ensure that water flows smoothly through the drainage system, preventing clogs and backups. To connect the pipes, fittings such as couplings and elbows are used to create secure joints. It’s essential to choose high-quality fittings that can withstand the pressure of water flow.
Pipe insulation is another important consideration when connecting the pipes. Insulating the pipes helps prevent them from freezing during cold weather, which can cause damage to the drainage system. Additionally, insulating the pipes reduces noise from water flowing through them. There are several types of pipe insulation available, including foam sleeves and fiberglass wrap.
To maintain proper drainage function, regular maintenance is necessary. This includes cleaning out any debris or sediment that may accumulate in the drainage system over time. Checking for leaks and ensuring that all connections are tight should also be part of routine maintenance procedures. By following these tips, property owners can ensure their French drain systems remain effective for years to come without experiencing any major issues or costly repairs down the line.
Covering The Pipe With Gravel
The next step in installing a French drain is to cover the pipe with gravel. Using the proper size of gravel is essential for ensuring that water flows through the drainage system effectively. A good rule of thumb is to use ¾ inch to 1-inch washed round stones, which are commonly found at landscape supply stores.
Before adding the gravel, it is important to lay down drainage fabric over the pipe. This fabric will help prevent soil and debris from clogging up the drainage system and ensure that water flows freely through the pipe. It is crucial to use high-quality drainage fabric for this purpose, as cheaper alternatives may not be as effective.
Once you have laid down the drainage fabric, you can add a layer of gravel on top of the pipe. The gravel should be spread evenly, creating a layer that is approximately 2-3 inches deep. Be sure not to overfill with gravel, as this can cause water to flow back into your landscaping instead of being directed away from your property. In the next section, we will discuss how to add more filter fabric over this layer of gravel for added protection against clogs and debris buildup in your French drain system.
Adding More Filter Fabric
After covering the perimeter of the french drain with gravel, it’s time to add another layer of filter fabric. This step is crucial because it prevents soil and debris from entering the drain and clogging it. There are different types of filter fabric available in the market, but make sure to choose one that is designed for landscaping purposes. The most commonly used filter fabrics are made from polyester or polypropylene materials.
When installing a french drain without filter fabric, there will be a higher risk of clogging due to soil and debris accumulation over time. Therefore, it’s highly recommended to use filter fabric during installation. Moreover, using filter fabric ensures that water flows smoothly through the drain without any obstructions. It also provides an extra layer of protection against root intrusion.
In summary, adding another layer of filter fabric after covering the pipe with gravel is an essential step in installing a french drain in your landscaping. Choose a high-quality filter fabric made from polyester or polypropylene materials for best results. Installing without filter fabric will result in higher risks of clogging and root intrusion. In the next section, we’ll discuss backfilling the trench around the french drain for optimal drainage efficiency.
Backfilling The Trench
As we move forward in our guide on how to install a French drain in your landscaping, the next crucial step is backfilling the trench. Backfilling techniques will vary depending on factors such as soil type and drainage requirements. It is essential to ensure proper soil compaction during the process to avoid significant issues such as sinkholes and instability.
Before starting the backfilling process, it is crucial to remove any excess debris or sharp objects from the trench bottom. This step will prevent damage to the drain’s perforated pipe and ensure that water flows freely through it. Once this is done, add a layer of gravel at the bottom of the trench for better drainage.
Next, you can start backfilling around the pipe with soil while ensuring proper compaction at each layer. Use a compacting tool like a tamper or plate compactor to compress each layer of soil before adding another one. Repeat this process until you reach ground level or desired height above the pipe. Properly backfilled trenches are critical in ensuring your French drain system functions effectively for years without any problems.
As we have seen, proper backfilling techniques are essential in ensuring that French drains operate efficiently and effectively. The use of compacted soil layers during installation provides stability, prevents sinkholes and ensures that water flows freely through the perforated pipes. With these steps complete, we can proceed to create a drain outlet which will be covered in our subsequent section.
Creating A Drain Outlet
After backfilling the trench, the next crucial step in installing a French drain is designing and creating a drain outlet. The drain outlet is where excess water will be released from your drainage system. Designing an outlet will depend on your landscaping’s topography and water flow patterns. You can choose to discharge the excess water underground, into a dry well or rock-filled basin, or onto the surface with a pop-up emitter.
Maintaining your drain outlet is essential to ensure that it remains functional and efficient. Regularly inspect for debris build-up that could clog the system, especially after heavy rains or storms. If you notice any blockages, clear them immediately to prevent any damage to your drainage system. Additionally, ensure that your outlet is correctly positioned to prevent erosion of soil around it.
When designing and maintaining your French drain’s outlet, consider these three essential factors:
- Proper location: Ensure that you place the outlet in an area where it won’t cause any harm to the environment.
- Adequate sizing: Your French drain’s capacity should match the amount of water being discharged.
- Suitable materials: Consider using durable materials such as PVC or corrugated plastic for longevity.
By following these tips when designing and maintaining your French drain’s outlet, you can guarantee that your landscaping stays free from water damage and flooding issues in the future. Next up is testing your French drain’s functionality to ensure that it works efficiently.
Testing Your French Drain
Imagine you’ve spent hours digging trenches, laying pipe, and backfilling your French drain. You feel accomplished and relieved that the project is finally over. But before you pat yourself on the back, imagine if a storm hits and water starts pooling around your house. Your French drain might not be working as expected, and all your hard work will have gone to waste.
To avoid this situation, testing methods are critical to ensure that your French drain is working effectively. One method is to fill the trench with water and observe how quickly it drains away. If it takes more than 24 hours for the water to disappear, then there may be an issue with your system’s slope or clog in the pipes.
Troubleshooting tips can help you identify any problems with your installed French drain. If you notice standing water in areas where it’s not supposed to be after heavy rainfalls or see soil erosion near the drainage area, there may be a problem with your installation. Checking for clogs in pipes using a plumbing snake or flushing out debris with a garden hose can help prevent future issues.
As essential as testing and troubleshooting are when installing a French drain successfully, maintaining them is just as vital. In the next section, we will discuss ways of keeping up with regular maintenance practices to ensure that your French drain continues to serve its purpose effectively while also preventing costly repairs down the road.
Maintaining Your French Drain
Proper maintenance of your French drain is essential to ensure its optimal performance. Preventing clogs is the first step in maintaining your drainage system. Regularly inspect the area around the drain and remove any debris, such as leaves or small twigs, that could obstruct water flow. You may also consider installing a filter fabric or mesh over the top of the drain to prevent larger objects from entering and clogging it.
Seasonal maintenance is also crucial for keeping your French drain functioning correctly throughout the year. During autumn, make sure to remove fallen leaves regularly as they can accumulate and create blockages in your drainage system. In winter, clear any snow that has accumulated around the drain to prevent ice buildup which can impede water flow during spring thaw. Finally, during spring and summer, check for any signs of erosion around the drain’s perimeter and repair it promptly to avoid further damage.
Remember that proper maintenance is key to preventing costly repairs or replacements down the line. Taking care of your French drain will not only extend its lifespan but also ensure that it functions efficiently during heavy rains or other adverse weather conditions. By following these simple steps for preventing clogs and performing seasonal maintenance, you can enjoy a functional and reliable drainage system for years to come.
Conclusion
Installing a French drain in your landscaping can seem like a daunting task, but with the right tools and knowledge, it can be done successfully. As a landscape drainage expert, I recommend starting by assessing your drainage needs and choosing the right location for your French drain. This will help ensure that you are addressing the root of the problem and creating an effective solution.
Once you have gathered materials and tools, you can begin digging the trench for your French drain. It is important to create a slope for proper drainage and backfill the trench with gravel or other porous material. Creating a drain outlet and testing your French drain are also crucial steps in ensuring its effectiveness. By properly maintaining your French drain, you can prevent future drainage issues in your landscaping.
In conclusion, installing a French drain may seem like a daunting task, but by following these steps and taking care to assess your specific needs, it is possible to create an effective solution to improve drainage in your landscaping. Remember that just like any other aspect of landscaping or home maintenance, regular upkeep is key to preventing future issues. As the saying goes, an ounce of prevention is worth a pound of cure – so take the time to install and maintain your French drain properly to save yourself from costly repairs down the line.
Image Credits
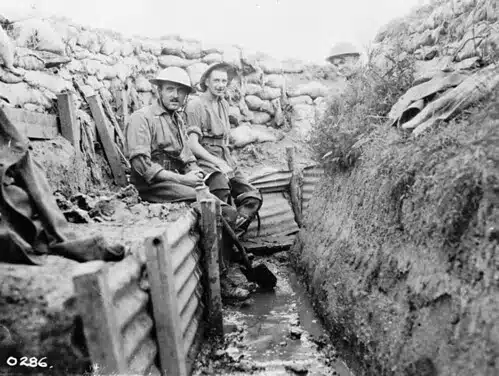
- “The 22nd (French Canadian) Battalion draining trenches, July 1916 / Le 22e Bataillon (canadien français) draine les tranchées en juillet 1916” by BiblioArchives / LibraryArchives (featured)










![How To Get Hair Out Of A Bathtub Drain 14 2/365 [Bathtub Drain]](https://green-life.blog/wp-content/uploads/2023/05/cOEu5edpkejq-150x150.jpg.webp)







![How To Replace A Bathtub Drain In A Mobile Home 25 2/365 [Bathtub Drain]](https://green-life.blog/wp-content/uploads/2023/05/3ft8KAJsNnjq-150x150.jpg.webp)
