Self-piercing saddle valves are a plumbing solution that provides an easy way to tap into existing water lines, without the need for complex tools or extensive knowledge. These valves are commonly used in various applications such as installing ice makers, drinking water filtration systems, and humidifiers. However, installing a self-piercing saddle valve requires proper technique and understanding of the plumbing system to avoid damaging it.
As a plumbing technician, it is crucial to have a comprehensive understanding of how to install a self-piercing saddle valve correctly. This article aims to provide step-by-step instructions on how to install this type of valve safely and efficiently. With these guidelines, homeowners can confidently take on this DIY project and save themselves from costly professional services while ensuring that their plumbing system stays intact.
Assessing Your Plumbing System
Imagine waking up one day and finding out that your kitchen faucet has stopped working. Upon closer inspection, you realize that your refrigerator’s water line is leaking, and you need to install a self-piercing saddle valve. Before embarking on the installation process, it is essential to assess your plumbing system and evaluate the feasibility of installing the valve.
A self-piercing saddle valve is a fitting that taps into an existing water supply line without requiring any cutting or soldering. However, these valves are not suitable for all plumbing systems as they may cause damage to pipes or create leaks. Therefore, before purchasing a valve, it is crucial to examine your plumbing system and determine whether a self-piercing saddle valve is compatible with your setup.
If you are unsure about assessing your plumbing system’s compatibility with a self-piercing saddle valve or have concerns about damaging pipes or causing leaks, it may be best to seek professional assistance. A licensed plumber can evaluate your plumbing system and advise you on whether installing a self-piercing saddle valve is feasible. This assistance can save you time, money, and potential headaches down the road.
With an assessment of your plumbing system complete, it’s time to move onto gathering the necessary tools and materials for installing a self-piercing saddle valve.
Gathering The Necessary Tools And Materials
To install a self-piercing saddle valve, you need to gather the necessary tools and materials. First, you need to identify the type of valve that is most suitable for your needs. There are different types of valves available, including ball valves, gate valves, and globe valves.
When it comes to self-piercing saddle valves, they are a popular choice due to their ease of installation. They are designed to puncture through the pipe’s surface without requiring any special tools or equipment. However, there are pros and cons to using these types of valves. One advantage is that they are relatively inexpensive and readily available in most hardware stores. On the downside, they can restrict water flow and may not provide a secure connection over time.
Overall, installing a self-piercing saddle valve requires careful consideration and attention to detail. It is important to understand the advantages and disadvantages of this type of valve before making a decision. In the next section, we will discuss how to shut off the water supply before proceeding with the installation process.
Shutting Off The Water Supply
After gathering all the necessary tools and materials, it’s important to shut off the water supply before installing a self-piercing saddle valve. Shutting off the water correctly is crucial to avoid any potential risks when installing the valve. If you don’t shut off the water properly, you risk causing damage to your plumbing system or even injuring yourself.
One of the main risks of not shutting off water properly is that it can cause leaks in your plumbing system. This can lead to costly repairs and even damage to your home if left unchecked. Additionally, if you attempt to install a self-piercing saddle valve without shutting off the water, you risk causing serious injury due to high-pressure water flow.
To ensure that you shut off the water correctly, follow these steps:
- Locate the main shutoff valve for your home’s water supply
- Turn the handle on the shutoff valve clockwise until it stops
- Open a faucet in your house to release any remaining pressure in the pipes
By following these steps, you can be sure that you have completely shut off the water supply before installing a self-piercing saddle valve. In the next section, we will discuss how to locate the water line so that you can proceed with installation.
Locating The Water Line
Before installing the self-piercing saddle valve, it is important to locate the water line. This can be done by measuring the distance from a known point where the water line enters the house and using a pipe locator. It is essential to find the right location to prevent any damage to the water line or other pipes in your home.
Measuring distance is an important aspect of locating your water line. Start by finding where the water supply enters your home, this could be a basement or crawl space. Measure the distance from that point to where you want to install the saddle valve. Make sure you measure accurately to avoid any errors in installation.
Using a pipe locator will help determine where your water line is located inside your walls. This tool is specifically designed to detect metal pipes through walls and floors, making it easier for plumbers and homeowners alike to locate their pipes without causing unnecessary damage. With these tools, you can accurately locate your water line and begin installing your self-piercing saddle valve safely.
To ensure proper installation of your self-piercing saddle valve, cleaning the area around its installation is crucial. A clean surface ensures that there are no contaminants that may interfere with its functionality after installation. In addition, cleaning also helps remove any debris that may obstruct access during installation, making it easier for plumbers and homeowners alike to work safely and efficiently.
Cleaning The Area For Installation
Before installing a self-piercing saddle valve, it is essential to prepare the area adequately. The first step is choosing the right location for the valve. It should be positioned on the water supply line that feeds the appliance you want to connect. A general rule of thumb is to place it at least six inches above and below any horizontal part of the pipe to avoid turbulence in the water flow.
Once you have identified the location, clean the area thoroughly. Use a clean cloth or rag to wipe away any dirt, debris, or moisture from around the pipe. This ensures that there is no interference between the valve and the pipe, which could cause leaks or damage over time. Proper disposal of debris is also crucial as it prevents clogs or obstructions in your plumbing system.
Additionally, make sure that there are no obstructions around the area where you intend to install your self-piercing saddle valve. Clear out any objects or clutter that might get in your way during installation. This will save you time and ensure that you complete your work efficiently and safely. With all these preparations done, you can now move on to positioning your self-piercing saddle valve onto your water supply line without any hindrances.
Moving forward with positioning your self-piercing saddle valve onto your water supply line requires patience and precision. Placing it too tight can cause leaks, while placing it too loose can result in a lack of proper connection causing inefficient water flow throughout your home’s plumbing system. Therefore, take extra care when fitting and tightening your self-piercing saddle valve onto your water supply line by following all manufacturer’s instructions closely before moving onto testing for possible leakages later on in this process.
Positioning The Valve
After cleaning the area for installation, it is important to ensure that the valve you are using is of proper size. This is essential in order for the valve to function efficiently and effectively. Before proceeding with the installation process, make sure that you have chosen a self-piercing saddle valve that fits the size of your pipe.
Once you have confirmed the appropriate sizing of your valve, it’s time to take safety precautions before starting the installation process. Make sure to wear protective clothing such as gloves and goggles, as well as having a fire extinguisher nearby in case of emergencies. It is also recommended to turn off the water supply before going any further with the installation process.
After taking all necessary safety precautions, proceed with positioning your valve accurately. The purpose of positioning is to ensure that there are no leaks or damage during installation. Proper positioning is achieved by aligning and centering your valve correctly on top of your pipe. By doing so, you are preparing yourself for drilling a hole at an optimal location without causing any harm or damages to your pipes or valves.
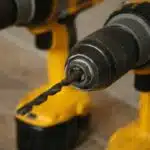
Preparing The Drill
- To prepare the drill, the necessary materials should be gathered, such as a self-piercing saddle valve, a tape measure, and a marker.
- The size of the pipe should be accurately measured before proceeding.
- The measurement should be noted with the marker on the pipe.
- A drill bit can then be used to create a hole in the pipe.
- The self-piercing saddle valve should then be inserted into the hole.
- The valve should be tightened and checked for any leaks.
Gather Materials
To install a self-piercing saddle valve, the first step is to gather all necessary materials. As a plumbing technician, it is crucial to ensure that you have everything you need before starting the job. Choosing the right valve size is important, as using the wrong size can lead to leaks and other complications. It is recommended to use a valve that matches the size of your water line.
Once you have your valve, it’s time to prepare the drill. Proper valve positioning is key in ensuring that your installation will be successful. The valve should be installed on a straight section of pipe with enough space around it for easy access and maintenance. It’s important to avoid installing the valve near any sharp bends or angles in the water line.
In addition to choosing the right size and positioning of your valve, make sure you have all necessary tools such as pliers, screws, and a drill bit before beginning installation. Taking time to properly prepare for this project will save time and frustration in the long run and ensure a successful installation of your self-piercing saddle valve.
Measure Pipe
Ensuring measuring accuracy is crucial in the installation process of a self-piercing saddle valve. As a plumbing technician, it is vital to measure the diameter of the pipe correctly to ensure that you choose the right size of valve. Using an incorrect size can result in leaks, damage to your water line, and other problems. Therefore, it’s essential to use proper tools such as a tape measure or calipers to measure accurately.
Choosing the right size of self-piercing saddle valve for your water line is also key in successful installation. The size of your valve should match that of your water line. After measuring the diameter of your pipe accurately, select a valve that corresponds to its size. Failure to choose the right size may lead to complications during installation, which may require additional time and resources.
In summary, measuring accuracy and choosing the right size are critical steps in preparing the drill before installing a self-piercing saddle valve. As a plumbing technician, it’s important to take these steps seriously to avoid any complications during installation. By taking accurate measurements and selecting the appropriate valve size, you’ll be on your way towards a successful installation that provides reliable access and maintenance for your water supply system.
Mark Pipe
The next step in preparing the drill for installation is to mark the pipe where the self-piercing saddle valve will be installed. As a plumbing technician, you need to ensure that you mark the right spot on the pipe accurately. First, locate and measure the diameter of your water line using a tape measure or calipers. This step is crucial because it helps you determine where to install the valve and how much pressure is required. Once you have measured accurately, use a marker or pencil to make an X on the spot where you will drill.
Marking the pipe correctly ensures that you avoid drilling through any critical components, such as electrical wires or gas lines. Additionally, it saves time by preventing unnecessary drilling on other spots and avoids creating multiple holes in your pipes that may lead to leaks and damage. After marking, double-check your measurements and ensure that they correspond with those of your chosen valve size.
In conclusion, marking your water line precisely is crucial in preparing your drill for installation of a self-piercing saddle valve. By measuring diameter accurately and choosing an appropriate valve size, you can mark the right spot on your pipe without damaging any critical components. This step saves time and resources while ensuring that your water supply system remains reliable and efficient over time.
Drilling Into The Pipe
Drilling a hole into a pipe requires skill and precision to avoid damaging the pipe or causing leaks. Before drilling, it is important to ensure that the pipe’s material can withstand drilling without breaking or cracking. For instance, PVC pipes may not be suitable for drilling as they are prone to cracking under pressure. Once you have verified that the pipe can be drilled, proceed with caution.
The drilling technique involves using a drill bit that is slightly smaller than the saddle valve’s diameter. Begin by marking the area where you want to drill using a pencil or marker. Then, secure the drill bit onto your power drill and make sure it is tightly fastened. To avoid damaging the pipe, start drilling slowly and gently increase speed as you go deeper into the pipe. It is essential to maintain a steady hand and consistent pressure while drilling.
Safety precautions must be taken when drilling into pipes as there is a risk of injury from flying debris or metal shavings. Wear protective gear such as safety goggles and gloves while working with power tools. Additionally, ensure that there are no flammable materials in close proximity to your work area to prevent accidental fires caused by sparks from the drill bits.
Now that you have successfully drilled a hole in your pipe, you are ready to move on to installing the self-piercing saddle valve. With these safety precautions in mind, follow our guide closely for seamless installation of your new valve without any complications.
Installing The Valve
After successfully drilling into the pipe, the next step is to install the valve. This process involves using a self-piercing saddle valve, which is designed to create a hole in the pipe and connect to it simultaneously. To begin, position the valve on the pipe and tighten it until it pierces through. It is crucial to ensure that the valve is placed at a suitable location where there are no obstructions or bends.
Common mistakes that people make when installing self-piercing saddle valves include placing them too close together or too far apart from each other. It is also important not to over-tighten the valve as this could damage the pipe. Another mistake is failing to clean both surfaces before installation, which can result in leaks. Troubleshooting tips for these issues involve checking for any visible leaks once installation is complete and making necessary adjustments.
After piercing through the pipe with the self-piercing saddle valve, tightening the compression nut is essential to secure it in place. It is important not to overtighten this nut as doing so may damage or break it. Instead, turn it until you feel resistance and then add an extra quarter turn. Once tightened, check for any leaks by turning on the water supply and inspecting all connections thoroughly. If there are no leaks, then your installation was successful!
Tightening The Compression Nut
Once the self-piercing saddle valve has been installed, it is important to check the tightness of the compression nut. This nut is responsible for holding the valve in place and ensuring that there are no leaks in the water supply system. To do this, use a wrench to carefully tighten the compression nut until it feels snug. Be careful not to over-tighten it, as this can cause damage to both the valve and the pipe.
When checking tightness, it is essential to avoid over tightening as this can lead to serious problems down the line. Over-tightening can strip threads on either side of the valve or pipe and cause leaks. Additionally, over-tightening can warp or crack plastic pipes, leading to costly repairs and potential water damage. Always use care when tightening any plumbing components.
Once you have tightened the compression nut to an appropriate level, you can move on to turning on the water supply. This is an exciting moment as you get to see your work come to fruition! However, before doing so, make sure all connections have been properly secured and that there are no visible leaks or issues with your installation. In the next section, we will discuss how to safely turn on and test your newly installed self-piercing saddle valve.
Turning On The Water Supply
After installing the self-piercing saddle valve, it is important to turn on the water supply. However, before doing so, it is crucial to emphasize the importance of safety. Ensure that all power sources are turned off before turning on the water supply to avoid any electrical hazards. Additionally, make sure that all connections are secure and free from leaks.
One common mistake to avoid when turning on the water supply is opening the valve too quickly. This can create a surge in pressure, which may cause damage to the pipe or fittings. Instead, open the valve slowly and gradually increase the flow until it reaches its maximum level. This will prevent any sudden surges in pressure and ensure that everything operates smoothly.
Another common mistake is not checking for leaks after turning on the water supply. It is important to inspect all connections for any signs of leakage before resuming normal use of your plumbing system. Any leaks should be addressed immediately to prevent further damage and potential hazards.
Transition: Now that you have turned on the water supply safely and effectively, it’s time to check for any leaks in your newly installed self-piercing saddle valve.
Checking For Leaks
After successfully installing a self-piercing saddle valve, it is important to check for leaks to ensure that the installation was done correctly. Leak prevention is crucial in maintaining the overall efficiency of your plumbing system. A leak can cause water damage to your property and lead to costly repairs.
To check for leaks, turn on the water supply and observe the valve and surrounding pipes for any signs of moisture. If there are no visible leaks, use a dry tissue or paper towel to wipe down the areas around the valve and pipes. If there is any dampness on the tissue, it could indicate a small leak that needs to be addressed immediately.
Troubleshooting leaks may involve tightening connections or replacing faulty components. It is important to identify the source of the leak before making any repairs. If you are unsure about how to fix a leak, it is always best to consult with a professional plumber who can provide expert advice and assistance.
Before securing the valve in place, it is essential to ensure that there are no leaks present. Taking this extra step will save you time and money by preventing potential damage caused by unaddressed leaks. In the next section, we will discuss how to secure the valve properly to complete your installation process.
Securing The Valve In Place
- A self-piercing saddle valve needs to be installed in order to provide water to a new appliance.
- The first step in this process is to use a drill bit to cut a hole in the pipe.
- The valve must then be fitted onto the pipe, making sure that the valve is positioned at a 90 degree angle.
- The valve should then be secured in place by using a pipe clamp to hold the valve in the desired location.
- Screws can then be used to further secure the valve onto the pipe.
- All connections must be checked for any signs of leakage before the valve is deemed secure.
Cutting The Hole
Cutting the hole is a crucial step in securing a self-piercing saddle valve in place. Before cutting, it is important to gather all necessary tools and materials such as a drill, tape measure, pencil, and safety glasses. Proper cutting techniques should be employed to ensure that the hole is precise and free from any damage.
Safety precautions must also be observed when cutting the hole. Safety glasses should always be worn to protect the eyes from flying debris. The area where the hole will be cut should also be cleared of any obstructions and people to avoid accidents or injuries. Care should also be taken not to drill too deep or too close to other pipes or wires.
After carefully measuring and marking the spot for the hole, drilling can now commence. A small pilot hole should first be made before gradually increasing its size with larger drill bits until it reaches the required diameter for the saddle valve. After drilling, debris should be removed from the area before inserting and securing the valve in place. By following proper cutting techniques and safety precautions, installing a self-piercing saddle valve can be done effectively and efficiently without any accidents or damage.
Fitting The Valve
After successfully cutting the hole, fitting the valve is the next important step in securing it in place. Proper sizing of the valve is crucial to ensure a tight and leak-free fit. The valve should fit snugly into the hole without any gaps or spaces around its edges. If there are any irregularities or gaps, it may cause leaks and damage to the surrounding pipes.
Tightening technique is also an important factor to consider when fitting the valve. It should be tightened just enough to create a secure seal but not too much that it damages the pipe or causes it to crack. A wrench or pliers can be used to tighten the valve, but caution should be taken not to over-tighten it. It is also recommended to use Teflon tape on the threads of the valve before tightening it for added protection against leaks.
Overall, proper sizing and tightening technique are essential in fitting a self-piercing saddle valve securely in place. By following these guidelines and taking care not to damage other pipes or wires, one can effectively install a saddle valve without encountering any issues or complications in the future.
Securing The Valve
As a plumbing technician, securing the valve is an essential step in installing a self-piercing saddle valve. There are different types of saddle valves available, but regardless of the type, improper installation can lead to leaks and damage to surrounding pipes. When securing the valve in place, it is crucial to avoid common mistakes that may cause issues in the future.
One common mistake when securing a saddle valve is over-tightening. This can cause the pipe to crack or damage other wires and pipes nearby. It is important to use a wrench or pliers to tighten the valve just enough to create a secure seal without causing any damage. Another mistake that should be avoided is not using Teflon tape on the threads of the valve before tightening it. Teflon tape provides added protection against leaks and ensures a tight fit.
To properly secure the valve, it should fit snugly into the hole without any gaps or spaces around its edges. Proper sizing of the valve is crucial for a leak-free fit and avoiding further complications down the line. By following these guidelines and taking care not to damage other pipes or wires, one can effectively install a saddle valve without encountering any issues in the future.
Testing The Valve
After installing the self-piercing saddle valve, it is important to test its effectiveness before using it for any purpose. Testing the valve will ensure that it is functioning properly and there are no issues that need to be addressed.
To test the valve, turn on the water supply and check for any leaks around the valve or in the surrounding area. If there are leaks present, troubleshoot the issue by tightening any loose connections or replacing damaged parts.
Another way to test the effectiveness of the self-piercing saddle valve is by running water through it and checking for proper flow. If there is insufficient water flow or pressure, troubleshoot by checking for clogs or blockages in the pipe leading up to the valve.
Testing and troubleshooting issues with a self-piercing saddle valve will ensure that it is safe to use and functioning as intended. Once testing is complete, move on to cleaning up the area around the installation site.
Cleaning Up The Area
As we have finished testing the valve, it is time to move on to the next step of installing a self-piercing saddle valve. Before we start, let me illustrate the importance of choosing a cleaner and preparing the surface with an analogy. Just like our bodies need proper cleaning and preparation before getting a needle injection, pipes also require thorough cleaning and preparation for a successful installation.
Choosing a cleaner is crucial as it ensures that the surface is free from grease, dirt, and other debris that might interfere with the valve’s sealing ability. There are various types of cleaners available in the market, such as mineral spirits, rubbing alcohol, or vinegar solution. Depending on your pipe’s material and condition, one must select a suitable cleaner that does not cause any damage or corrosion to the pipe.
After selecting the appropriate cleaner, it is essential to prepare the surface by wiping it clean using a rag or sponge. Ensure that there are no traces of cleaner left behind before proceeding with the installation process. Once you have thoroughly cleaned and prepared the surface for installation, you can proceed with mounting your self-piercing saddle valve as per instructions.
Remember that proper cleaning and preparation are crucial for any plumbing job’s success. Skipping this step might result in leaks or other complications down the line. So take your time and ensure that everything is adequately cleaned and prepped before beginning any installations or repairs.
Conclusion
Assessing your plumbing system is the first step in installing a self-piercing saddle valve. You need to identify the location of the water line and ensure that it is suitable for installation. The next step is to gather all the necessary tools and materials, including a self-piercing saddle valve, tubing cutter, adjustable wrench, and Teflon tape.
Once you have everything you need, shut off the water supply and clean the area where you will be installing the valve. After securing the valve in place, test it to make sure there are no leaks. Finally, clean up the area and dispose of any waste materials appropriately.
In conclusion, installing a self-piercing saddle valve may seem like a daunting task, but with proper preparation and safety precautions, it can be done quickly and efficiently. Remember to follow each step carefully and check for any leaks before finishing up. By doing so, you will have peace of mind knowing that your plumbing system is working correctly. As they say in our profession: “Measure twice, cut once.”
Image Credits
- “Breathe neon signage” by Tim Goedhart (featured)


