As a power drill expert, I am often asked about the best practices for using this versatile tool. A power drill is an essential tool in any DIY enthusiast’s toolkit and can serve multiple purposes, from drilling holes to driving screws. However, if not used correctly, it can be dangerous and cause serious injuries. Therefore, it is crucial to learn how to use a power drill properly.
In this article, I will guide you through the basic steps of using a power drill safely and effectively. Whether you are a beginner or have some experience with power tools, these tips will help you use your drill with confidence and precision. By following these guidelines, you will be able to complete your projects more efficiently while minimizing the risk of accidents or damage to your workpiece. So let’s get started on our journey towards becoming a proficient power drill user!
Understanding The Different Types Of Power Drills
Power drills are a versatile and essential tool in any workshop, construction site or home improvement project. They come in different types, each designed for specific purposes. It is important to choose the right type of power drill that suits your needs and budget.
One of the factors to consider when choosing a power drill is the type of battery it uses. There are two main types of power drill batteries: nickel-cadmium (NiCd) and lithium-ion (Li-ion). NiCd batteries are cheaper but heavier than Li-ion batteries. They also have a shorter lifespan and take longer to charge. On the other hand, Li-ion batteries are more expensive but lighter, have a longer lifespan and charge faster.
Another factor to consider when choosing a power drill is your budget. Power drills come in different price ranges, from affordable options for occasional use to high-end models for professional use. It is important to evaluate your needs and determine how often you will be using the drill before investing in an expensive model that you may not need.
When choosing a power drill, it is essential to consider both the type of battery it uses and your budget. By doing so, you can ensure that you get the best value for your money while meeting your specific needs. In the next section, we will discuss how to choose the right drill bit for your project based on its size and material properties.
Choosing The Right Drill Bit For Your Project
As a power drill expert, it is important to understand the significance of selecting the appropriate drill bit for your project. It is as crucial as choosing the right tool. Drill bits come in different materials, and each of them has unique features that cater to specific drilling tasks.
The most common drill bit materials are high-speed steel (HSS), cobalt, carbide, and titanium-coated. HSS bits are suitable for drilling into wood, plastic, and soft metals. Cobalt bits are ideal for drilling into hard metals such as stainless steel, cast iron, and brass. Carbide bits are perfect for masonry work such as concrete or brick walls. Titanium-coated bits have higher durability and last longer than other types of bits.
After selecting the right material, it is also essential to choose the appropriate size of the drill bit. The size should correspond to the hole you need to make. Choosing a smaller size may cause overheating of the bit, while selecting a larger one may damage your workpiece or even injure you. Therefore, it is essential to measure accurately and select the appropriate size according to your project’s needs.
To ensure your workpiece is securely fastened during drilling, follow these simple steps. First, clamp or use a vice grip to hold down your workpiece firmly in place. Next, mark where you intend to drill with a center punch or awl to prevent any slippage or mistakes while drilling. Finally, start drilling slowly at first until you reach your desired depth before increasing speed gradually.
By understanding drill bit materials and appropriately sizing them for your project’s needs, you will achieve optimal results and ensure safety while working with power drills. Remember always to secure your workpiece before starting any task with a power drill!
Ensuring Your Workpiece Is Securely Fastened
Now that you have chosen the right drill bit for your project, it’s time to ensure that your workpiece is securely fastened. This step is crucial because if the workpiece moves while you’re drilling, it can cause damage to both the workpiece and the drill bit.
One option for securing your workpiece is to use clamps. There are a variety of clamp options available, including quick-release clamps and C-clamps. The type of clamp you choose will depend on the size and shape of your workpiece, as well as the location where you’ll be drilling.
Another important consideration when ensuring your workpiece is stable is the stability of your workbench. A wobbly or unstable bench can result in inaccurate or uneven holes, which can ruin your project. Make sure that your bench is level and secure before beginning any drilling.
Remember, taking the time to properly secure your workpiece before using a power drill will save you time and frustration in the long run. By utilizing clamps and ensuring that your workbench is stable, you’ll be able to drill precise and accurate holes every time. In our next section, we will discuss adjusting the speed and torque settings on your power drill for optimal performance.
Adjusting The Speed And Torque Settings
- Adjusting the speed of a power drill is a crucial part of the process of using the tool, depending on the material and the desired result.
- Adjusting the torque of a power drill is important for avoiding stripped screws and other potential damage from overdriving the bit.
- When selecting the speed and torque settings for a power drill, it is essential to consider the materials being used and the desired result.
- Adjusting the speed and torque of a power drill is a skill that requires practice, and the user should become familiar with the tool’s operation in order to achieve the best results.
Adjusting Speed
To ensure drill safety and achieve optimal results, adjusting speed is an essential aspect of using a power drill. While the ability to adjust speed varies with different types of drills, most models have adjustable speed settings that allow users to control the amount of torque they apply when drilling. One common mistake many DIY enthusiasts make is failing to adjust speed according to their project’s requirements, which can lead to damaged bits and uneven holes.
When working with different materials, it is crucial to adjust the drill’s speed accordingly. For instance, adjusting a high-speed setting when drilling through softwood can cause the bit to overheat or get stuck, while low speeds on hard materials such as metal may cause chipping or breaking. Adjusting the speed also helps in managing the amount of dust and debris created during drilling.
It is important to note that adjusting the speed alone does not guarantee safety when using a power drill. It would be best if you always adhered to safety procedures such as wearing protective gear and ensuring that your work area is clear of any obstacles or hazards. By doing so, you can achieve optimal performance while minimizing accidents and injuries associated with power drills’ usage.
Adjusting Torque
Adjusting the speed of a power drill is an essential aspect of achieving optimal results and ensuring safety. However, adjusting the torque is just as crucial. Torque refers to the force that rotates an object around its axis, and it plays a significant role in drilling through different materials. Adjusting torque helps users manage the amount of force they apply when drilling, which can prevent damage to bits and ensure even holes.
Safety precautions are necessary when adjusting torque because high levels of torque can cause bits to overheat, break or get stuck. To avoid such issues, it is important to adjust torque according to the material being drilled. For example, soft materials require lower levels of torque than hard ones. Properly adjusting torque also helps users manage dust and debris created during drilling.
When troubleshooting issues related to power drills, adjusting torque is one area that should be considered. If a drill bit is getting stuck or breaking frequently, it may be due to inadequate or excessive amounts of applied force caused by improper adjustment of torque settings. Therefore, it is crucial to adjust both speed and torque according to project requirements and material being drilled while following safety procedures for optimal performance and minimizing accidents and injuries associated with power drills’ usage.
Properly Positioning And Holding The Drill
To ensure optimal performance and safety when using a power drill, proper drill posture and workpiece securing are crucial. You must position yourself correctly before starting work to avoid injury and achieve precision in your drilling. Proper drill posture involves standing upright with your feet shoulder-width apart, allowing for a stable base. Ensure that you keep your back straight, and your shoulders relaxed to avoid any strain or discomfort.
In addition to proper drill posture, securing the workpiece is equally essential. The workpiece should be securely clamped or held in place to prevent it from moving while you’re drilling. A loose or unstable workpiece can cause the drill bit to grab and twist unexpectedly, resulting in damage or injury. It’s also important to make sure that the area around the workpiece is clear of any obstructions, as this can cause an accident.
By employing correct posture and securely holding your workpiece, you’ll be able to achieve accurate results while avoiding accidents. Remembering these simple steps will help you get the most out of your power drill while keeping you safe at all times. Now that we’ve covered proper positioning and holding of the drill let’s move on to starting up the machine and making our first hole with ease.
Starting The Drill And Making Your First Hole
To start the drill, ensure that you have your safety gear on. This includes eye protection and earplugs. Next, check that the drill bit is securely fastened in the chuck by turning it clockwise until it clicks into place. Plug in the drill and grip it firmly with both hands.
Before making your first hole, practice drills on a scrap piece of wood or metal to get used to the weight and feel of the drill. This will also help you determine if you need to adjust the speed setting for different materials. Always use a lower speed setting for harder materials such as metal or concrete.
When drilling, make sure that your workpiece is securely clamped down to prevent movement. Hold the drill perpendicular to the surface and apply steady pressure while keeping your balance. Remember to never force the drill through a material as this can cause damage or injury. Instead, let the drill do its job at its own pace.
Now that you’ve learned how to start your power drill and make your first hole safely, it’s time to move onto removing the drill bit safely. By following proper safety precautions and practicing drills beforehand, you’re well on your way to mastering this essential tool for DIY projects and home repairs.
Removing The Drill Bit Safely
Safe removal of drill bits is crucial to prevent injury and damage to the drill. It is important to ensure that the drill bit is not in motion before attempting to remove it. To do this, switch off the power button and unplug the drill from the electrical outlet. Give it some time for the bit to stop rotating before proceeding with its removal.
Once the drill bit has stopped moving, use a chuck key or your hands to loosen and remove it from the chuck. Make sure you hold onto the drill bit firmly as you remove it. Do not let go of it until it has been fully removed from the chuck to avoid dropping or losing it. After removing the drill bit, store it in a safe place such as a designated container or tool cabinet.
Proper storage of drill bits is essential in maintaining their functionality and longevity. When storing them, ensure that they are clean and dry to avoid rusting or corrosion. Keep them in their original packaging if possible, or use a labeled container with compartments for each type of bit. This will help keep them organized and readily accessible when needed for future tasks.
Switching drill bits for different tasks requires careful consideration of factors such as size, material, and purpose. In order to choose an appropriate bit for each task, one must be familiar with various types of bits available on the market. The subsequent section will provide information on these types of bits and how they can be used effectively in different projects.
Switching Drill Bits For Different Tasks
Now that you have safely removed the drill bit, it’s time to switch to a different one for your next task. This is where having a variety of drill accessories comes in handy. Always make sure to choose the right bit for the job at hand. Not only will this ensure optimal performance, but it will also help extend the life of your drill bits.
When swapping drill accessories, it’s important to follow proper safety procedures. First, turn off and unplug the power drill before making any changes. Next, firmly grip the chuck and turn it counterclockwise until it loosens enough to remove the current bit. Then, insert and tighten the new bit by turning the chuck clockwise until it’s secure. Make sure not to overtighten as this can damage both the bit and chuck.
In addition to proper safety procedures, regularly maintaining your drill bits will ensure optimal performance and longevity. Here are some tips for keeping your bits in top shape:
- Clean them after each use with a wire brush or cloth
- Store them properly in a dry place away from moisture
- Sharpen dull or worn-down bits using a bench grinder or file
By following these guidelines, you can keep your drill accessories in great condition for years to come.
As you become more comfortable with using your power drill, you’ll likely start using it for tasks beyond just drilling holes. One common task is driving screws into wood or other materials. In order to do this effectively, there are a few key things to keep in mind such as selecting the right screwdriver bit and adjusting the torque settings on your drill if applicable. We’ll cover these details in our next section on using the drill to drive screws.
Using The Drill To Drive Screws
- When selecting a drill bit to use with a power drill, it is important to take into consideration the size and type of screw being used.
- The power drill should be set to the correct speed and torque for the type of material being drilled into.
- To ensure that the screw is inserted into the material without any problems, pre-drilling a pilot hole is advisable.
- To protect the screw from splitting the material, it is important to countersink the hole slightly deeper than the screw head.
Choosing The Right Drill Bit
When using a power drill to drive screws, it is important to choose the right drill bit for the job. The drill bit material and size should be carefully considered in order to ensure that the screw is properly driven into the intended material.
Drill bit materials can vary greatly, with some being designed specifically for use with certain materials. For example, masonry bits are used for drilling into concrete or brick while wood bits are used for drilling into wooden surfaces. It’s important to choose the right type of bit for your project as using the wrong one can result in inefficient drilling and potential damage to both the drill and material being drilled.
Matching drill bit sizes is equally important when driving screws. A general rule of thumb is to match the diameter of the drill bit to that of the screw being used. This ensures that enough space is created for the screw to fit snugly and securely into place without causing any splitting or other damage to the surrounding material. Additionally, it’s important to consider the length of both the screw and drill bit when choosing which ones to use together.
By taking into account both drill bit materials and matching sizes when choosing a bit for driving screws, you can ensure that your project is completed efficiently and effectively without any unnecessary complications. Remembering these simple guidelines will help you achieve professional-looking results every time you use your power drill.
Preparing The Wood For Drilling
When it comes to using a power drill to drive screws, proper preparation of the wood is essential. One step in preparing the wood for drilling is sanding and finishing. Sanding your wood to a smooth finish ensures that there are no rough spots or sharp edges that can damage your drill bit or cause splintering during drilling. Finishing the wood with an appropriate sealant or paint not only improves its appearance but also helps protect it from moisture which can weaken its structure over time.
Another important step in preparing your wood for drilling is pre-drilling for screws. This involves creating a small pilot hole before inserting the screw into the wood. Pre-drilling helps prevent splitting of the wood, especially when driving screws near the end or edge of the board. The size of the pilot hole will depend on the thickness and type of wood being used as well as the size of the screw.
Overall, taking these steps to properly prepare your wood for drilling will result in a stronger and more professional-looking finished product. By sanding and finishing your wood and pre-drilling pilot holes prior to inserting screws, you can avoid unnecessary damage to both your materials and equipment while achieving a more secure hold for your screws.
Preparing Your Drill For Storage
As you wind down from your drilling tasks, you need to prepare your power drill for storage. It’s important that you clean and lubricate your drill to maintain its optimal performance. This will ensure that the next time you use it, it is ready to go.
To begin with, make sure you clean any debris or dust that has accumulated on your power drill. Use a soft cloth or brush to wipe away any dirt and grime from the exterior of the tool. After cleaning, apply a light coating of lubricant to protect the moving parts of the machine. This will prevent rusting and keep your drill in good working order.
When storing and carrying your power drill, make sure it is kept dry and protected from moisture. Store it in a dry place where it won’t be exposed to extreme temperatures or humidity. You can use a hard case or a soft bag to protect it when transporting it around. Moreover, do not store any other heavy equipment on top of the tool as this could damage its delicate parts.
In summary, preparing your power drill for storage is an essential part of maintaining its longevity and optimal performance. Cleaning and lubrication are necessary steps that should not be overlooked as they contribute significantly to keeping your power tool in tip-top shape. In the subsequent section, we’ll delve into more detail on maintaining and cleaning your power drill so that it lasts for years to come.
Maintaining And Cleaning Your Power Drill
Now that you have stored your power drill properly, it is important to maintain and clean it regularly. Regular maintenance will help prolong the life of your power drill and ensure optimal performance. Cleaning techniques for power drills may vary depending on the model, but there are some general steps you can take to keep your power drill in good condition.
Firstly, always unplug your power drill before cleaning it. Use a soft cloth to wipe down the exterior of the drill, making sure to remove any debris or dust that may have accumulated on it. For more stubborn dirt or grime, use a mild detergent mixed with water and a soft-bristled brush to scrub the affected areas. Be sure not to get any water or cleaning solution inside the motor or other sensitive components.
Secondly, make sure to follow a regular maintenance schedule for your power drill. This includes checking and replacing worn out parts such as brushes or belts, lubricating moving parts as needed, and ensuring that all screws and bolts are tightened properly. By following a regular maintenance schedule, you can prevent costly repairs down the line.
Lastly, always refer to your power drill’s manual for specific cleaning techniques and maintenance schedules recommended by the manufacturer. Following these guidelines will help keep your power drill in top condition for years to come.
- Lubricate moving parts as recommended by the manufacturer.
- Check and replace worn-out parts such as brushes or belts.
- Tighten all screws and bolts properly after each use.
By incorporating these three items into your regular maintenance routine, you can significantly extend the lifespan of your power drill while ensuring optimal performance every time you use it.
Troubleshooting Common Drill Problems
- Stalling is often caused by an overloaded motor, which can occur when drilling through materials that are too thick or hard.
- To prevent stalling, ensure that the drill is set to the correct speed for the given task and that the motor is not overworked.
- Jammed bits can be caused by a variety of issues, such as inadequate lubrication, incorrect bit size for the task, or incorrect drilling speed.
- To prevent the drill bit from becoming jammed, ensure that the bit size is appropriate for the task, use adequate lubrication, and adjust the speed of the drill accordingly.
Stalling
Preventing stalling is essential in maximizing the efficiency of your power drill. To avoid stalling, it is important to select the right drill bit and ensure that the workpiece is properly secured. If a bit is too large or dull for the material being drilled, it can lead to stalling. On the other hand, if the workpiece is not properly secured, it can cause the drill to bind and result in stalling. To troubleshoot stalling issues, inspect the drill bit for wear and tear or damage. Additionally, check if there are any obstructions in the drilling path that may be causing resistance.
Another common cause of stalling is overheating due to prolonged use without breaks. It is recommended to take regular breaks when using a power drill for extended periods to prevent overheating and subsequent stalling. Moreover, when drilling harder materials such as metal or concrete, it is crucial to use an appropriate lubricant to reduce friction and prevent overheating.
In conclusion, preventing stalling requires proper selection of drill bits and securing of workpieces. Troubleshooting stalling issues involves checking for damaged bits or obstructions in the drilling path. Regular breaks during prolonged use and using lubricants when drilling harder materials also help prevent stalling. By following these tips, you can maximize your power drill’s efficiency while avoiding frustrating stalls that slow down your projects.
Jammed Bits
When it comes to troubleshooting common drill problems, a jammed bit can be a frustrating issue to deal with. A jammed bit occurs when the drill bit gets stuck in the workpiece, and cannot rotate or be removed easily. This can be caused by various factors such as using the wrong type of bit for the material being drilled, drilling at an angle, or not applying enough pressure. To prevent jammed bits, it is important to select the right type of drill bit for your project and ensure that you are drilling straight and applying sufficient pressure.
Clearing blockages is the first step in resolving a jammed bit issue. If you encounter a jammed bit, stop drilling immediately and unplug the power cord. Use pliers or vice-grips to grip onto the shank of the bit while turning it counter-clockwise to remove it from the chuck. If this does not work, you may need to disassemble the chuck and remove the bit manually. Once you have cleared any blockages causing the jammed bit, inspect both the drill bit and chuck for any damage before resuming drilling.
Preventing jammed bits involves taking appropriate safety measures such as wearing proper eye protection and gloves when handling tools. It is also important to use sharp drill bits that are suitable for your project’s materials, as dull bits are more likely to get stuck in your workpiece. Additionally, avoid rushing through your project or using excessive force when drilling as these actions increase your risk of encountering a jammed bit issue.
By following these steps in clearing blockages and preventing jammed bits, you can minimize downtime on your projects and maximize efficiency with your power drill. Remember that safety always comes first when handling power tools, so take extra care when troubleshooting issues like jammed bits.
Knowing When To Replace Your Drill Bits
Identifying dull bits is crucial to ensure that your power drill is working efficiently. A dull bit can cause the drill to overheat and become damaged, resulting in costly repairs or even replacement. A simple way to test if a bit is dull is by running it across your fingernail. If it slides smoothly without catching, then it’s still sharp. However, if it catches or scratches your nail, then it’s time to replace the bit.
Proper disposal of old bits is also important for safety and environmental reasons. Never throw them in the trash as they can be a hazard for sanitation workers and end up in landfills, which can harm the environment. Instead, recycle them at a local hardware store or dispose of them at hazardous waste collection sites.
To help you keep track of when to replace your bits, refer to this table:
| Signs of Dull Bits | Frequency of Use | Replacement Time |
|---|---|---|
| Wobbling during use | Occasional use | Every 6 months |
| Difficulty drilling through materials | Regular use | Every 3-4 months |
| Burning smell while drilling | Frequent use | Every 1-2 months |
By following these guidelines and regularly checking your bits for wear and tear, you can ensure that your power drill remains in good condition and operates safely.
Looking after your power drill involves more than just changing out old bits as necessary. In order to use it safely, there are important safety tips that must be followed to prevent injuries and damage. Let’s explore those in the next section.
Safety Tips For Using A Power Drill
Knowing when to replace your drill bits is essential in ensuring the efficiency and quality of work done. However, having the right tools and equipment is only part of the equation. Proper use and safety precautions are equally important in preventing accidents that could lead to injuries or worse.
Common injuries associated with power drills include cuts, burns, eye injuries, and electrocution. Emergency response training should be a prerequisite for anyone using a power drill. It’s also important to have a first aid kit on standby in case of accidents. In addition, knowing how to turn off the power drill quickly can help prevent further harm.
Protective gear such as gloves, goggles, earplugs, and hard hats can significantly reduce the risk of injury when using a power drill. Safety accessories like clamps and vices also provide stability and control during drilling operations. Before starting any project, it’s crucial to inspect the equipment thoroughly for any damage or defects that may compromise its safety.
- Always wear protective gear
- Keep emergency response kits near
- Regularly inspect equipment
- Use safety accessories
- Stay focused while operating
In conclusion, understanding the potential risks associated with using a power drill is vital in preventing accidents that could lead to serious injury. By taking necessary precautions such as wearing protective gear and regularly inspecting equipment before use, you can ensure safe operation of your power drill. In the next section, we will explore advanced techniques for experienced users who want to take their drilling skills to the next level.
Advanced Techniques For Experienced Users
The power drill is a versatile tool that can perform a wide variety of tasks. However, to fully utilize its capabilities, advanced techniques are necessary for experienced users. Like a skilled carpenter who knows how to use every tool in their toolbox, mastering these techniques will help you accomplish your drilling tasks with ease and precision.
Drill maintenance is an essential component of being an experienced power drill user. By keeping your drill in good condition, you can ensure that it performs at its best capacity when you need it the most. Regular cleaning, lubrication and replacement of worn out parts can make all the difference in the longevity and performance of your drill.
In addition to regular maintenance, advanced drilling techniques can take your skills to the next level. Techniques such as countersinking, counterboring and tapping may sound daunting at first, but with practice and patience, they will become second nature. These techniques allow you to create precise holes for specific purposes like fitting screws or bolts securely into place. Advanced drilling techniques are not only useful for experienced users but also improve efficiency and productivity while reducing overall frustration on the job site.
Conclusion
After thoroughly understanding the different types of power drills and choosing the right drill bit for your project, it is essential to ensure that your workpiece is securely fastened before beginning. Adjusting the speed and torque settings, positioning and holding the drill properly are crucial steps in using a power drill effectively.
As an experienced power drill expert, I highly recommend troubleshooting any common problems that may arise during use and knowing when to replace your drill bits. Safety should always be a top priority when operating a power drill, so make sure to follow all safety tips and guidelines.
For advanced users, there are techniques available to improve drilling accuracy and increase efficiency. With these tips in mind, you can become a master at using a power drill for all of your DIY projects. So get drilling with confidence, knowing you have the knowledge and skills necessary to get the job done right!
Image Credits
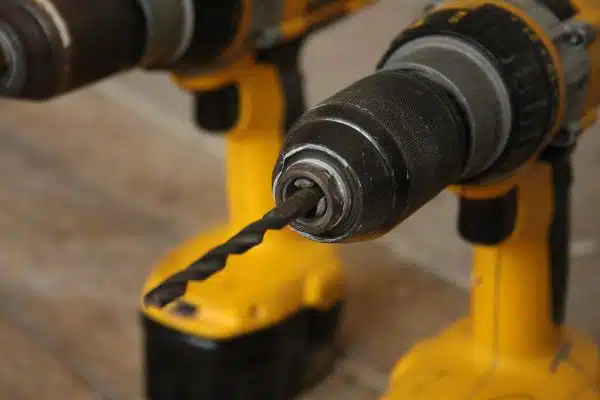
- “DeWalt Power Tool – Drill” by digital internet (featured)

