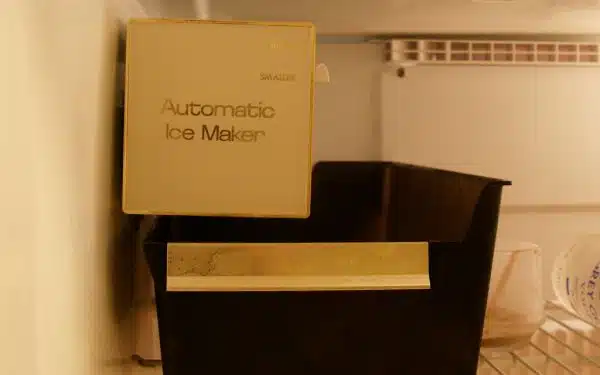
Automatic ice makers have become an essential part of modern refrigerators. They eliminate the hassle of manually filling up ice trays and ensure a steady supply of ice. However, there may be situations when you need to turn off your automatic ice maker. For example, if you are going on a vacation or need to clean your refrigerator, it’s important to know how to turn off the ice maker properly.
As a home appliance expert, I understand that many people find it challenging to turn off their automatic ice makers. However, it is a simple process that can save you money and prevent any potential damage to your refrigerator. In this article, I will guide you through the steps to turn off your automatic ice maker safely and efficiently. Whether you’re a homeowner or renter, this guide will provide you with the knowledge you need to serve yourself and others in maintaining your home appliances.
Understanding Automatic Ice Makers
Automatic ice makers are a convenient addition to any kitchen, providing a steady supply of ice without the need for constant refilling of ice trays. Understanding how these machines work can help you troubleshoot common issues that may arise.
One important aspect of automatic ice makers is understanding how they produce ice. These appliances typically use an evaporator plate that freezes water into small cubes or nuggets. Once frozen, a heating element warms the evaporator and releases the cubes into a collection bin below. This process is controlled by a thermostat that regulates the temperature and ensures consistent production.
Despite their convenience, automatic ice makers can also experience problems. One common issue is when the machine stops producing ice altogether. This could be due to a clogged water filter, faulty inlet valve, or defective thermostat. Another issue could be when the ice produced has an unusual taste or odor, which could indicate dirty water lines or a need for cleaning and maintenance.
Understanding these aspects of automatic ice makers can help you identify and resolve common problems that may arise with your appliance. However, there may also be reasons why you need to turn off your automatic ice maker, which we will explore in the following section.
Reasons To Turn Off Your Automatic Ice Maker
There are several reasons why one would want to turn off their automatic ice maker. One common reason is for ice maker maintenance. If you notice that your ice maker is not producing ice as it should, it may be time to turn it off and take a look inside. Cleaning the interior of your ice maker can help remove any build-up or blockage that may be hindering the production of ice.
Another reason to turn off your automatic ice maker is for repair purposes. If you notice that your ice maker is not working correctly, turning it off can prevent any further damage from occurring. Attempting to fix an ice maker while it is still on can be dangerous and cause more problems than solutions.
Taking care of your appliances, such as turning off your automatic ice maker when necessary, can also prevent costly repairs in the future. By following proper maintenance procedures and addressing issues promptly, you can extend the life of your appliance and save money in the long run on potential repairs.
Now that we have discussed some reasons for turning off your automatic ice maker let’s move on to preparing your refrigerator for this process.
Preparing Your Refrigerator For Turning Off The Ice Maker
After identifying the reasons why you may want to turn off your automatic ice maker, it’s important to prepare your refrigerator for this process. Checking compatibility is the first step in ensuring that you can safely turn off your ice maker. Some models have built-in features that may require the ice maker to be on at all times. If this is the case, you’ll need to consult your user manual or contact the manufacturer to determine if there is a way to disable this feature.
Once you’ve confirmed that your refrigerator can safely operate without an ice maker, gather the necessary tools before proceeding. You’ll need a pair of pliers or an adjustable wrench to disconnect the water supply line from the valve at the back of your fridge. Before doing so, ensure proper ventilation by moving your fridge away from any walls or obstacles that could obstruct airflow. This will prevent overheating and potential damage to your appliance.
Safety precautions should always be taken when working with home appliances. To avoid electrical shock or injury, unplug your refrigerator before attempting any maintenance tasks. Additionally, wear gloves and eye protection when handling potentially hazardous materials such as water and refrigerant. With these steps completed, you’re now ready to move onto locating the shut-off valve and turning off your automatic ice maker.
Locating The Shut-Off Valve
- Automatic shut-off valves are typically located close to the ice maker and may be located behind the refrigerator or underneath a sink.
- To turn off the valve, insert a flathead screwdriver into the slot and turn it clockwise until it stops.
- Ensure that the valve is in the off position by turning the handle until it is perpendicular to the pipe.
- To reactivate the valve, insert a flathead screwdriver into the slot and turn it counterclockwise until it stops.
- After the valve has been turned back on, the handle should be parallel with the pipe.
- Once the handle is in the correct position, the ice maker should be operational again.
Locating Automatic Shut-Off Valve
For homeowners, experiencing common problems with automatic ice makers can be frustrating. One of the most common issues is having too much ice production, resulting in clogged drains and overflowing bins. While troubleshooting solutions are available, sometimes the best course of action is to turn off the automatic ice maker until it can be repaired or adjusted.
To locate the shut-off valve for an automatic ice maker, start by checking behind the refrigerator. Most models have a small lever or switch that controls the flow of water into the ice maker. If this valve is not visible or accessible, consult your user manual or contact a professional for assistance. Alternative shut off options include turning off the main water supply to your home or using a shut off valve installed specifically for your ice maker.
Remember, turning off an automatic ice maker may be necessary but should not be done without proper consideration and understanding. Always consult your user manual or seek professional help before attempting any repairs or adjustments on your own. With these tips and information at hand, you can easily locate and use an automatic shut-off valve to turn off your ice maker when necessary.
Turning Off The Valve
Locating the shut-off valve for an automatic ice maker is crucial in preventing overflowing bins and clogged drains. However, sometimes turning off the valve may not be enough to resolve the issue. In some cases, adjusting pressure or replacing the valve may also be necessary. If you notice that your ice maker is producing too much ice even after turning off the valve, it’s best to seek professional help.
When adjusting pressure, it’s important to note that improper adjustments can lead to leaks or damage to the appliance. Before attempting any adjustments on your own, consult your user manual or contact a professional for assistance. If you decide to replace the valve, make sure that you have identified the correct part and have all necessary tools before starting.
Remember that tinkering with an automatic ice maker can be dangerous if done incorrectly. Always prioritize safety and seek professional help when needed. With these tips in mind, you can confidently locate and turn off the shut-off valve for your automatic ice maker while being mindful of other potential solutions for common issues like excessive ice production.
Reactivating The Valve
Now that we have discussed the importance of locating and turning off the shut-off valve for an automatic ice maker, it’s also essential to know how to reactivate the valve. Reactivating the valve is necessary after troubleshooting leaks or when you need to resume ice production. Before reactivating the valve, make sure that you have resolved any issues causing leaks or damage to your appliance.
To reactivate the valve, turn on the water supply and slowly open the valve. Check for any signs of leaks or irregularities in water pressure. If there are no visible issues, wait for a few minutes until ice production resumes. It’s important to monitor the ice maker regularly after reactivating the valve to ensure that everything is working correctly.
In some cases, reactivating the valve may not be enough to solve recurring problems with your automatic ice maker. If you continue experiencing issues despite troubleshooting and reactivating the valve, it’s best to seek professional help from an appliance expert. They can provide a thorough diagnosis of your appliance and recommend necessary repairs or replacements to prevent further damage.
Turning Off The Water Supply
To turn off an automatic ice maker, one of the crucial steps is shutting off the water supply. This action is necessary to prevent leaks that could damage your home’s floors and walls. Moreover, it also helps to conserve water in case you won’t be using the ice maker for a while.
To shut off the water supply, locate the valve responsible for supplying water to your ice maker. This valve is usually located under the sink or behind the refrigerator. Once you locate it, turn it clockwise until it stops turning. Doing this will shut off the water supply to your ice maker.
Preventing leaks should always be a priority when dealing with appliances that use water in their operation. Shutting off the water supply not only helps keep your home safe but also prolongs your appliance’s lifespan. Now that you have successfully turned off the water supply let’s proceed to our next step of turning off the ice maker switch.
Turning Off The Ice Maker Switch
After turning off the water supply to your ice maker, the next step is to turn off the ice maker switch. Understanding the components of your ice maker is important in performing this task. The ice maker switch controls the power supply to the motor that turns the ice cube tray and fills it with water.
To locate the ice maker switch, you need to consult your user manual or look for it on the control panel of your refrigerator. Once you have located it, simply flip it to turn it off. This will prevent your ice maker from producing any more ice until you turn it back on.
If your automatic ice maker continues to produce ice even after turning off its switch, you might be dealing with a faulty component. Troubleshooting common issues such as a jammed ejector arm or a clogged water filter can help identify and fix these problems. However, if these do not solve the problem, it is advisable to seek professional assistance to avoid further damage to your appliance.
Moving on from turning off the ice maker switch, another essential step in cleaning or repairing an automatic ice maker is removing its tray. We will discuss how to do this in detail in our next section.
Removing The Ice Maker Tray
- In order to remove an ice maker tray, it is necessary to unplug the refrigerator from its power source.
- The ice maker tray is typically located in the upper left corner of the freezer compartment.
- It is important to take precautionary measures when unplugging the refrigerator, as the appliance contains hazardous electrical components.
- Carefully remove the ice maker tray from its compartment, ensuring all of its components are disconnected.
Unplugging The Refrigerator
As a home appliance expert, unplugging the refrigerator is one of the most important steps that you should take before removing the ice maker tray. This is because the automatic ice maker relies on electricity to function, and unplugging it will ensure that there are no electrical accidents while you are working on it. Additionally, cleaning instructions and maintenance tips can be more easily followed if your refrigerator is not plugged in.
To start, locate the power cord of your refrigerator and unplug it from its outlet. Afterward, make sure that you remove any items from both the fridge and freezer compartments to avoid any spills or messes during the process. Once you have done this, proceed to remove the ice maker tray carefully, following any manufacturer’s instructions that came with your refrigerator. Be sure to also wipe down any surfaces around where the tray was located to prevent any build-up of debris or bacteria.
When it comes to maintenance tips for your refrigerator’s automatic ice maker, regularly cleaning it is crucial in ensuring its longevity and functionality. You can use warm water and mild soap to clean both the tray and its surrounding area. Make sure that these areas are completely dry before reinserting the tray back into place. Following these simple steps will help keep your appliance running smoothly and efficiently for years to come.
In conclusion, unplugging your refrigerator before removing an automatic ice maker tray is a crucial step in preventing accidents and making cleaning easier. Regular maintenance through proper cleaning techniques will also ensure optimal performance for your appliance in the long run. Remember these tips when taking care of your home appliances for a stress-free experience!
Taking Out The Ice Maker Tray
Now that we have discussed the importance of unplugging your refrigerator before removing the ice maker tray, let’s move on to the next step: taking out the tray itself. This may seem like a simple task, but it is important to handle the tray with care to avoid any damage or spills. Before removing the tray, make sure that you have read any manufacturer’s instructions that came with your refrigerator and familiarized yourself with the removal process.
To start, locate the release button or lever that is used to remove the ice maker tray. This can usually be found on either side of the tray or at its base. Once you have located it, gently press or pull on it to release the tray from its position. Make sure that you are holding onto the tray securely as you remove it from its slot to avoid any spills or messes.
After removing the ice maker tray, take this opportunity to clean both it and its surrounding area thoroughly. As mentioned earlier, regular cleaning is crucial in maintaining optimal performance for your appliance. You can use warm water and mild soap for this task, making sure to dry all surfaces completely before reinserting the tray back into place. By following these cleaning tips and handling the ice maker tray with care, you can ensure a stress-free experience when taking care of your home appliances.
Draining Remaining Water From The Ice Maker
To ensure the proper functioning of your ice maker, it is essential to turn off and drain the remaining water from it. Draining techniques may vary depending on the model of your ice maker. However, some general precautions must be taken for safe and effective drainage.
Before draining the water from your ice maker, make sure to unplug the unit or switch off its power supply. This will prevent any possible electrical shock that might occur while you are working with the machine’s internal components. After turning off the power source, remove all ice cubes from the machine’s storage bin and dispose of them properly.
To drain any remaining water in your ice maker, locate its drain plug or valve at the bottom rear end of the unit. Once you have found it, connect a hose to it and allow all water to flow out into a container or sink. You can repeat this process until you are sure that no more water is left inside your ice maker.
Safety precautions for draining an automatic ice maker
Here are some safety measures you should follow when draining an automatic ice maker:
- Always wear gloves when handling an automatic ice maker.
- Never touch electrical components while unplugging or disconnecting power.
- Use a clean cloth to wipe away any excess moisture after draining.
- Keep children and pets away from the area where you are working.
- Double-check that all components are securely reassembled before resuming use.
Now that you have successfully turned off and drained any remaining water from your ice maker, it’s time to move on to cleaning your refrigerator.
Cleaning Your Refrigerator
Once you have drained the remaining water from your ice maker, you may want to turn off the automatic feature altogether. This can be easily done by locating the on/off switch located on the control panel of your refrigerator. Simply switch it to the “off” position and your ice maker will no longer produce ice.
Now that your ice maker is turned off, it’s important to remember to clean it regularly. Cleaning frequency will depend on how often you use your ice maker, but a good rule of thumb is every three months or so. To ensure that your ice maker is thoroughly cleaned, use a combination of warm water and mild soap to wipe down all parts of the unit. You can also purchase specialized cleaning products designed specifically for ice makers.
When looking for the best cleaning products for your automatic ice maker, consider those that are non-toxic and environmentally friendly. Many manufacturers offer their own line of cleaning solutions, but there are also plenty of natural options available such as vinegar or lemon juice. Regardless of which product you choose, be sure to follow the manufacturer’s instructions carefully and rinse all parts thoroughly before restarting your machine.
Restarting Your Automatic Ice Maker
As the saying goes, “all good things must come to an end.” This is especially true for home appliances that require regular maintenance to keep them functioning properly. If you’ve turned off your automatic ice maker, but now want to restart it, there are some key troubleshooting steps you should take before doing so.
First and foremost, it’s important to check the ice maker’s water supply line. Make sure there are no kinks or blockages in the line that could prevent water from flowing freely. Next, inspect the ice maker’s control arm to ensure it is in the “on” position. Finally, verify that the freezer temperature is set to below freezing (32 degrees Fahrenheit).
Once you’ve verified these three crucial components of your ice maker are functioning properly, you can begin restarting the unit. Begin by turning on the machine and allowing it to fill with water. It may take several hours for ice production to resume at full capacity, so be patient and avoid opening and closing the freezer door frequently during this time.
To keep your automatic ice maker functioning at peak performance, regular maintenance is key. Here are a few tips for keeping your unit in top shape:
- Clean the interior of the ice maker regularly with a mild soap solution
- Replace any damaged or worn components as soon as possible
- Keep the area around your ice maker clean and free of debris
In conclusion, restarting your automatic ice maker requires thorough troubleshooting to ensure all components are functioning properly before beginning production again. By following these simple steps and implementing regular maintenance tips, you can minimize downtime and keep your unit producing fresh ice whenever you need it. Next up: checking for leaks!
Checking For Leaks
After restarting your automatic ice maker, it is important to check for any leaks. Leaks can cause damage not only to the machine but also to your home. It is recommended to perform this task at least once a year.
To check for leaks, start by inspecting the water supply line that runs from the back of the refrigerator to the valve on the wall. Make sure it is properly connected and free from any kinks or damage that could cause water to leak out. Then, move onto checking the connections between the valve and the water supply line. If there are any visible cracks, replace them immediately.
If you find a leak, it is crucial to fix it right away before it causes further damage. Minor leaks can often be fixed by tightening loose connections or replacing damaged parts. However, if you notice a major leak or one that cannot be easily repaired, it may be necessary to call in a professional for assistance. Remember that prevention is key when it comes to avoiding leaks, so make sure to regularly inspect your ice maker and its components.
Moving on from checking for leaks, troubleshooting common issues with your automatic ice maker can also help you avoid future problems. If you’re experiencing issues such as slow production or poor quality ice, there are several things you can do before resorting to calling in a repair technician. Stay tuned for our next section where we’ll cover some common troubleshooting techniques!
Troubleshooting Common Issues
As the saying goes, “prevention is better than cure.” But when it comes to home appliances like automatic ice makers, troubleshooting common issues is just as important. Before calling in an expert, there are some simple tips that you can try to fix the problem yourself.
One of the most common problems with an automatic ice maker is that it stops making ice. If this happens, check if the water supply line is connected and not clogged. You should also make sure that the freezer temperature is set correctly since a temperature that’s too high or too low can affect ice production. Additionally, check for any clogs or damages in the inlet valve and replace it if necessary.
Another issue that you may encounter with your automatic ice maker is leaking water. This can be caused by a clogged drain line or a damaged water inlet valve. To solve this problem, first, switch off the power supply to your appliance and then remove any excess water from inside. Afterward, unclog the drain line by flushing it with warm water or using a wire hanger to remove any debris stuck inside. If this does not work, consider replacing your inlet valve to prevent further leaks.
Now that you have learned some troubleshooting tips for common problems with your automatic ice maker let us move on to maintaining it properly so you can avoid these issues altogether.
Maintaining Your Automatic Ice Maker
Having addressed the common issues that may arise with your automatic ice maker, it is essential to know how to maintain it. Cleaning frequency is an important aspect of maintaining your machine. Depending on usage, it is recommended to clean your ice maker every three to six months. This will ensure that your ice remains clean and free from bacteria.
To clean your ice maker, first, turn off the power supply and disconnect the water source. Remove any remaining ice and then use warm soapy water to wash the inside of the machine thoroughly. Rinse and dry before reconnecting the water source and turning it back on. If you are unsure of how to complete this process or require troubleshooting tips, refer to your user manual or contact a professional for assistance.
In certain instances, it may be necessary to hire a professional for assistance when dealing with your automatic ice maker. This can typically occur when there are severe issues such as leaks or electrical problems. It is best not to attempt any repairs beyond cleaning without proper training or knowledge as this can lead to further damage or injury. Contact a trusted service technician who specializes in appliance repair for quick, efficient help with all of your concerns related to automatic ice makers.
Hiring A Professional For Assistance
It is possible to turn off an automatic ice maker using several DIY methods. However, it is important to note that not all ice makers are created equal, and some may require different approaches. Therefore, it is essential to read the manufacturer’s instructions before attempting to turn off the ice maker.
If you are unsure about how to turn off your specific ice maker, it may be best to seek professional assistance. A home appliance expert can assess your ice maker and provide the necessary guidance on how to safely and effectively turn off the machine. This way, you can avoid damaging the appliance or causing injury to yourself.
Here are four reasons why hiring a professional for assistance with turning off an automatic ice maker is beneficial:
- Professional technicians have the knowledge and experience needed to handle complex appliances like ice makers.
- They can identify any underlying issues that may be affecting your appliance’s performance.
- With their expertise, they can offer valuable advice on how to maintain your ice maker in good working condition.
- By seeking professional help, you can save time and energy that would otherwise be spent trying out various DIY methods.
With these considerations in mind, it is evident that a professional technician is a reliable option when it comes to turning off an automatic ice maker. By seeking their assistance, you can ensure that your appliance remains in excellent condition and continues serving you well for years to come.
Conclusion: Enjoy Your Ice Maker With Confidence
Hiring a professional for assistance can sometimes be the best course of action when it comes to dealing with home appliances. However, turning off an automatic ice maker is a simple task that can easily be done without the need for a technician. In this section, we will discuss the benefits of using an ice maker and how to troubleshoot common problems.
Using an ice maker has several benefits, such as convenience and efficiency. With an automatic ice maker, you no longer have to manually fill up ice trays and wait for them to freeze. It also eliminates the need for storing bags of ice in your freezer. Additionally, most modern ice makers are energy-efficient, which means they consume less electricity compared to traditional models.
However, like any other appliance, an ice maker may encounter problems from time to time. The most common issue is slow or no production of ice. This could be due to a clogged water filter or a faulty water inlet valve. Another problem could be small or cloudy cubes, which may indicate mineral buildup in the machine’s components. To troubleshoot these issues, refer to the manufacturer’s manual for instructions on how to clean or replace parts.
In conclusion, knowing how to turn off your automatic ice maker is a simple task that does not require professional assistance. Using an ice maker has several benefits, including convenience and efficiency. However, if you encounter any problems with your machine, refer to the manufacturer’s manual for troubleshooting tips before calling a technician.
Conclusion
Automatic ice makers are a convenient feature in many modern refrigerators, providing ice on demand. However, there are times when you may need to turn off your ice maker. Perhaps you’re going away for an extended period or simply want to save energy. Whatever the reason, it’s important to know how to properly turn off your automatic ice maker.
Before turning off your ice maker, it’s important to prepare your refrigerator by emptying any existing ice and cleaning the interior of the freezer compartment. Once you’ve done this, locate the shut-off valve typically located near the back of your refrigerator and turn off the water supply. If you encounter any issues during this process, consult the manufacturer’s manual or consider hiring a professional for assistance.
Maintaining your automatic ice maker is also crucial to ensuring its longevity and continued functionality. Regularly cleaning and inspecting your ice maker can prevent potential problems from arising in the future. Like any home appliance, proper care and maintenance can make all the difference in performance and longevity.
In conclusion, turning off an automatic ice maker may seem like a simple task but requires proper preparation and understanding of your refrigerator’s mechanism. By following these steps, you can confidently turn off your ice maker when needed while maintaining its functionality for years to come. Remember that just as with any complex system, taking care of it with diligence will guarantee maximum efficiency and convenience over time.
Image Credits
- “automatic ice maker” by romana klee (featured)

