As a water cooler cleaning expert, I have witnessed firsthand the benefits of providing clean and refreshing drinking water to employees and customers. A well-maintained water cooler not only ensures access to safe drinking water but can also promote hydration, improve productivity, and enhance overall well-being. However, an unclean or neglected water dispenser can harbor bacteria and germs that may cause health risks and affect the taste and quality of the water.
To maintain a clean and hygienic water cooler, regular cleaning is essential. In this article, we will explore step-by-step instructions on how to clean a water cooler effectively. From gathering the necessary supplies to performing a deep cleaning of the dispensing unit, we will discuss everything you need to know about keeping your water cooler in tip-top shape. Whether you are responsible for maintaining a single unit or multiple dispensers, our guide will provide you with valuable insights on how to serve others by ensuring access to clean drinking water.
The Importance Of Regular Water Cooler Cleaning
Regular water cooler maintenance is crucial to ensure the health and safety of consumers. Water coolers are often used in offices, schools, and public areas, making them susceptible to dirt and bacteria buildup. Neglecting routine cleaning can lead to a host of health risks for those who use the water cooler. It is essential to recognize the importance of regular water cooler cleaning to prevent these risks.
Dirty water coolers can harbor harmful bacteria such as E.coli and Legionella that cause illnesses like pneumonia, diarrhea, and urinary tract infections. These microorganisms can thrive in warm and stagnant water environments which are common in uncleaned water coolers. Regular cleaning not only eliminates these bacteria but also helps prevent algae growth, unpleasant odors, and mineral buildup that can affect the taste of drinking water.
Additionally, neglecting regular cleaning may lead to clogged faucets or dispensers that result in low water pressure or no flow at all. This could cause inconvenience for users who depend on the water cooler for their daily hydration needs. To avoid such situations, it is important to keep up with regular maintenance including sanitization, disinfection, and filter replacement schedules. By doing so, users can have access to clean drinking water without worrying about potential health risks associated with dirty water coolers.
To ensure the longevity of your water cooler while maintaining its hygiene standards it is important that you gather all necessary supplies before beginning the cleaning process.
Gathering The Necessary Supplies
Gathering the necessary supplies for cleaning a water cooler is like collecting tools for a doctor. Just as a doctor needs the right equipment to perform his job, you also need appropriate supplies to clean your water dispenser effectively. Choosing appropriate supplies is crucial because using the wrong products can damage the cooler’s surface and cause contamination. The most commonly used supplies include gloves, towels, sponges, cleaning solution, and a bucket.
When choosing gloves for cleaning your water cooler, ensure that they are made of nitrile or latex material as they provide better protection against germs than regular household gloves. Towels and sponges should be soft and non-abrasive to prevent scratches on the surface of your dispenser. A good quality cleaning solution is essential in eliminating bacteria and grime buildup from all parts of your water cooler. Always opt for disinfectant cleaners approved by EPA (Environmental Protection Agency) as they kill bacteria and viruses effectively without harming the environment.
Tips for effective cleaning involve using hot soapy water to clean surfaces thoroughly before applying any sanitizers. Change towels frequently when wiping surfaces to avoid spreading germs around the dispenser. Use different sponges for each part of the cooler to reduce cross-contamination risks between areas such as spigots and reservoirs. Lastly, always rinse with clean water after using any sanitizers or disinfectants to remove any residue left behind.
As you gather your necessary supplies for cleaning your water cooler, keep in mind that proper selection will lead to better results while minimizing damage and contamination risks. Once you have everything you need at hand, it’s time to turn off the dispenser before starting the actual cleaning process.
Turning Off The Water Dispenser
Water dispenser maintenance is essential to ensure that it continues to function efficiently and provide safe, clean drinking water. One of the first steps in maintaining a water cooler is turning off the water dispenser. This simple step can prevent any accidents or spillage during the cleaning process.
To turn off the water dispenser, locate the switch or valve on your device. The switch may be located at the back of the machine or underneath it. Once you find it, turn it off by switching it to the ‘off’ position or closing the valve. Ensure that you do not apply too much force while turning off the switch as this may damage it.
Troubleshooting tips for turning off your water dispenser include checking if there is any leakage around the switch or valve when turned off. If there is leakage, tighten any loose connections or replace any damaged parts before proceeding with cleaning. Remember to always unplug your device before performing any maintenance work, including turning off your water dispenser. By following these simple steps, you can keep your water cooler in excellent condition for years to come.
Moving onto draining the water reservoir, carefully follow these steps…
Draining The Water Reservoir
Metaphorically speaking, draining the water reservoir of a water cooler is like letting go of old habits to make way for new ones. It’s an essential step in cleaning your water cooler and ensuring that your drinking water remains fresh and safe. Here are some tips on how to properly drain your water cooler’s reservoir.
- Turn off the power supply of your water cooler before draining the reservoir to avoid electrocution.
- Place a bucket or any container that can hold at least 5 gallons of water under the spigot or valve of your water cooler.
- Slowly open the spigot or valve and let the water flow into the container until it stops.
Once you have drained all the water from your cooler’s reservoir, it’s important to properly dispose of it. Don’t pour it down the drain as it may contain contaminants that could harm the environment. Instead, use it to water plants or flush toilets.
To prevent mold growth in your water reservoir, make sure to clean it regularly and allow it to dry completely before refilling it with fresh water. You can also use a mixture of vinegar and water to disinfect your reservoir and eliminate any bacteria that may be present.
Now that you’ve successfully drained your water cooler’s reservoir, the next step is removing the water guard and drip tray. This will allow you to thoroughly clean these parts and ensure that there is no buildup of dirt or debris that could contaminate your drinking water.
Removing The Water Guard And Drip Tray
After draining the water reservoir, it is time to focus on removing stains and preventing mold growth. Stains can accumulate over time due to mineral buildup, dust, and dirt. To remove stains, use a mixture of warm water and mild detergent. Avoid using harsh chemicals or abrasive materials as they may damage the surface of the cooler.
Once you have removed any visible stains, it is important to prevent mold growth by regularly cleaning the interior of the cooler. This can be done by wiping down the interior with a solution of one part vinegar to three parts water. Be sure to thoroughly rinse the interior with clean water afterwards to remove any residue.
Now that you have cleaned the water reservoir, removed stains, and prevented mold growth, it’s time to move on to removing the water guard and drip tray for further cleaning. These components are often overlooked but can harbor bacteria and other contaminants if not cleaned regularly. Follow these steps carefully to ensure proper cleaning of these components.
Cleaning The Water Guard And Drip Tray
The water guard and drip tray are two essential parts of your water cooler that require regular cleaning to maintain hygiene. The water guard is responsible for preventing dust and debris from entering the reservoir, while the drip tray collects excess water that drips from the spigot. Over time, both components can accumulate residue, leading to mold growth and unpleasant odors.
To clean the water guard and drip tray, start by removing them from the cooler. Use a soft-bristled brush or cloth to scrub away any visible dirt or grime. For hard-to-reach areas, use a toothbrush or cotton swab. Avoid using abrasive cleaners or rough materials that could damage the surfaces.
Choosing the right cleaning solution is crucial when it comes to cleaning these parts effectively without causing any harm. A mild detergent mixed with warm water is often sufficient for removing residue and preventing mold growth. Be sure to rinse both components thoroughly with clean water after cleaning, then dry them completely before reattaching them to your cooler.
- Regular cleaning of your water guard and drip tray will prevent unpleasant odors.
- Avoid using abrasive cleaners or rough materials that could damage the surfaces.
- Choosing a mild detergent mixed with warm water will help effectively clean these components.
With proper maintenance, your water cooler will continue providing you with clean drinking water for years to come. The next section will cover how to clean the water reservoir properly, which is another essential step in maintaining optimal hygiene levels in your cooler.
Cleaning The Water Reservoir
- Sanitizing the water reservoir is essential to ensure the quality of drinking water from the cooler remains safe.
- Cleaning the interior of the cooler is key to removing any bacteria or other contaminants.
- Regularly inspecting the cooler for any signs of damage or wear is important for maintaining its functionality.
- Scheduling periodic deep cleanings of the reservoir is a critical part of ensuring the water cooler remains in optimal condition.
Sanitizing The Reservoir
As a water cooler cleaning expert, I understand the importance of maintaining a clean and sanitized reservoir in order to provide safe drinking water. Sanitizing the reservoir is a crucial step in the process of cleaning a water cooler. There are several ways to accomplish this task, including using disinfectant wipes or alternative cleaning methods.
Using disinfectant wipes is one common method for sanitizing the reservoir. Begin by emptying the reservoir of all remaining water and removing any filters or accessories. Next, use a disinfectant wipe to thoroughly clean all surfaces inside the reservoir, including the lid and spigot. Be sure to follow the instructions on the package for proper use and disposal of the wipes.
Alternatively, there are other effective cleaning methods for reservoir sanitization. For example, you could use a solution of vinegar and water to clean and sanitize the interior surfaces of the reservoir. After emptying any remaining water from the unit, mix equal parts white vinegar and water in a spray bottle. Spray this mixture inside the reservoir and let it sit for 10-15 minutes before wiping it down with a clean cloth.
In conclusion, maintaining a clean and sanitized water cooler is essential for providing safe drinking water to others. Sanitizing the reservoir is an important part of this process that can be accomplished using disinfectant wipes or alternative cleaning methods such as vinegar solutions. By following these steps regularly, you can ensure that your water cooler remains free of harmful bacteria and contaminants.
Maintaining The Cooler
Maintaining a clean and sanitized water cooler is not only crucial for providing safe drinking water to others but also for prolonging the life of the unit. After sanitizing the reservoir, it’s important to take steps to prevent mold growth and keep the cooler in good working condition.
One tip for preventing mold is to regularly clean and replace any accessories such as filters or drip trays. These areas can collect moisture and become breeding grounds for bacteria and mold. Additionally, it’s important to empty and refill the reservoir on a regular basis to prevent stagnant water from sitting in the unit for too long.
Choosing the right cleaning solution is also important for maintaining the cooler. While vinegar solutions can be effective for sanitizing, some coolers may require a specific type of cleaner that is recommended by the manufacturer. It’s important to follow these guidelines to avoid damaging the unit or voiding any warranties. By following these tips, you can ensure that your water cooler remains clean, safe, and functional for years to come.
Cleaning The Dispensing Nozzle And Faucet
Imagine you have just finished cleaning the exterior of your water cooler. After wiping it down, you begin to notice that the dispensing nozzle and faucet have a build-up of mineral deposits and stains. This is a common issue that can lead to poor water quality and an unpleasant taste. Fortunately, there are effective cleaning techniques that can be used to restore your dispenser’s functionality.
To clean the dispensing nozzle and faucet, start by removing them from the water cooler unit. Using warm soapy water, scrub off any visible dirt or grime with a soft-bristled brush or cloth. For stubborn stains or mineral deposits, use a mixture of equal parts white vinegar and warm water to soak the parts for about 15-20 minutes before scrubbing again.
Maintenance tips for preventing future build-up include regularly wiping down the dispenser after each use with a clean cloth or sponge, using filtered water in your cooler whenever possible, and avoiding leaving stagnant water in the reservoir for extended periods of time.
Moving on to the next step in maintaining your water cooler’s cleanliness, sanitizing is crucial for ensuring safe drinking water.
Sanitizing The Water Cooler
After cleaning the dispensing nozzle and faucet, it is crucial to ensure that the water cooler is sanitized. The importance of sanitization cannot be overstated, especially in public areas where multiple people use the same water cooler. Sanitizing the water cooler eliminates any bacteria, viruses, or other contaminants that may have accumulated over time.
There are several effective cleaning methods for sanitizing a water cooler. One method involves using a mixture of bleach and water to clean both the inside and outside of the cooler. This solution should be allowed to sit for at least 10 minutes before being rinsed off with clean water. Another effective method involves using a commercial sanitizer specifically designed for use on water coolers.
It is important to note that while sanitizing the water cooler is crucial, it is also essential to follow proper safety precautions when handling cleaning products. Always wear gloves and protective eyewear when working with bleach or other chemicals. Additionally, make sure to read and follow all instructions on cleaning products carefully.
Now that you have successfully sanitized your water cooler, you can move on to reassembling it. It is important to take care when putting the various parts back together so as not to damage any components or compromise the cleanliness of your newly-sanitized cooler.
Reassembling The Water Cooler
Proper reassembly of a water cooler is crucial for the device to function efficiently and provide safe drinking water. Once you have cleaned all the components, make sure to dry them thoroughly before starting the reassembly process. Begin by attaching the faucet assembly to the front of the cooler, ensuring that it fits snugly. Next, insert the drip tray and secure it in place with screws.
One common mistake people make during reassembly is not properly aligning the spout with the faucet assembly. This can cause leaks or blockages, resulting in low water flow. To avoid this error, carefully fit the spout into its designated spot on top of the cooler and twist it until it locks into place.
Another common issue that people face when putting back together their water coolers is cross-threading. This happens when two pieces are screwed together at an angle that is not parallel, causing damage to both parts. To avoid cross-threading, ensure that each piece is lined up correctly and screw them together slowly and cautiously.
Having successfully reassembled your water cooler, you are now ready to turn on your device and enjoy clean drinking water once again. But before doing so, there are a few more steps to take to ensure that everything is functioning correctly.
Turning The Water Dispenser Back On
Now that we have successfully cleaned the water cooler, it’s time to turn the dispenser back on and get it ready for use. Before turning the machine on, it is essential to check if there are any issues with the dispenser. Troubleshooting techniques can be employed in this process to prevent any damage or malfunction of the machine.
To restart the dispenser, follow these steps:
- Turn off the power source: Before restarting, ensure that you switch off the power supply. This will prevent any electrical mishaps from occurring during the process.
- Allow Time for Cooling: Once you have turned off the power source, wait for around five minutes before proceeding further. This will allow the machine to cool down gradually.
- Turn On Water Supply: Next, turn on the water supply and let it run through for a few minutes.
- Plug-In Power Cord: Finally, plug in your power cord and switch on your water cooler.
Restarting your water cooler can be a simple process when done correctly. However, if you face any issues while restarting your machine or observe any malfunctions after restarting, consider employing troubleshooting techniques to solve these problems before using your device.
Now that we have restarted our water dispenser let’s move onto flushing out our system. This step is crucial as it ensures that all contaminants and impurities are removed from our system before use.
Flushing The System
Flushing frequency is a crucial aspect of maintaining a clean and healthy water cooler. It is recommended that the system be flushed every three months to ensure that any accumulated debris or bacteria is removed. To begin, unplug the unit and remove the bottle or reservoir. Drain any remaining water from the cooler, taking care to dispose of it properly.
Next, fill the cooler with a disinfectant solution consisting of one part vinegar and three parts water. Allow this solution to sit in the cooler for at least 15 minutes before draining it completely. Rinse the system thoroughly with clean water until no traces of vinegar are present. Once complete, replace the bottle or reservoir and plug in the unit.
The importance of disinfecting cannot be overstated when it comes to maintaining a safe and hygienic water cooler. Bacteria can easily accumulate in the moist environment, leading to possible illnesses for those who consume from it. By regularly flushing and disinfecting your system, you are not only ensuring your own health but also providing a safe source of hydration for others around you.
Transition: Now that you have completed flushing the system, it’s time to check for any potential leaks in your water cooler.
Checking For Leaks
After flushing the system, it’s important to check for leaks in your water cooler. Leaks can be a serious problem, leading to water damage and even mold growth if left unchecked. To prevent these issues, take the time to carefully inspect your water cooler and make any necessary repairs.
One of the most important things you can do when checking for leaks is to look for signs of moisture around the base of your water cooler. This can indicate that there is a leak somewhere in the system. Additionally, be sure to examine all of the hoses and connections leading into and out of your water cooler. Any cracks or holes in these components could also be responsible for leaks.
If you do find a leak in your water cooler, don’t panic! There are several tips you can follow to fix it quickly and easily. First, try tightening any loose connections or replacing damaged hoses. If this doesn’t solve the problem, consider replacing any faulty valves or other internal components that may be causing the issue.
- Check all hoses and connections for cracks or damage
- Tighten loose connections
- Replace damaged hoses
- Consider replacing faulty valves or other internal components
- Test the system thoroughly after making any repairs
Maintaining a regular cleaning schedule is essential for ensuring that your water cooler stays in top condition. By flushing the system periodically and checking for leaks on a regular basis, you can keep your water cooler running smoothly and avoid costly repairs down the line. Remember, taking care of your water cooler is an investment in its longevity and performance – so don’t neglect this important task!
Maintaining A Cleaning Schedule
Regular cleaning of your water cooler is essential to maintain the quality of the water and ensure that it remains safe for consumption. The frequency of cleaning depends on various factors such as the usage, location, and environmental conditions. In general, it is recommended to clean your water cooler at least once every three months.
When it comes to cleaning products, always use non-toxic and food-grade solutions to avoid any contamination. Some of the best cleaning products include vinegar, baking soda, and lemon juice. These natural ingredients not only remove dirt and grime but also eliminate any unpleasant odors.
Maintaining a cleaning schedule is crucial for the longevity of your water cooler. It helps prevent potential issues such as mold growth or bacterial buildup which can affect the quality of your drinking water. Consider creating a simple table with a schedule for cleaning and maintenance tasks to stay organized and on top of things.
Moving forward, let’s take a closer look at some common issues that may arise with your water cooler and how to troubleshoot them effectively.
Troubleshooting Common Issues
A water cooler is a vital appliance that provides clean and refreshing drinking water. However, it can be frustrating when it malfunctions, especially if the cause is unknown. Troubleshooting common issues with your water cooler can save you time and money in the long run.
Firstly, troubleshooting leaks should be taken seriously as they can lead to bigger problems such as mold growth or electrical damage. A leaking water cooler may be caused by a loose or damaged valve, a cracked reservoir, or a clogged drain line. If you notice any leakage, immediately turn off the power source to prevent further damage and carefully examine the appliance for obvious signs of damage. Tighten any loose valves or replace damaged parts as needed.
Addressing mold growth is another common issue with water coolers. Mold thrives in damp environments and can pose health risks to users if not taken care of properly. To prevent mold growth in your water cooler, regularly clean the appliance using a mixture of mild detergent and warm water. Pay attention to hard-to-reach areas such as the reservoir where mold tends to grow quickly. Additionally, ensure that all components are completely dry before reassembling the unit.
To maintain your water cooler’s optimal performance, always follow the manufacturer’s instructions for cleaning and maintenance. Regularly sanitize all parts of the unit, including faucets and tubing connections. Replace filters as recommended by the manufacturer to ensure that your drinking water remains clean and safe for consumption. Finally, be sure to conduct routine checks on your appliance for any signs of wear or damage so that you can address potential problems before they escalate into costly repairs or replacements.
Conclusion
Regular cleaning of water coolers is essential to ensure that the water dispensed is always clean and safe for consumption. To start, gather all necessary supplies before turning off the dispenser and draining the reservoir. Remove the water guard and drip tray, then flush the system thoroughly. Finally, check for leaks and make sure to maintain a regular cleaning schedule.
It cannot be overstated how important it is to keep your water cooler clean. Neglecting this task can lead to contamination of your drinking water, which can cause serious health problems. As a professional in the field of water cooler cleaning, I urge you to take this responsibility seriously.
In conclusion, remember that maintaining a clean and functioning water cooler not only protects your health but also ensures that you have access to fresh drinking water at all times. As Benjamin Franklin once said, “An ounce of prevention is worth a pound of cure.” So take action now and implement a regular cleaning schedule for your water cooler today.
Image Credits
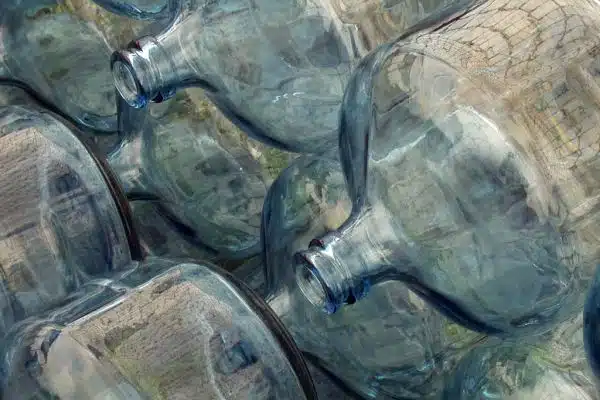
- “Old water cooler bottles” by Earl – What I Saw 2.0 (featured)

