Juicing has become increasingly popular in recent years, as more and more people recognize the health benefits of consuming fresh fruits and vegetables. However, careless cleaning of juicers can lead to the accumulation of bacteria and mold, which can pose serious health risks. Proper juicer cleaning is essential for maintaining optimal health and ensuring that your juice remains pure and nutritious.
As a juicing expert, I have seen firsthand how improper cleaning techniques can compromise the integrity of juice. In this article, I will provide you with a step-by-step guide on how to clean your juicer effectively. By following these simple guidelines, you will be able to maintain the quality of your juice while safeguarding your health. So whether you’re a seasoned juicer or just starting out, read on to learn how to keep your juicer clean and safe for consumption.
Disassembling Your Juicer
When it comes to cleaning your juicer, disassembling the machine is an essential first step. It allows you to access all the nooks and crannies where pulp and juice residue can accumulate. But before you start taking apart your juicer, make sure you have the right tools at hand. You’ll need a clean, dry workspace, a soft-bristled brush or toothbrush, a damp cloth or sponge, and possibly a small tool like a screwdriver or pliers.
To begin disassembling your juicer, consult your owner’s manual for specific instructions. Some models may require you to remove parts in a particular order, while others may have tricky mechanisms that require some finesse to detach. Whatever the case may be, take your time and don’t force anything that won’t budge. This will prevent damage to your juicer and ensure that all parts are properly cleaned.
Here are some tips for best practices when disassembling your juicer: work methodically from top to bottom; avoid using abrasive cleaners or scrubbers on plastic parts; rinse each piece thoroughly in warm water after removing it; and let all parts air-dry completely before reassembling the machine. By following these guidelines and using the proper tools, you’ll be able to disassemble your juicer quickly and efficiently, leaving it ready for thorough cleaning of excess pulp and debris in the next step.
Removing Excess Pulp And Debris
After disassembling your juicer, it’s time to clean the individual parts. The first step is to remove any excess pulp and debris that may have accumulated during the juicing process. Use a small scrub brush or toothbrush to gently scrub away any remaining particles. For hard-to-reach areas, use a cotton swab or toothpick.
Once all visible debris has been removed, it’s time to soak the parts in warm water. This will help to loosen any remaining particles and make them easier to remove. Add a few drops of dish soap to the water for added cleaning power. Allow the parts to soak for at least 10 minutes before gently scrubbing with a soft-bristled brush.
Many people are quick to throw away the pulp after juicing, but there are actually many benefits of pulp that shouldn’t be overlooked. Pulp is rich in fiber and nutrients, making it an excellent addition to baked goods, smoothies, and even soups. Get creative with your leftover pulp by experimenting with different recipes and flavor combinations. Not only will you reduce food waste, but you’ll also be adding extra nutrition to your meals.
Transitioning into the next section: Soaking the parts in warm water is an important step in cleaning your juicer, but don’t forget about drying and reassembling the parts properly for optimal performance.
Soaking Parts In Warm Water
Soaking parts in warm water is a common method for cleaning small and intricate parts of a juicer. This method works best when the water is warm, as it helps to loosen any residue or buildup on the parts. It is important to use warm, not hot, water in order to avoid warping or damaging any of the parts. The duration of the soak should be dependent on the severity of the residue; some parts may only need a few minutes while others may require a few hours.
Soaking Parts
Are you tired of struggling to clean your juicer? Soaking the parts in warm water can make the process much easier. The benefits of soaking are numerous. It helps to loosen any leftover pulp or residue, making it easier to scrub off. Additionally, soaking can help remove any stains that may have accumulated on the surface of your juicer.
To ensure that you get maximum benefits from soaking, it is important to know how long to soak the parts. Generally, it is recommended that you soak the parts for at least 15 minutes. However, if there is stubborn residue or stains, you may need to soak them for longer. It is also crucial that you use warm water instead of hot water as this could damage some of the plastic parts.
By incorporating soaking into your juicer cleaning routine, you can save yourself a lot of time and effort. Not only does it make cleaning easier, but it also helps keep your juicer in good condition by removing any buildup or stains that could affect its performance. So next time you’re cleaning your juicer, remember to soak the parts for maximum benefits!
Warm Water
When it comes to cleaning your juicer, using warm water can be a game-changer. Warm water is an essential ingredient in many juicer cleaning hacks due to its ability to effectively remove residue and stains without damaging the parts. However, it is important to note that warm water should not be too hot, as this could cause damage to some of the plastic components.
To get the most out of using warm water during the soaking process, it is recommended that you use a temperature between 100-110°F. This temperature range is hot enough to loosen any stubborn pulp or residue but not so hot that it causes harm to your juicer’s parts. Additionally, remember not to use boiling water as it can warp or melt some of the plastic parts.
Using warm water during the soaking process is just one of many juicer cleaning hacks that can make your life easier. By incorporating this technique into your cleaning routine, you’ll save time and effort while keeping your juicer in top condition. So next time you’re ready to clean your machine, remember to use warm water for maximum benefits!
Using A Juicer Brush For Stubborn Residue
As the saying goes, “A clean juicer is a happy juicer.” However, removing stubborn residue from a juicer can be a daunting task. Fortunately, using a juicer brush can make this task more manageable. Here are some tips on how to effectively use a juicer brush to remove stubborn residue:
Start by disassembling the juicer – Make sure that you have unplugged the machine before taking it apart. This will allow you to access all parts of the machine and thoroughly clean them.
Use the brush to scrub away any remaining pulp or seeds – The bristles on the brush should be firm enough to remove any stubborn residue without damaging the machine.
Pay special attention to hard-to-reach areas – These areas are often neglected during regular cleaning but can harbor bacteria and other harmful microorganisms if left uncleaned.
Rinse all parts thoroughly under running water – Be sure to remove all soap residue before reassembling the machine.
Using a Juicer Brush for removing Stubborn Residue is an effective way of keeping your juicer in top condition. Regular maintenance of your juicing equipment ensures that it performs optimally and produces high-quality juice every time. By following these simple tips, you can maintain your juicer’s performance and extend its lifespan. In the next section, we will discuss how rinsing parts under running water is another important step in cleaning your juicer thoroughly.
Rinsing Parts Under Running Water
To ensure that your juicer remains in good condition, it is important to clean it regularly. Stubborn residue can be difficult to remove with just a juicer brush, which is why using vinegar can be effective. Vinegar is a natural cleaning agent that can break down tough residue and sanitize your juicer.
To use vinegar for cleaning your juicer, first disassemble the parts and place them in a container filled with equal parts water and vinegar. Allow the parts to soak for at least 30 minutes before scrubbing them with a soft brush. Be sure to rinse all the parts thoroughly under running water before reassembling the juicer.
Cleaning the blades of your juicer is an essential part of maintenance. Over time, fruits and vegetables can leave behind small particles that can become lodged in the blades. To clean the blades, first disassemble them from the juicer and use a soft brush to gently scrub away any debris. Soak the blades in a solution of warm water and mild detergent for 15-20 minutes before rinsing them thoroughly under running water. Once they are completely dry, you can reassemble your juicer.
To keep your juicer in top condition, it is important to dry all of its parts thoroughly after washing. Use a clean towel to pat each piece dry or let them air dry on a clean surface. Avoid using paper towels as they can leave behind lint or fibers that could contaminate your juice. By following these simple steps, you can ensure that your juicer remains clean and ready to use whenever you need it.
Drying Parts With A Clean Towel
After washing all the removable parts of your juicer, it is important to dry them off completely to avoid any moisture buildup that could lead to mold or bacteria growth. Using microfiber towels is highly recommended as they are gentle and absorbent enough to effectively remove any remaining water droplets.
Begin by using a dry microfiber towel to carefully wipe down each part, making sure to get into crevices and hard-to-reach areas. Be thorough in your drying process, as any leftover moisture can compromise the cleanliness of the juicer and affect its performance over time.
After each part has been dried with a clean towel, allow them to air dry completely before reassembling the juicer. This will ensure that every component is completely free from moisture before being put back into use. By following these simple steps, you can maintain optimal cleanliness and functioning of your juicer for years to come.
To continue cleaning your juicer, it is important to pay special attention to the juicing screen. This crucial component needs proper care and maintenance in order for your juicer to work effectively.
Cleaning The Juicing Screen
Juicing screen maintenance is an essential task to keep your juicer functioning at its best. A dirty juicing screen could cause strain on the motor and reduce its lifespan. Therefore, it’s important to clean the screen after every use. To clean the juicing screen, remove it from the machine and rinse it under running water. If there is any pulp stuck in the mesh, use a soft-bristled brush to scrub it off gently.
It’s essential to replace your juicing screen periodically, even with adequate cleaning. Over time, mineral buildup from hard water or residue from fruits and vegetables can accumulate in the mesh holes of the screen resulting in clogging and reduced juice flow. Replacement screens are readily available online or in stores that carry juicers’ spare parts. Before purchasing a replacement screen, ensure that it fits your specific juicer model.
Screen replacement options may vary depending upon your budget and preferences. Stainless steel screens are durable and long-lasting but expensive compared to plastic ones. Plastic screens are more affordable but not as sturdy as stainless steel ones; they may crack or break quickly with rough handling or regular use. Choose a replacement that suits your needs while ensuring that it’s compatible with your machine to avoid any issues down the road.
Transition: Now that we’ve covered maintaining and replacing your juicing screen let’s move on to removing stains with baking soda and vinegar for a thorough cleaning of your juicer.
Removing Stains With Baking Soda And Vinegar
1.Mixing baking soda and vinegar can create a powerful paste that is effective in cleaning off various types of stains. 2.The paste should be applied directly to the stained area, taking care to evenly spread the paste over the entire area of concern. 3.Gently scrubbing with a soft brush can help to further break down and remove the stain from the surface. 4.It is important to note that vinegar is acidic and can damage some surfaces, so it is best to spot test on an inconspicuous area first. 5.If the surface is not adversely affected, the paste can be allowed to sit for a few minutes before scrubbing with the brush. 6.Once the stain has been removed, the area should be rinsed with warm water and wiped dry with a clean cloth.
Mixing Baking Soda And Vinegar
When it comes to cleaning a juicer, mixing baking soda and vinegar is a popular alternative cleaning method that has been gaining recognition. The benefits of vinegar are well-known in the world of cleaning due to its natural acidic properties that can break down stubborn stains effectively. Combining it with baking soda creates a powerful solution that can help get rid of grease and grime build-up in your juicer.
To use this method, begin by mixing equal parts of baking soda and vinegar together until they form a paste-like consistency. Apply the mixture onto the stained area of your juicer and let it sit for about 10-15 minutes before wiping it away with a damp cloth. The chemical reaction between the two ingredients will create bubbles that can help loosen up dirt particles, making it easier to remove them.
It’s worth noting that while this method is effective, it may not work on all types of stains or materials. Always test the solution on a small inconspicuous area first before applying it to the entire juicer. Additionally, remember to rinse off any leftover residue thoroughly before using your juicer again. With these tips in mind, you’ll be able to effectively clean your juicer without harsh chemicals or damaging scrubbing techniques.
Applying Paste To Stains
As a juicer cleaning expert, I highly recommend using natural cleaning solutions to remove stubborn stains from your juicer. One effective method is by applying paste to stains using a mixture of baking soda and vinegar. This combination creates a powerful solution that can effectively break down grease and grime build-up in your juicer.
To apply paste to stains, simply mix equal parts of baking soda and vinegar until they form a paste-like consistency. Apply the mixture onto the stained area of your juicer and let it sit for about 10-15 minutes before wiping it away with a damp cloth. The chemical reaction between the two ingredients will create bubbles that can help loosen up dirt particles, making it easier to remove them.
While this method is effective, always test the solution on a small inconspicuous area first before applying it to the entire juicer. Additionally, remember to rinse off any leftover residue thoroughly before using your juicer again. With these tips in mind, you’ll be able to effectively clean your juicer without harsh chemicals or damaging scrubbing techniques. By applying paste to stains using natural cleaning solutions like baking soda and vinegar, you can keep your juicer looking and functioning its best while also serving others by providing healthy, fresh juice.
Scrubbing With A Brush
When it comes to removing stains from your juicer, there are several natural cleaning solutions that you can use. One popular method is applying paste using a mixture of baking soda and vinegar. However, there are other alternative cleaning methods that you can also try to effectively remove stubborn stains from your juicer.
Using different brushes is one such alternative cleaning method. While pastes and solutions are effective in removing most stains, sometimes dirt particles can be harder to remove. With the use of a brush, particularly a soft-bristled one, you can scrub away dirt particles more easily. Be careful not to use too much force as this may damage the surface of your juicer.
When scrubbing with a brush, make sure to use a natural cleaning solution like the baking soda and vinegar paste mentioned earlier. Apply the solution onto the stained area and begin scrubbing gently with the brush until the stain is removed. Rinse off any leftover residue thoroughly before using your juicer again. By incorporating different brushes into your cleaning routine along with natural cleaning solutions, you’ll be able to effectively clean your juicer while prolonging its lifespan.
Sanitizing With Rubbing Alcohol
As the saying goes, “cleanliness is next to godliness.” This is especially true when it comes to juicers. After removing stains with baking soda and vinegar, the next step in ensuring your juicer is perfectly clean is through sanitization using rubbing alcohol.
Using rubbing alcohol for juicer sanitation is highly recommended as it effectively kills bacteria and prevents the growth of mold and mildew. Simply mix one part rubbing alcohol with one part water and use a spray bottle to apply it to the juicer’s parts. Allow the solution to sit for a few minutes before rinsing thoroughly with warm water. This process should be done after every use.
While rubbing alcohol is an effective cleaner, many people prefer using natural cleaners for their juicers. The benefits of using natural cleaners include avoiding harsh chemicals that can potentially harm the environment or leave behind harmful residues on your juicer’s parts. Some common natural cleaners include lemon juice, white vinegar, and baking soda. These cleaners can be mixed with water in a spray bottle or used individually depending on the type of cleaning needed.
Now that we have covered sanitizing with rubbing alcohol and using natural cleaners, it’s important not to forget about cleaning the motor base of your juicer. The motor base should be cleaned only with a damp cloth or sponge as any liquid cleaner can easily damage the electrical components inside. Ensure that you unplug your juicer before cleaning its motor base and avoid getting any moisture onto the electrical components. With these tips in mind, you’ll be able to maintain a perfectly clean and functional juicer!
Cleaning The Motor Base
- Prior to any cleaning, it is essential to unplug the motor base of the juicer from its power source.
- Cleaning the motor base of a juicer should begin by wiping down the exterior with a damp cloth.
- It is recommended to disassemble the motor base to ensure a thorough cleaning of all components and to prevent damage to the juicer.
- To disassemble the motor base, a screwdriver may be necessary to remove any screws and separate the parts.
- Once the motor base is disassembled, each individual part should be wiped down with a damp cloth and mild detergent.
- To prevent rust or other damage, all parts of the motor base should be dried completely before reassembling.
Unplugging
As a juicer cleaning expert, I understand the importance of properly unplugging your juicer before attempting to clean it. This may seem like a simple task, but it is crucial for preventing accidents and ensuring the longevity of your juicer. To properly unplug your juicer, always make sure to turn off the power switch and unplug the cord from the outlet. It is also important to wait a few minutes after turning off the power switch to allow any remaining juice or debris to settle.
Before disassembling your juicer for cleaning, there are several precautions you should take. First, make sure that all parts are cool to the touch before handling them. Additionally, wear gloves or use a cloth when handling sharp blades and be cautious when removing any stuck pieces of produce or pulp from the machine. Always refer to your user manual for specific instructions on how to safely disassemble and reassemble your particular model.
By following these simple steps on how to properly unplug your juicer and taking necessary precautions before disassembling it, you can ensure that your machine stays in top condition and provides you with delicious and nutritious juices for years to come. Remember that safety should always come first when working with any appliance in the kitchen, including your beloved juicer!
Wiping Down
Now that we have discussed the importance of unplugging your juicer and taking necessary precautions before disassembling it, let’s move on to another crucial step in juicer cleaning – wiping down the motor base. The motor base is the central part of your juicer where the power switch and motor are located. Keeping this area clean is essential for preventing rust and ensuring proper functioning of your machine.
To wipe down the motor base, use a microfiber cloth moistened with warm water and mild detergent. Avoid using abrasive cleaners or scrubbers as they can scratch the surface of your machine. Gently wipe all surfaces of the motor base, including any nooks or crevices where dirt or juice residue may accumulate. Be sure to dry the area thoroughly with a clean, dry cloth to prevent moisture from seeping into any electrical components.
Regularly wiping down your juicer’s motor base not only helps prevent rust but also keeps it looking shiny and new. Additionally, a clean motor base can help prolong the life of your juicer by keeping its internal parts from becoming clogged with dirt or debris. By incorporating this step into your regular juicer cleaning routine, you can ensure that your machine stays in top condition for years to come while providing delicious juices for you and your loved ones to enjoy.
Disassembling
Now that we have covered the importance of wiping down the motor base, let’s move on to another crucial step in thoroughly cleaning your juicer – disassembling. Disassembling your juicer is necessary to clean its various parts that come in contact with fruits and vegetables. This step ensures that no juice residue or pulp is left behind, which can lead to mold growth or bacterial build-up.
To disassemble a juicer, start by referring to the manufacturer’s instructions. The manual should provide detailed guidance on how to safely take apart your specific model. It is essential to follow these directions carefully as each juicer has unique parts and mechanisms. Some general tips for safely disassembling a juicer include wearing gloves if necessary, using a soft brush or cloth to remove any debris, and being gentle with fragile components.
Once you have successfully disassembled your juicer, you can proceed with cleaning its removable components such as the strainer, auger, and juice container. These parts can be washed with warm water and mild detergent or placed in the dishwasher if they are dishwasher-safe. While cleaning the removable parts, ensure that you remove all food particles from every crevice of each piece before reassembling them back into their original places.
Protecting Electrical Components From Water
Waterproofing techniques are essential to protect the electrical components of a juicer from water damage. The first step is to make sure that all electrical components are dry before using the juicer. One can use a towel to wipe down the exterior of the machine and allow it to air dry. This will help prevent any moisture from entering the electrical parts of the juicer.
Another technique to waterproof your juicer is by applying a waterproof sealant. A waterproof sealant is a protective coating that is applied over the electrical components of the machine. It helps keep moisture out and prevents water damage. However, it’s essential to ensure that you follow all instructions carefully while applying it to avoid any mishaps.
Maintenance tips for protecting your juicer from water damage include keeping it clean and dry at all times, storing it in a dry place, and avoiding exposing it to moisture or damp conditions. Additionally, regular cleaning of your machine can help prevent dirt buildup, which could cause damage over time. By following these tips, you can extend the life of your juicer and enjoy its benefits for years to come.
To avoid harsh chemical cleaners that may damage your machine’s surface or interior, consider using natural cleaning agents like vinegar or lemon juice mixed with water. These solutions are gentle on your machine yet effective in removing dirt and grime buildup without causing any harm. Always remember to unplug your appliance before cleaning it and never immerse it fully in water as this could lead to short circuits and other electrical hazards.
Avoiding Harsh Chemical Cleaners
- Alternative natural cleaners such as baking soda, vinegar, and lemon juice are often effective in cleaning juicers and other kitchen appliances.
- Natural cleaners are generally more eco-friendly and safer for use than traditional chemical cleaners.
- To disinfect a juicer, it is recommended to use a mixture of water and vinegar or a water solution with a few drops of essential oils.
- For particularly tough stains, a paste made of baking soda and water can be used with a clean cloth to scrub off the residue.
Alternative Natural Cleaners
Maintaining a clean and sanitary juicer is essential to ensure that it operates optimally and produces high-quality juice. While many people resort to harsh chemical cleaners to achieve this, there are alternative natural cleaners that are equally effective without the negative impact on the environment. As a juicer cleaning expert, I highly recommend exploring DIY cleaning solutions and eco-friendly options that will not only save money but also promote a healthier lifestyle.
One of the most popular natural cleaners for juicers is vinegar. This versatile substance can be mixed with water in equal parts to create a powerful solution that effectively removes stubborn stains and buildup. Simply soak your juicer parts in the mixture for at least an hour before scrubbing them with a soft brush or cloth. Another option is baking soda, which can be used as a gentle abrasive to scrub away residue from juicer components. Mix baking soda with water to make a paste, apply it onto the affected areas, let it sit for a few minutes before wiping it off with a damp cloth.
In conclusion, avoiding harsh chemical cleaners when cleaning your juicer is not only good for the environment but also beneficial for your health. With DIY cleaning solutions and eco-friendly options readily available, there’s no reason why you should continue using toxic substances that pose harm to both you and nature. By making use of natural alternatives such as vinegar and baking soda, you can maintain a clean and healthy juicer while doing your part in preserving the planet.
Safe Disinfectants
As a juicer cleaning expert, I highly recommend using natural disinfectants as an alternative to harsh chemical cleaners. While vinegar and baking soda are excellent choices for removing stains and buildup, they may not be sufficient in killing harmful bacteria that can accumulate in your juicer over time. That’s why it’s essential to prioritize regular cleaning with safe disinfectants to ensure that your juicer is not only clean but also free from harmful pathogens.
One of the most effective natural disinfectants for juicers is hydrogen peroxide. This powerful substance can be mixed with water in equal parts and used to sanitize juicer components thoroughly. Simply soak your parts in the solution for at least 5-10 minutes before rinsing them off with water. Another option is using essential oils such as tea tree oil, which has antibacterial properties that can kill germs and bacteria effectively. Mix a few drops of tea tree oil with water and use it to wipe down your juicer components.
In conclusion, avoiding harsh chemical cleaners when cleaning your juicer is crucial for promoting a healthier lifestyle and preserving the environment. Still, it’s equally important to use safe disinfectants regularly to ensure that your juicer is free from harmful pathogens. By incorporating natural disinfectants such as hydrogen peroxide or essential oils like tea tree oil into your regular cleaning routine, you can maintain a clean and healthy juicer while serving others by providing them with high-quality juice that they can enjoy without any health risks.
Maintaining Your Juicer’s Cleanliness
How can you maintain the cleanliness of your juicer? One of the most important steps is to clean it regularly. This will prevent buildup and ensure that you have fresh and healthy juices every time.
Cleaning frequency depends on how often you use your juicer. If you use it daily, then it is recommended that you clean it after each use. However, if you only use it occasionally, then once a week should be sufficient. The key is to make sure that all parts are thoroughly cleaned to prevent any bacteria or mold from growing.
When cleaning your juicer, avoid using harsh chemical cleaners as these can damage the machine and potentially contaminate your juice. Instead, opt for natural cleaning products such as vinegar or lemon juice mixed with water. These are effective at removing stains and odors without leaving any harmful residue.
By following these cleaning guidelines and using the recommended cleaning products, you can keep your juicer in top condition and enjoy healthy juices for years to come. However, if you encounter any issues with cleaning or maintaining your juicer’s cleanliness, don’t worry – there are troubleshooting tips available to help solve any problems that may arise.
Troubleshooting Juicer Cleaning Issues
Common mistakes during juicer cleaning can be easily avoided with proper knowledge and preparation. One of the most common mistakes is not disassembling the juicer completely before cleaning, which can lead to buildup in hard-to-reach areas. Another mistake is using abrasive materials such as steel wool or harsh chemicals, which can damage the juicer and leave harmful residue. To avoid these mistakes, refer to the manufacturer’s instructions for disassembly and use gentle cleaning solutions such as vinegar or lemon juice.
Time-saving tips for juicer cleaning include taking apart the juicer immediately after use and rinsing each component under running water to prevent buildup. It is also helpful to have a designated cleaning area with all necessary supplies readily available, such as a scrub brush, soft cloth, and mild detergent. For tough stains or buildup, soaking components in warm water with a bit of baking soda or dish soap can make cleaning easier and more efficient.
With proper care and maintenance, juicers can last for years without issues. However, it is important to address any problems that arise during cleaning promptly to prevent further damage. If you encounter difficulties such as rust or mold growth on your juicer components, refer to manufacturer’s instructions for troubleshooting tips or seek professional assistance from a qualified technician.
Transition: Now that we have covered some common mistakes and time-saving tips for juicer cleaning, let’s move on to frequently asked questions about this topic.
Frequently Asked Questions About Juicer Cleaning
Juicer maintenance is key to ensuring that your juicer remains in good working condition for a long time. A study conducted by the National Health and Nutrition Examination Survey revealed that people who regularly cleaned their juicers experienced fewer breakdowns compared to those who did not. This implies that regular cleaning can prevent damage and prolong the lifespan of your juicer.
Cleaning frequency is an important aspect of juicer maintenance. How often you clean your juicer will depend on how frequently you use it. However, it is recommended that you clean your juicer after each use to prevent the build-up of pulp and other debris. In addition, if you plan on storing your juicer for an extended period, make sure you give it a thorough clean before packing it away.
To ensure proper cleaning of your juicer, follow these tips:
- Disassemble the juicer: Remove all detachable parts such as the blades, strainer, and feeding chute.
- Soak in warm soapy water: Place all removable parts in a basin filled with warm soapy water and let them soak for about 10 minutes.
- Scrub thoroughly: Use a brush to scrub off any remaining debris or residue from each part.
- Rinse and dry: Rinse each part with clean water then allow them to air dry completely before reassembling.
By following these tips and cleaning your juicer regularly, you can be sure that it will remain in good working condition for years to come. Remember, prevention is better than cure!
Conclusion
Cleaning your juicer is an important task that ensures the longevity of your machine and the quality of your juice. Just as a chef must clean their knives after each use, a juicer owner must dedicate time to properly cleaning their equipment. Disassembling the juicer, removing excess pulp and debris, soaking parts in warm water, using a juicer brush for stubborn residue, and rinsing parts under running water are all crucial steps in maintaining a clean juicer.
However, it’s important to remember that cleaning isn’t just about removing visible dirt or grime; it’s also about preventing bacteria buildup and ensuring the safety of your health. Neglecting to clean your juicer can have serious consequences on your health and wellbeing. Remember: a clean juicer equals a healthy body.
In conclusion, maintaining the cleanliness of your juicer should be treated with utmost importance. Just as we take care of our bodies through healthy eating habits and exercise, we must also take care of our equipment by regularly cleaning it. By doing so, you ensure not only the longevity of your machine but also the quality of your juice and most importantly, your health. So go ahead, disassemble that juicer today and give it a thorough cleaning – you’ll thank yourself later!
Image Credits
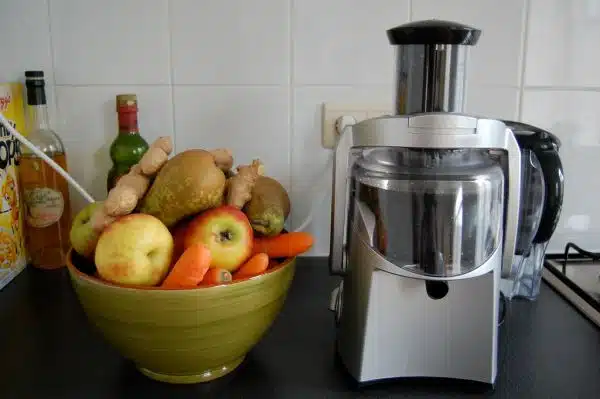
- “Juicer with fruit” by mathiasbaert (featured)

