Hair brushes can be a breeding ground for dirt, oil, and bacteria. Over time, this build-up can lead to an ineffective brush that may even damage your hair. With all the time and effort we put into styling our hair, it’s important to make sure our tools are clean and working efficiently. In this article, we will cover the proper techniques for cleaning dirty hair brushes.
As a hair care expert, I have seen firsthand the negative effects of using a dirty brush on both the health of the scalp and the appearance of the hair. Knowing how to properly clean your brushes not only ensures their longevity but also contributes to overall hair health. By following these simple steps, you can maintain hygienic tools while achieving your desired hairstyle.
The Importance Of Clean Hair Brushes
Maintaining clean hair brushes is an integral part of good hygiene and healthy hair care practices. The benefits of using clean brushes are numerous, from promoting scalp health to preventing breakage and damage to the hair. On the other hand, dirty brushes can have harmful effects on the hair and scalp.
Brushing your hair with a dirty brush can lead to build-up of dead skin cells, oils, dirt, and product residue on the bristles. This build-up can transfer back onto your hair during brushing, causing clogged pores on your scalp and creating an unhealthy environment for hair growth. Moreover, using a dirty brush can also contribute to increased frizz and tangling in the hair.
Furthermore, dirty brushes can harbor bacteria that may cause infections or irritations on the scalp. Bacteria thrive in warm and moist environments such as those found in a dirty brush. If left uncleaned for a long time, these bacteria can multiply rapidly and cause unpleasant odors or even infections. It is essential to keep our brushes clean regularly to maintain healthy hair and scalp.
If you’re unsure whether your brush needs cleaning or not, there are some signs you should look out for that indicate it’s time for a wash. Let’s take a closer look at these signs in the next section.
Signs Of A Dirty Brush
According to a recent survey, nearly 70% of people use hair brushes more than once before cleaning them. This may come as a surprise to some, but it is important to recognize the signs of a dirty brush in order to maintain healthy hair. Identifying buildup and implementing proper cleaning techniques are essential for ensuring your brush serves its intended purpose of keeping your locks looking their best.
The first step in identifying buildup is to take a close look at your brush. If you see clumps of hair stuck between bristles or notice a thick residue on the surface, this is a good indication that your brush needs cleaning. Another telling sign is if your hair starts looking greasy or dull despite regular washing. This could be due to the transfer of oils and product buildup from an unclean brush.
Cleaning techniques vary depending on the type of brush you have and the amount of buildup present. For plastic or metal brushes, soak in warm water with shampoo or vinegar for 20-30 minutes before using a toothbrush to scrub away debris. Wooden brushes require extra care as they can warp or crack when exposed to water for extended periods. Instead, use a mixture of baking soda and water to gently clean wooden bristles without damaging the material.
Now that you know how to identify when your hairbrush requires cleaning and which techniques work best for different types of brushes, it’s time to gather your supplies. With just a few simple steps, you can ensure your brush is free from dirt and grime, allowing you to enjoy healthy, shiny locks all year round.
Gather Your Supplies
After identifying the signs of a dirty brush, it is time to gather your supplies to start cleaning. Cleaning techniques will vary depending on the type of brush and bristles you have, but there are some general steps you can follow. Before starting, make sure you have the following items:
| Supplies | Description | Where to Find |
|---|---|---|
| Shampoo | Gentle shampoo without sulfates | Drugstore or online |
| Comb | Wide-tooth comb for detangling hair from brush | Beauty supply store or online |
| Bowl of warm water | To soak brushes in | Kitchen |
Helpful tips:
- Use a toothbrush or cleaning toothbrush to scrub hard-to-reach areas.
- Avoid harsh chemicals that can damage your brushes.
- Let air-dry completely before using again.
To start cleaning, remove hair from the brush with a wide-tooth comb. For plastic brushes, you can wash them with warm water and gentle shampoo. For wooden brushes, avoid soaking in water and instead use a damp cloth with shampoo to clean. Be sure not to get water on the cushion or base of any brush as this can cause mildew.
Once cleaned, lay brushes on a towel to dry completely before using again. Regular cleaning will keep your brushes free from dirt and oils that can weigh down hair and cause breakage.
Transitioning into the next section about removing hair from the brush: Keeping your brushes free from hair is important for maintaining their cleanliness. Here are some helpful tips for removing hair from different types of brushes.
Remove Hair From The Brush
As a hair care expert, one of the most important steps in cleaning a dirty hairbrush is to remove the hair from the brush. This step is crucial because it allows for better access to the bristles and prevents them from being tangled in loose strands. Think of it like decluttering your home – once you remove the excess, you can focus on what really matters.
To remove hair from the brush, start by using your fingers or a comb to gently loosen any strands that may be caught between the bristles. Once you have removed as much hair as possible, use a pair of scissors or tweezers to carefully cut and pull out any remaining hairs. Be sure to dispose of the hairs in a trash bin or compost pile rather than flushing them down the toilet.
After removing all visible hairs, it’s time to move on to cleaning the brush itself. But before we dive into effective cleaning solutions, let’s first discuss why this step is important. A clean brush not only ensures that your hair stays healthy and free of debris but also extends its lifespan. So if you want your hairbrushes to last longer and keep your locks looking their best, regularly cleaning them is key.
- Use a soft-bristled toothbrush to gently scrub away any stuck-on debris
- Mix equal parts baking soda and water into a paste and apply it directly onto the bristles
- Soak the brush in warm water mixed with a tablespoon of vinegar for 10-15 minutes
- Rinse thoroughly with warm water and allow it to air dry completely before using again
Now that we’ve covered how to effectively remove hair from your brushes and why it’s important to clean them regularly, let’s move on to soaking your brush in warm water mixed with vinegar for an even deeper clean.
Soak The Brush In Warm Water
After removing the hair from the brush, soaking it in warm water is the next step in cleaning dirty hair brushes. Soaking your brush in warm water for a few minutes helps to loosen debris, dirt, and oils that have accumulated on the brush. The benefits of soaking are twofold: it helps to remove build-up from your hairbrush and it keeps your brush clean for future use.
The best temperature for soaking your hairbrush in warm water is between 95°F and 105°F (35°C-40°C). This temperature range is perfect because it’s not too hot that it will damage the bristles or handle, but it’s also not too cold that it won’t effectively clean the brush. It’s important to avoid using boiling water as this can cause damage to both natural and synthetic bristles.
Now that you have soaked your hairbrush in warm water, you can add a cleaning solution to help remove any remaining dirt or debris. There are many different types of cleaning solutions available on the market, but some people prefer using a simple mixture of baking soda and water. Adding a cleaning solution to the warm water will help break down any remaining oils or product buildup on the brush.
Add Cleaning Solution
There are several types of cleaning solutions that can be used to clean dirty hair brushes. These include white vinegar, soap and water, and special brush cleaning solutions.
Adding a cleaning solution to your hairbrush cleaning routine is an important step in maintaining the integrity of your hair brushes.
When using a cleaning solution, it is important to follow the manufacturer’s instructions, as well as rinse the brush thoroughly before use.
Additionally, it is important to clean your hair brushes on a regular basis to avoid build-up of dirt and hair products that can cause damage to the brush bristles.
Types Of Cleaning Solution
When it comes to cleaning dirty hair brushes, using a cleaning solution can be very effective in removing dirt and buildup. There are two main types of cleaning solutions: DIY and commercial. DIY solutions are made from household items that you likely already have on hand, such as vinegar, baking soda, and dish soap. On the other hand, commercial solutions are specifically designed for cleaning hair brushes and can be found at most drugstores or online.
One advantage of using DIY cleaning solutions is that they are often more affordable than their commercial counterparts. Additionally, many people appreciate the fact that they know exactly what ingredients are going into their cleaning solution. However, there are some downsides to using DIY solutions. For example, they may not be as effective at removing stubborn buildup as commercial solutions. Additionally, some people may find the smell of vinegar or other natural ingredients unpleasant.
Commercial cleaning solutions, while typically more expensive than DIY options, have several advantages as well. They are often specially formulated to remove buildup from hair products and oils, making them very effective at deep-cleaning brushes. Additionally, many commercial solutions come in convenient spray bottles or packets that make them easy to use without creating a mess. However, one potential downside is that some people may be sensitive to certain chemicals used in these products and experience irritation or allergic reactions.
In conclusion, whether you choose a DIY or commercial cleaning solution ultimately depends on your personal preferences and needs. If you’re looking for an affordable option that’s gentle on the environment but less effective on tough buildup, then a DIY solution might be right for you. However, if you’re willing to spend a bit more money for a product that’s specifically designed for deep-cleaning hair brushes and removing stubborn buildup quickly and efficiently, then a commercial solution might be preferable.
Steps To Add Cleaning Solution
When it comes to cleaning hair brushes, adding a cleaning solution is an essential step to effectively remove dirt and buildup. The type of cleaning solution used can vary from DIY options made from household items to commercial solutions specifically formulated for cleaning brushes. While both options have their advantages and disadvantages, the steps to add the cleaning solution are relatively similar.
For those using DIY cleaning solutions, there are several alternatives to soaking the brush in a mixture of vinegar or baking soda. One option is to mix the solution in a spray bottle and spray it onto the brush. Another alternative is to mix the solution in a bowl and use a toothbrush or small brush to scrub the bristles. Regardless of the method chosen, it’s important to thoroughly saturate the brushes with the solution and let it sit for a few minutes before rinsing with warm water.
When using commercial solutions, most come in convenient spray bottles or packets that make it easy to apply directly onto the brush. After applying the solution, let it sit for a few minutes before rinsing with warm water. It’s important to follow any specific instructions on the packaging for optimal results and avoid over-saturating the brush with too much product.
Overall, adding a cleaning solution is an essential step in effectively cleaning hair brushes. Whether choosing a DIY option or commercial product, there are several ways to apply them without soaking and achieve optimal results. Experiment with different methods and solutions until finding what works best for individual needs and preferences.
Use A Toothbrush To Scrub The Bristles
For those who want to effectively clean their hair brushes, using a toothbrush to scrub the bristles is a great option. Let’s say you have been using your hair brush for several weeks and it has accumulated dirt, oil and other debris. A toothbrush can help remove these build-ups from the brush without damaging the bristles.
To begin with, prepare a bowl of warm water and add some shampoo or dish soap. Dip the toothbrush into the mixture and gently scrub the bristles in circular motions. Make sure to get in between each bristle to ensure that all dirt and debris are removed. Once done, rinse off with clean water.
Here are some additional tips to ensure that your hair brushes stay clean:
- Alternate methods: Aside from using a toothbrush, there are other ways to clean your hair brushes such as soaking them in vinegar or baking soda solutions.
- Preventative measures: To minimize the amount of build-up on your brushes, make sure to remove any excess hair after each use and store them in a dry place.
Now that you have scrubbed your hair brush thoroughly with a toothbrush, it’s time to rinse it off with clean water. Make sure to remove all soap residue from the bristles as they can attract more dirt if left behind. Rinse until no soap suds are visible then shake off any excess water before air-drying the brush upside down on a towel or rack. By taking care of your hair brushes regularly, you can ensure that they last longer and perform better when styling your hair.
Rinse The Brush Thoroughly
- To properly clean a hair brush, it is important to fill a sink with lukewarm water before beginning the process.
- The brush should then be soaked in the water for several minutes to allow the dirt and product buildup to loosen.
- After several minutes of soaking, begin to swirl the brush back and forth under the water, being sure to make contact with all parts of the brush.
- This swirling motion should be repeated until the brush appears to be free of dirt and debris.
- It is important to ensure that the bristles of the brush are thoroughly rinsed to remove any trapped dirt or product.
- After rinsing, the brush should be allowed to air dry before its next use.
Fill Sink With Water
To properly clean a dirty hairbrush, it is important to rinse it thoroughly after removing the hair. One effective way to do this is by filling a sink with water. This ensures that all the dirt and debris trapped in the bristles are completely removed.
When filling the sink with water, it is essential to consider different cleaning solutions that can be added for a deeper clean. A mild detergent or shampoo can be used to help break down any product build-up or excess oils on the brush. Another option is vinegar or baking soda, which can help remove any odors and disinfect the brush. These solutions should be mixed with warm water before placing the brush in them.
For an even more thorough cleaning process, using a brush cleaner tool can help remove any remaining debris and buildup from between the bristles. This tool typically has small wire bristles or hooks that can reach deep into the brush head without damaging the bristles themselves. It is important to use this tool gently, ensuring that no damage is done to either the brush or scalp.
By filling a sink with water and incorporating various cleaning solutions and tools, you can effectively rinse your hairbrush thoroughly and ensure its longevity. The result will be a clean and well-maintained hairbrush that will continue to serve you well for years to come.
Soak Brush In Water
To maintain a clean and healthy hairbrush, it is necessary to rinse it thoroughly after removing any hair. However, rinsing alone may not be enough to remove all the dirt and debris that have accumulated in the bristles over time. Soaking your hairbrush in water is an effective way to deep clean it.
When soaking your hairbrush, you can add different cleaning solutions to further enhance its cleaning power. A mild detergent or shampoo can help break down product build-up and excess oils on the brush. Vinegar or baking soda can also be used to disinfect the brush and remove any unpleasant odors. It is essential to mix these solutions with warm water before submerging your brush in them.
Effective soaking times depend on how dirty your brush is. If your brush has a lot of product buildup or debris, you should soak it for at least 15 minutes. For less dirty brushes, five minutes of soaking should suffice. After soaking, use a small toothbrush or a brush cleaner tool to remove any remaining dirt and debris from between the bristles. Rinse thoroughly with warm water until all traces of cleaning solution are gone.
By following these steps, you can ensure that your hairbrush remains clean and well-maintained for longer periods while keeping your scalp healthy and free from bacteria buildup. Incorporating different cleaning solutions during soaking will also help eliminate unpleasant odors caused by product buildup or natural oil accumulation on the bristles of your hairbrush.
Swirl Back And Forth
Proper technique is essential when it comes to maintaining a clean and healthy hairbrush. One of the most critical steps in keeping your brush free from dirt and debris is rinsing it thoroughly after each use. However, simply running water over the bristles may not be enough to remove all the buildup that has accumulated over time.
To ensure that your hairbrush remains clean, you must use the proper technique when rinsing it. Start by removing all hair from the brush, then hold it under running water, making sure that the water flow is directed towards the bristles. Swirl back and forth to help dislodge any stubborn dirt or debris trapped between the bristles. Continue rinsing until all traces of dirt and cleaning solution are gone.
The type of material used in making your brush also plays a significant role in how you should rinse it. For instance, brushes with natural boar bristles require extra care during rinsing as they are more delicate than synthetic materials. When rinsing a boar bristle brush, avoid using hot water as this can damage its natural fibers. Instead, use lukewarm water while swirling back and forth to remove any buildup without damaging the bristles’ integrity.
Dry The Brush
After thoroughly rinsing your hair brush, it’s important to let it dry completely before using it again. Leaving a wet hair brush can promote the growth of mold and bacteria, which can be harmful to your scalp and hair. To prevent mold growth, it’s crucial that you air dry your brush.
To air dry your hair brush, start by shaking out any excess water from the bristles. Next, use a clean towel to gently blot the bristles until they are no longer dripping with water. Place the brush on a flat surface with the bristles facing down and allow it to air dry naturally.
It’s important to note that if you have a wooden hair brush, you should take extra care when drying it. Avoid leaving wooden brushes in direct sunlight or near a heat source as this can cause cracking or warping. Instead, place them in a well-ventilated area away from direct sunlight and allow them to air dry naturally before using them again. In doing so, you’ll ensure that your brushes stay in good condition for years to come.
Transition: Now that we’ve covered how to dry your hair brushes properly, let’s move on to cleaning wooden brushes.
Cleaning Wooden Brushes
Wooden brushes are a popular choice for hair care enthusiasts because of their natural materials that do not cause static electricity. There are two types of wooden brushes: those made from hardwoods and those made from softwoods. Hardwood brushes, such as oak and cherry, have tightly packed bristles that make them ideal for detangling thick hair. Softwood brushes, such as pine and cedar, have widely spaced bristles that are perfect for fine or thinning hair.
The benefits of using wooden brushes for hair care are numerous. They distribute the scalp’s natural oils throughout the hair shaft, which results in healthier-looking locks. Wooden brushes also reduce frizz and prevent breakage by gently massaging the scalp and detangling knots without damaging the hair’s cuticle layer. Moreover, wooden brushes last longer than plastic ones since they do not melt or crack over time.
If you own a wooden brush, it is essential to maintain its cleanliness to avoid bacterial buildup on its surface. In the next section, we will discuss how to clean boar bristle brushes effectively.
Cleaning Boar Bristle Brushes
Boar bristle brushes are a popular choice for those looking for an effective tool to maintain healthy hair. These brushes have natural bristles that help to distribute the scalp’s oils throughout the hair, which promotes shine and softness. Boar bristle brushes also help to prevent breakage and damage by gently detangling hair without pulling or snagging it.
Different brush types serve different purposes, and understanding the benefits of each type can help you choose the right one for your specific needs. Boar bristle brushes are great for distributing natural oils through your hair, but they may not be suitable for all hair types. For example, individuals with curly or thick hair may prefer a paddle brush because it can easily detangle stubborn knots without causing any damage.
When using a boar bristle brush, be sure to clean it regularly to keep it in good condition. Here are some tips on how to clean your boar bristle brush:
- Use a comb or brush cleaner to remove any hair from the bristles.
- Fill a bowl with warm water and add a few drops of shampoo.
- Dip the brush into the water and swish it around gently.
- Rinse thoroughly with warm water and lay flat on a towel to air dry.
Next up, we will discuss how to clean paddle brushes effectively without damaging them.
Cleaning Paddle Brushes
As the saying goes, “a good hair day starts with a clean brush.” Paddle brushes are one of the most commonly used hairbrushes, and they require regular cleaning to maintain their performance. Before diving into the cleaning process, it is important to understand the different types of paddle brushes available in the market.
Types of paddle brushes:
| Type | Description |
|---|---|
| Classic paddle brush | Features a flat base with evenly spaced bristles along the surface |
| Vented paddle brush | Contains small vents on its base that allow air to pass through while styling |
| Cushioned paddle brush | Has a soft cushioned base that provides extra comfort and flexibility during use |
Using a paddle brush regularly offers several benefits for your hair. Firstly, it detangles knots and removes dirt and oils from your scalp without damaging your hair. Secondly, it stimulates blood flow to your scalp, promoting healthy hair growth. Lastly, it distributes natural oils from your scalp down to the ends of your hair, leaving it shiny and smooth.
To keep your paddle brush in top condition, you should clean it at least once a week. Start by removing any loose hair using a comb or toothbrush. Then mix warm water with shampoo or baking soda in a bowl and soak the brush for 10-15 minutes. Use an old toothbrush to gently scrub away any remaining buildup before rinsing it thoroughly with clean water.
Next up: cleaning round brushes!
Cleaning Round Brushes
- Before attempting to clean a round brush, it is important to ensure that all hair is removed from the bristles.
- To clean the brush, a mild shampoo or soap should be mixed with lukewarm water and used to gently scrub the bristles.
- After scrubbing, any remaining dirt should be wiped away with a damp cloth and the brush should be rinsed thoroughly with lukewarm water.
- To dry the brush, it should be placed on a flat surface, with the bristles facing down, and left to air dry.
- It is important to avoid submerging or soaking the brush in any liquid, as this can damage the handle and bristles.
- To maintain the brush in optimal condition, it should be cleaned regularly and allowed to dry completely between uses.
Preparing The Brush
When it comes to maintaining good hair hygiene, one should not overlook the importance of brush maintenance. A dirty brush can harbor bacteria and dirt that can transfer to your hair, causing various scalp issues. Therefore, cleaning your round brush regularly is essential for healthy hair. To begin with, preparing the brush before cleaning is crucial to ensure effective results.
Firstly, remove any tangles or hair strands from the bristles of the round brush using a wide-tooth comb or another clean brush. This step will make it easier to deep clean the bristles and ensure that all areas are thoroughly cleaned. Next, soak the round brush in warm water mixed with a mild shampoo for about 15-20 minutes. The warm water helps soften any dirt buildup on the bristles and shampoo aids in breaking down any product residue.
After soaking, use an old toothbrush or a small cleaning brush to scrub around each bristle of the round brush gently. Make sure you clean all sides and angles of the bristles well. Additionally, pay attention to any crevices or grooves on the base of the brush as these areas tend to accumulate dirt easily. Once you have finished scrubbing every part of the brush, rinse it thoroughly under running water until there are no suds left.
In conclusion, preparing your round brush before deep cleaning is necessary for efficient removal of dirt buildup while preventing damage to the bristles during cleaning. Brush hygiene plays a vital role in maintaining healthy hair by preventing transfer of bacteria and product buildup from dirty brushes onto your hair and scalp. Incorporating regular cleaning into your hair care routine will help extend your brushes’ lifespan while ensuring optimal performance every time you use them.
Cleaning The Brush
Maintaining good hair hygiene requires proper brush maintenance, and cleaning your round brush is essential to promote healthy hair. One of the crucial steps in cleaning a round brush is preparing it before deep cleaning. This process ensures effective removal of dirt buildup while preventing damage to the bristles during cleaning. Therefore, brushing maintenance starts with proper preparation before commencing with the actual cleaning process.
Cleaning techniques for round brushes involve soaking them in warm water mixed with mild shampoo for about fifteen to twenty minutes. The warm water helps soften any dirt buildup on the bristles while the shampoo aids in breaking down any product residue. After soaking, use an old toothbrush or a small cleaning brush to scrub gently around each bristle of the round brush. It is vital to clean all sides and angles of the bristles well, including crevices or grooves on the base of the brush.
Properly cleaning your round brush plays a significant role in maintaining optimal performance and extending its lifespan. Neglecting this aspect can cause bacteria and dirt build-up that can transfer onto your hair, leading to various scalp issues. In conclusion, regular cleaning should be incorporated into your hair care routine to prevent product buildup and transfer of bacteria from dirty brushes onto your hair and scalp. By following proper brush maintenance guidelines and employing appropriate cleaning techniques, you can maintain healthy hair while extending your brushes’ longevity.
Drying The Brush
After properly cleaning your round brush using the correct techniques, the next step is to dry it correctly. There are two methods to dry your brush: air drying and using a blow dryer. Air drying is the most recommended method as it does not damage the bristles, and it allows them to keep their shape. On the other hand, using a blow dryer can melt or warp the bristles, which can affect the performance of your brush.
To air dry your brush, shake off any excess water and place it on a clean towel with the bristles facing down. Ensure that there is enough space between each bristle for proper ventilation. Avoid placing your brush under direct sunlight or close to a heat source as this can damage the bristles. Allow your brush to dry overnight or for at least 24 hours before using it again.
If you need to use your brush urgently, you can use a blow dryer on low heat setting. Hold the blow dryer a few inches away from the bristles and move it back and forth until they are completely dry. However, ensure that you do not overheat or hold it too close to avoid damaging the bristles. Properly drying your round brush helps prevent bacteria and mold growth while also extending its lifespan.
How Often To Clean Your Hair Brushes
The Importance of Frequency in Cleaning Your Hair Brushes
As a hair care expert, I cannot stress enough the importance of cleaning your hair brushes regularly. Not only does it keep your brushes looking new, but it also prevents the buildup of dirt, oil, and bacteria that can transfer to your hair during styling. The frequency at which you should clean your brushes depends on how often you use them and the type of hair products you use.
If you use your hairbrush every day, it’s recommended that you clean it once a week to prevent product buildup and bacteria growth. However, if you don’t use it as often or have shorter hair, then cleaning it every other week may suffice. Neglecting to clean your brush frequently can lead to clogged pores on the scalp and other undesirable effects.
Benefits of Infrequent Cleaning
On the other hand, some people may argue that infrequent cleaning is beneficial because the natural oils in our hair can help condition and protect our strands. While this is true to some extent, using a dirty brush repeatedly can cause more harm than good by distributing dirt and bacteria onto our freshly washed hair. It’s essential to strike a balance between cleaning your brush too often or not enough by following the recommended frequency based on your usage habits.
In conclusion, maintaining a regular cleaning schedule for your hairbrushes ensures they remain hygienic and effective for styling purposes. In the subsequent section about maintaining clean brushes for healthy hair, we will discuss specific steps you can take to ensure that both your brushes and hair stay in excellent condition with proper maintenance techniques.
Maintaining Clean Brushes For Healthy Hair
Brush hygiene is essential when it comes to maintaining healthy hair. Dirty brushes can accumulate dead skin cells, oil, and product buildup, which can transfer back onto the scalp, causing irritation, dandruff or even infections. To maintain clean brushes, it’s recommended to remove any tangled hair or debris with a comb and then rinse the brush under running water. A gentle shampoo can also be used to deep clean the bristles of the brush.
Hair care maintenance is crucial in keeping your locks healthy and shiny. Regularly cleaning your hairbrushes is just one aspect of proper hair care maintenance. It’s important to choose a brush that meets your specific hair type and needs as well. For example, a paddle brush works best on thick or curly hair while a round brush is ideal for creating volume and movement in fine or straight hair. By using the right type of brush for your hair and regularly cleaning it, you can keep your strands looking their best.
Incorporating good practices for maintaining clean brushes into your daily routine will lead to healthier-looking tresses over time. Brush hygiene should be performed frequently – at least once per week – to avoid buildup on the bristles that could damage your locks if left unattended. Additionally, replacing brushes every few months is recommended as worn-out bristles may cause breakage or other damage to your hair. With these tips in mind, you’ll be able to enjoy beautiful and healthy-looking hair for years to come without worry about dirty brushes affecting its quality!
Conclusion
Maintaining clean hair brushes is essential for healthy hair. Signs of a dirty brush include an accumulation of hair, product buildup, and a foul odor. To clean your brushes, gather supplies such as scissors, shampoo, baking soda, and warm water. First, remove the hair from the brush using scissors or your fingers. Next, soak the brush in warm water mixed with baking soda and shampoo for 30 minutes.
Cleaning paddle brushes involves using a toothbrush to scrub away any remaining debris. Round brushes require more attention as they have bristles that can be damaged if soaked for too long. Use a comb to remove any excess hair before wiping with a damp cloth soaked in shampoo and warm water. It is recommended to clean your hair brushes once a month to prevent bacteria buildup.
Maintaining clean brushes ensures healthy hair as it prevents dirt and bacteria from accumulating on your scalp. Remember to remove hair from the brush after each use and store them in a dry place. Your hair will thank you for investing time into cleaning dirty brushes regularly.
Image Credits
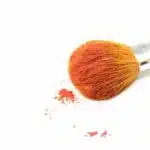
- “Dirty Brush” by mandolux (featured)












![How To Get Hair Out Of A Bathtub Drain 21 2/365 [Bathtub Drain]](https://green-life.blog/wp-content/uploads/2023/05/cOEu5edpkejq-150x150.jpg.webp)

