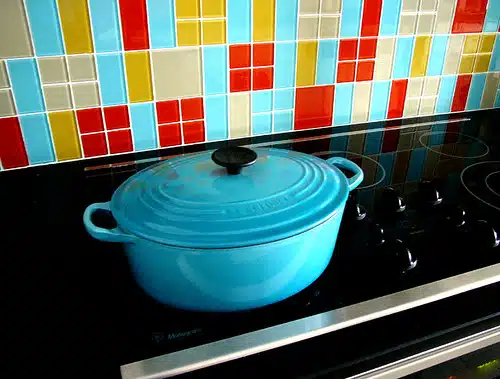
A Dutch oven is a versatile and durable cooking vessel that can be used for various purposes, including baking, roasting, and braising. This kitchen tool is typically made of cast iron or enamel-coated cast iron, which makes it prone to rusting and staining. Cleaning a Dutch oven can be a daunting task for many people, especially those who use it frequently and are unsure about the proper cleaning techniques. In this article, we will discuss how to clean a Dutch oven the right way and provide tips on maintaining its quality and longevity.
As a professional cleaning expert, I have seen countless cases of improperly cleaned Dutch ovens that have become damaged or unusable over time. Cleaning a Dutch oven is not just about removing food residue or stains; it’s also about preserving its unique properties and ensuring its longevity. Whether you’re an avid cook or someone who uses their Dutch oven occasionally, learning how to clean it properly can save you time, money, and frustration in the long run. In the following paragraphs, we will guide you through the steps to achieve optimal cleanliness for your Dutch oven.
Understanding Your Dutch Oven
Dutch ovens have been around for centuries, and they remain a popular choice for cooking enthusiasts. These versatile pots are made of different materials, including cast iron and ceramic. Understanding seasoning is critical when it comes to maintaining your Dutch oven in good condition.
Seasoning refers to the process of coating the surface of your Dutch oven with oil and heating it in an oven or on a stovetop. This process creates a non-stick surface that prevents food from sticking to the pot while cooking. It also helps protect the surface from rusting or corroding over time.
When it comes to materials, cast iron Dutch ovens are the most popular option due to their durability and heat retention properties. However, ceramic Dutch ovens are also an excellent choice because they are easy to clean and come in various colors and designs. Understanding your Dutch oven’s material is crucial when choosing cleaning supplies that will not damage its surface.
To ensure that your Dutch oven remains in good condition, understanding its seasoning and material is essential knowledge. This knowledge will guide you in selecting appropriate cleaning supplies, which we will discuss further in the subsequent section about gathering necessary supplies.
Gathering The Necessary Supplies
- When cleaning a Dutch oven, it is important to have the necessary supplies, such as sponges, scrub brush, soap, gloves, baking soda, vinegar, bowl, water, towels, dishrag, steel wool, scouring pad, brush, paper towels and a bucket.
- A sponge and a scrub brush should be used to remove any large pieces of food or residue.
- Soap should be added to water in a bowl to create a cleaning solution.
- Gloves should be worn to protect the hands from harsh cleaning solutions.
- Baking soda and vinegar can be used to clean hard-to-reach areas and remove stubborn stains.
- Once the cleaning is complete, the Dutch oven should be wiped down with paper towels, a dishrag, and a towel and then dried with a brush.
Sponges
When it comes to cleaning a dutch oven, having the right supplies is crucial. One of those supplies is sponges. There are two types of sponges: natural and synthetic. Natural sponges come from the ocean and are biodegradable, while synthetic sponges are made from man-made materials and are not biodegradable. Both types of sponges have their pros and cons, so it’s important to choose the one that works best for you.
To disinfect your sponge before using it on your dutch oven, there are a few methods you can try. The first method is to soak your sponge in a mixture of hot water and vinegar for about 5 minutes. Another method is to put your sponge in the microwave for 2 minutes on high power. It’s important to note that you should never put a dry sponge in the microwave, as it could catch fire. Lastly, you can use a dishwasher with a heated dry cycle to sanitize your sponge.
In conclusion, choosing the right type of sponge and disinfecting it properly is essential when cleaning a dutch oven. By following these tips, you can rest assured that your dutch oven will be clean and ready for its next use. Remember, taking care of your cookware not only prolongs its life but also ensures safe cooking for you and your loved ones.
Scrub Brush
When it comes to cleaning a Dutch oven, having the right supplies is crucial. Aside from sponges, another essential tool for cleaning is a scrub brush. Choosing the right scrub brush can make all the difference in effectively removing stubborn food residue and stains.
When selecting a scrub brush for your Dutch oven, there are a few factors to consider. Look for one with stiff bristles that can handle tough scrubbing without damaging the surface of your cookware. You may also want to choose a brush with an ergonomic handle that provides a comfortable grip during use.
To properly use a scrub brush for cleaning a Dutch oven, start by filling the cookware with warm water and adding dish soap. Dip the scrub brush into the soapy water and begin gently scrubbing away any food particles or stains. Be sure to reach all areas of the pot or pan, including corners and edges. Rinse thoroughly with hot water after cleaning and dry completely before storing. By choosing the right scrub brush and using it properly, you can keep your Dutch oven looking and functioning like new for years to come.
Soap
In cleaning a Dutch oven, using soap is an essential part of the process. When gathering the necessary supplies for cleaning, it is important to choose the right type of soap that will effectively remove any food particles and stains without damaging the surface of your cookware. Dish soap is a common and effective choice for cleaning a Dutch oven, but there are also alternative options available.
When using soap to clean your Dutch oven, start by filling it with warm water and adding a small amount of dish soap. Use a sponge or scrub brush to gently scrub away any food residue or stains. Be sure to reach all areas of the pot or pan, including corners and edges. Rinse thoroughly with hot water after cleaning and dry completely before storing.
While dish soap is a popular choice for cleaning a Dutch oven, there are also alternative options available such as baking soda and vinegar. Baking soda can be used as a gentle abrasive to remove stubborn stains while vinegar can help dissolve grease and grime. However, it is important to note that these alternatives may not be as effective as dish soap in removing tough food residue. Ultimately, choosing the right type of soap for your Dutch oven depends on personal preference and the level of cleaning needed.
Preparing Your Dutch Oven For Cleaning
Proper pre cleaning preparation plays a vital role in ensuring that your dutch oven is cleaned the right way. Before starting the cleaning process, it is essential to remove any food remnants or debris from the pot. Use a wooden spoon or spatula to scrape off any food stuck on the surface. Do not use harsh abrasive scrubbers or steel wool as they can damage the enamel coating of your dutch oven.
In addition to removing food particles, it is crucial to ensure proper ventilation during the cleaning process. The fumes released by some cleaning agents can be harmful if inhaled for an extended period. Therefore, open windows and doors to allow fresh air to circulate in your kitchen. This will also help eliminate any unwanted odors that may arise during the cleaning process.
Remember, taking time to prepare your dutch oven before cleaning ensures that you get optimal results when you are done. Proper pre cleaning preparation and ventilation are critical aspects of maintaining your cookware’s quality and longevity. Next, we will discuss how soaking your dutch oven can aid in its cleaning process without causing any damage or harm to its exterior.
Soaking Your Dutch Oven
To properly clean a Dutch oven, soaking is an essential step. When it comes to choosing the best soaking solution, there are multiple options to consider. One common solution is warm water and dish soap. However, this may not be enough for tougher stains or burnt-on food. In these cases, a mixture of equal parts baking soda and water can be effective in removing stubborn residue.
The duration of soaking will depend on the severity of the stains or residue. For light cleaning, 30 minutes should suffice. For more stubborn stains, it may be necessary to soak for several hours or even overnight. It’s important to never let your Dutch oven soak for too long as it can cause damage to the enamel coating.
When soaking your Dutch oven, make sure that it is fully submerged in the solution and that the lid is off to allow for proper ventilation. After the designated soaking duration has passed, drain the solution and rinse thoroughly with warm water. Once rinsed, inspect your Dutch oven to see if any residue remains before moving onto the next step: scrubbing your Dutch oven.
Scrubbing Your Dutch Oven
A Dutch oven is a versatile cooking tool that can be used for baking, roasting, and simmering. However, cleaning it can be quite challenging, especially if you don’t know the right techniques. Effective scrubbing techniques are essential to keep your Dutch oven in good condition and prevent it from rusting or developing an unpleasant odor.
To effectively scrub your Dutch oven, start by soaking it in hot soapy water for several minutes. This will loosen any food particles or residues stuck on the surface of the pot. Once the pot has soaked for some time, use a soft-bristled brush or sponge to scrub it gently. Avoid using harsh detergents or abrasive cleaners that may scratch the surface of your pot.
Eco-friendly cleaning methods are also a great way to clean your Dutch oven without harming the environment. You can use natural ingredients such as baking soda and vinegar to remove stains and odors from your pot. Simply make a paste with baking soda and water and apply it on the stains. Let it sit for some time before rinsing with warm water. For tough stains, mix equal parts of vinegar and water and boil the solution in your Dutch oven for several minutes before scrubbing it with a brush or sponge.
Transition into subsequent section: Now that you know how to effectively scrub your Dutch oven, let’s explore how you can use baking soda and vinegar to keep it smelling fresh and clean!
Using Baking Soda And Vinegar
After scrubbing your Dutch oven, consider using baking soda and vinegar to deep clean it. Baking soda is a gentle abrasive that helps remove stubborn stains and odors without damaging the surface of your Dutch oven. Vinegar, on the other hand, is acidic and can dissolve mineral buildup inside your pot.
One of the benefits of vinegar is that it’s an all-natural cleaning agent that won’t harm your health or the environment. Additionally, it’s versatile and can be used for a variety of cleaning tasks around your home. Baking soda alternatives include cream of tartar or lemon juice, both of which are also mildly acidic and effective at removing stains.
To use baking soda and vinegar to clean your Dutch oven, start by sprinkling a generous amount of baking soda on the bottom of the pot. Then pour in enough vinegar to cover the bottom with a thin layer. Let this mixture sit for 10-15 minutes before scrubbing with a non-abrasive sponge or brush. Rinse thoroughly with warm water and dry completely before storing.
To remove stubborn stains from your Dutch oven, try using a paste made from baking soda and water. Apply this paste to any stains or discoloration inside the pot and let it sit for several hours or overnight. Then scrub with a non-abrasive sponge or brush and rinse thoroughly with warm water. This method may require multiple applications for tough stains but can be an effective way to restore your Dutch oven to its original condition.
Removing Stubborn Stains
Boiling water is an effective way to remove stubborn stains from a dutch oven by loosening them from the surface. Baking soda and vinegar can be used to create an abrasive paste that can be used to scrub away tough stains. Scouring pads, steel wool, and wire brushes are also useful tools for scrubbing away tough stains. Dish soap, salt, cream of tartar, lemon juice, rubbing alcohol, ammonia, oxygen bleach, hydrogen peroxide, and oven cleaner are all effective cleaning agents for removing stubborn stains. Finally, it is important to use all of these products carefully in order to avoid damaging the surface of the dutch oven.
Boiling Water
Picture yourself in the kitchen, standing over a dirty Dutch oven with stubborn stains that refuse to budge. As a professional cleaning expert, you know that boiling water can be an effective solution for removing these stains. Boiling water has been widely used for centuries due to its many benefits.
The benefits of boiling water are numerous. It is a natural and cost-effective way to clean your Dutch oven without using harsh chemicals or spending too much time scrubbing away at the stains. Boiling water also helps to sanitize the pot by killing bacteria and other harmful microorganisms. Additionally, it loosens up any food particles that may have stuck on the surface of the pot.
If you’re not ready to use boiling water, there are alternatives that you can try instead. One alternative is using baking soda mixed with vinegar or lemon juice. This solution creates a chemical reaction that helps break down dirt and grime without damaging your Dutch oven’s surface. Another alternative is using a mixture of dish soap and warm water to soak the pot overnight before scrubbing it with a non-abrasive sponge.
In conclusion, boiling water is an effective method for removing stubborn stains from your Dutch oven due to its numerous benefits such as sanitizing the pot and loosening up food particles. However, if you prefer not to use boiling water, there are other alternatives available that can also provide excellent results. Whatever method you choose, always remember to handle your Dutch oven with care to avoid damaging its surface while cleaning it thoroughly.
Baking Soda
As a professional cleaning expert, I understand the importance of using natural cleaning products to remove stubborn stains from your Dutch oven. While boiling water is an effective solution, there are other alternatives available that can also provide excellent results. One such alternative is using baking soda mixed with vinegar or lemon juice.
Using baking soda for other cleaning tasks is a cost-effective and eco-friendly solution. It is a gentle abrasive that helps to break down dirt and grime without damaging the surface of your Dutch oven. When combined with vinegar or lemon juice, it creates a chemical reaction that can dissolve even the most stubborn stains. This solution is particularly useful for removing burnt-on food and grease from the bottom of your pot.
The benefits of using natural cleaning products like baking soda go beyond their effectiveness in removing stubborn stains. They are also safe to use around children and pets as they do not contain harsh chemicals that can be harmful if ingested or inhaled. Additionally, using natural products reduces your carbon footprint by reducing the amount of chemical waste that goes into our environment. By incorporating baking soda into your cleaning routine, you can achieve a sparkling clean Dutch oven while doing your part in preserving our planet’s health.
Vinegar
As a professional cleaning expert, it is important to have alternative methods for removing stubborn stains from your Dutch oven. Baking soda mixed with vinegar or lemon juice is an effective solution, but using vinegar alone can also provide excellent results.
Cleaning with lemon and vinegar has been used for generations as a natural cleaning agent. The acidity in the vinegar helps to break down dirt and grime while also dissolving mineral deposits. When heated, it can also help to loosen burnt-on food and grease from the bottom of your pot.
To use vinegar as a cleaning solution, simply mix equal parts water and vinegar in your Dutch oven and bring it to a boil. Let it simmer for 10-15 minutes before turning off the heat and allowing the mixture to cool. Once cooled, empty the pot and wash it with warm soapy water. This method is not only effective but also safe for you and the environment. Using natural cleaning products like vinegar reduces your carbon footprint while providing you with a sparkling clean Dutch oven.
Dealing With Rust
It is quite ironic that even the toughest and most durable cookware can fall victim to rusting. A well-used dutch oven is no exception, as it may accumulate rust over time. Rust stains not only ruin the aesthetics of your cookware but also pose risks to your health if ingested. Thus, it is vital to deal with rust as soon as possible.
Preventing rust in the first place is much more manageable than removing it later on. Here are some tips to keep your dutch oven rust-free:
- Always dry your dutch oven thoroughly after each use.
- Store your dutch oven in a dry and well-ventilated area.
- Coat your dutch oven with vegetable oil or shortening before storing it.
- Avoid using harsh cleaning agents that may damage the seasoning of your dutch oven.
If you already have rust stains on your dutch oven, worry not! There are still ways to restore its former glory. Removing rust stains from a dutch oven requires a mild abrasive and some elbow grease.
Incorporate these four steps into your cleaning process to remove rust stains effectively:
- Mix equal parts water and baking soda into a paste.
- Apply the mixture onto the affected areas.
- Gently scrub with a non-abrasive sponge or brush until the stain disappears.
- Rinse thoroughly and dry completely.
Now that you have successfully removed all the rust from your beloved cookware, it’s time to move on to the next step: drying it properly before storing it away for future use without any worries of rusted brown spots resurfacing again anytime soon.
Drying Your Dutch Oven
Proper drying is crucial in maintaining your Dutch oven’s quality and longevity. After washing your Dutch oven, it is essential to dry it thoroughly before storing it. Otherwise, water can remain in the cast iron and cause rusting or warping of the pot.
To properly dry your Dutch oven, you can wipe it down with a clean cloth or paper towel. Ensure that you get into all the crevices and corners of the pot to remove any remaining moisture. Then, place it on a stovetop or in an oven set at low heat to allow any remaining moisture to evaporate fully.
Preventing warping is also important when drying your Dutch oven. If you leave your pot wet for too long, it can warp and become unusable. To avoid this problem, always dry your Dutch oven immediately after washing and do not soak it for extended periods.
Now that you have dried your Dutch oven properly, the next step is seasoning it to maintain its non-stick surface. Seasoning is essential as it protects the cast iron from rusting and keeps food from sticking to the surface. In the next section, we will discuss how to season your dutch oven correctly without damaging its quality or non-stick surface.
Seasoning Your Dutch Oven
- Properly cleaning your Dutch oven is an essential step in order to ensure its longevity.
- It is important to properly remove all food particles and grease from the surface of the oven.
- Once the oven is clean, seasoning should be done in order to create a non-stick cooking surface.
- Seasoning should be done by applying a thin layer of cooking oil to the oven’s surface and baking it in the oven at a high temperature.
Cleaning The Oven
Maintaining the cleanliness of your dutch oven is crucial to ensure that it lasts for years. The benefits of using natural cleaners are numerous, as they are not only effective in removing stains but they also do not leave behind any toxic residue. Regular maintenance of your dutch oven is equally important as it prevents the buildup of grease and grime, which can be challenging to remove.
To clean your dutch oven, start by soaking it in warm water for a few minutes to loosen any food particles stuck on its surface. Next, use a non-abrasive scrubber or brush to gently remove any remaining debris. Avoid using harsh chemicals or abrasive cleaning tools, as these can damage the seasoning on your dutch oven. Instead, opt for natural cleaners such as baking soda or vinegar mixed with water.
After cleaning your dutch oven, make sure to dry it thoroughly before storing it away. Leaving moisture in your dutch oven can lead to rust and deterioration of its surface over time. By following these simple steps and incorporating regular maintenance into your routine, you can ensure that your dutch oven remains in pristine condition for years to come.
Seasoning The Oven
As a professional cleaning expert, one of the most important steps in maintaining your dutch oven is seasoning it. The benefits of seasoning your dutch oven are numerous, as it helps to create a non-stick surface that prevents food from sticking and makes cleaning easier. Additionally, seasoning also protects the cast iron material from rust and helps to extend the lifespan of your dutch oven.
To season your dutch oven properly, there are some common mistakes that you should avoid. Firstly, do not use too much oil when seasoning your dutch oven. Using too much oil can lead to a sticky surface and cause the oil to become rancid over time. Secondly, make sure to preheat your oven before placing the seasoned dutch oven inside. This ensures that the oil is evenly distributed throughout the surface of the pot.
When seasoning your dutch oven, start by applying a thin layer of oil all over its surface using a clean cloth or brush. Next, place it in an oven preheated at 350°F for about an hour. After an hour, remove the pot from the oven and allow it to cool completely before wiping off any excess oil with a clean cloth. By following these simple steps and avoiding common mistakes while seasoning your dutch oven, you can ensure that it remains in excellent condition for years to come.
Maintaining Your Dutch Oven
After seasoning your Dutch oven, the next step is to keep it clean and well-maintained. Did you know that improper cleaning can lead to rust formation and burnt-on residue build-up? According to a survey conducted by Consumer Reports, 65% of Dutch oven owners reported having trouble cleaning their cookware. This emphasizes the importance of knowing how to clean your Dutch oven properly.
Preventing rust is essential for the longevity of your Dutch oven. Here are some tips to prevent rust formation:
- Always dry your cookware thoroughly after each use
- Avoid soaking it in water for long periods
- Apply a thin coat of oil after each use
Removing burnt-on residue may seem like a daunting task, but it can be done effectively with these steps:
- Fill the Dutch oven with warm water and bring it to a boil.
- Add a few drops of dish soap and let it simmer for a few minutes.
- Use a wooden spoon or spatula to scrape off any burnt-on residue.
- Rinse the Dutch oven thoroughly with hot water.
- Dry the cookware completely before storing it.
Incorporating these cleaning tips into your routine will ensure that your Dutch oven stays in top condition for years to come. In the next section, we will discuss how to store your Dutch oven properly to maintain its quality and durability.
Storing Your Dutch Oven
Proper storage of your dutch oven is crucial if you want to keep it in good condition for many years. Always ensure that the pot is fully dry before storing it, as moisture can lead to rust and other forms of damage. You can do this by wiping it down with a clean towel or leaving it out to air dry.
Another important consideration when storing your dutch oven is preventing damage. This means avoiding stacking other pots or pans on top of it, as well as placing heavy items on the lid. Instead, store the pot in a cool, dry place where it won’t be bumped or knocked over. If you have limited storage space, you may want to invest in a protective cover to help prevent scratches and other types of damage.
By following these simple tips for proper storage and damage prevention, you can help ensure that your dutch oven stays in great shape for years to come. Of course, proper cleaning after each use is also essential for maintaining its overall quality and longevity. In the next section, we’ll explore some useful tips for safely and effectively cleaning your dutch oven so that you can continue to enjoy delicious meals cooked in this versatile kitchen essential.
Tips For Safe Cleaning
Now that you have learned how to properly store your Dutch oven, it is time to discuss the proper way to clean it. Cleaning your Dutch oven can be a daunting task but with the right technique and cleaning agent, this task can be accomplished efficiently. However, if not done correctly, cleaning your Dutch oven can cause damage and affect its longevity.
Preventing damage is essential when cleaning your Dutch oven. Avoid using abrasive tools such as steel wool or harsh chemicals that could scratch or damage the enamel coating. Instead, opt for a soft sponge or cloth and a non-abrasive cleaning agent that is specifically designed for cast iron cookware. This will ensure that your Dutch oven remains in top condition and lasts for years to come.
Choosing the right cleaning agent is also crucial when it comes to properly cleaning your Dutch oven. Avoid using soap as it can strip away the seasoning on the cast iron surface which helps prevent rusting and sticking of food. Instead, use hot water and baking soda or vinegar to remove any stubborn stains or residue. For tougher stains, let the mixture sit in the pot for a few hours before scrubbing gently with a soft sponge or cloth.
In summary, proper cleaning techniques are essential when maintaining your Dutch oven’s longevity and preventing damage. By using non-abrasive tools and choosing the right cleaning agent such as hot water with baking soda or vinegar, you can ensure that your Dutch oven remains in great condition for many years. In the next section, we will discuss common mistakes to avoid when cleaning your Dutch oven so that you can keep it looking like new for all of your cooking needs.
Common Mistakes To Avoid
- Properly cleaning a Dutch oven requires preheating the oven for 10-15 minutes before removing any food residue.
- Over-scrubbing the Dutch oven can cause scratches and damage to the surface, and should be avoided.
- Utilizing abrasive cleaners to clean the Dutch oven is not recommended, as it can diminish the protective layer of seasoning on the surface.
- The Dutch oven should be cleaned with a nylon brush and warm water, and any remaining residue can be removed by soaking with a mild liquid detergent.
- It is important to avoid using steel wool to clean the Dutch oven, as it can cause scratching and pitting of the surface.
- After cleaning the Dutch oven, it should be rinsed with warm water and then dried with a paper towel or cloth.
Failing To Preheat
Preheating is an essential step in the cooking process, and it should not be ignored when using a Dutch oven. Failing to preheat can lead to incorrect temperature readings and uneven heat distribution, which can negatively impact the cooking process. Therefore, it is crucial to understand the importance of preheating and learn some techniques for achieving optimal results.
One of the most effective preheating techniques for a Dutch oven is placing it inside an oven that has been preheated to the desired temperature. This method ensures that the pot’s temperature rises gradually and evenly, preventing any hot spots. Another technique is heating the Dutch oven on a stovetop over low heat until it reaches the desired temperature. This method may take longer than using an oven but can be more convenient if you do not want to use your oven.
Overall, failing to preheat your Dutch oven correctly can lead to disastrous results when cooking. It’s crucial to take this step seriously and follow proper techniques for achieving optimal results. Whether you choose to preheat in an oven or on a stovetop, ensure that you monitor your pot closely and avoid rushing the process. By doing so, you’ll have delicious meals every time you use your Dutch oven!
Over-Scrubbing
Maintaining the quality of your Dutch oven is essential to ensure that it can serve you for many years. One common mistake that many people make when cleaning their Dutch ovens is over-scrubbing. While it’s important to clean your pot thoroughly, excessive scrubbing can lead to permanent damage and reduce its lifespan. To prevent this from happening, you need to understand how to clean your Dutch oven correctly.
Over-scrubbing can cause scratches on the surface of your Dutch oven, which can make it more difficult to clean in the long run. Using harsh detergents or abrasive materials during cleaning can also strip off any protective coatings on the pot’s surface, making it more susceptible to rust and corrosion. To prevent damage, consider using gentler alternatives such as baking soda or vinegar mixed with water for a more effective yet safe cleaning solution.
Another option is to soak your Dutch oven in warm soapy water for several hours before scrubbing gently with a soft brush or sponge. This technique helps loosen any food residues stuck on the pot’s surface without damaging its protective layers. Remember always to rinse thoroughly and dry completely after each use to prevent rusting and discoloration.
In conclusion, over-scrubbing your Dutch oven is a common mistake that you should avoid when cleaning it. Instead of using harsh chemicals or abrasive materials, opt for gentler alternatives such as baking soda or vinegar mixed with water. Soaking your pot in warm soapy water before scrubbing gently with a soft brush or sponge can also help prevent damage while ensuring that your Dutch oven stays clean and functional for years to come.
Using Abrasive Cleaners
To maintain the quality of your Dutch oven, you have to use proper cleaning techniques. Common mistakes like over-scrubbing can lead to permanent damage and reduce its lifespan. Another mistake is using abrasive cleaners that can cause scratches on the surface of your pot.
Avoiding scratches is crucial in keeping your Dutch oven looking brand new. Using abrasive cleaners like steel wool or harsh detergents can strip off any protective coatings on the pot’s surface, making it more susceptible to rust and corrosion. Abrasive materials can also leave scratch marks that not only make it harder to clean but also affect the aesthetic value of your pot.
When choosing cleaners for your Dutch oven, always opt for gentler alternatives. Baking soda or vinegar mixed with water are effective yet safe cleaning solutions that won’t damage the surface of your pot. If you must use a commercial cleaner, choose one specifically formulated for cast iron cookware. Remember, prevention is better than cure, so avoid using abrasive materials and harsh chemicals to keep your Dutch oven in top condition for years to come.
Troubleshooting Common Issues
As the saying goes, prevention is better than cure. This is particularly true when it comes to maintaining the quality of your dutch oven. Preventing damage and discoloration should be a priority if you want your dutch oven to last for several years. There are simple steps you can take to ensure that your dutch oven remains in top condition.
Preventing damage starts with proper handling. Always use the right utensils when cooking with a dutch oven. Avoid using metal utensils as they can scratch the surface of your pot and cause damage over time. Instead, use wooden or silicone utensils that are gentle on the pot’s surface. Additionally, avoid exposing your dutch oven to sudden temperature changes as this can lead to cracking.
Preventing discoloration requires regular cleaning after each use. Never leave food residue in your dutch oven for an extended period as this can cause stubborn stains that are difficult to remove. Instead, clean your pot immediately after cooking with mild dish soap and warm water using a non-abrasive sponge or cloth. Finally, dry your dutch oven thoroughly before storing it away to prevent rusting or odors from developing.
By following these simple tips, you can keep your dutch oven looking new for years to come. Remember that prevention is key when it comes to maintaining the quality of any kitchenware item. With proper handling and regular cleaning, you’ll avoid unnecessary expenses on repairs or replacements in the future.
Conclusion
A Dutch oven is a versatile and durable kitchen tool that can last for generations if properly maintained. Cleaning a Dutch oven may seem like a daunting task, but with the right tools and techniques, it can be done efficiently and effectively.
To clean your Dutch oven, first understand its material. Cast iron requires different care than enamel-coated or stainless steel Dutch ovens. Gather necessary supplies such as mild soap, scrub brushes, and sponges before starting the cleaning process. Always avoid harsh chemicals or abrasives that could damage the surface of your Dutch oven.
Before cleaning, prepare your Dutch oven by removing any excess food or debris and wiping it down with a damp cloth. Soak your Dutch oven in warm water with dish soap for 30 minutes to loosen any stubborn residue. Scrub the interior of the pot gently with a non-abrasive brush or sponge to remove stuck-on food particles.
When storing your Dutch oven, always ensure it is completely dry to prevent rusting. Remember to oil cast iron pots regularly to maintain their seasoning and prevent sticking.
As an expert cleaner, I have seen many mistakes made when cleaning a Dutch oven. Common errors include using abrasive materials or failing to dry the pot thoroughly after washing. Troubleshoot issues such as burnt-on stains by soaking overnight in vinegar and baking soda before scrubbing.
Cleaning your Dutch oven may require effort, but proper maintenance will prolong its life span and keep it functioning properly for years to come. As Benjamin Franklin once said, “An ounce of prevention is worth a pound of cure.” Treat your cast iron pot like an investment, taking care of it with regular maintenance will pay off in dividends down the line.
Image Credits
- “dutch oven” by chotda (featured)

