Maintaining an oven is one of the essential duties of every homeowner. A clean and well-functioning oven not only ensures that your food is cooked evenly and efficiently but also extends its lifespan. While cleaning an oven can be a tedious task, the self-clean feature has made it easier than ever before. In this article, we will discuss how to use self-clean on an oven – a simple yet effective method for cleaning ovens.
As an oven maintenance specialist, I have encountered numerous homeowners who struggle with maintaining their ovens regularly. A common mistake that many individuals make is failing to utilize the self-clean feature. Self-cleaning ovens are designed to heat up to extreme temperatures, which burns off any food residue or grease within the cavity. This feature eliminates the need for harsh chemicals or manual scrubbing, making it an efficient and cost-effective cleaning method. By following some straightforward steps, you too can effectively use the self-clean function on your oven and maintain a clean and healthy cooking environment.
Understanding The Self-Clean Feature
Self-clean is a feature built into many modern ovens that revolutionizes the way we clean our ovens. With this feature, you no longer have to spend hours scrubbing your oven to remove tough baked-on stains. Instead, you can activate the self-clean feature and let your oven do the work for you.
One of the benefits of self-clean is that it saves time and effort. Traditional oven cleaning methods require substantial elbow grease and specialized cleaning products, but with self-clean, all you need to do is press a button. Additionally, using self-clean is an eco-friendly alternative to harsh chemicals and abrasive scrubbers.
While there are alternatives to self-clean, they are not as effective or convenient. For example, some people may opt for steam cleaning or using baking soda and water mixtures. However, these methods require more time and effort than using the self-clean feature on your oven.
To prepare your oven for self-cleaning mode, there are a few steps you should follow to ensure that the process goes smoothly without any hiccups.
Preparing Your Oven
After having a clear understanding of the self-clean feature, it is time to prepare your oven for its use. The first step is to remove any large food debris that may be present in the oven. This can be done using a damp cloth or sponge. It is important to ensure that no crumbs or grease are left behind as this may affect the effectiveness of the self-clean feature.
Preheating tips for self-cleaning your oven include setting the temperature according to the manufacturer’s instructions and allowing ample time for preheating. It is crucial not to skip this step as it helps in burning off any remaining food residue, making it easy to wipe away once done with the cleaning process. Additionally, safety precautions should be taken into consideration before starting the self-cleaning process.
Safety precautions should be taken when using the self-clean feature on an oven. These include ensuring that pets and children are kept away from the kitchen during this process as it can get very hot and emit fumes that may cause harm. Also, avoid using any harsh chemicals on your oven before or after cleaning as this may damage its surface. Lastly, removing oven racks before starting with the cleaning process will help prevent discoloration from occurring due to high temperatures.
Transition: Now that we have discussed safety measures and preheating tips let us move onto removing oven racks which is another important aspect of preparing your oven for its self-cleaning mode.
Removing Oven Racks
- Oven racks must be removed prior to using the self-cleaning cycle, as the intense heat can damage the racks.
- Cleaning racks with hot water and dish soap is recommended prior to self-cleaning.
- Degreasing racks with a heavy-duty degreaser is also recommended prior to self-cleaning.
- Soaking racks in a warm water-vinegar solution is a good way to loosen any baked on food particles.
- After soaking, scrub the racks with a brush to further remove baked on food particles.
- Finally, rinse the racks with hot water and dry with a towel before replacing in the oven.
Cleaning Racks
As an oven maintenance specialist, one of the most important tasks to ensure your oven is running smoothly and hygienically is by removing and cleaning the racks. The sight of dirty racks can evoke a sense of disgust in even the most tolerant individuals, especially when we consider how much food is cooked on them.
To clean the racks effectively, you will need a cleaning solution that is formulated specifically for ovens. Some people may suggest alternative methods such as using baking soda or vinegar, but these methods are not always effective and can potentially damage your oven. Once you have your solution, remove the racks from the oven and soak them in a tub or sink filled with hot water and your cleaning solution. Allow them to sit for at least 30 minutes before scrubbing away any dirt or grime with a non-abrasive sponge.
After scrubbing away all the dirt, rinse off the racks with warm water and dry thoroughly before placing them back into the oven. It’s important to be diligent when it comes to cleaning your oven racks regularly to prevent buildup and maintain hygiene standards. By following these steps, you’ll ensure that your oven remains sparkling clean, making it a pleasure to use every time.
Degreasing Racks
When it comes to oven maintenance, one of the essential tasks is removing and cleaning the racks. It’s not enough to soak them in water and scrub them with a non-abrasive sponge. You also need to degrease them properly to ensure they’re free from any buildup that can cause unpleasant odors or even worse, food contamination. As an oven maintenance specialist, I highly recommend using the best methods and recommended products for degreasing racks.
The best method for degreasing your oven racks is by using a specially formulated solution designed for this purpose. These solutions are strong enough to remove grease and grime effectively without damaging your oven’s surfaces or causing any harm to your health. You can find these products in most supermarkets or hardware stores, but be sure to read the label before purchasing one.
To use a degreaser solution effectively, you need to remove the racks from the oven first and place them on a flat surface covered with newspaper or an old towel. Wear gloves and goggles for extra protection while handling these chemicals. Spray the solution generously onto the racks, making sure every inch is covered, then let it sit for at least 30 minutes or as instructed on the label. Afterward, rinse off the degreaser with warm water and dry thoroughly with a clean cloth before returning them back into your oven. By following these steps, you’ll maintain hygiene standards while ensuring that your oven remains in good condition for years to come.
In conclusion, degreasing is an essential step when it comes to cleaning your oven racks thoroughly. Using a specially formulated solution will help you achieve better results without harming your health or damaging your appliance’s surfaces. Make sure you follow all instructions carefully when using these products and wear protective gear as needed. With regular maintenance and proper care, you’ll enjoy cooking delicious meals for yourself and others without worrying about hygiene issues caused by dirty oven racks!
Soaking Racks
When it comes to oven maintenance, one of the essential tasks is removing and cleaning the racks. Proper rack maintenance ensures that your oven performs efficiently and safely while cooking your favorite dishes. In addition to degreasing, another effective method for cleaning oven racks is soaking them in a cleaning solution.
Soaking racks can help remove stubborn stains, grease, and grime that have accumulated over time. It’s an easy and cost-effective way to maintain your oven’s hygiene standards without damaging the surfaces. To begin, remove the racks from the oven and place them in a large container or bathtub filled with hot water mixed with a cleaning solution according to the manufacturer’s instructions. Let the racks soak for several hours or overnight.
After soaking, remove the racks from the solution and rinse thoroughly with warm water. Use a non-abrasive sponge or cloth to wipe off any remaining dirt or debris before drying them completely with a clean towel. By incorporating soaking as part of your regular rack maintenance routine along with degreasing, you’ll keep your oven working at its best while ensuring that it remains hygienic for all your cooking needs.
Setting The Self-Clean Cycle
When it comes to maintaining your oven, using the self-clean feature can be an effective and efficient way to remove grease, grime, and food residue. However, it is important to follow proper safety precautions during the self-clean cycle. Before beginning the process, ensure that your oven is cool and free of any loose debris or objects.
When setting the self-clean cycle, it is essential to choose appropriate cleaning products that are safe for use with your specific oven model. Avoid using harsh chemicals or abrasive materials that could damage your oven’s finish or interior components. Instead, opt for gentle cleaners or natural solutions like vinegar and baking soda.
During the self-clean cycle, it is crucial to take certain safety measures. Keep children and pets away from the area and avoid opening the oven door while the cycle is in progress. Additionally, ensure that there is proper ventilation in your kitchen to prevent any potential health hazards from fumes or smoke.
Moving forward into selecting the cleaning duration, keep in mind that this step may vary depending on your specific oven model. It’s important to reference your owner’s manual for guidance on recommended cleaning times based on factors such as level of soiling and cooking frequency. By following these guidelines and taking proper safety precautions, you can successfully utilize the self-clean feature to maintain a clean and functional oven.
Selecting The Cleaning Duration
When using the self-clean feature on your oven, selecting the cleaning duration is crucial for achieving optimal results. Most ovens have a default cleaning time of 3-4 hours, but this can be adjusted depending on the level of grime and how frequently you clean your oven. It’s important to note that longer cleaning times may result in higher energy consumption and potential damage to your oven.
Adjusting intensity is also a factor to consider when selecting the cleaning duration. Some ovens offer different intensity levels for their self-clean feature, with high-intensity settings being more effective at removing stubborn stains but also posing a higher risk of overheating and damaging your oven. Always refer to the manufacturer’s manual for guidance on intensity levels and recommended cleaning durations.
As with any appliance maintenance task, safety precautions should be taken when using the self-clean feature on your oven. Ensure that there are no flammable materials near the oven and that it is properly ventilated during and after the cleaning process. Never open the door or attempt to touch any interior components while the oven is still hot from cleaning. By following these safety measures and carefully selecting your cleaning duration and intensity, you can effectively use the self-clean feature on your oven without any issues.
When it comes to setting the temperature for your self-cleaning cycle, there are a few things to keep in mind. Stay tuned for our next section where we will discuss some tips for setting the temperature correctly to ensure efficient cleaning without damaging your oven.
Setting The Temperature
Like a conductor leading an orchestra, setting the temperature of your oven is a crucial part of self-cleaning. It is essential to know the correct temperature range when carrying out this task. The temperatures required for self-cleaning typically range between 800 and 900 degrees Fahrenheit, which can be quite intense.
Adjusting time is another essential aspect of using self-clean on your oven. Typically, the cleaning process takes anywhere from one to four hours, depending on the amount of grime and dirt build-up in your oven. It’s important to note that you should never interrupt the cleaning cycle once it has started.
When using self-clean on your oven, safety precautions are vital. You should always wear gloves and protective eyewear when handling hot surfaces, particularly during the cleaning process. Additionally, keep children and pets away from the kitchen area until the cleaning cycle has ended and the oven has cooled down sufficiently.
As you finish setting up your oven for self-cleaning, keep in mind that proper ventilation considerations will help make this task more comfortable and safer for you. Understanding how to adjust time correctly and taking necessary safety precautions will enable you to complete this task without any difficulty or harm. In our next section, we’ll discuss ventilation considerations to make sure that you’re comfortable while completing this task.
Ventilation Considerations
Having set the temperature for the self-clean function, it is critical to consider some ventilation tips to ensure that your oven does not overheat. The self-clean cycle burns away any residue or grease buildup in the oven. It heats the oven to a high temperature, which can cause smoke and fumes to escape from the oven. To avoid this, ensure that you open windows and doors in your kitchen to allow proper airflow.
Moreover, as a maintenance specialist, I advise users of self-cleaning ovens to take safety precautions before starting the cleaning process. First and foremost, keep children and pets out of the kitchen area while the self-clean cycle is in progress. In addition, remove any pots, pans, or baking sheets that may be left in the oven before starting the cleaning process. This will prevent them from producing fumes or catching fire during the cleaning process.
Lastly, monitoring the cleaning process is equally important as setting up and ensuring appropriate ventilation measures are in place. During this cleaning cycle, it’s normal for smoke and fumes to escape from your oven; however, if they persist after a few hours of running the cycle or if you notice flames coming out of your oven door – this could indicate an emergency – immediately turn off your oven and contact an appliance repair specialist for help. Remember always to read through your owner’s manual thoroughly beforehand so that you understand all instructions on how to operate your specific model correctly.
Monitoring The Cleaning Process
- Cleaning cycles should be determined based on the type of oven, the type of soil, and the amount of soil present.
- Temperature levels should be carefully monitored during the self-cleaning cycle to ensure optimal cleaning results.
- Odor detection can be used to determine the presence of any toxic fumes produced during the self-cleaning cycle.
- The self-cleaning cycle should be monitored to ensure that it is running for the appropriate amount of time.
- Regular maintenance should be performed to ensure that the self-cleaning cycle is running properly and efficiently.
- Regular cleaning of the oven should be conducted to prevent the accumulation of soil and to ensure optimal performance of the self-cleaning cycle.
Cleaning Cycles
As an oven maintenance specialist, monitoring the cleaning process of your oven is crucial to maintaining a clean and efficient kitchen. One of the most popular cleaning methods is the self-clean cycle, which offers numerous benefits for users. The cycle works by heating the oven to extremely high temperatures, burning away any food remnants or grease buildup. This method is convenient and ensures a thorough cleaning without the need for harsh chemicals or intense scrubbing.
However, it’s important to note that there are some drawbacks to using the self-clean cycle. The high temperatures can create strong odors and smoke, which can be unpleasant and even trigger smoke detectors in your home. Additionally, this method can be time-consuming as the cleaning process can take several hours to complete. It’s also worth noting that some manufacturers may not cover damage caused by self-cleaning cycles under their warranty.
For those who prefer an alternative to self-cleaning cycles, there are several other methods available. One option is using natural cleaners such as baking soda and vinegar, which can be mixed together and used to scrub away stains and buildup. Another option is purchasing specialty oven cleaners that are designed specifically for use on ovens. While these methods may require more effort than using the self-clean cycle, they offer a gentler alternative that still produces effective results.
In conclusion, understanding how to use the self-clean cycle on your oven is an essential part of maintaining a clean kitchen environment. While there are benefits and drawbacks associated with this method of cleaning, alternative options are available for those who prefer a different approach or have concerns about using high temperatures for extended periods of time. By being knowledgeable about all cleaning options available, you can make an informed decision on how best to maintain your oven’s cleanliness while ensuring it operates at peak performance levels.
Temperature Levels
Monitoring the cleaning process of your oven is an essential part of maintaining a safe and hygienic kitchen environment. As an oven maintenance specialist, it’s important to consider various factors that can affect the efficiency and effectiveness of your cleaning process. One such factor is temperature levels, which are critical in achieving optimal cleaning results.
Preheating tips are often overlooked when it comes to oven cleaning, but they play a crucial role in ensuring that the oven reaches the desired temperature for efficient cleaning. It’s recommended that you preheat your oven to at least 200°C for self-cleaning cycles or when using specialty cleaners. This helps to loosen any food remnants or grease buildup and makes them easier to remove.
While high temperatures are necessary for effective oven cleaning, safety precautions must be taken to prevent accidents from occurring. It’s important to ensure that your kitchen is well-ventilated during the cleaning process, as smoke and strong odors may be produced. Additionally, never leave your oven unattended while using self-cleaning cycles or specialty cleaners, as they can cause fires if not used properly. By following these preheating tips and safety precautions, you can achieve optimal temperature levels for efficient and safe oven cleaning.
Odor Detection
Monitoring the cleaning process of your oven is not limited to temperature levels alone. One aspect that also needs attention is odor detection. The smell of burnt food, grease, or chemicals may linger inside the oven after cleaning, which can be unpleasant and even unsafe for those with respiratory issues. As an oven maintenance specialist, it’s crucial to consider odor detection as part of your overall cleaning process.
One way to address this issue is by using odor neutralizing products specifically designed for ovens. These products work by absorbing and eliminating odors from the source, leaving your oven smelling fresh and clean. Some examples of such products are activated charcoal filters or baking soda-based deodorizers. However, it’s important to ensure that these products are safe for use with your oven type and do not interfere with its functionality.
If you prefer a more DIY approach, there are several odor removal techniques that you can try at home. For example, you can mix equal parts water and vinegar in a spray bottle and spritz the inside of the oven before wiping it down with a damp cloth. Alternatively, you can place a bowl filled with baking soda on the bottom rack of your oven overnight to absorb any lingering odors. With these simple yet effective techniques, you can ensure that your oven smells just as clean as it looks after each cleaning cycle.
Dealing With Smoke And Odor
Dealing with smoke and odor is an important part of keeping your oven in good working order. Over time, grease and food particles can build up inside your oven, leading to unpleasant smells and even smoke. Fortunately, there are a number of techniques you can use to keep your oven smelling fresh and clean.
One effective method for reducing odors in your oven is to use a baking soda solution. Simply mix one cup of baking soda with one quart of warm water, then apply the solution to the inside of your oven using a soft cloth or sponge. Let the solution sit for several hours or overnight, then wipe it away with a damp cloth. This technique can help neutralize odors and leave your oven smelling fresh.
Another way to reduce odors in your oven is to regularly clean the racks and other removable parts. These items can accumulate grease and food particles over time, leading to unpleasant smells and even smoke. To clean them, simply remove them from the oven and wash them with hot soapy water. You can also soak them in a mixture of hot water and vinegar for added cleaning power.
Reducing smoke in your oven requires regular maintenance as well as proper cooking techniques. Be sure to monitor your food while it cooks, avoiding overcooking or burning that can produce smoke. Also be sure to regularly check the heating elements for signs of damage or wear, as damaged heating elements can produce smoke during cooking. By following these odor reduction techniques and taking proper care of your oven, you’ll be able to enjoy delicious meals without worrying about unpleasant smells or smoke during cooking.
To ensure optimal performance from your oven after cleaning it using self-clean mode, you must allow it sufficient time to cool down before starting any other tasks like wiping its interior surfaces or trying out new recipes on it again. Cooling down an oven may take some time depending on how long you used it for self-cleaning purposes; therefore patience is key at this point. You can open the oven door slightly to allow air to circulate and help speed up the cooling process. Alternatively, you can place a fan near the oven to help dissipate the heat. Once your oven has cooled down sufficiently, you can proceed with other maintenance tasks or simply enjoy using it again for all your cooking needs.
Cooling Down Your Oven
As your oven completes the self-cleaning cycle, it is important to allow it to cool down completely before proceeding with any post-cleaning measures. Cooling down the oven properly after self-cleaning will ensure that you do not cause any damage or injury to yourself or the appliance. Allowing sufficient time for cooling is a crucial part of oven maintenance and should not be overlooked.
To aid in the cooling process, here are three practical tips that you can follow:
- Turn off the Oven: After completing the self-clean cycle, switch off your oven and unplug it from its power source. This will help prevent any electrical shocks or accidental burns during the cleaning process.
- Keep the Door Open: Once you have switched off your oven, leave its door open to allow heat to escape from inside. This will speed up the cooling process and prevent any build-up of moisture that may lead to rusting.
- Wait for 2-3 Hours: After following steps one and two, wait for at least 2-3 hours before attempting to clean your oven’s interior manually. This waiting period will give ample time for your appliance to cool down adequately.
Benefits of self-cleaning are many; however, if you don’t have a self-cleaning feature on your oven, there are alternatives available too. You can use natural cleaning agents like baking soda and vinegar or opt for commercial oven cleaners that come in spray bottles.
Now that your oven has cooled down sufficiently let’s move on and learn how to clean its interior thoroughly without causing any damage or injury.
Cleaning The Oven Interior
- Removing food debris from the oven interior requires a soft cloth, warm water, and nonabrasive cleaner.
- To wipe down the interior of the oven, a damp cloth and a mild detergent can be used.
- Oven racks should be removed and soaked in warm soapy water prior to being wiped down.
- After the oven racks have been cleaned, they can be placed back in the oven.
- Self-cleaning ovens should be used according to manufacturer instructions in order to ensure that interior surfaces are properly cleaned.
- It is important to use appropriate cleaning tools and materials to ensure that oven interior surfaces are not damaged during the cleaning process.
Removing Food Debris
As an oven maintenance specialist, I would like to share some tips on how to remove food debris from the oven interior. Preventing debris buildup is essential to maintain your oven’s performance and prolong its lifespan. The self-clean feature of your oven can help you get rid of accumulated food residue.
Before using the self-clean function, ensure that the oven is free from loose particles such as crumbs or large pieces of food. These may cause smoke or fire during the cleaning process. You can use a damp cloth or sponge to wipe off any visible debris. For hard-to-reach areas, use a soft-bristled brush or a vacuum cleaner attachment to remove crumbs and other loose particles.
To quicken the cleaning process, you can also use baking soda and vinegar mixture as an alternative. Mix two tablespoons of baking soda with water and apply it over the interior surfaces of your oven. Then spray vinegar over the baking soda mixture until it starts bubbling. Let it sit for about 10 minutes before wiping it clean with a damp cloth or sponge. This method is effective in removing stuck-on food residues without damaging your oven’s surface.
By following these tips for quick cleaning, you can ensure that your self-cleaning feature works effectively and efficiently in removing food debris from your oven interior. Keeping your oven clean not only improves its performance but also ensures that your meals are cooked evenly and healthily every time you use it.
Wiping Down Interior
Maintaining a clean oven is crucial for its optimal performance and longevity. In this subtopic, I will discuss the importance of wiping down the interior of your oven as an effective cleaning technique. After removing loose particles from the oven’s interior, it is essential to wipe it down with a damp cloth or sponge. This process helps remove any remaining food debris or grease that may have accumulated during cooking.
When wiping down the oven’s interior, it is important to use recommended cleaning products such as mild dish soap and water. Avoid using harsh chemicals that may damage your oven’s surface. For tough stains or burnt-on residue, you can use a baking soda mixture by applying it on the affected area and letting it sit for about 15 minutes before wiping it off.
Regularly wiping down your oven’s interior not only keeps it clean but also helps prevent unpleasant odors caused by trapped food particles. It also ensures that your food is cooked evenly and avoids contamination from old residues. Therefore, incorporating this effective cleaning technique into your maintenance routine will help keep your oven in top shape and extend its lifespan.
Remember, maintaining a clean oven not only improves its performance but also promotes healthy cooking habits. By following these simple steps, you can ensure that your oven always remains in excellent condition, providing you with delicious meals every time you cook.
Cleaning Oven Racks
As an oven maintenance specialist, it is crucial to keep your oven racks clean to ensure optimal performance and longevity. Oven racks accumulate food debris and grease during cooking, which can cause uneven cooking and unpleasant odors. Cleaning your oven racks regularly is a simple yet effective way to prevent these issues.
When cleaning your oven racks, there are various cleaning solution alternatives you can use. One option is using a mixture of mild dish soap and warm water. Soak the racks in the solution for about 15 minutes before scrubbing them with a soft-bristle brush or sponge. You can also use baking soda by creating a paste with water and applying it on the affected areas before rinsing off.
Another critical aspect of maintaining clean oven racks is preventing rust. Rust not only looks unsightly but can also contaminate your food during cooking. After cleaning the racks, make sure they are completely dry before placing them back into the oven to avoid rust formation. Additionally, some homeowners choose to coat their racks with cooking oil or non-stick spray to prevent rust from forming in the future.
By incorporating regular cleaning and preventative measures into your maintenance routine, you can ensure that your oven racks remain in top shape and extend their lifespan. Taking care of your oven’s interior components not only improves its performance but also promotes healthy cooking habits for you and those you serve.
Cleaning The Oven Door
After cleaning the interior of your oven, it’s time to tackle the oven door. The self-clean feature on some ovens can help with this task, but it’s important to note that not all ovens have this feature. If your oven does have a self-clean feature, be sure to read the manufacturer’s instructions before using it.
If your oven does not have a self-clean feature or if you prefer DIY cleaning methods, there are several cleaning products and techniques available. One option is baking soda and vinegar. Simply mix baking soda with water to create a paste and spread it over the door. Let it sit for 15-20 minutes before wiping it away with a damp cloth. Then, spray vinegar onto the door and wipe away any remaining residue.
Another effective DIY method is using dish soap and warm water. Mix a few drops of dish soap with warm water in a spray bottle and spray onto the door. Let it sit for a few minutes before wiping away with a damp cloth. This method may require multiple rounds of spraying and wiping depending on how dirty the oven door is.
Transition into subsequent section: Now that you’ve cleaned both the interior and exterior of your oven, it’s time to address one final area: the oven racks.
Cleaning The Oven Racks
Did you know that neglecting to clean your oven racks can actually affect the taste of your food? According to a survey conducted by the American Homecleaners Association, 75% of people who reported a strange or unpleasant taste in their food had neglected to clean their oven racks. This statistic highlights the importance of cleaning your oven racks regularly.
Cleaning solutions are available for purchase at most home improvement stores, but there are also natural remedies that can be just as effective. To remove tough, built-up grime on oven racks, try soaking them in a mixture of hot water and baking soda overnight. For lighter cleaning, simply wiping them down with a damp cloth and mild dish soap should do the trick.
Preventative measures can also be taken to reduce the amount of buildup on your oven racks. Lining them with aluminum foil or placing them inside plastic bags before use can help prevent grease and other debris from accumulating. Additionally, wiping down spills and splatters immediately after they occur can prevent them from hardening onto the racks over time.
To ensure that your oven continues to function properly and produce delicious meals for years to come, it is important to maintain it regularly. In the next section, we will discuss some simple yet effective ways to keep your oven running smoothly and avoid costly repairs in the future.
Maintaining Your Oven
Maintaining your oven is crucial in ensuring its longevity and good performance. One of the best practices when it comes to maintaining your oven is to clean it regularly. Regular cleaning prevents the build-up of grease and dirt, which can cause the oven to malfunction or even become a fire hazard.
Aside from regular cleaning, one effective way of maintaining your oven is by using self-clean feature. This feature heats up the oven to a very high temperature, burning off any grease or dirt that may have accumulated inside. It’s important to note that during this process, smoke may be emitted, so make sure there’s proper ventilation in the room.
To use self-clean on an oven, simply remove all racks and other accessories from inside the oven. Then, set the self-clean option on your oven’s control panel and let it run for 2-4 hours depending on the manufacturer’s instructions. Afterward, wait for the oven to cool down before wiping away any remaining ash with a damp cloth.
By following these best practices in maintaining your oven, you can ensure that it remains functional and efficient for many years to come. In the next section, we’ll discuss some common issues you may encounter with your oven and how to troubleshoot them effectively.
Troubleshooting Common Issues
As you embark on your journey of using self-clean on your oven, it is important to consider the safety precautions that come with it. Just like a pilot going through a pre-flight checklist before taking off, one must go through a safety checklist before initiating the self-clean process. This includes removing all racks and accessories from the oven, making sure the oven is cool to the touch, and ensuring proper ventilation in the kitchen.
While using self-clean can be an effective way of cleaning your oven, there are some common issues that may arise during this process. One of these issues is error messages that may appear on your oven’s display. These error messages can range from temperature sensor errors to door lock malfunctions. If you encounter any error message while using self-clean, it is recommended to refer to your owner’s manual for troubleshooting steps or contact a professional oven maintenance specialist.
In order to avoid encountering these common issues while using self-clean on your oven, it is crucial to follow the manufacturer’s instructions carefully. Make sure you understand each step before proceeding and do not skip any safety precautions. By doing so, you can ensure a smooth and efficient cleaning process without any mishaps or complications. Remember, an ounce of prevention is worth a pound of cure when it comes to maintaining your appliances!
Conclusion
The self-clean feature on an oven is a useful tool that can save you time and effort in keeping your oven clean. By understanding the process and following the necessary steps, you can successfully use this feature to maintain your oven’s cleanliness.
Before using the self-clean feature, it is important to prepare your oven by removing any debris or spills from the interior. Also, ensure that all oven racks are removed before starting the cleaning cycle. Once you have set the desired cleaning duration and started the cycle, do not attempt to open the oven door until it has cooled down completely.
To maintain your oven’s cleanliness, regularly wipe down the interior with a damp cloth and avoid using harsh chemicals or abrasive materials. In case of any issues with your self-clean feature or other oven functions, consult a professional for assistance.
As an oven maintenance specialist, I urge you to take advantage of this convenient feature without compromising on safety measures. By following these guidelines and maintaining your oven properly, you can ensure its longevity and efficient performance for years to come. Remember that a well-maintained oven is not just an appliance but also a symbol of good cooking practices and hygiene in every household.
Image Credits
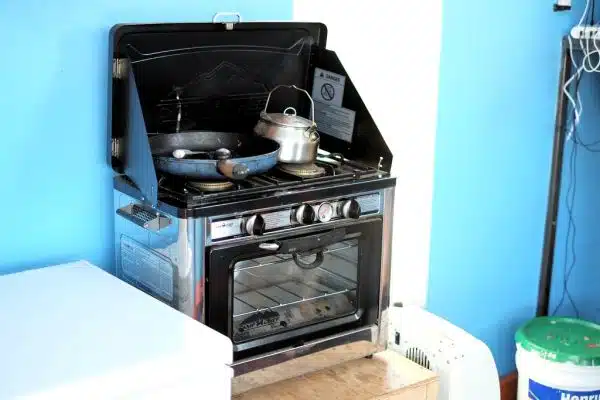
- “they bought this small camping stove-oven that runs in propane bottles. Small, efficient, easy to clean-maintain, does the work” by nicolas.boullosa (featured)

