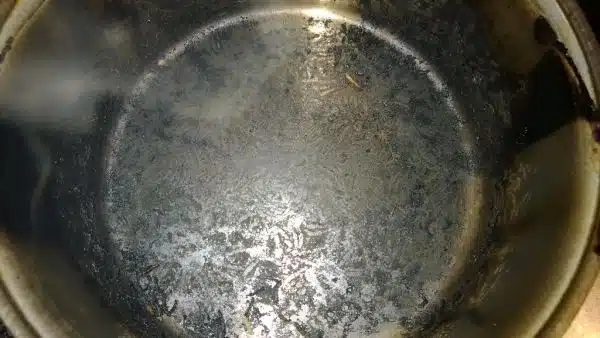
Cleaning a burnt pot can be a daunting task, especially when the burnt residue sticks to the bottom of the pot. However, with the right tools and techniques, it is possible to clean even the most stubborn burnt pots. As a home cleaning expert, I have seen many people struggle with cleaning burnt pots and pans. In this article, I will share my tips and tricks for effectively cleaning a burnt pot.
A burnt pot can result from various reasons such as leaving food unattended on high heat or forgetting to add water while cooking. The blackened residue can be challenging to remove and may require more than just soap and water. It is essential to know how to clean a burnt pot properly as it not only affects the appearance of your cookware but also impacts the taste of your food. By following these steps, you can ensure that your pots are clean and ready for use again without having to throw them away.
Understanding The Causes Of Burnt Pots
Burnt pots are a common kitchen mishap that can happen to anyone. They occur when food is left unattended on high heat for too long, causing it to stick and burn onto the pot’s surface. This problem can be caused by several factors, including distractions while cooking, inaccurate temperature control, and unseasoned cookware.
Distractions while cooking are a leading cause of burnt pots. It’s easy to forget about food on the stove when you’re busy with other tasks or multitasking in the kitchen. This is why it’s essential to stay focused on your cooking and avoid distractions like phone calls or social media notifications.
Another factor that contributes to burnt pots is inaccurate temperature control. If your stove isn’t calibrated correctly, or if you’re using an unfamiliar appliance, it’s easy to overheat your cookware and burn your food. To prevent this from happening, use a thermometer to monitor the temperature of your pot or invest in high-quality cookware that distributes heat evenly.
To prevent future burns, make sure you season your cookware before use properly. Seasoning helps create a non-stick surface that makes it easier to clean and prevents food from sticking and burning onto the pot’s surface. Additionally, always keep an eye on your food while cooking and avoid leaving it unattended for extended periods. By following these simple steps, you can prevent burnt pots from occurring in the future.
With an understanding of what causes burnt pots and how they can be prevented in mind, let’s move on to gathering our supplies for cleaning up this common kitchen mess.
Gather Your Supplies
First and foremost, before you begin cleaning your burnt pot, it’s important to gather all the necessary supplies. This will ensure that you have everything you need on hand to tackle the job and prevent any interruptions during the cleaning process. Not having the right supplies can result in frustration and ultimately a less than desirable outcome.
Supplies needed for cleaning a burnt pot include dish soap, baking soda, white vinegar, and a scrubbing brush or sponge. These items work together to remove stubborn stains and burnt residue from pots without damaging them. It’s crucial to use these supplies properly to avoid causing any harm to your cookware.
Properly cleaning a burnt pot is essential not only for its appearance but also for hygiene reasons. Residue left behind from burnt food can harbor bacteria that may contaminate your next meal. Additionally, over time, buildup of grease or grime can affect the performance of your cookware. By taking the time to clean your pots correctly with the right supplies, you’ll extend their lifespan while ensuring they remain in tip-top shape for future use.
- Dish soap
- Baking soda
- White vinegar
- Scrubbing brush or sponge
Now that you’ve gathered all necessary supplies and understand the importance of proper cleaning let’s move onto soaking the burnt pot.
Soak The Burnt Pot
Effective soaking techniques are the key to removing burnt-on food from pots and pans. Soaking not only loosens the stuck-on food but also makes it easier to scrub away with cleaning solutions. The longer the pot is soaked, the easier it will be to clean.
There are several effective soaking techniques that can be used for burnt pots. One method is to fill the pot with hot water and add dish soap or a small amount of baking soda. Let it soak for several hours or overnight before attempting to clean it. Another technique is to fill the pot with equal parts of water and white vinegar and heat it until boiling. Let it cool before emptying the solution and scrubbing away any remaining residue.
When choosing the best cleaning solutions for burnt pots, there are several options available. Baking soda is a common household item that can effectively remove burnt-on food without damaging the pot’s surface. Another option is using a commercial cleaner specifically designed for burnt pots, although these may contain harsh chemicals that require proper ventilation when in use. It’s important to read labels carefully and follow all safety precautions when using any cleaning solution.
Transition: Now that we have discussed effective soaking techniques and best cleaning solutions for burnt pots, let’s move on to another useful method – using baking soda and vinegar.
Use Baking Soda And Vinegar
- Combining baking soda and vinegar is an effective and economical option for cleaning a burnt pot.
- To begin, the pot should be filled with a mixture of 1/4 cup of baking soda and 1/2 cup of vinegar.
- Allow the mixture to soak in the pot for up to an hour for more stubborn stains.
- After soaking, use a firm-bristled brush or steel wool to scrub the pot and remove any remaining residue.
- Rinse the pot with hot water and then dry it with a clean cloth.
- For more difficult stains, repeat the above steps as necessary.
Mixing Baking Soda And Vinegar
Mixing baking soda and vinegar is a common household cleaning method that can be used to clean a burnt pot. This method works by creating chemical reactions that dissolve the burnt food particles and stains in the pot, making them easier to remove. The fizzing action that occurs when baking soda and vinegar are mixed together helps to break down any tough residue on the surface of the pot.
As a home cleaning expert, I recommend using this alternative method for cleaning burnt pots because it is both eco-friendly and effective. Unlike harsh chemical cleaners, baking soda and vinegar are natural ingredients that will not harm your family or pets. Additionally, this method is cost-effective and does not require any special equipment or tools.
To use this method, start by filling the burnt pot with water until it covers the burnt area. Add a cup of white vinegar to the water and bring it to a boil. Once boiling, remove from heat and add two tablespoons of baking soda to the mixture. Allow the mixture to sit for several hours or overnight before scrubbing with a non-abrasive sponge or brush. Rinse thoroughly with warm water.
In conclusion, mixing baking soda and vinegar is an effective way to clean a burnt pot without using harsh chemicals or special equipment. This alternative method uses chemical reactions to break down tough residue on the pot’s surface, making it easier to scrub away. Give this eco-friendly cleaning method a try next time you need to clean a burnt pot!
Soaking The Pot
Now that we have discussed the method of mixing baking soda and vinegar, let’s talk about another effective way to clean a burnt pot – soaking. Soaking the pot is an essential step in cleaning, as it helps to loosen the burnt-on residue, making it easier to scrub away. The benefits of soaking include saving time and effort while also preserving the quality of your cookware.
There are different soaking methods you can use, depending on the severity of the burn. For light burns, you can simply fill the pot with hot water and let it sit for 30 minutes to an hour. However, for more severe burns, you may need to add dish soap or baking soda to the water and let it soak overnight. By morning, the burnt-on residue should be significantly softened and easier to remove.
Combining soaking with baking soda and vinegar is a powerful cleaning combination that can effectively clean even the toughest burned pots. After soaking your pot in hot water mixed with dish soap or baking soda, drain out some of the water before adding white vinegar. Allow it to sit for a few hours before adding more hot water and two tablespoons of baking soda. Let this mixture sit overnight before scrubbing away any remaining residue with a non-abrasive sponge or brush. Rinse thoroughly with warm water, and your previously burnt pot will look good as new!
Scrubbing The Pot
After soaking your burnt pot, the next step is to scrub away any remaining residue. When it comes to scrubbing, it’s important to use the right type of scrubber for your cookware. Non-abrasive sponges or brushes are best, as they won’t scratch or damage the surface of your pot.
While scrubbing, be sure to apply firm pressure but avoid using too much force that may damage the finish of your cookware. You can also use a paste made from baking soda and water to help remove any stubborn stains. Simply apply the paste to the affected areas and let it sit for a few minutes before scrubbing with a non-abrasive sponge or brush.
Once you’ve finished scrubbing, rinse your pot thoroughly with warm water and dry it with a soft cloth. With this method, baking soda and vinegar have proven to be an effective cleaning duo that can rejuvenate even the most heavily burnt pots. By following these steps, you can restore your cookware back to its original condition without having to replace it entirely.
Heat Up The Pot
Are you tired of waiting for a pot to heat up? There are various ways to heat up pots quickly and efficiently. One of the most popular methods is using an induction cooktop or stove, which uses magnetic fields to directly heat the pot. This method is much faster than traditional gas or electric stoves.
Another way to heat up pots quickly is by using lightweight materials such as copper or aluminum. These materials are great conductors of heat, allowing for rapid heating of the pot. Additionally, avoiding heavy-bottomed pots can also ensure faster heating times.
When selecting a pot for quick heating, it’s important to consider not only the material but also the size and shape. A wider surface area allows for more even heating and quicker boiling times. A taller pot, on the other hand, may take longer to heat up due to its increased volume.
Now that you’re equipped with some knowledge about how to increase your pot’s temperature quickly, let’s move on to the next step: scrubbing with a non-scratch pad.
Scrub With A Non-Scratch Pad
Scrubbing is a crucial step in cleaning a burnt pot. However, using the wrong scrubbing pad can further damage the pot and make it harder to clean. Fortunately, there are non-scratch pad alternatives that you can use for effective scrubbing.
When looking for non-scratch pad alternatives, consider using microfiber cloths or sponges. These materials are gentle on your pots and pans while still providing enough abrasion to remove any stubborn stains. Alternatively, you can also use baking soda as a natural abrasive cleaner. Sprinkle some baking soda on the burnt area of your pot and gently scrub with a damp cloth until the stain is removed.
To ensure effective scrubbing, take note of these tips: first, soak your burnt pot in hot water and dishwashing soap for 10-15 minutes before scrubbing. This will loosen up any residue and make it easier to clean. Second, always use warm water when scrubbing as it helps break down any grease or oil that may have stuck to the surface of the pot. Lastly, apply some elbow grease when scrubbing but avoid applying too much pressure as this may scratch or damage the surface of your pot.
With these non-scratch pad alternatives and tips for effective scrubbing, cleaning a burnt pot should be less daunting. In the next section, we’ll explore how lemon juice and salt can help remove even the toughest stains from your pots and pans without damaging them.
Use Lemon Juice And Salt
After scrubbing with a non-scratch pad, the next step in cleaning a burnt pot is to use lemon juice and salt. This method has been tried and tested by home cleaning experts for its effectiveness in removing tough burnt stains. Lemon juice contains citric acid that can dissolve stubborn particles on the surface of the pot while salt acts as a mild abrasive.
One of the benefits of using lemon juice is its natural ability to remove stains without leaving any chemical residue. It is also an eco-friendly alternative to harsh chemicals that can be harmful to the environment. Salt, on the other hand, is readily available in most households and can be used as an alternative to baking soda or other abrasive cleaners. However, for those who are sensitive to citrus fruits or have skin allergies, there are alternatives to using salt such as vinegar or cream of tartar.
To use this method, first sprinkle a layer of salt onto the burnt surface of the pot. Then squeeze fresh lemon juice over it until it covers all areas with burnt stains. Let it sit for about 10 minutes before using a non-scratch pad or sponge to scrub away the stains. Rinse thoroughly with water and dry with a clean cloth. For tougher stains, you may need to repeat this process until all traces of burn marks are gone.
To take things up another notch, you can create a paste with cream of tartar and vinegar instead of using salt and lemon juice alone. Cream of tartar is an acidic powder that has been known for its cleaning properties while vinegar acts as an effective degreaser. Simply mix equal parts cream of tartar and white vinegar until it forms a paste-like consistency then apply it onto the burnt areas of your pot. Let it sit for at least 15 minutes before scrubbing away with a non-scratch pad or sponge then rinse well with water and dry thoroughly.
Create A Paste With Cream Of Tartar
- To create a paste with cream of tartar, first gather the necessary ingredients: Cream of tartar, baking soda, and hot water.
- Mix together the cream of tartar and baking soda in a non-metallic bowl until they are well combined and a paste is formed.
- Gradually add hot water, stirring constantly, until the paste reaches a desired consistency.
- Use the paste to clean a burnt pot by applying a thick layer to the burnt area and letting it sit for several minutes before scrubbing with a stiff brush.
Create Paste
Imagine a pot that has been burnt to the point where it seems impossible to clean. The thought of scrubbing for hours on end can be daunting and frustrating, but there is a solution: creating a paste with cream of tartar. This method has been proven to effectively remove even the toughest burnt-on stains.
One of the benefits of paste cleaning is that it requires minimal effort and time. Instead of vigorously scrubbing away at the stains, all you need to do is create a simple paste and let it do the work for you. Not only does this save time, but it also reduces the risk of damaging your cookware by using harsh chemicals or tools.
While there are alternative methods for cleaning burnt pots, such as soaking in vinegar or baking soda, these may not be as effective as creating a paste with cream of tartar. Additionally, some alternative methods can leave an unpleasant odor or taste in your cookware. With paste cleaning, however, you can rest assured that your pot will be left sparkling clean without any residual smells or flavors.
Gather Ingredients
To create a paste with cream of tartar, the first step is to gather all the necessary ingredients. The good news is that these ingredients are likely already in your kitchen pantry. For this recipe, you will need cream of tartar, baking soda, and water. While there are alternative methods for cleaning burnt pots, such as soaking in vinegar or using baking soda alone, the combination of cream of tartar and baking soda has been proven to be the most effective.
When it comes to ingredient choices, it’s important to note that not all brands of cream of tartar are created equal. Look for a high-quality brand that is pure and free from additives. Additionally, make sure to use warm water when creating the paste as it will help activate the cleaning agents in the cream of tartar and baking soda. While alternative methods may be cheaper or more readily available, using quality ingredients will ensure optimal results.
While there are alternative methods for cleaning burnt pots, nothing compares to the effectiveness and ease of creating a paste with cream of tartar. By gathering quality ingredients like pure cream of tartar and warm water, you can rest assured that your burnt pot will be left sparkling clean without any harsh chemicals or tools needed. So why not try out this simple yet powerful method today?
Try A Commercial Cleaner
While there are several home remedies to clean a burnt pot, sometimes the situation requires a more potent solution. This is where commercial cleaners come in handy. There is a common misconception that commercial cleaners are harsh chemicals that can be harmful to both the user and the environment. However, this is not always true as there are many benefits of using commercial cleaners.
Benefits of Commercial Cleaners:
They are designed to break down tough stains and grime, making it easier to clean.
Commercial cleaners often have antibacterial properties that ensure proper sanitation and hygiene.
They can save time and effort compared to using home remedies repeatedly.
Some commercial cleaners have pleasant scents that leave your kitchen smelling fresh and clean.
Safety Precautions when Using Commercial Cleaners:
It is essential to take necessary safety precautions when using commercial cleaners. Here are some safety tips to keep in mind:
Always read the label before using a cleaner and follow instructions carefully.
Wear gloves while cleaning with commercial cleaners, especially if you have sensitive skin.
Use them in well-ventilated areas to avoid inhaling any fumes.
Keep them out of reach of children and pets as they can be poisonous if ingested.
Using commercial cleaners can be an effective way to clean burnt pots without having to resort to harsh scrubbing or hours of soaking. However, it is important always to use them safely and correctly for optimal results and minimal harm done to yourself or the environment. In the next section, we will explore another method that can make cleaning burnt pots even easier – pressure cooking!
Use A Pressure Cooker
If commercial cleaners fail to remove the stains from your burnt pot, there are alternative methods that you can try. One such method is using baking soda and vinegar. Start by filling the pot with water, add a cup of vinegar, and bring it to a boil. Remove it from the heat source, add two tablespoons of baking soda and let it sit for an hour. Afterward, empty the contents and scrub the pot with a non-abrasive sponge.
Another alternative method is using lemon juice and salt. Cut a lemon in half, squeeze both halves into the pot, then add a tablespoon of salt. Fill the pot with water and let it sit for an hour or until the stains start to loosen up. Empty out the contents and use a non-abrasive sponge to scrub off any remaining stains.
Pros of using these alternative methods are that they are readily available at home and more affordable than commercial cleaners. However, cons may include not being as effective as commercial cleaners or taking longer periods to get rid of tough stains. It’s important to note that prevention is always better than cure when it comes to burnt pots.
To prevent burnt pots in the future, ensure that you don’t leave your cooking unattended for long periods. Also, use appropriate heat settings on your stove top depending on what you’re cooking. If you’re boiling something like pasta or rice, consider adding enough water before turning on your stove top so that it doesn’t dry out quickly or stick to your pot’s bottom surface. These simple measures will go a long way in keeping your pots clean without necessarily having to resort to harsh cleaning agents or spending too much money on replacements.
Preventing Burnt Pots In The Future
While cleaning burnt pots can be a hassle, it’s always better to prevent them from happening in the first place. Some may argue that burnt pots are just an inevitable part of cooking, especially when cooking with high heat. However, there are plenty of preventive measures that you can take to avoid this problem altogether.
Firstly, proper kitchen organization is key. Make sure that your pots and pans are easily accessible and don’t require too much stacking or shuffling around to get to. This will not only save you time and effort when cooking, but it will also prevent accidents like dropping a pot while trying to get to another one.
Secondly, be mindful of the heat level you’re using while cooking. While high heat may seem like the quickest way to cook something, it can also lead to burnt pots and pans if you’re not careful. Instead, try using medium heat and adjusting as needed depending on what you’re cooking.
Lastly, always keep an eye on your food while it’s cooking. It can be easy to get distracted or multitask in the kitchen, but leaving something unattended for too long is a recipe for disaster (pun intended). By being present and attentive while cooking, you’ll be able to catch any potential problems before they turn into burnt pots.
By implementing these three simple tips – proper kitchen organization, mindful use of heat levels, and staying present while cooking – you’ll be well on your way to avoiding burnt pots in the future. But there’s one more step you can take to ensure success: avoiding high heat altogether.
Avoid High Heat
When cooking, it’s essential to be mindful of the heat level being used. High heat can cause food to burn quickly and can lead to difficult-to-clean pots and pans. To avoid this, always use a lower heat setting when cooking. While it may take longer for the food to cook, it will prevent burning and save you time in the long run by avoiding the need for extensive cleaning.
It’s also important to monitor heat levels throughout the cooking process. Sometimes, even when using a low heat setting, certain foods may require adjustments to prevent burning. For example, stirring frequently or adjusting the temperature slightly may help prevent sticking or burning. Being attentive to these details can save you from having to deal with a burnt pot or pan.
By implementing these tips, you can minimize your chances of dealing with burnt pots and pans altogether. However, accidents do happen! If you find yourself with a burnt pot or pan despite your best efforts, don’t worry. There are still ways to clean them effectively without damaging them further. The next section will discuss how adding water while cooking can help prevent burning and make cleaning easier as well.
Add Water While Cooking
After avoiding high heat and cooking with less water, it’s time to tackle the issue of a burnt pot. Burnt pots can be quite frustrating to deal with, but fear not! With the right technique and a bit of patience, you can restore your pot to its former glory.
One of the first steps to take is pre-soaking the burnt pot. This has numerous benefits, such as softening any stubborn stains or burnt food particles that may have stuck to the pot’s surface. By pre-soaking your pot in warm water for a few hours or even overnight, you’ll have an easier time cleaning it later on.
Another tip for cleaning a burnt pot is to add a bit of baking soda and vinegar to the water while soaking. These two ingredients work together to create a powerful cleaning solution that will help loosen up any remaining stains or food particles. After soaking, use a non-abrasive sponge or brush to scrub away any remaining stains gently. Remember always to rinse thoroughly afterward and dry off completely before storing your pot.
Using a timer while cooking can also help prevent future burnt pots from happening again. Set the timer according to what you’re cooking, making sure not to leave it unattended for too long. This will ensure that you don’t forget about your food and end up burning it accidentally. By following these tips, you’ll be able to clean even the most stubbornly burnt pots without breaking a sweat!
Use A Timer
Using timers is an essential tool in cooking, especially when it comes to cleaning burnt pots. Timers can help prevent overcooking or burning of food, which often leads to difficult-to-clean pots. There are different types of timers for cooking, including manual and digital timers that can be set for specific periods.
One benefit of using timers in the kitchen is that they help you keep track of time and avoid distractions. For example, if you have a timer set for boiling water, you won’t forget about it and let the water boil dry. This will not only save you from having to clean a burnt pot but also prevent any safety hazards that may arise due to overheating.
In summary, using timers in the kitchen is a simple yet effective way to prevent burnt pots. By keeping track of cooking times, you can ensure that your food doesn’t burn or overcook and reduce the amount of cleaning required post-meal preparation. Incorporating this small practice into your routine can make a big difference in your kitchen experience and ultimately lead to less stress and hassle when cleaning up after meals. To further ease the process of cleaning pots, it’s important to clean them regularly as well.
Clean Your Pots Regularly
While it’s essential to use a timer when cooking, sometimes we forget, and pots end up getting burnt. It’s frustrating and can be challenging to clean. However, don’t worry, here’s how you can clean your burnt pot without damaging it.
Regular cleaning is crucial to prevent pots from getting burnt. When you clean your pots regularly, you’ll avoid the frustration of having to scrub them for hours on end. Moreover, regular cleaning helps maintain the quality of your cookware and prolongs its lifespan.
When cleaning a burnt pot, using natural cleaning agents is beneficial. Not only are they better for the environment, but they’re also safer for your health than harsh chemicals. Additionally, natural cleaners like baking soda and vinegar are readily available in most households and are affordable.
- Here are four benefits of using natural cleaning agents:
- They’re non-toxic
- They’re eco-friendly
- They’re cost-effective
- They’re gentle on surfaces
As a home cleaning expert, I recommend that you make it a habit always to clean your pots after every use. Don’t wait until they get burnt before you start scrubbing them. Also, consider using natural cleaning agents whenever possible as they have several advantages over chemical cleaners.
Remember that keeping your cookware clean isn’t just about appearances; it’s also about maintaining their quality and prolonging their lifespan. So make sure to take good care of them by incorporating regular cleaning into your routine using natural cleaning agents whenever possible.
Conclusion
Understanding the causes of burnt pots is essential for every home cleaning expert. Burnt pots are a common occurrence in many households, and they can be caused by various factors such as cooking at high temperatures, leaving food unattended, or using the wrong type of cookware. To effectively clean burnt pots, it is crucial to gather your supplies, soak the pot, use baking soda and vinegar, heat up the pot, avoid high heat, add water while cooking, use a timer and clean your pots regularly.
After gathering your supplies and soaking the pot, mixing baking soda and vinegar is an effective method to remove burnt-on food from your pot. The mixture creates a chemical reaction that bubbles and loosens any food residue. Additionally, heating up the pot can also help loosen any residue from the bottom of the pot. However, it is important to avoid high heat when cleaning burnt pots as this can cause further damage.
In conclusion, cleaning a burnt pot requires patience and knowledge of effective cleaning methods. Following these tips will ensure that you can restore your cookware to its original state without causing any further damage. Remember to always clean your pots regularly to prevent future burns. As a home cleaning expert, I highly recommend using these methods to achieve sparkling clean cookware that is free from any stubborn stains or burns.
Image Credits
- “Filthy burnt pot” by qubodup (featured)

