Designing and building a simple backyard ice-skating rink can be a rewarding and fun experience for anyone with an interest in outdoor activities. As the winter months approach, many people seek out ways to enjoy the outdoors despite the cold weather. A backyard ice-skating rink provides a unique opportunity for families to bond, exercise, and create memories that will last a lifetime.
Creating a backyard ice-skating rink requires careful planning and preparation. This project involves understanding the basic principles of engineering and landscaping to ensure that the rink is level, sturdy, and safe for use. With the right tools, materials, and guidance, anyone can build a backyard ice-skating rink that will provide hours of entertainment throughout the winter season. In this article, we will explore the steps involved in designing and constructing a simple yet functional backyard ice-skating rink.
Choosing The Right Location
The process of building a backyard ice-skating rink necessitates selecting the appropriate location. Landscaping considerations are critical when determining where to construct the rink. One should ensure that the ground is level and free of any rocks or other obstructions. When constructing an ice-skating rink, it’s important to choose an area with good drainage to prevent water from pooling on top.
Weather implications must also be considered when deciding on a location for your backyard ice-skating rink. An area that receives little to no sunlight will be colder, which is ideal for keeping the ice frozen solid. However, if there are trees or buildings nearby, they may obstruct sunlight and cause uneven freezing patterns on the surface of the rink. Rain can also be a significant obstacle in maintaining a smooth and safe skating surface.
Before beginning construction, it’s important to take accurate measurements and mark off the designated area. The size of your backyard will determine how large your rink can be, but generally speaking, 20 feet by 40 feet is sufficient for recreational skating purposes. Marking off the area will assist in ensuring that you have adequate space for building your rink and provide guidance throughout the construction process.
Measuring And Marking The Area
Having chosen the perfect location for your backyard ice-skating rink, it is time to move on to measuring and marking the area. Measuring techniques are an essential aspect of this process as they ensure that you have the correct dimensions for your rink. The most efficient way to measure your area is by using a measuring tape or a long piece of rope.
Equipment needed for this task includes stakes, mallets, and string lines. Stakes are used to mark off corners and points of intersection on the ground while mallets help in driving them into the ground. String lines are then tied around each stake, with each line representing one side of the rink. These lines should be pulled taut to ensure accuracy in measurement.
Once you have marked out the perimeter of your rink, it’s time to move onto preparing the ground. This step involves removing any debris, rocks or branches from your designated space. It’s important to have a level surface that drains well for optimal skating conditions. Preparing the ground will allow you to create a base layer that will support your ice sheet and provide stability during use.
Preparing The Ground
- Clearing the ground is necessary to ensure a level surface and to remove any debris that could interfere with the ice-skating rink.
- It is important to measure the area to be used for the ice-skating rink to ensure the correct size for the rink is achieved.
- Marking the area for the ice-skating rink provides a visual representation of the rink’s size that can be used as a guide during construction.
- The ground should be cleared and measured prior to marking the area for the ice-skating rink to ensure accuracy.
Clearing The Ground
To ensure a stable and safe surface for your backyard ice-skating rink, it is crucial to properly prepare the ground. One of the first steps in this process is ground protection. This involves laying down a protective barrier such as tarps or plastic sheeting to prevent any damage or disruption to the natural landscape. By doing so, you can avoid damaging the grass or soil beneath and help maintain the overall health of your backyard.
Once the ground has been protected, it’s time to consider landscaping tips for creating a level and even surface. Begin by removing any rocks, debris, or other obstacles that may cause unevenness in your rink. This will help prevent any hazards while skating and ensure an enjoyable experience for all. It’s also important to level out any bumps or dips using shovels, rakes, or even a lawn roller.
In addition to clearing and leveling the ground, another crucial step in preparing your backyard for an ice-skating rink is ensuring proper drainage. Without proper drainage, melted ice can pool and create hazardous conditions on your rink. To prevent this from happening, make sure that there is adequate slope in your yard to allow for water runoff. By taking these steps in preparing the ground for your backyard ice-skating rink, you can create a safe and enjoyable space for family and friends alike.
Measuring And Marking The Area
Measuring and marking the area for your backyard ice-skating rink is a crucial step in preparing the ground. Before starting with any leveling techniques, it is important to choose the right size of the rink that will fit in your available space. Measuring tools such as measuring tapes or laser levels can help you determine the appropriate size and shape of your ice rink. It’s also essential to consider drainage when choosing the location and size of your rink. Proper drainage will ensure that melted ice does not accumulate on the surface.
After selecting the appropriate location and size, it’s time to mark out the area where you’ll be building your backyard ice-skating rink. This can be done using spray paint or stakes with strings attached to them. The markings should be precise to ensure that your rink is level and even. Leveling techniques such as using shovels or lawn rollers can then be used to create an even surface for skating. It’s important to check for levelness frequently during this process to avoid any bumps or dips in the surface.
Once you have marked out and leveled your rink, it is necessary to consider drainage again. You can incorporate grading into your landscaping plan by creating a slight slope away from your house or other structures on your property. This ensures adequate water runoff and prevents puddles from forming on your skating surface during melting periods. By following these steps, you can create a safe environment for skating while maintaining proper drainage in your backyard ice-skating rink.
Creating The Frame
The frame of your ice-skating rink is the foundation for the entire structure. The first step in creating the frame is to decide on the size and shape of your rink. Once you have determined these factors, you can move on to selecting the materials needed for your frame.
Materials needed:
- Pressure-treated lumber or PVC pipes
- Deck screws or pipe connectors
- Measuring tape
- Circular saw or pipe cutter
- Hammer or rubber mallet
The cost estimation for building a frame will vary depending on the size and material chosen. Pressure-treated lumber can range from $2-$5 per linear foot, while PVC pipes can range from $0.50-$1 per foot. Deck screws can cost around $10 per pound, while pipe connectors can cost around $3 each.
Constructing the frame requires precise measurements and cutting of the materials chosen. The pressure-treated lumber should be cut into lengths that match your desired rink size and then screwed together at each corner to create a square or rectangular shape. If using PVC pipes, they should be cut into equal lengths and connected with pipe connectors to form the same shape.
In the next section, we will discuss how to install a liner over your newly constructed frame to prepare for filling with water.
Installing The Liner
Choosing the right liner is crucial when building a backyard ice-skating rink. The liner should be made of durable material that can withstand harsh weather conditions and frequent use. A heavy-duty polyethylene liner is a popular choice, as it is resistant to tears and punctures. It is also important to ensure that the liner is the correct size for your rink area. Measure the area carefully before selecting a liner.
Securing the liner properly will prevent leaks and wrinkles from forming on the ice surface. Start by laying out the liner in the rink area, making sure it covers every corner and edge. Then, secure it with stakes or bungee cords around the perimeter of the rink. Be sure to pull the liner taut to avoid any wrinkles or sagging areas in which water may collect. To prevent leaks, inspect the entire surface of the liner for any holes or cuts that may have occurred during installation.
Repairing leaks promptly ensures that your ice-skating rink remains functional throughout winter. If you discover a leak, drain all water from the rink immediately and locate the source of leakage. Once you find it, patch up any holes with a waterproof adhesive tape or sealant before refilling with water. Removing wrinkles can be done by draining all water from your rink then using a heat source such as a hairdryer or sun exposure on sunny days to relax any wrinkles on your rink surface before refilling with water.
Transition: With your liner securely in place and leak-free, it’s time to move onto filling your backyard ice-skating rink with water.
Filling With Water
After successfully installing the liner, the next step is to prevent cracking of the ice. This can be done by ensuring that there are no air pockets between the liner and the ground. To achieve this, use a broom or squeegee to remove any excess water before it freezes. Additionally, adding a layer of insulation such as hay or straw underneath the liner can help regulate the temperature and prevent cracking.
For those looking to add a fun touch to their backyard ice rink, consider adding coloring to the water before filling up the rink. Food coloring can easily be added to create a unique and vibrant look for skaters. However, it is important to note that excessive use of coloring may affect the quality and consistency of the ice.
Once all preparations have been made, it is time to fill up the rink with water. It is recommended that you start by filling half of the rink with water and allowing it to freeze before adding more layers. This will ensure that each layer has enough time to freeze properly without causing any cracks in the ice. Allow for sufficient freezing time before moving on to the next step in creating your very own backyard ice-skating rink.
Allowing For Freezing Time
To allow for proper freezing time, it is essential to prepare the area before setting up the rink. Firstly, ensure that the ground is level and free from any debris or rocks that may puncture the liner. It is recommended to use a laser level for accurate leveling of the surface. Once leveled, add a layer of sand or gravel to promote drainage and prevent standing water.
After preparing the area, install the liner and fill it with water. The depth of water should be at least 4 inches but not more than 6 inches. Allow ample time for freezing; this usually takes about three days with temperatures below 32°F. Ensure that no one walks on or disturbs the ice during this period as it can cause uneven freezing.
While waiting for the ice to freeze, consider building your DIY ice resurfacer and planning for ice skate storage. An ice resurfacer can smooth out rough patches on the ice by spraying hot water on them, creating a smoother surface for skating. For skate storage, consider building a small shed or using an existing outdoor storage unit to keep your skates dry and protected from weather elements.
Moving forward, clearing snow and debris off your rink is crucial for maintaining good skating conditions. A snow blower or shovel can be used to clear snow while a broom can be used to remove debris such as leaves or twigs. Regular maintenance will ensure that your rink remains in good condition throughout winter months, providing hours of fun skating activities for you and your family.
Clearing Snow And Debris
As the freezing process continues, it’s important to start thinking about the next steps in maintaining your backyard ice-skating rink. One of the most important aspects is clearing snow and debris from the surface of the ice. This can be achieved through a few different methods, such as using a snowblower or shoveling by hand. It’s crucial to keep the surface as clean as possible to ensure safe skating conditions.
Using a snowblower is an efficient way to remove large amounts of snow quickly. However, it’s important to use caution and not damage the ice surface while using this tool. Snow shoveling can also be effective but requires more physical exertion. Regardless of which method you choose, removing any debris such as sticks or leaves is also essential for maintaining a smooth and safe skating experience.
In addition to maintaining the ice surface, backyard landscaping should also be considered when creating your rink. Proper temperature control and adequate backyard lighting are key factors in making sure your rink stays in top condition throughout the winter months. Adding rink accessories such as boards or netting can help keep stray pucks or skaters from damaging surrounding areas. With these winter landscaping considerations in mind, your backyard rink will provide endless hours of enjoyment for family and friends.
Maintaining The Ice
- Watering the ice is an essential part of maintaining a backyard ice-skating rink, as the water acts as a binding agent to hold the ice in place.
- Cleaning the ice surface of debris and snow helps to ensure that the ice is smooth and level for skating.
- A resurfacing of the ice should be done periodically to remove any irregularities or ridges in the surface.
- The water used for watering the ice should be at a temperature of 32°F or lower to ensure proper freezing.
- Cleaning the ice with a shovel or snow blower can help to remove any material that may have fallen onto the ice.
- Resurfacing the ice may require the use of specialized tools such as a rake or Zamboni to ensure a smooth, even surface.
Watering The Ice
Watering the ice is a crucial step in maintaining the quality of your backyard ice-skating rink. Tips for successful watering include starting with a smooth surface, as any bumps or divots will create weak spots in the ice. Additionally, it is important to water when temperatures are consistently below freezing, as warmer temperatures can cause the water to melt and weaken the ice.
Techniques for watering include using a hose with a fine mist nozzle to evenly distribute water across the surface of the rink. It is recommended to apply several thin layers of water rather than one thick layer, as this will promote even freezing and reduce the risk of cracks forming in the ice. To prevent any areas from becoming too thick, it is also important to overlap each layer slightly.
To ensure that all areas are properly watered, it may be helpful to divide the rink into sections and focus on one section at a time. By following these tips and techniques for watering your backyard ice-skating rink, you can maintain a smooth and sturdy surface that will provide hours of winter fun for you and your family.
Cleaning The Ice
Maintaining the ice of your backyard ice-skating rink is essential for a smooth and safe skating experience. One important aspect of maintaining the ice is cleaning it regularly. Dirt, leaves, and debris can accumulate on the surface of the ice, making it difficult to skate on and potentially causing injury.
To clean the ice, you will need a shovel or broom to remove any large debris. It is important to be gentle when removing debris so as not to damage the surface of the ice. After removing larger items, a scraper or squeegee can be used to remove any remaining dirt or residue from the surface of the ice.
Common mistakes when cleaning the ice include using too much force when scraping or using abrasive materials that can scratch or damage the surface of the ice. It is also important to avoid using hot water or chemicals that can melt or weaken the ice. By taking care when cleaning your backyard ice-skating rink, you can maintain a smooth and safe surface for skating.
In addition to regular cleaning, it may be necessary to repair any cracks or weak spots in the ice as they occur. This can be done by filling in cracks with snow or slush and then adding a layer of water to freeze over them. By staying vigilant in maintaining your backyard ice-skating rink, you can ensure that it remains safe and enjoyable for all who use it.
Resurfacing The Ice
Maintaining a backyard ice-skating rink requires regular cleaning and repair to ensure the safety of its users. While cleaning the ice can help remove dirt and debris, resurfacing is necessary to address any damage or wear on the surface. Resurfacing is a process that involves adding a new layer of water to the ice, which fills in any cracks or holes and creates a smooth surface for skating.
To resurface the ice, you will need a hose or sprayer to apply a thin layer of water evenly across the surface. It is important to avoid using too much water, as this can create uneven spots and lead to weak areas in the ice. Additionally, it is recommended to wait until temperatures are consistently below freezing before resurfacing, as warmer temperatures can cause melting and refreezing that can weaken the ice.
Common mistakes when resurfacing the ice include using too much water, not waiting for consistent freezing temperatures, and failing to address any underlying issues such as cracks or weak spots before adding new layers of water. By taking care when resurfacing your backyard ice-skating rink, you can ensure that it remains safe and enjoyable for all who use it.
In addition to regular cleaning and resurfacing, it is important to monitor the condition of the ice throughout the skating season. This includes checking for signs of wear or damage after heavy use, as well as making any necessary repairs promptly. By staying vigilant and proactive in maintaining your backyard ice-skating rink, you can provide a safe and enjoyable experience for yourself and others.
Adding Boards And Netting
The next step in building a backyard ice-skating rink is adding boards and netting. These will serve as a boundary for the rink, ensuring that skaters stay within the designated area. Boards can be made from various materials such as plywood, plastic or metal. The most common material used is treated lumber, which is resistant to rot and moisture.
When choosing boards and netting, cost considerations are important factors to keep in mind. Cheaper options may be available, but they may not last as long or provide adequate protection for skaters. On the other hand, high-end materials can be quite expensive but offer durability and aesthetic appeal. It’s important to strike a balance between quality and affordability when making these decisions.
Decorative options can also be considered when selecting boards and netting. Some homeowners might opt for custom designs on their boards or choose colors that complement their home’s exterior. Netting can also come in different colors or patterns to add visual interest to the rink area. Ultimately, the design choices will depend on personal preferences and budget limitations.
Transition: Once the boards and netting are installed, it’s time to consider lighting options for your backyard ice-skating rink.
Installing Lighting
After installing the boards and netting, it’s time to consider adding lighting to your backyard ice-skating rink. Not only will this increase visibility during nighttime skating sessions, but it can also add a decorative touch to your rink. There are various types of lighting options available on the market today.
Firstly, you could opt for LED lights which are energy-efficient and have a long lifespan. They come in various colors and can be used to create different moods depending on your preference. Secondly, halogen lights provide bright illumination and can be used for large-sized rinks. However, they consume more energy compared to LED lights. Thirdly, fluorescent lights offer a good balance between brightness and energy efficiency, but they may require frequent replacements due to their shorter lifespan.
The cost of lighting will depend on the type of light you choose as well as the size of your rink. LED lights tend to be more expensive upfront but are cheaper in the long run due to their lower energy consumption and longer lifespan. Halogen lights are cheaper initially, but their higher energy consumption means they will be more expensive over time. Fluorescent lights fall somewhere in between these two options in terms of cost and energy efficiency. Overall, it’s important to weigh up the pros and cons of each option before making a decision on what lighting option is best for you.
Creating a warming hut is another great addition that can enhance the overall experience of using your ice-skating rink during colder months. It provides a warm space where skaters can take breaks or change into warm clothing while enjoying hot cocoa or tea. In the next section, we’ll explore how you can build a simple warming hut that complements your backyard ice-skating rink perfectly.
Creating A Warming Hut
- When selecting a location for an ice-skating rink, it is important to consider the amount of available space, surrounding obstacles, and the stability of the soil.
- Constructing the structural frame of the rink should involve materials that are durable, waterproof, and able to withstand fluctuations in temperature.
- To ensure the ice surface is level and even, the frame should be built to a specific height and width.
- Insulation should be used to minimize heat transfer and to prevent melting of the ice surface.
- The insulation should be applied to the walls and floor of the rink and be of a material that is resistant to moisture.
- To ensure the rink is durable and long-lasting, careful consideration should be given to the type and quality of materials used.
Choosing A Suitable Location
When creating a warming hut for your backyard ice-skating rink, choosing a suitable location is crucial. Landscaping considerations should be taken into account to ensure that the hut does not disrupt the natural flow of your yard. Look for an area that is relatively flat and has easy access to the rink. It should also be located away from potential hazards such as trees or uneven terrain.
Additionally, it is important to consider the environmental impact when selecting a location for your warming hut. Avoid areas that are home to delicate plant or animal life and try to minimize damage to existing vegetation. Consider using eco-friendly materials for construction and landscaping.
Overall, finding the right spot for your warming hut requires careful planning and consideration of various factors. With proper attention paid to landscaping and environmental impact, you can create a comfortable and functional space that complements your backyard ice-skating rink perfectly.
Building The Structure
Once a suitable location has been identified for the warming hut, the next step is to start building the structure. Before starting construction, it is important to consider the cost estimation of the project and select appropriate materials that will be both durable and functional. The choice of materials will depend on various factors such as budget, aesthetics, and environmental impact.
When selecting materials for the warming hut, it is essential to choose those that can withstand harsh weather conditions. Wood or metal are commonly used for framing while roofing shingles or metal panels are popular choices for roofing material. Windows should be made from durable materials such as tempered glass or acrylic sheets to ensure they can withstand impacts from flying hockey pucks.
Cost estimation of the project depends on various factors such as size, complexity, and choice of materials. It is crucial to plan ahead and budget accordingly to avoid any unexpected expenses during construction. A well-built warming hut with proper insulation and ventilation can last for years with minimal maintenance, making it a worthwhile investment for any backyard ice-skating rink enthusiast.
Adding Insulation
Adding insulation to the warming hut is a crucial step in ensuring its functionality during cold winter months. Insulation helps retain heat within the structure and provides a comfortable environment for users. The choice of insulation material depends on several factors, including cost considerations, effectiveness, and environmental impact.
Fiberglass batts or spray foam insulation are popular choices for insulating walls and ceilings of the warming hut. These materials are affordable, effective, and easy to install. However, it is essential to follow manufacturer instructions carefully to ensure proper installation and avoid any safety hazards.
Cost considerations should be taken into account when adding insulation to the warming hut. While it may increase the initial construction cost, investing in good quality insulation can lead to long-term savings on energy bills. Additionally, proper insulation can extend the life of the structure by preventing moisture buildup that can cause damage over time.
Incorporating insulation into the design of a warming hut is an important consideration for anyone interested in building their own ice-skating rink in their backyard. By selecting appropriate insulation materials, following installation instructions carefully, and considering cost implications, one can create a comfortable and functional space that can be enjoyed for years to come.
Safety Precautions
As you prepare to build a simple backyard ice-skating rink, it is essential to prioritize safety. Just like in any construction project, the safety of all involved should remain paramount. Safety gear is crucial when building and using an outdoor skating rink. You should have helmets, gloves, elbow pads, knee pads, and appropriate footwear.
In addition to having the necessary safety gear, it is essential to have an emergency plan in case of accidents or injuries. Ensure that everyone using the rink knows how to get help quickly in case of an emergency. You can display emergency numbers or keep a first aid kit close by for quick access.
When you have taken all necessary safety precautions and are ready to use your backyard ice-skating rink, it’s time to invite friends and family over for some fun times on the ice! With the right preparations and equipment, your outdoor skating rink can provide hours of entertainment for all ages. Whether it’s a friendly game of hockey or twirling around with loved ones under twinkling lights, you’re sure to create many cherished memories on this homemade rink.
Inviting Friends And Family
- Inviting guests for a backyard ice-skating rink requires adequate planning and preparation.
- Supplies needed for a backyard ice-skating rink typically include a tarp, boards, plywood, and ice-melting salt.
- Setting a date for a backyard ice-skating rink should take into account the weather conditions, available resources, and the number of guests invited.
- The ideal location for a backyard ice-skating rink should be a flat, level surface, free of debris and large rocks.
- The ice-skating rink should be placed away from any standing water sources, as this could lead to potential flooding.
- Ice-skating rinks should also be placed away from any trees or other obstructions that could cause an interruption in the skating experience.
Inviting Guests
When planning a gathering with friends and family, it’s important to make sure everyone feels welcome and comfortable. Whether it’s a small get-together or a larger party, there are many ways to create an inviting atmosphere in your backyard ice-skating rink. One of the first things to consider is the layout of the space. Make sure there is plenty of room for people to move around and socialize, while also leaving enough space for skating. Consider adding seating areas or fire pits where guests can warm up and relax between skating sessions.
Another important aspect of inviting guests to your backyard ice-skating rink is offering refreshments. While hot cocoa is always a popular choice, you can also get creative with other winter-themed drinks like mulled cider or peppermint hot chocolate. For those who prefer something non-alcoholic, consider offering warm apple cider or herbal tea. As for snacks, think beyond the typical chips and dip and opt for heartier options like chili or soup served in insulated containers to keep them warm throughout the evening.
Finally, don’t forget about party planning details such as music, lighting and decor. Stringing lights around the perimeter of the rink can create a cozy ambiance while also providing necessary illumination for nighttime skating. Playing festive music will help set the mood and encourage guests to get out on the ice. And adding touches like winter-themed decorations or blankets draped over chairs can help tie everything together into a cohesive theme that will leave your guests feeling warm and welcome all night long.
Supplies Needed
When planning an ice-skating gathering with friends and family, it’s crucial to consider the supplies needed to ensure a successful event. First, you’ll need to estimate the cost of building your backyard ice-skating rink. The cost of materials will depend on the size of the rink and whether you plan to install a liner or use a natural surface. Suppliers comparison can help in finding the best deals without compromising quality.
In addition to building materials for the rink itself, there are other supplies that may be needed for guests’ comfort and safety. This includes skates for those who don’t have their own, as well as helmets and protective gear. You may also want to invest in quality lighting around the rink to ensure visibility at night.
Lastly, don’t forget about refreshments and decorations for your gathering. Consider investing in insulated containers for hot drinks and food items like chili or soup that can be kept warm throughout the evening. Winter-themed decorations can add a festive touch and create a welcoming atmosphere for your guests.
By considering all of these supplies needed and estimating costs ahead of time, you can ensure that your ice-skating gathering is both enjoyable and safe for everyone involved. With careful planning and attention to detail, your backyard ice-skating rink can become a favorite destination for winter celebrations year after year.
Setting A Date
Choosing the date for your ice-skating gathering is an important aspect of planning. You’ll want to select a time that works for you and your guests, but also takes into consideration weather conditions and the availability of supplies. It’s best to plan ahead and give guests plenty of notice to ensure attendance.
When selecting a date, it’s important to consider the average temperature in your area during the winter months. If temperatures consistently stay above freezing, it may not be feasible to build a backyard ice-skating rink. Similarly, if temperatures are too cold, it may be unsafe for guests to spend extended periods of time outside. Consider consulting with local weather sources or professionals in the landscaping industry to determine the optimal time for your gathering.
Once you’ve selected a date, it’s time to invite guests. Start by sending out save-the-date notifications well in advance, followed by formal invitations closer to the event date. Be sure to include all relevant information such as directions, parking instructions, dress code and what supplies will be provided versus what guests should bring themselves. By being clear and concise with communication, you can ensure that everyone is on the same page and ready for an enjoyable evening of ice skating fun.
Enjoying Your Backyard Ice-Skating Rink
After inviting your friends and family, it is time to enjoy your backyard ice-skating rink. Whether you are a seasoned skater or just starting, there are some tips that can help you perfect your skating technique. First, make sure to wear appropriate clothing for the cold weather, including warm socks, gloves, and a hat. Also, choose comfortable and well-fitted skates that provide good ankle support.
When it comes to skating technique on your backyard rink, start by practicing basic skills such as gliding and stopping. Keep your knees slightly bent and lean forward while skating to maintain balance. Avoid looking down at your feet and instead focus on looking ahead towards where you want to go. As you gain confidence on the ice, try more advanced moves such as turns and jumps.
To fully enjoy your backyard ice-skating rink, having the right equipment is essential. In addition to skates, consider investing in a sturdy snow shovel for clearing snow off the rink surface. A hose with a spray nozzle will come in handy for watering down the ice surface before each use. If you plan on skating at night, install some outdoor lighting around the rink for improved visibility.
In summary, with proper clothing and equipment recommendations for your backyard rink, along with some basic skating tips, anyone can enjoy a fun day or evening of ice-skating with their loved ones. Get started today by creating an inviting atmosphere in your backyard that will keep everyone entertained this winter season!
Conclusion
When it comes to building a backyard ice-skating rink, preparation is key. Choosing the right location, measuring and marking the area, preparing the ground, creating the frame, installing the liner, and creating a warming hut are all crucial steps in ensuring a successful and enjoyable experience.
However, safety should always be a top priority. Properly maintaining the ice surface and regularly checking for any cracks or weak spots can prevent accidents and ensure that everyone can safely enjoy the rink. Additionally, inviting friends and family to share in this winter wonderland can create lasting memories.
As professional landscapers or engineers know, building an ice-skating rink requires careful planning and attention to detail. But with dedication and patience, anyone can create their own backyard oasis for skating enthusiasts of all ages. And just as ice-skating requires balance and grace, so too does life require us to navigate its ups and downs with poise and determination. So let’s lace up our skates and glide forward with confidence into whatever challenges may come our way!
Image Credits
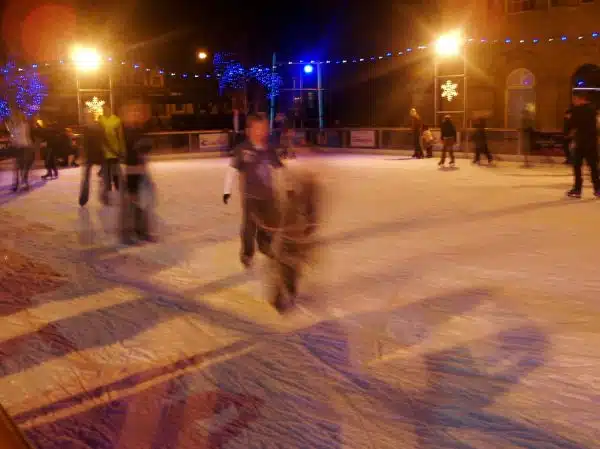
- “Ice Skating at the Centre for Life Ice Rink (blur shot) – Centre for Life Newcastle” by Glen Bowman (featured)







![How To Build A Detached Deck 22 Force Reconnaissance Detachment Deck Shoot [Image 4 of 4]](https://green-life.blog/wp-content/uploads/2023/05/RJo3tlizSGjq-150x150.jpg.webp)

