Bocce ball is a classic game that has been enjoyed for centuries. It is a fun and simple game that can be played by people of all ages and skill levels, making it perfect for family gatherings, picnics, or any outdoor event. However, to fully enjoy this game, it is essential to have a properly constructed bocce ball court. While there are plenty of pre-made options available in the market, building your own DIY bocce ball court can be an excellent way to save money while ensuring you have a court that meets your specific needs.
Building a DIY bocce ball court may seem like a daunting task at first glance, but with the right guidance and tools, anyone can do it. In this article, we will guide you through the step-by-step process of building your own bocce ball court. From selecting the right location and materials to laying out the dimensions and installing drainage systems, we will provide you with all the information you need to build your very own DIY bocce ball court. By following our instructions carefully and taking your time with each step, you can have a beautiful and functional bocce ball court that will provide endless hours of entertainment for years to come.
Benefits Of A Diy Bocce Ball Court
Constructing your own DIY bocce ball court is an excellent way to add outdoor entertainment to your home. With a little effort and creativity, you can create a beautiful space for family and friends to gather and enjoy the game of bocce ball. Building your own court has many benefits, including cost savings and customization options.
One of the primary advantages of constructing your own bocce ball court is the cost savings. Hiring professionals to install a bocce ball court can be expensive, but building it yourself can save you a considerable amount of money. Additionally, by choosing the materials and design yourself, you can customize the court to fit your specific needs and preferences.
Another benefit of creating a DIY bocce ball court is that it adds value to your home. Not only will it provide endless hours of fun for family and friends, but it also enhances the aesthetic appeal of your outdoor space. A well-designed court can transform an ordinary backyard into an inviting oasis that will impress guests and increase the value of your property.
When considering building a DIY bocce ball court, there are many factors to consider. One essential aspect is choosing the right location for your court. By selecting a suitable area in your yard with ample space, proper drainage, and good lighting conditions, you can ensure that your new addition will be enjoyed for years to come.
Choosing The Right Location For Your Court
Factors to Consider When Choosing the Right Location for Your Court
When building a DIY bocce ball court, one of the most important steps is selecting the right location. The first factor to consider is the size of your court. You will need a relatively flat area that is at least 10 feet wide and 60 feet long. Make sure there are no obstructions such as trees or rocks that could interfere with your game.
Another important factor to consider is the surface you will be playing on. Grass, gravel, and sand are all suitable options for a bocce ball court. However, keep in mind that grass can be difficult to maintain and may require frequent mowing. Gravel and sand both provide an even surface for gameplay but may require additional leveling before use.
Environmental considerations should also be taken into account when selecting a location for your court. Ideally, you want an area that receives plenty of sunlight throughout the day, as well as good drainage in case of rain. It’s also important to consider any nearby sources of noise or distractions that could interfere with your game.
In summary, when choosing the right location for your DIY bocce ball court, consider factors such as size, surface material, and environmental conditions. By taking these factors into account, you can ensure that your court is both functional and enjoyable to play on.
Transition: Now that you have selected the perfect location for your bocce ball court, it’s time to move on to selecting the best materials for construction.
Selecting The Best Materials For Your Court
To ensure that your DIY bocce ball court lasts for years, it is crucial to select the right materials. One important aspect of this is choosing the right bocce balls. Consider purchasing high-quality balls made of resin or composite materials, which are more durable and resistant to cracking than cheaper plastic versions. Additionally, ensure that you choose appropriately sized balls – usually around 107mm in diameter – that are suitable for your specific court surface.
Another essential factor to consider when selecting materials is maintaining the court surface. This involves regularly raking and rolling the court to keep it level and free of debris. It is also important to choose a material that will not shift or erode over time, such as crushed oyster shells or decomposed granite. These materials provide a stable playing surface while still allowing for proper drainage.
To help you make an informed decision about which materials to use for your DIY bocce ball court, refer to the table below:
| Material | Pros | Cons |
|---|---|---|
| Crushed Oyster Shells | Stable playing surface, allows for proper drainage | Can be expensive |
| Decomposed Granite | Durable, low maintenance | Can be slippery when wet |
| Clay | Traditional surface used in professional courts, consistent bounce | High maintenance, can become uneven |
| Artificial Turf | Easy installation and maintenance, provides consistent roll and bounce | More expensive than other options |
By carefully selecting the right materials for your DIY bocce ball court, you can create a high-quality playing surface that will last for years. In the next section, we will discuss how to measure the dimensions of your court before construction begins.
Measuring The Dimensions Of Your Court
Accurate measurements are crucial when building a DIY bocce ball court. You want to ensure that your court is regulation size, which is 13 feet wide and 91 feet long. Measuring accuracy can be achieved with the proper equipment, such as a measuring tape or surveyor’s wheel.
To begin measuring your court, start by finding a flat and level area where you plan to build it. Clear any debris or obstacles from the area before proceeding. Next, use a measuring tape or surveyor’s wheel to measure out the length of your court. Start at one end and roll out the measuring tape or wheel all the way to the other end.
Once you have determined the length of your court, measure out 13 feet from one side to the other for its width. Repeat this process on both sides of the court to ensure that it is symmetrical. Take note of any discrepancies in your measurements and adjust accordingly to maintain accuracy.
- Use stakes or flags to mark off where each end of the court will be.
- Make sure your measuring tape or surveyor’s wheel is calibrated correctly.
- Check your measurements multiple times before finalizing them.
- Consider adding extra space around the edges for spectators or seating.
- Double-check local regulations regarding bocce ball courts before beginning construction.
The next step in building your DIY bocce ball court is preparing the ground for construction.
Preparing The Ground For Your Court
Choosing a Location: When selecting a location to build a bocce court, it is important to consider the amount of available space, its proximity to amenities, and the amount of shade or sunlight the area will receive.
Clearing the Ground: After selecting the ideal location, the area must be cleared of any debris or obstructions. This may include removing vegetation, rocks, and other items in order to create a level and even surface.
Laying the Base: Once the ground is cleared, the base of the court should be installed. This will typically consist of a layer of gravel, sand, or wood chips, depending on the desired surface. It is important to ensure that the base is level and even to ensure the court is playable.
Choosing A Location
Choosing the right location for your DIY bocce ball court is crucial to ensure a successful and enjoyable gaming experience. The first factor to consider when deciding on a location is the size of the area needed for the court. Bocce ball courts can range from 60 to 90 feet in length and 8 to 13 feet in width, so make sure you have enough space available.
Another important factor to consider is the surface of the location. Ideally, you want a flat and level surface that is free from debris and obstructions. Grass, gravel, or decomposed granite are all suitable surfaces for bocce ball courts. Keep in mind that grass will require more maintenance than other surfaces, so be prepared for additional upkeep if you choose this option.
Lastly, think about accessibility when choosing a location for your DIY bocce ball court. You want a spot that is easy to get to and has adequate parking nearby. Additionally, consider how much noise your game may generate and whether it will disturb neighbors or other activities in the area. By taking these factors into consideration when choosing a location, you can set yourself up for success as you prepare the ground for your DIY bocce ball court.
Clearing The Ground
Before you start building your DIY bocce ball court, it is essential to prepare the ground properly. One of the crucial steps in this process is clearing the ground. This step involves removing any obstructions, debris, and vegetation that may be present on the site. To do this, you will need to use specialized clearing equipment such as a skid steer loader or a backhoe. These machines can help you clear the area quickly and efficiently.
Once you have cleared the ground, it’s time to level it. Leveling the ground is important because it ensures that your bocce ball court has a flat surface, which is essential for gameplay. There are several ground leveling techniques that you can use, depending on the type of surface you have chosen for your court. For instance, if you are using grass as your playing surface, you may need to remove any high spots and fill in any low spots with topsoil.
If you are using gravel or decomposed granite as your playing surface, then you will need to compact the ground using a plate compactor. This machine uses vibrations to compress the soil and create a level surface suitable for laying down your playing surface. By clearing and leveling your ground correctly, you can ensure that your DIY bocce ball court is safe and enjoyable for all players who decide to join in on the game.
Laying The Base
After clearing and leveling the ground for your DIY bocce ball court, the next step is to lay the base. The base serves as a foundation for your playing surface and plays a crucial role in ensuring proper drainage. Without proper drainage, water can accumulate on the surface, making it unfit for gameplay. Therefore, choosing the right type of gravel for your court base is essential.
There are several types of gravel that you can use for your court base, including crushed stone and pea gravel. Crushed stone has sharp edges that interlock well, providing a stable and firm base for your playing surface. Pea gravel, on the other hand, is more rounded and provides a softer texture underfoot. Both types of gravel are suitable for bocce ball courts; however, crushed stone is recommended if you want a firmer and more stable playing surface.
To lay the base, you will need to spread the chosen type of gravel evenly over the leveled ground. You will then need to compact the gravel using a plate compactor to create a solid foundation. It is important to ensure that the base is level and smooth before laying down your playing surface. By properly laying down your DIY bocce ball court drainage and choosing the right type of gravel for your court base, you can create an enjoyable and safe playing environment for all players involved.
Building The Frame Of Your Court
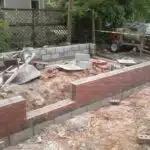
After preparing the ground for your court, it’s time to start building the frame. Building techniques vary, but one common approach is using wooden panels that measure 8 feet long and 6 inches wide. These panels are then buried at a depth of 6-8 inches around the perimeter of the court. To ensure that the panels remain level, make sure you use a spirit level to check as you go along.
Necessary tools include a hammer, nails, saw, measuring tape, and drill. Begin by cutting your wooden panels into an appropriate length and ensuring they fit snugly together before nailing them in place. Once you have completed all four sides of the frame, use stakes to secure them to the ground. Once your frame is secure, it’s time to move on to installing the drainage system.
Incorporating a drainage system is crucial in preventing water from pooling on your court after heavy rainfalls. One effective method is to install perforated pipes around the perimeter of your court that drain into an underground gravel bed. This will allow water to flow through easily while also providing stability for your court. Remember that proper drainage is essential for maintaining your bocce ball court over time and ensuring its longevity for years of enjoyment with family and friends.
Installing The Drainage System
Designing and installing a proper drainage system is crucial when building a DIY bocce ball court. Without it, water can accumulate on the surface of the court, making it difficult to play in wet conditions. To avoid this problem, a well-planned drainage system should be installed during the court’s construction.
When designing the drainage system for your bocce ball court, you need to consider factors such as slope and soil type. The slope should be sufficient to allow water to flow away from the playing area. You should also use materials that are durable and can withstand heavy rainfall. If your soil is heavy clay or compacted, you may need to add sand or gravel to improve drainage.
Once you have designed your drainage system, installation tips include digging trenches along the edges of the playing area with a slight slope towards the designated drainage area. Use drain pipes that are at least four inches in diameter and cover them with landscape fabric to prevent debris from entering. Finally, backfill around the pipes with gravel or crushed stone to ensure good drainage flow.
With a properly designed and installed drainage system in place, you can now move onto laying the gravel base for your bocce ball court. This layer will provide a sturdy foundation for your playing surface and help maintain proper moisture levels throughout the year.
Laying The Gravel Base For Your Court
After installing the drainage system, it’s time to prepare the base for your bocce ball court. The first step is to lay down a layer of gravel that will serve as the foundation for your court. Before you begin, ensure that you have all the necessary materials including gravel, edging materials, and a compactor.
The next step is to spread the gravel evenly over the entire surface of your court area. Once you have done this, use a compactor to compact the gravel. Gravel compaction is an important step in ensuring that your court is level and stable. By compacting the gravel, you prevent it from shifting or settling over time which can lead to an uneven playing surface.
Finally, it’s time to install edging materials around the perimeter of your court. These materials will help keep the gravel in place and prevent it from spilling out onto surrounding areas. You can use a variety of edging materials including wood, metal, or plastic depending on your personal preference and budget. After installing the edging materials, make sure they are secure by hammering stakes into the ground at regular intervals along their length.
- Use a compactor to ensure even gravel distribution
- Edging materials help keep gravel in place
- Proper gravel compaction prevents an uneven playing surface
With these steps complete, you’re ready for tamping and leveling the gravel base. This is an essential part of building a bocce ball court that will remain stable and level over time. By following these steps carefully and taking care with each phase of construction, you’ll be well on your way to enjoying countless hours of fun with family and friends on your very own DIY bocce ball court!
Tamping And Leveling The Gravel Base
Before proceeding with the installation of the oyster shell surface, it is crucial to ensure that the gravel base is properly tamped and leveled. The success of your bocce ball court depends heavily on how well you execute these two essential tasks. Here are some tamping techniques and gravel leveling tips to help you achieve a smooth and even surface.
First, use a plate compactor or hand tamper to compact the gravel base. Start by working your way around the perimeter of the court, then move inward in a zigzag pattern until you cover the entire area. This process will help eliminate any voids and settle the rocks into a solid base. Be sure to follow the manufacturer’s instructions for operating the plate compactor effectively.
Secondly, after tamping, check if there are any high spots on your gravel base using a long level tool or straightedge board. If there are high areas, remove them by scraping off some of the excess gravel with a shovel or rake until you achieve an even surface. Repeat this process until all high spots have been removed, and then check again for low spots that are more than 1/8 inch deep.
Table:
| Tamping Techniques | Gravel Leveling Tips |
|---|---|
| Use plate compactor or hand tamper | Check for high spots using a level tool |
| Work your way around perimeter first | Remove high areas with shovel/rake |
| Move inward in zigzag pattern | Repeat process until even surface |
| Follow manufacturer’s instructions | Check again for low spots |
With these tamping techniques and gravel leveling tips in mind, you can now proceed with confidence knowing that your bocce ball court has a sturdy foundation. The next step is installing the oyster shell surface, which requires careful attention to detail and precision in execution. By taking your time to properly tamp and level your gravel base beforehand, you’ll set yourself up for success in the subsequent steps of the construction process.
Installing The Oyster Shell Surface
After tamping and leveling the gravel base, it’s time to move on to installing the surface. An oyster shell surface is a popular choice for bocce ball courts due to its high level of playability and low maintenance requirements. However, finding oyster shell sources can be challenging depending on your location. If you’re unable to obtain oyster shells, there are alternative surface options such as decomposed granite or crushed limestone.
When considering an alternative surface option, keep in mind that it should be able to provide a smooth and consistent playing surface. Decomposed granite is a great option for those looking for a more natural look, while crushed limestone can provide a firmer surface with better drainage. Additionally, both options are readily available in most areas.
Regardless of which surface option you choose, the key to success lies in properly leveling and smoothing the surface. This ensures that the bocce balls will roll smoothly and consistently throughout the court. In the next section, we’ll discuss how to effectively level and smooth your chosen playing surface for optimal gameplay.
Leveling And Smoothing The Surface
Leveling and smoothing the surface of your DIY bocce ball court is crucial for ensuring a fair and enjoyable game. To begin this step, you will need some essential DIY tools such as a shovel, rake, and a level. First, remove any grass or debris from the area where you plan to build your court. Then use the shovel to dig down about 4-6 inches deep into the soil.
Next, use the rake to level out the area by removing any bumps or uneven spots on the surface. You may want to consider renting a plate compactor to ensure that the surface is compacted and firm. Once you are satisfied with how level and smooth your surface is, it’s time to move onto the next step.
Smoothing techniques can also be used on your bocce ball court surface. One technique involves using a screed board which is essentially a long piece of wood with two handles at either end. Place it on top of your leveled surface and drag it across while applying pressure evenly across the board. This will help fill in any small gaps or dips in your court’s surface.
With your DIY tools handy, leveling and smoothing techniques can be achieved with ease when building your own bocce ball court. In the next section, we will discuss adding border materials around your court to complete its construction and make it look professional!
Adding Border Materials
After leveling and smoothing the surface of your bocce ball court, it’s time to start thinking about adding border materials. The border design is an essential aspect of any bocce ball court as it helps keep the balls within the playing area. There are different types of materials that you can use for your border, such as wood, plastic, or metal. Each material has its advantages and disadvantages.
When choosing a border material, consider both aesthetics and cost comparison. Wooden borders look great and are affordable, but they require more maintenance than other materials. Plastic borders are easy to install and maintain, but they may not last as long as wood or metal borders. Metal borders are durable and require little maintenance, but they can be costly compared to other options.
Once you have chosen your border material, it’s time to start installing it around your bocce ball court. Start by measuring the length of each side and marking where you want the border to go. Then dig small trenches along each side where you will place each section of your border material. Once in place, secure them in position using stakes or screws depending on the kind of material used. After this step is completed successfully, then it’s time to move onto installing court accessories such as scoreboards and benches around the perimeter of the court for added convenience during games!
Installing Court Accessories
Brighten Up Your Bocce Ball Court with DIY Lighting
Now that your bocce ball court is set up and ready for play, it’s time to add some finishing touches. One easy way to enhance your court is by adding DIY lighting. Not only does it make playing at night possible, but it also adds a touch of ambiance to the game. There are several lighting options available, including solar-powered lights or string lights hung around the perimeter of the court. Choose the option that best fits your budget and preferences.
Court Decor Ideas
Another way to elevate your bocce ball court is through decor. You can add personality to your court by incorporating decorative elements such as potted plants or a scoreboard. Consider painting lines on the court using stencils for a more professional look. Additionally, you can invest in custom-made bocce balls with unique designs or colors to add some flair to your game.
With these simple additions, you can create a personalized bocce ball court that will provide hours of entertainment for family and friends. Don’t forget to keep up with maintenance tips for optimal performance and longevity of your DIY bocce ball court!
Maintenance Tips For Your Bocce Ball Court
Regular maintenance is crucial for keeping your DIY bocce ball court in top condition. A well-maintained court will not only provide a better playing experience but also extend the lifespan of your investment. The good news is that maintaining a bocce ball court is relatively easy and straightforward.
One of the most important maintenance tips for your bocce ball court is to keep it clean. This involves regularly sweeping or blowing away debris such as leaves, twigs, and dirt that can accumulate on the surface. You can use a broom or leaf blower to do this. It’s also important to remove any standing water from the court after it rains as this can lead to mold growth and damage the playing surface.
Another key maintenance tip is to inspect your DIY bocce ball court regularly for any signs of wear and tear. This includes checking for cracks, chips, or other damage to the surface that could affect gameplay or cause injury. If you notice any issues, make repairs as soon as possible using appropriate materials and techniques.
- Keep the surface clean by sweeping regularly
- Remove standing water after rain
- Inspect for damage and make repairs promptly
As you can see, regular maintenance is essential for ensuring that your DIY bocce ball court remains in top condition over time. By following these simple cleaning tips and inspecting the surface regularly, you’ll be able to enjoy many years of fun games with family and friends on your very own bocce ball court!
Enjoying Your New Diy Bocce Ball Court
After ensuring that your bocce ball court is well-maintained, it’s time to enjoy playing on it! Outdoor lighting is a great way to make sure that you can play even after the sun has gone down. You can install solar-powered lights around the perimeter of your court or even hang string lights above it. This will add ambiance to your playing experience and allow you to continue playing into the night.
In addition to lighting, landscaping can also enhance your bocce ball court area. You can plant trees and shrubs around the edges of the court to provide shade and privacy. If you have space, consider adding benches or seating areas for players and spectators. This will not only make your space more comfortable but also more inviting for others to join in on the fun.
Overall, building a DIY bocce ball court is a satisfying project that provides endless entertainment for friends and family alike. By incorporating outdoor lighting and landscaping ideas, you can create an inviting atmosphere that will keep everyone coming back for more games. So grab some balls, invite some friends over, and let the good times roll!
Conclusion
Constructing a DIY bocce ball court can be a fun and rewarding project for anyone who enjoys playing this classic game. By following the proper steps and using high-quality materials, you can create a court that will provide hours of entertainment for years to come. Whether you are an experienced DIY enthusiast or just starting out, building your own bocce ball court is an achievable goal.
One example of the benefits of building your own bocce ball court is the story of a retired couple who wanted to create a space where they could enjoy outdoor activities with their family and friends. They decided to build a bocce ball court in their backyard, which quickly became a favorite gathering spot for everyone. The couple enjoyed watching their grandchildren learn how to play the game and seeing how it brought people together for friendly competition and laughter.
Overall, building your own DIY bocce ball court is not only practical but also enjoyable. With careful planning and execution, you can create a space that will provide endless hours of entertainment for yourself and those around you. So why not take on this project today? Who knows what memories you’ll make on your very own bocce ball court!
Image Credits
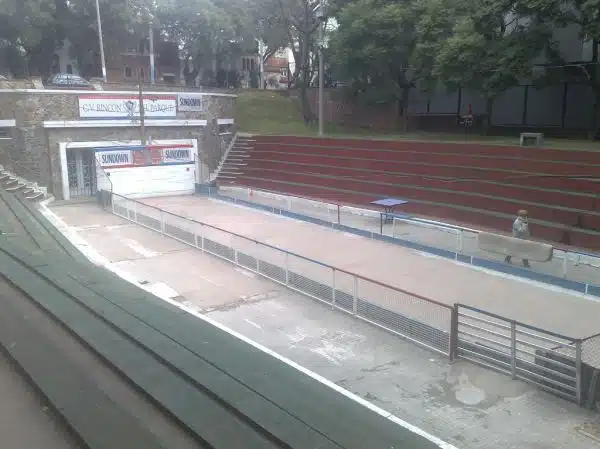
- “Giant Bocce Ball Court in Montevideo” by rabble (featured)





![How To Build A Detached Deck 20 Force Reconnaissance Detachment Deck Shoot [Image 4 of 4]](https://green-life.blog/wp-content/uploads/2023/05/RJo3tlizSGjq-150x150.jpg.webp)
