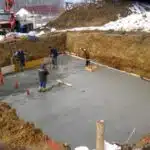
The foundation of any structure is the most critical aspect in determining its overall stability and durability. A sturdy foundation ensures that a building or shed can withstand the forces of nature and remain standing for years to come. However, building a strong shed foundation is often overlooked or underestimated by many homeowners, resulting in costly repairs and even safety hazards.
In this article, we will explore the essential steps required to build a sturdy shed foundation. As structural engineers, we understand the importance of a solid base and are committed to providing valuable insights on how to achieve optimal results. By following our expert advice, you can take pride in knowing that your shed’s foundation is not only reliable but also safe for those who utilize it.
Assessing Your Site And Planning Your Foundation
As the old adage goes, “a good foundation is the key to a sturdy structure.” This holds true for building a shed as well. Before you begin construction, it is crucial to assess your site and plan your foundation accordingly.
Site evaluation is the first step towards building a strong foundation for your shed. You need to assess the site’s soil conditions and topography. The type of soil on your site will determine what kind of foundation design you should use. It is important to make sure that the soil can support the weight of your shed and its contents. If you’re not sure about the soil type, consult an expert.
Foundation design is also critical in ensuring that your shed remains stable over time. There are several types of foundations to choose from, including concrete slabs, pier and beam foundations, and post-and-beam foundations. Each has its advantages and disadvantages depending on factors such as climate, soil type, and local building codes.
With proper site evaluation and foundation design in place, you can be confident that your shed will stand the test of time. In the next section, we’ll discuss how to choose the right materials for your project.
Choosing The Right Materials
Assessing the site and planning your foundation is a crucial step in building a sturdy shed foundation. However, choosing the right materials is equally important. One of the most critical decisions to make regarding your shed foundation is whether to use gravel or concrete.
Gravel is an affordable and straightforward option for a foundation. It can be easily installed and provides sufficient drainage for your shed. Gravel also allows air circulation under the shed, preventing moisture buildup that can damage your shed’s structure. On the other hand, concrete offers more durability than gravel and can withstand heavy loads better. Concrete also requires less maintenance than gravel.
Another element to consider when constructing a sturdy shed foundation is the type of pavers you will use. Pavers are available in various materials such as bricks, natural stone, or concrete blocks. Each material has its unique properties that may suit different needs. For instance, natural stone pavers provide excellent aesthetic appeal but may not be as durable as concrete blocks.
In summary, selecting the right materials for your shed foundation involves weighing several factors such as cost, durability, and ease of installation. By considering options such as gravel versus concrete and types of pavers available, you can make informed decisions about what will work best for your specific needs. The next section will cover preparing the ground and leveling the site to ensure proper installation of your chosen materials for a stable shed foundation.
Preparing The Ground And Leveling The Site
Land preparation is an essential part of building a sturdy shed foundation. Before starting the construction, it is vital to clear the ground of any vegetation and debris that may interfere with the foundation’s stability. A clean surface will ensure that your shed’s base rests on stable ground, reducing the risk of future damage.
Soil stabilization is also crucial in preparing the land for a shed foundation. Stabilizing soil helps to prevent erosion, settling, and other forms of damage caused by unstable soils. One way to stabilize the soil is by adding a layer of gravel or crushed rock to provide better support for your shed’s foundation. Another way is by compacting the soil to improve its density and strength.
To level your site effectively, you can use a variety of tools such as a shovel, rake, or even a laser leveler. The goal is to create a flat surface where your shed will sit comfortably without any unevenness. Once you have achieved this level surface, you can proceed with building forms for your concrete base.
- Here are four tips for effective land preparation and soil stabilization:
- Remove all vegetation and debris from the area
- Use gravel or crushed rock to stabilize the soil
- Compact the soil for increased strength
- Use appropriate tools such as shovels and rakes when leveling the site
With proper land preparation and soil stabilization techniques, you can create a solid foundation that will withstand weather changes and other external factors that could compromise its stability. Now that your site is appropriately leveled, it’s time to move onto building forms for your concrete base – an essential step in creating a sturdy shed foundation.
Building Forms For Your Concrete Base
Concrete forms are essential in building a sturdy shed foundation. This is because they serve as a barrier that holds wet concrete in place until it dries up and hardens. Therefore, it is crucial to choose the right type of form for your project based on the size and shape of your shed foundation. For instance, if you are building a rectangular foundation, you can use straight wooden boards or metal forms to create straight edges.
Reinforcement options are also critical when building a concrete base for your shed. They help to distribute the weight of the structure evenly across the foundation, reducing stress points that may cause cracking or sinking over time. One reinforcement option is using steel rebar or mesh, which adds strength to the concrete and prevents it from breaking under pressure. Another option is fiber reinforcement, which consists of synthetic fibers that are mixed into the concrete mixture for added strength.
When building forms for your concrete base, ensure that they are level and square before pouring in the mixture. This will prevent any unevenness or imperfections in the finished product that may compromise its stability and durability. Additionally, consider adding braces to keep the forms steady during construction and avoid any shifting or collapsing during pouring.
Moving forward with pouring and finishing your concrete foundation, it is essential to take precautions such as wearing protective gear like gloves and goggles while handling wet concrete mixtures. Next section topic: Pouring and Finishing Your Concrete Foundation – Precautions to Take
Pouring And Finishing Your Concrete Foundation
Once you have properly prepared the ground for your shed foundation, it is time to pour and finish your concrete foundation. Concrete pouring techniques vary depending on the size and shape of your foundation. Generally, a smooth, level surface is desired. This can be achieved by using a screed board or bull float to level and smooth out the concrete as it is poured. It is important to work quickly but carefully during this process to avoid any air pockets or unevenness in your foundation.
There are several reinforcing options for concrete foundations that can increase its strength and durability. One common method is to add rebar, which is a type of reinforcing steel, into the wet cement mixture before pouring. Rebar helps distribute weight evenly throughout the foundation, reducing the likelihood of cracking or shifting over time. Another option is to use wire mesh reinforcement, which adds stability and holds the concrete together more securely.
Before finishing your concrete foundation, it’s important to ensure that you have allowed enough time for it to properly dry and cure. This typically takes anywhere from 24-72 hours depending on environmental conditions such as temperature and humidity levels. During this time, it’s crucial that no weight or pressure be applied to the foundation so as not to disturb its setting process. Once fully cured, you can move onto building your shed with confidence knowing that you have a sturdy base for support.
- Wear protective gear such as gloves and goggles when working with wet cement.
- Take breaks frequently during the pouring process to prevent fatigue.
- Consider hiring a professional contractor for larger projects where more specialized equipment may be required.
With proper execution of these steps in concrete pouring techniques and reinforcing options for your shed foundation, you can expect long-lasting results that will provide reliable support for many years to come. Allowing proper drying and curing time sets the stage for a strong structure that will withstand any harsh weather conditions or heavy loads placed upon it without fail.
Allowing Proper Drying And Curing Time
After pouring and finishing your concrete foundation, it is important to allow proper drying and curing time before proceeding with the construction of your shed. This stage is crucial in ensuring that the foundation is sturdy and durable enough to support the weight of your shed. It is recommended to wait at least 7 days for standard concrete mixtures to dry and cure before placing any weight on them.
During this period, it is important to take precautions to avoid damaging the curing concrete. One of the most common mistakes people make during this stage is not providing adequate ventilation. Proper ventilation helps regulate temperature and humidity levels, which are critical factors in ensuring that the concrete cures properly. Failure to provide proper ventilation can lead to cracks, weakened structural integrity, and other issues.
In addition to ventilation, it is also important to avoid placing heavy objects or equipment on the curing concrete surface. Doing so can cause damage that will compromise its strength and durability. By taking these precautions during the drying and curing process, you can ensure that your foundation remains sturdy enough to support your shed for years to come.
| Pros | Cons |
|---|---|
| Durable | Time-consuming |
| Resistant to moisture | Expensive |
| Supports heavy loads | Requires skilled labor |
| Long lifespan | Limited design options |
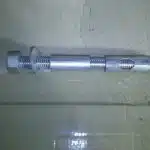
Moving forward, once your foundation has fully cured, you can proceed with installing anchor bolts and framing for your shed. This next step involves securing anchor bolts into the cured concrete foundation by drilling holes into it first. The anchor bolts are then secured into these drilled holes using epoxy or grout as a bonding agent. Once this has been done, you can begin framing your shed using lumber that has been treated for rot resistance.
By following these steps carefully, you can ensure that your shed has a strong foundation that will stand up against harsh weather conditions and provide a safe place for storing your belongings. Remembering the importance of proper ventilation and taking precautions during the curing process are key to building a sturdy shed foundation.
Installing Anchor Bolts And Framing
- Accurate positioning of anchor bolts is essential for ensuring the structural integrity of a shed foundation.
- Once anchor bolts are in place, framing can be secured using appropriate fasteners.
- Framing should be designed to resist lateral and uplift forces from wind and other external loads.
- Joists should be securely connected to framing with structural connectors and metal fasteners.
- Joist spans should be evaluated to ensure that adequate structural capacity is provided for the intended loading conditions.
- Appropriate bracing should also be provided to improve the overall stability of the shed foundation.
Positioning Anchor Bolts
Positioning anchor bolts is a critical step in the process of building a sturdy shed foundation. The spacing and depth of these bolts play a key role in ensuring that the foundation can hold up the weight of the shed. When determining the spacing between anchor bolts, it is important to consider local building codes as well as the size and weight of the shed.
Anchor bolt spacing should be determined based on the size and weight of your shed. In general, anchor bolts should be spaced no more than 6 feet apart along each side of the foundation. This will allow for even distribution of weight across all parts of the foundation. Additionally, it is important to ensure that there are enough anchor bolts to securely hold down all corners and any mid-span points along each wall.
Anchor bolt depth is also an important consideration when positioning them for your shed foundation. The depth at which anchor bolts should be placed varies depending on soil conditions and local building codes. Generally, anchor bolts should be buried at least 12 inches deep into undisturbed soil or 6 inches deep into concrete footings. Ensuring proper depth helps to prevent shifting or settling over time, which could compromise the stability of your shed foundation.
In conclusion, proper positioning of anchor bolts is a crucial aspect in building a sturdy shed foundation. Anchor bolt spacing and depth are key considerations that must be taken into account during installation to ensure that your structure remains stable and secure for many years to come. By following recommended guidelines and consulting with local building authorities, you can successfully install anchor bolts that will provide ample support for your shed.
Securing Framing
Now that the anchor bolts are in place, securing the framing is the next critical step in building a sturdy shed foundation. This involves anchoring the wooden frame to the concrete or masonry foundation using various techniques. The goal is to ensure that the frame remains stable and secure despite external forces such as high winds or earthquakes.
One of the most common anchoring techniques for securing framing is through the use of anchor straps or bolts. These are typically made of galvanized steel and are attached to both the wooden frame and the anchor bolt embedded in the concrete foundation. Another option is to use metal brackets, which can be bolted directly onto both surfaces for added stability. Additionally, angle braces can be installed between beams and posts to provide extra reinforcement against lateral forces.
When selecting framing options, it is important to consider factors such as size and weight distribution, as well as local building codes. The size of your shed will determine how many studs and joists you will need for your frame. It is also important to evenly distribute weight across all parts of the frame to prevent any sagging or bowing over time. Furthermore, local building codes may dictate certain requirements for materials used in framing, such as pressure-treated lumber for outdoor structures.
In summary, securing framing is an essential aspect of building a strong and reliable shed foundation. Through proper anchoring techniques and careful consideration of framing options, you can ensure that your shed remains secure even in adverse weather conditions or seismic events. By working with professionals and following recommended guidelines, you can create a durable structure that serves its purpose for years to come.
Connecting Joists
Now that the anchor bolts are in place and framing is secured, the next step in building a sturdy shed foundation is connecting joists. Joists are horizontal beams that support the weight of the floor or roof of the structure. The spacing of joists depends on the size and weight distribution of your shed. Generally, the smaller the shed, the closer together the joists should be to evenly distribute weight.
Joist hangers are one common method used to secure joists to framing. These metal brackets attach to both sides of a joist and then are nailed or screwed into place on a beam or ledger board. This creates a strong connection between the two pieces, preventing lateral movement and ensuring stability. It is important to choose joist hangers that are rated for outdoor use and appropriate for your local building codes.
In addition to using joist hangers, it is also important to properly space your joists to prevent sagging over time. The spacing will depend on factors such as size and intended use of your shed, as well as local building codes. By carefully selecting materials and following recommended guidelines, you can ensure that your shed foundation is strong enough to withstand external forces such as high winds or earthquakes.
Adding Insulation And Moisture Barriers
Installing a vapor barrier is an essential step in preserving the longevity of your shed foundation. It is crucial to install a moisture barrier over the ground before pouring concrete or placing pavers. A vapor barrier prevents moisture from seeping up into the building structure and causing rot, mold, or mildew. It also helps regulate temperature by keeping the air dry, which can be beneficial for tools and storage items.
Insulating the floor of your shed will help maintain a comfortable working environment throughout the year. Depending on your climate, you may need to use different types of insulation materials to ensure optimal performance. Insulation works by trapping air within its fibers, creating a thermal barrier that resists heat transfer. This means that during colder months, warmth stays inside and during warmer months, cool air stays inside.
When installing insulation and moisture barriers, it’s important to follow manufacturer instructions carefully to avoid any potential hazards or damage. You should also consider adding ventilation to prevent condensation from forming inside the shed walls. Adequate ventilation will allow fresh air to circulate freely while removing excess moisture from inside.
In preparation for laying subflooring and flooring in your shed, there are a few additional steps you’ll need to take first. After installing insulation and vapor barriers, it’s necessary to add a layer of plywood or oriented strand board (OSB) over the top as an underlayment for flooring material such as linoleum or tile. Before doing this step, make sure that all joists are level and square so that there is no movement when walking across the floor surface later on.
Laying Subflooring And Flooring
To ensure the durability and longevity of your shed, it is important to lay a sturdy subflooring foundation. The type of subflooring chosen will depend on the specific needs and preferences of the builder. Consider the following options:
- Plywood: A popular option for its affordability and ease of installation.
- Oriented Strand Board (OSB): A stronger alternative to plywood that can withstand heavier loads.
- Pressure-Treated Wood: Treated with chemicals to resist rot, insects, and moisture.
Once you have selected your subflooring material, it is time to choose the flooring for your shed. Durability should be a top priority when selecting flooring as it will be exposed to heavy foot traffic and potential spills or damage from tools or machinery. Some options include concrete, vinyl, or tile. It is important to also consider the climate in which the shed will be located as extreme temperatures or moisture levels can impact the longevity of certain materials.
Building your shed walls and roof requires a solid foundation to prevent any shifting or movement over time. By taking the necessary steps to properly prepare your subflooring and select durable flooring materials, you are setting yourself up for success in constructing a sturdy shed that will withstand various weather conditions and continue serving its purpose for years to come.
Building Your Shed Walls And Roof
- Prior to constructing the shed walls, it is important to prepare a level surface and ensure that the walls are plumb and square.
- Roof trusses should be installed in accordance with local building codes and the manufacturer’s specifications.
- The roofing material should be selected based on the desired roof pitch and the anticipated environmental conditions.
- The roofing material should be secured using fasteners that are compatible with the material and the structure.
- Care should be taken to ensure that the roofing material is installed correctly and that all flashing and trim pieces are securely fastened.
- The roof should be inspected for proper installation prior to being considered complete.
Preparing The Walls
As a structural engineer, it is imperative to ensure that the walls of your shed are prepared properly. This involves several steps such as installing wall insulation and choosing the right exterior siding options. When it comes to insulation, there are various materials to choose from including fiberglass, spray foam, and cellulose. It’s important to consider factors like climate and budget when making this decision.
Once you have chosen your insulation material, it’s time to select the perfect exterior siding for your shed. Some popular options include vinyl, wood, and fiber cement. Each material has its own unique advantages and disadvantages in terms of cost, maintenance requirements, and durability. As an engineer, I recommend taking into account all these factors before deciding on the best option for your shed.
Properly preparing the walls of your shed is crucial to its longevity and overall stability. By considering factors like wall insulation and exterior siding options during the construction process, you can ensure that your shed will stand strong against harsh weather conditions for years to come.
Installing The Roof Trusses
As a structural engineer, the importance of proper installation of the roof trusses cannot be overstated. The roof is one of the most important components of your shed, and it’s essential to ensure that it’s built to handle harsh weather conditions. Installing the roof trusses requires attention to detail and careful planning.
The first step in installing the roof trusses is determining their spacing. It’s crucial to determine this spacing before you begin, as it will affect the overall stability of your shed. The spacing will depend on various factors such as the size of your shed and local building codes. Once you have determined the spacing, you can begin installing the trusses using appropriate bracing techniques.
After installing the trusses, it’s time to add the roof sheathing and shingles. Roof sheathing provides a solid base for shingles or other roofing materials while also helping to distribute weight evenly across the trusses. When selecting roofing materials like shingles, consider factors such as climate and budget. Proper installation of these materials is important for ensuring that your shed remains sturdy and protected from weather elements for years to come.
Securing The Roofing Material
As a structural engineer, the process of building a shed requires careful planning and attention to detail. The roof is one of the most important components of a shed, and it’s essential to ensure that it’s built to handle harsh weather conditions. To achieve this, securing roofing material on your shed is crucial.
Securing roofing material involves more than just nailing shingles onto the roof sheathing; it requires proper installation techniques that account for weather elements such as wind, rain, and snow. Weatherproofing techniques should be employed to create an effective barrier against water infiltration that can cause damage over time. This includes installing underlayment beneath the shingles, sealing any gaps or penetrations around vents or chimneys, and ensuring that all flashing is properly installed.
Properly securing roofing material also involves selecting quality materials that are appropriate for your climate and budget. From asphalt shingles to metal panels or clay tiles, different types of roofing materials have varying levels of durability, aesthetics, and maintenance requirements. Consulting with a professional roofer can help you make informed decisions about which type of roofing material will best suit your needs while ensuring proper installation techniques are used for long-lasting protection against weather elements.
Installing Windows And Doors
Proper window placement and door hardware are essential components of any shed build. When it comes to windows, their placement should be determined by the intended use of the space. For example, if natural lighting is a priority, windows should be placed on the side of the shed that receives the most sunlight. Additionally, if the shed will be used for storage, placing windows higher up on the walls can help prevent break-ins.
Choosing and installing door hardware is just as important as window placement. The type and quality of hardware will determine how secure and functional your shed doors will be. It’s recommended to choose heavy-duty hinges and locks that can withstand extreme weather conditions and potential forced entry attempts. Additionally, choosing a door handle that is easy to grip and turn can make accessing your shed more convenient.
Once you’ve installed your windows and doors with high-quality hardware, you can move onto adding finishing touches to your shed. This could include painting or staining the exterior to protect against weather damage or adding shelving and storage solutions inside for organization. Remember to always prioritize functionality over aesthetics when it comes to finishing touches, as a sturdy foundation and reliable windows/doors are key factors in ensuring your shed serves its intended purpose for years to come.
Adding Finishing Touches
To truly make your shed stand out, you may want to consider adding some finishing touches that fit your personal style and needs. For example, if you plan on using the shed as a workspace or hobby area, additional lighting fixtures may be necessary. Alternatively, you could opt for decorative windows or even skylights to let in natural light and create a more inviting atmosphere.
Another way to personalize your shed is by choosing from various painting options. Whether you prefer bold colors or a more subdued palette, painting can help protect the wood from weathering while also adding visual interest. Additionally, if your shed will be visible from other areas of your property, coordinating the color scheme with other buildings or outdoor elements can create a cohesive look.
Finally, if you want to add some decorative features to really make your shed unique, there are many options available. From flower boxes and shutters to cupolas and weathervanes, these features not only add charm but also serve practical purposes such as providing ventilation or concealing unsightly vents. With so many choices available, it’s easy to find accessories that fit both your aesthetic preferences and functional needs.
As you add finishing touches like painting options and decorative features to your shed, it’s important not to overlook the importance of ensuring proper drainage and ventilation. In order for your shed to remain sturdy over time, water must be able to flow away from the foundation without pooling underneath the structure. Proper ventilation helps prevent moisture buildup inside the shed which can lead to mold growth and structural damage. By taking these steps in addition to building a sturdy foundation as previously outlined, you can ensure that your new shed will provide years of reliable use.
Ensuring Proper Drainage And Ventilation
Proper grading and drainage are critical components of a sturdy shed foundation. A foundation that is not built on properly graded soil or with adequate drainage will be susceptible to water damage, leading to structural issues and an unstable shed. The first step in ensuring proper drainage is to evaluate the slope of the land where you plan to build your shed. If the slope is not adequate, then grading may be required.
Sufficient airflow is also essential for a sturdy shed foundation. Adequate ventilation helps regulate temperature and moisture levels inside the shed, which can prevent mold growth and rot. One way to ensure sufficient airflow is by incorporating vents into your shed’s design. These can be placed near the roofline or on gable ends to allow hot air to escape and fresh air to enter.
Proper grading and ventilation are important steps in building a sturdy shed foundation that will stand up over time. Neglecting these factors can result in costly repairs down the line, so it’s essential to get them right from the beginning. With proper grading and ventilation, you can help safeguard your investment and ensure that your shed remains stable and secure for years to come. As we have discussed how critical it is to achieve proper drainage and sufficient airflow when constructing a durable shed foundation, regular maintenance and upkeep are also necessary for prolonging its lifespan. In the following section, we will discuss some tips for maintaining your foundation regularly without compromising its structure or safety.
Regular Maintenance And Upkeep
Ensuring proper drainage and ventilation is crucial to building a sturdy shed foundation. It’s like the foundation of a house, it must be strong enough to support the weight of the structure above it. However, long term durability of the foundation also depends on regular maintenance and upkeep.
Regular maintenance is essential for any structure, including shed foundations. Inspection should be done at least once a year to check for any signs of damage or wear and tear. This involves checking for cracks, settling, or shifting in the foundation. Additionally, keeping the area around the shed free from debris and vegetation will help prevent moisture buildup that could weaken the foundation.
Upkeep is also important for maintaining long term durability of your shed foundation. This includes repairing any damage as soon as possible to prevent further deterioration. It’s recommended to use materials that are resistant to water and other elements that can cause damage over time. Applying sealants or coatings can help protect against moisture penetration that could lead to future problems.
- To make regular maintenance easier, here are some tips:
- Keep a record of inspections and repairs.
- Schedule inspections regularly.
- To make upkeep more effective, consider:
- Using high-quality materials.
- Applying sealants or coatings.
Taking care of your shed foundation through regular maintenance and upkeep will ensure its longevity. However, there are common mistakes that you should avoid when building and maintaining your shed foundation to maximize its durability in the long run.
Common Mistakes To Avoid
Common Mistakes to Avoid:
When it comes to building a sturdy shed foundation, there are several common mistakes that people should avoid. Two of the most significant ones are poor drainage and inadequate compaction. Poor drainage can lead to water accumulation around the foundation, which can cause erosion and weaken the structure’s stability. On the other hand, inadequate compaction can result in uneven settling of the soil, leading to cracks in the foundation.
One of the primary reasons for poor drainage is choosing a location with a low spot or an area that is prone to flooding. It is crucial to ensure that the site chosen for building the shed has proper drainage or grading established beforehand. One way of achieving this is by digging a trench around the perimeter of the proposed foundation and filling it with gravel or crushed stone. This will help redirect any water away from the foundation.
Inadequate compaction occurs when soil is not compacted enough before building. Compacting soil helps remove air pockets, increasing its density and strength. A lack of proper compaction can lead to uneven settling over time, causing cracks in the foundation walls or floor slab. To avoid this, it is essential to use a plate compactor or roller on each layer of soil added during construction until reaching desired density levels.
Therefore, ensuring proper drainage and adequate soil compaction are two critical factors when building a sturdy shed foundation. By avoiding these common mistakes and following industry best practices, one can build a strong and durable shed that will stand up against adverse weather conditions for years to come.
Conclusion
When it comes to building a sturdy shed foundation, planning and proper execution are essential. Just as a skilled architect takes the time to assess the terrain before constructing a building, so too must you carefully examine your site before beginning any work. By choosing the right materials, preparing the ground and leveling the site, building forms for your concrete base, pouring and finishing your foundation, and ensuring proper drainage and ventilation, you can create a reliable structure that will stand the test of time.
As a structural engineer, I am reminded of the allegory of building on sand versus building on rock. The wise builder who constructs their foundation on solid rock can withstand even the fiercest of storms. Similarly, those who take care in planning and executing their shed foundation can expect it to endure for many years to come. However, those who rush into construction without adequate preparation may find themselves facing costly repairs or even complete failure.
In conclusion, building a sturdy shed foundation requires careful attention to detail every step of the way. By following best practices and avoiding common mistakes, you can ensure that your structure provides reliable protection for your belongings while standing strong against whatever nature may throw its way. Remember – just as with any project worth doing well, patience and dedication are key to success!
Image Credits
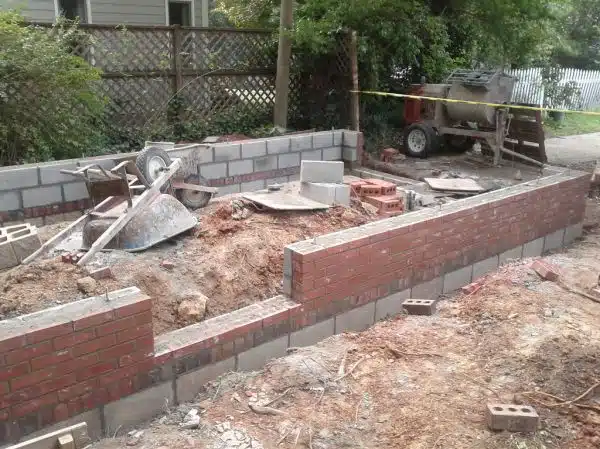
- “Foundation for the bike shed” by skvidal (featured)

