Concrete footings are an essential component of any stone wall construction project. They serve as the foundation on which the whole structure is built, ensuring its stability and longevity. Pouring concrete footings requires a precise set of skills and knowledge to ensure successful results. In this article, we will explore the key steps involved in pouring concrete footings for stone walls.
As a concrete and masonry expert, I have seen countless projects fail due to poorly constructed footings. The importance of proper footing construction cannot be overstated; it is the backbone of any stone wall construction project. With the right guidance and techniques, anyone can master the art of pouring concrete footings for stone walls. Whether you are a seasoned professional or a DIY enthusiast, this guide will provide you with valuable insights and practical tips on how to pour concrete footings that will stand the test of time. So let’s dive into the world of concrete and masonry and learn how to create sturdy foundations for your stone walls.
Understanding The Importance Of Concrete Footings
The importance of concrete footings cannot be overstated when constructing stone walls. They are the foundation upon which the entire structure stands, and as such, they must be able to support the weight of the wall while also resisting the pressure of soil and moisture. The key to achieving this is depth. The deeper the footing, the greater its ability to withstand these forces.
To ensure that a concrete footing is deep enough for a stone wall, it is important to consider proper drainage techniques. Water can be one of the greatest enemies of any masonry structure, and concrete footings are no exception. If water is allowed to accumulate around or beneath a footing, it can weaken its structural integrity over time. Proper drainage techniques involve creating channels through which water can flow away from the footing and into a safe location.
In summary, when pouring concrete footings for stone walls, it is critical to understand the importance of achieving sufficient depth and employing proper drainage techniques. These measures will ensure that the footings are strong enough to support the weight of the wall while also withstanding external pressures like soil and moisture. Up next, we will discuss some key tools and materials needed for successfully pouring concrete footings.
Tools And Materials Needed For Pouring Concrete Footings
Understanding the importance of concrete footings is crucial in ensuring the stability and longevity of your stone walls. Now that you have a grasp on why footings are necessary, it’s time to move on to the tools and materials needed for pouring concrete footings.
Before starting any construction project, it’s essential to gather all the necessary tools and materials. For pouring concrete footings, you’ll need a wheelbarrow, mixing drill, shovel or hoe, trowel, level, string line, stakes or rebar, and of course, concrete mix. Make sure to purchase enough materials for your project’s size and scope to avoid running out midway through construction.
Concrete pouring tips can help ensure that your footings are strong and durable. First, make sure that your excavation site is level before starting the pour. This will prevent any shifting or settling once the footing is complete. Additionally, be sure to mix the concrete according to the manufacturer’s specifications and pour it evenly into the excavation site using a wheelbarrow or mixing drill. Finally, use a trowel to smooth out any bumps or ridges in the surface of your newly poured footing.
Now that you have an idea of what tools and materials you’ll need for your project as well as some helpful concrete pouring tips let’s move on to determining the dimensions of your footings. This step is essential in ensuring that your wall has enough support from its foundation while also minimizing material waste.
Determining The Dimensions Of Your Footings
To ensure a sturdy and stable stone wall, the dimensions of your footings must be carefully calculated. The depth of your footings will depend on several factors, including the weight and height of your wall, as well as the soil conditions in your area. Calculating depth is crucial to prevent any shifting or settling over time.
When selecting materials for your footings, it’s important to choose ones that will withstand the weight of your stone wall. Concrete is a popular choice for its durability and strength, but there are also other options such as masonry blocks or poured gravel. Consider factors such as cost, availability, and ease of installation when making your decision.
To determine the exact dimensions of your footings, follow these steps:
- Measure the length and width of your planned wall.
- Calculate the weight of the wall by multiplying its length by its height.
- Use a footing calculator to determine the required depth and width based on the weight and soil conditions in your area.
With careful planning and attention to detail when calculating depth and selecting materials, you can ensure that your footings will support a strong and long-lasting stone wall. Now that you have determined the dimensions for your footings, it’s time to begin excavating your site to prepare for their installation.
Excavating Your Site For Footings
After determining the dimensions of your footings, the next step is to begin site preparation. This involves excavating the area where you plan on pouring your concrete footings. Before beginning excavation, it is important to take safety measures to ensure that the area is safe for both yourself and others. This may involve marking off the area or placing warning signs around the site.
Excavation can be done using a variety of tools such as shovels, backhoes, or bulldozers. It is important to remove all organic material such as grass and roots from the area before digging down to the required depth for your footings. Once you have reached the desired depth, it is important to level out the bottom of your excavation site to ensure that your footing will be even.
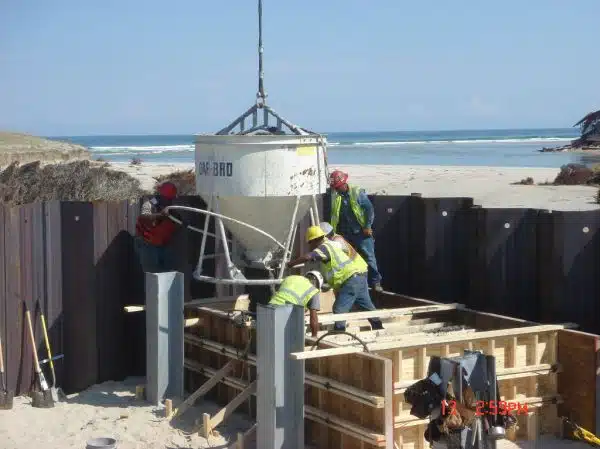
To prevent any movement or shifting in your concrete footings, it is essential that you set up forms before pouring. Forms are typically made from wood or metal and are used to create a mold for your concrete. These forms should be level and sturdy enough to withstand the weight of wet concrete. When setting up forms, it is important to ensure that they are placed at exactly the right location and height for your desired footing dimensions. With proper site preparation and form setup, you can pour your concrete footings with confidence knowing that they will provide a strong foundation for your stone walls.
Setting Up Your Forms For Pouring Footings
Form design is crucial to the success of your concrete footing project. Properly setting up your forms will ensure that your footings are level, straight, and adequately sized for the weight-bearing requirements of your stone wall. When designing your forms, consider factors such as the depth and width of your footings, soil type and compaction, and any slope or grade changes that may require additional support.
Once you have designed your forms, it’s time to prepare for pouring the concrete. Before pouring the concrete into the forms, it’s essential to take precautions to prevent any leaks or seepage from occurring. This can be achieved by using a sealant or a waterproofing agent on both sides of the form boards. Additionally, adding rebar or wire mesh reinforcement within the form will help provide extra strength and stability to the footing.
Concrete pouring techniques are critical in ensuring that you achieve well-compacted footings that can withstand weathering and erosion over time. Pouring at a consistent rate with no breaks in between will produce strong footings with no weak points. Be sure to use a vibrating tool during the pouring process to eliminate any air pockets within the mixture. Once poured, allow ample time for curing before proceeding with any further construction.
As important as proper form design and concrete pouring techniques are in creating successful footings for stone walls, it’s equally crucial to mix your concrete correctly. In this next section, we will discuss in detail how to mix ideal proportions of cement, sand, gravel, and water for achieving optimal results in footing strength and durability.
Mixing Your Concrete For Footings
As the forms are set up for pouring footings, it’s important to consider the type of concrete mix that will be used. Choosing the right concrete mix is crucial to ensure sturdy and long-lasting footings. Concrete mixing techniques may vary depending on the project’s requirements, but there are general guidelines that are followed.
When selecting a concrete mix, it’s essential to consider the strength and durability needed for your project. The most commonly used types of concrete mixes for footings are high-strength and standard mixes. High-strength mixes typically contain more cement and less water than standard mixes, making them ideal for areas with heavy loads or where soil conditions may cause settling.
When mixing your concrete, it’s important to follow proper techniques to ensure consistency and quality. Start by adding water to a mixer or wheelbarrow first, then gradually add the dry mix while continuously mixing until all ingredients are evenly distributed. Avoid over-mixing as this can result in weak spots in the footing. Once mixed, pour immediately into the forms.
With your forms set up and your concrete mix chosen and prepared, you’re now ready to move onto pouring your footings. Remember to take extra precautions during this step as any mistakes could lead to future structural issues.
Pouring Your Footings
Accurate measurements and precise markings are essential when pouring footings for stone walls, as the foundation must be level and in the correct position. When mixing the concrete, ensure the correct ratio of dry and wet ingredients is used for the desired strength and durability. Once the mix is ready, pour the concrete and use a trowel or float to smooth the surface, making sure to leave a slight elevation for the stone wall. To cure the concrete, use an appropriate curing method such as a curing compound or wet burlap, and cover it for the recommended amount of time. To complete the project, finish the surface with a steel trowel for a smooth, glossy finish. Regular inspection of the footing and wall is recommended to ensure it remains in good condition.
Measuring & Marking
Measuring and marking are crucial steps in pouring your concrete footings for stone walls. Accuracy is key when it comes to measuring the dimensions of your footing, as even a slight deviation from the intended specs can result in structural problems down the line. To ensure precise measurements, use a reliable measuring tape that’s been calibrated for accuracy. It’s also important to double-check your measurements before proceeding with construction.
Marking tools are another essential component of properly pouring concrete footings. These tools help you to mark out the exact location and dimensions of the footing on the ground, which serves as a guide during excavation and construction. Some commonly used marking tools include chalk lines, stakes, and string lines. When using these tools, it’s important to maintain accuracy by checking and rechecking your markings throughout the process.
Overall, measuring accuracy and using reliable marking tools are essential steps in pouring your concrete footings for stone walls. By taking care during these initial phases of construction, you’ll be setting yourself up for success down the line. Remember to take your time and double-check all measurements and markings before proceeding with excavation and placement of your footing forms.
Mixing & Pouring
After measuring and marking the dimensions of your concrete footings for stone walls, the next crucial step is mixing and pouring. Proper mixing is essential to ensure that your concrete has the right consistency, which will affect its strength and durability. You should follow some tips for consistency when it comes to mixing concrete. First, use a reliable mixer that can handle large batches of concrete. Second, add water gradually while mixing until the desired consistency is achieved. And third, mix for at least two minutes after all ingredients have been added.
When it comes to pouring your footings, you must avoid common mistakes that could compromise the structural integrity of your project. One common mistake is overloading the mixer with too much material, which can cause uneven mixing and lead to weak spots in the concrete. Another mistake is not using enough water when mixing or pouring, resulting in a dry mixture that won’t set properly. To avoid these issues, it’s crucial to follow proper guidelines for mixing and pouring.
To achieve consistent results when pouring your footings, you should also pay attention to details such as temperature and humidity levels. High temperatures can cause rapid evaporation of moisture from the surface of freshly poured concrete, leading to cracks and weakened spots. On the other hand, low humidity levels can slow down curing time and result in weaker concrete overall. By taking care during every step of the process from measuring to marking through to mixing and pouring you will ensure a sturdy foundation for any stone wall construction project you undertake in future!
Curing & Finishing
Once you have poured your footings for your stone walls, the next critical step is curing and finishing. Curing time is essential to ensure that concrete becomes strong enough to support the weight of your construction project. It’s important to follow proper guidelines for curing time to prevent cracks and weakened spots in the concrete. Generally, it takes about a week for concrete footings to cure fully.
During the curing process, it’s crucial to keep moisture levels consistent by misting the surface of the concrete with water regularly. You should also cover the surface with plastic sheeting or burlap to retain moisture and protect against external factors such as wind and temperature changes. Once cured, you can start finishing your footings by removing any excess concrete and smoothing out rough edges using a trowel or other finishing tools.
There are several finishing techniques that you can use depending on your desired aesthetic and function of your stone wall project. For example, you could use a broom finish to create texture on the surface of the concrete or apply a sealer for added protection against weathering and staining. You could also apply decorative finishes such as stamping or engraving to enhance the appearance of your footings. With proper curing and finishing techniques, you can ensure that your footings will provide a sturdy foundation for your stone wall project for years to come!
Leveling And Smoothing Your Footings
After pouring your concrete footings for your stone walls, the next step is to level and smooth them. Leveling your footings involves ensuring that they are at the same height and depth where needed. Smoothness is essential in building a solid foundation because any roughness can negatively affect the stability of the wall.
To level your footings, use a straightedge to ensure that they are even. Use a wooden or metal float to smooth out any rough spots on the surface of the footing. A trowel is also an excellent tool for cleaning up edges and corners. In addition, you can use smoothing techniques such as brushing with a broom or spraying with water to obtain an even surface.
Finishing touches are crucial in creating a stable foundation for your stone walls. After leveling and smoothing out your footings, allow them to cure for at least 24-48 hours before proceeding to the next step of construction. A well-finished footing will provide a sturdy base upon which you can build your walls with confidence. Remember that proper curing times are necessary to ensure that your foundation sets properly before continuing with additional work on top of it.
Markdown list:
- Use a straightedge to check for level
- Smooth rough spots using a float or trowel
- Allow at least 24-48 hours for curing
With leveled and smoothed-out footings, you have created an essential component in building strong stone walls. The finishing touches you put into this stage will have long-lasting effects on the overall quality of the wall’s foundation. Adding reinforcement to your footings will further strengthen their ability to support heavy loads and keep your structure secure for years to come.
Adding Reinforcement To Your Footings
Reinforcement placement is an essential process when it comes to adding strength and durability to your concrete footings. Installing reinforcement bars, also known as rebar, will prevent cracks and add stability to the structure by distributing weight evenly. When planning for reinforcement placement, it is crucial to consider the length, width, and depth of your footings as well as the size of your stone walls.
One of the installation techniques for placing rebar is to lay them in a grid pattern throughout the entire footing area. The spacing between each bar should be consistent and according to local building codes. Another technique involves using a rebar cage that is pre-fabricated off-site and lowered into the excavated hole before pouring the concrete. This method ensures that the rebar is placed correctly without any risk of displacement during pouring.
Overall, proper installation techniques will ensure that your footings are strong enough to support your stone walls. Reinforcement placement should always be considered during the planning phase of your project because it will affect how much concrete you need and how long it takes to complete. When done correctly, adding reinforcement will make a significant difference in the longevity and stability of your structure.
As important as installing reinforcement is curing your footings so they can reach maximum strength potential. The next section will discuss different curing methods that can be used for concrete footings in stone wall construction.
Curing Your Footings
As the saying goes, “Rome wasn’t built in a day.” Similarly, curing your concrete footings is not an overnight process. Proper curing is crucial to ensuring the strength and longevity of your stone wall. It involves maintaining the moisture content of the concrete while it hardens and gains strength.
To accelerate curing, consider using a curing compound or covering your footings with plastic sheeting. These methods retain moisture and promote even hydration throughout the concrete. However, be cautious when applying water directly on the surface of the concrete during curing as this can cause cracking.
Preventing cracking during curing is essential to maintaining the integrity of your footings. Avoid placing heavy loads on the freshly poured concrete, as this can lead to stress fractures. Additionally, keep foot traffic to a minimum during curing and avoid sudden temperature changes in the surrounding environment. By following these tips for accelerating curing and preventing cracking, you can ensure that your concrete footings are strong and stable for years to come.
As you finish up with curing your footings, it’s time to move on to removing forms and cleaning up. This step requires careful attention as it affects both the appearance of your stone wall and its structural integrity. Let’s take a closer look at how to complete this critical stage in building your stone wall.
Removing Forms And Cleaning Up
After the curing process, you’ll need to remove the forms and clean up around your footings. This is an important step in the process because it ensures that your footings are free of debris, which can interfere with the stability of your stone wall. To remove the forms, you’ll need a hammer or pry bar to loosen them from the concrete. Once they’re loose, carefully lift them away from your footings.
When you’re done removing the forms, it’s time to dispose of any excess concrete that may be left over from pouring your footings. You can use a shovel or other cleaning tools to help scoop up any excess concrete and dispose of it in a safe location. Be sure not to pour any excess concrete down drains or into waterways as this can harm the environment.
Cleaning up after pouring concrete footings for stone walls is an essential part of ensuring their success. Disposing of any excess concrete and removing forms will keep your site clean and prepare you for inspecting your footings for quality control. So, let’s move on to our next section where we’ll discuss how to properly inspect your footings to ensure they meet industry standards.
Inspecting Your Footings For Quality Control
The foundation of any structure is like the roots of a tree; it anchors everything above it and provides stability. Similarly, the footings of a stone wall serve as its foundation, ensuring its longevity and durability. Before proceeding with stone wall construction, inspecting your footings is a crucial step in quality control.
Inspection tips involve checking for proper depth and width, ensuring the reinforcement steel placement and spacing are correct, and making sure that there are no debris or excess water present in the footing trench. Quality assurance measures also include testing the concrete slump to ensure consistency and uniformity of mix design. Proper curing is also critical to prevent cracking or shrinking.
Regular inspection of footings can prevent costly mistakes during construction. Even minor discrepancies can cause significant problems down the line, leading to potential safety hazards or structural issues. Taking the necessary time to inspect your footings will ultimately save you time and money during construction while ensuring that your stone wall will stand strong for years to come.
As essential as it is to have proper footing for your stone wall project, preparing for its construction is equally important. In the next section, we’ll discuss steps you need to take before laying stones on top of your footings.
Preparing For Stone Wall Construction
Choosing the right type of stone is crucial for constructing a high-quality stone wall. The choice will depend on several factors, such as the intended use of the wall, climate conditions, and budget. Some common types of stones used for walls include limestone, sandstone, granite, and bluestone. Each stone type has its unique characteristics that make it suitable for different purposes.
Preparing the site is another critical step in stone wall construction. Before starting to build the wall, you need to ensure that the foundation is sturdy enough to support it. This involves digging trenches where you plan to build your footing and then removing any debris or vegetation from the area. Once you have cleared out the site’s surface, level it with a rake to obtain a flat base and then add gravel to provide drainage.
In addition to choosing stone types and preparing the site, there are other steps that you can take when constructing footings for stone walls. These measures can help prevent problems such as cracking or uneven settling of your wall over time. By taking extra precautions like adding reinforcement rods or using waterproofing materials, you can ensure that your finished project will be both durable and visually appealing. Troubleshooting common footing issues requires an understanding of these techniques and their application in specific situations.
Troubleshooting Common Footing Issues
As with any construction project, issues may arise during the process of pouring concrete footings for stone walls. It is important to identify these common problems and have solutions ready to troubleshoot them. By being proactive in addressing potential issues, you can avoid costly mistakes and ensure the success of your project.
One common issue that may occur is settling or shifting of the soil beneath the footing after it has been poured. This can cause structural damage to your wall, as well as other potential hazards. To prevent this, ensure that the soil is properly compacted before pouring the footing. Additionally, consider using a geotextile fabric or gravel layer beneath the footing to improve soil stability.
Another issue that may arise is uneven curing of the concrete, which can result in cracking or other damage to your wall. To prevent this, ensure that the concrete is mixed properly and poured at an appropriate temperature for best results. Additionally, consider using a curing compound or covering the concrete with plastic sheeting once it has been poured to promote even curing.
Common solutions for these and other issues include carefully monitoring weather conditions during construction, ensuring proper mixing and pouring techniques are used, and seeking professional advice when necessary. Troubleshooting tips such as these can help you avoid costly mistakes and ensure a successful outcome for your project.
When all else fails, it may be necessary to hire a professional to assist with footing installation. A professional contractor will have experience in identifying potential issues before they become major problems and will have access to specialized tools and materials needed for proper installation. Consider consulting with a local masonry expert or contractor if you are unsure about any aspect of your project or if you encounter unforeseen difficulties during construction.
Hiring A Professional For Footing Installation
Hiring a professional for footing installation is a wise choice if you want to ensure the success of your stone wall project. While pouring concrete footings may seem like a simple task, it requires precision and expertise to ensure that the foundation can support the weight of the wall. Professionals have the necessary knowledge and experience to ensure that your footings are installed correctly, which is essential to avoid costly mistakes.
Cost considerations are often a factor when deciding whether or not to hire a professional for footing installation. However, it’s important to consider the long-term benefits of hiring an expert. A poorly installed footing can compromise the structural integrity of your entire project, leading to additional expenses in repairs or even rebuilding. Professional installation guarantees that everything is done right from the beginning, which saves money in the long run.
The benefits of professional expertise are numerous when it comes to footing installation for stone walls. Experts know how deep and wide your footings should be based on factors such as soil composition, wall height, and climate conditions. Additionally, they have access to specialized equipment and materials that ensure high-quality workmanship. Hiring a professional also saves you time and effort as they handle all aspects of the job from start to finish.
| Benefits | Cost Considerations | Expertise |
|---|---|---|
| Proper installation ensures structural integrity | Initial cost may be higher than DIY | Knowledge of necessary depth and width |
| Saves money in long term by avoiding costly mistakes | Poorly installed footings lead to additional expenses | Access to specialized equipment and materials |
| Guarantees high-quality workmanship | Professional installation saves time and effort | Handling all aspects of job from start to finish |
Overall, hiring a professional for footing installation is highly recommended for those embarking on stone wall projects. The benefits far outweigh any initial costs, especially when considering long-term durability and structural integrity. With their expertise and equipment, professionals guarantee quality workmanship that will ensure the success of your project.
Conclusion
Concrete footings are the foundation of any strong and durable stone wall. The importance of properly installing these footings cannot be overstated, as they provide the necessary support and stability for your structure. By following the steps outlined in this article, you can confidently pour concrete footings that will serve as a solid base for your stone wall.
Before beginning any construction project, it is crucial to have the right tools and materials on hand. In addition to excavating equipment, you will need concrete mix, rebar, and other supplies to construct your footings. By taking the time to carefully plan and measure your site, setting up your forms correctly, and inspecting your work for quality control, you can ensure that your footing installation is successful.
In conclusion, pouring concrete footings for stone walls requires careful planning and attention to detail. Just like building a house or laying a foundation for a bridge, constructing a sturdy stone wall starts with creating a solid base. Think of it like building a castle – if the foundation isn’t strong enough, even the most beautiful castle will crumble over time. Take pride in your workmanship during this critical part of the process and enjoy the satisfaction of creating something that will stand the test of time.
Image Credits
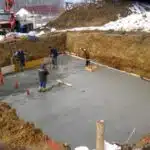
- “Pouring Concrete Footing” by NCDOTcommunications (featured)



![Calculating How Much Stone Dust You Need 6 [Blog Post]Stone Dust © Oxfam Australia](https://green-life.blog/wp-content/uploads/2023/05/GdZVzgTqPhjq-150x150.jpg.webp)

