Garden stepping stones are an essential component of any well-designed garden. They add a functional and aesthetic element to the landscape, providing a safe and easy pathway for those who walk through it. With the increasing popularity of DIY projects, making your own garden stepping stones has become a fun and rewarding activity for many garden enthusiasts.
In this article, we will explore the basics of making garden stepping stones, including materials needed, step-by-step instructions, and design tips to help you create unique and beautiful pathways in your garden. Whether you are a seasoned gardening veteran or just starting out, making your own stepping stones can be a fun way to add personal flair to your outdoor space while serving others who may walk through it. So let’s dive in and learn how to make our own garden stepping stones!
Understanding The Benefits Of Garden Stepping Stones
Benefits of Garden Stepping Stones
Garden stepping stones are an excellent addition to any outdoor space. They offer a plethora of benefits, both practical and aesthetic. First and foremost, they provide a stable surface for walking, which is especially important in areas with high foot traffic. This can reduce the risk of slips and falls, making your garden safer for all visitors.
In addition to their practical uses, garden stepping stones are also a great way to add creativity and design to your space. With so many different materials, shapes, and colors available, you can create a unique look that complements your existing landscape. Whether you prefer a more natural look with stone or wood materials or something more modern with concrete or metal options, there is no shortage of choices when it comes to designing your stepping stone pathway.
Furthermore, incorporating garden stepping stones into your design can enhance the overall aesthetics of your space. They can be used to accentuate certain areas of your garden or draw attention to specific features such as fountains or statues. By adding depth and dimensionality to your landscape design through these hardscape elements, you can create a more visually appealing outdoor environment that will impress guests and provide an enjoyable experience for all who visit.
With so many benefits associated with garden stepping stones – from practicality to creativity and aesthetics – it’s easy to see why they have become such a popular feature in modern landscape designs. In the next section, we will delve into selecting the right materials for your project so that you can achieve the desired look while also ensuring durability and longevity.
Selecting The Right Materials For Your Project
After realizing the benefits of using garden stepping stones, it’s time to move on to the exciting part – selecting the materials for your project. With so many options available, it can be overwhelming to decide which ones will work best for your garden design. Fear not, as we have prepared a comparison guide to help you make an informed decision.
First on the list is natural stone, which adds a touch of elegance and sophistication to any garden. Some popular types include bluestone, granite, and limestone. Natural stone is durable and requires minimal maintenance but can be quite expensive. On the other hand, concrete stepping stones are affordable and come in various shapes and sizes. They’re easy to work with and can be customized with different colors or patterns. However, their downside is that they tend to crack over time.
Finally, there’s brick stepping stones that provide a rustic charm to gardens. They’re durable and slip-resistant but require regular upkeep as they’re prone to moss growth. Ultimately, it all boils down to personal preference and budget when selecting materials for your garden stepping stones project.
Now that you’ve gone through our comparison guide for selecting materials, it’s time to gather your tools and supplies before starting your project. Make sure you have everything you need such as gloves, safety glasses, measuring tape, trowel or shovel, decorative accents if desired (such as glass gems or seashells), sand or gravel for leveling purposes, and of course the selected materials for your stepping stones. Once you have everything ready, let’s get started on creating beautiful pathways in your garden!
Gathering Your Tools And Supplies
To begin creating your garden stepping stones, you’ll need to gather the necessary tools and supplies. Choosing materials for your stepping stones is an important first step in the process. Some popular material options include concrete, natural stone, and resin. Consider the style of your garden when selecting your materials – for example, natural stone may be a better fit for a rustic or woodland-themed garden.
When it comes to safety precautions, there are several important steps to take. Always wear gloves and eye protection when working with heavy materials like concrete or stone. Additionally, keep children and pets away from your work area to avoid any accidents or injuries. Be aware of any potential hazards in your workspace and take steps to address them before beginning your project.
Now that you’ve chosen your materials and taken safety precautions, it’s time to prepare your work area. This will involve clearing the space where you plan on creating your stepping stones. Make sure the area is level and free of any debris or other obstacles that could interfere with your work. Once you’ve prepared your space, you’ll be ready to move on to the next step in creating beautiful garden stepping stones.
Preparing Your Work Area
Organizing your workspace is crucial when making garden stepping stones. Before starting, make sure you have a clean and clutter-free area to work in. This will ensure that you have enough space to move around and mix your materials without any hindrance.
Safety measures are also important when working with concrete or other materials. Wear gloves, safety glasses, and a dust mask to protect yourself from any potential harm. It’s also a good idea to wear old clothes that you don’t mind getting dirty, as the process can be messy.
In addition to safety measures, make sure all tools and materials are within arm’s reach before starting. This will save time and prevent any unnecessary accidents from occurring. With a well-organized workspace and proper safety precautions in place, you’re ready to start creating molds for your stepping stones.
Creating A Mold For Your Stepping Stone
Creating a Mold for Your Stepping Stone is an essential aspect of making your garden stepping stones. Molds come in various shapes, sizes, and materials, including plastic, metal, and even wood. The type of mold you choose will depend on the design and size of your stepping stone. You can use different molds to create a unique look for each stepping stone in your garden.
Before you begin making a mold for your stepping stone, consider adding decorative elements to it. These elements could include seashells, colored glass beads, or even small pebbles. You can add these items directly to the mold before pouring the concrete or stone material inside. Once the material hardens, these decorative elements will be embedded in the surface of the stepping stone.
Once you have chosen a mold and added any decorative elements, it’s time to prepare it for pouring the concrete or stone material. Make sure to clean and dry the mold thoroughly before using it. Then apply a release agent such as petroleum jelly or cooking spray to prevent sticking. With your mold ready to go, you can now move on to mixing the concrete or stone material.
Mixing The Concrete Or Stone Material
After creating a mold for your stepping stone, it’s time to mix the concrete or stone material. This step is crucial as it determines the strength and durability of your stepping stone. Mixing techniques can vary depending on the type of material you choose, but it’s important to follow the instructions carefully to ensure consistency.
When mixing concrete, you’ll need to add water slowly until you reach the desired consistency. A good rule of thumb is to use four parts of concrete mix to one part water. On the other hand, if you’re using a stone material, you may need to mix it with a bonding agent before adding water. Color options are also available for both concrete and stone materials, so make sure to choose one that complements your garden’s overall aesthetic.
To make sure your stepping stones turn out perfectly, here are four tips to keep in mind:
- Mix the materials in small batches rather than all at once.
- Use a trowel or spatula to mix thoroughly.
- Tap the mold gently on a hard surface after pouring in the mixture to remove any air bubbles.
- Let it dry completely before removing it from the mold.
With these tips in mind and by following proper mixing techniques and color options, you’ll be able to create beautiful stepping stones that will last for years to come. Now that we’ve covered how to properly mix your materials, let’s move on to pouring the mixture into the mold for optimal results.
Pouring The Mixture Into The Mold
When making garden stepping stones, the first step is to mix the materials. This typically involves combining cement, sand and water in a wheelbarrow or other suitable container, and stirring the mixture until it reaches a desired consistency. Once the mixture is ready, it can be poured into the mold of choice. The mold should be lubricated with vegetable oil or cooking spray to prevent the stepping stone from sticking. After the mixture is poured, it should be leveled and smoothed with a trowel or other suitable tool. Finally, the stone should be left to dry for several hours or overnight before it is removed from the mold. With careful attention to these steps, the finished garden stepping stone should be ready for use in landscaping.
Mixing Materials
To add more character and vibrancy to your garden stepping stones, mixing materials into the concrete mixture is a great option. Color options are readily available in powder or liquid form, which can be mixed into the wet concrete mixture for a unique touch. Experiment with different colors to match your garden’s color scheme or to create a fun pop of color.
If you’re looking for DIY alternatives, consider adding natural elements such as pebbles, shells, or even broken glass pieces into the mixture. These materials not only add texture but also create a visually stunning effect when set within the concrete. Make sure to mix these materials evenly throughout the mixture to ensure they are well-distributed in each stone.
Mixing materials is an excellent way to create personalized and unique garden stepping stones that are sure to impress your guests. Whether you choose to go with color options or DIY alternatives like pebbles or shells, experimenting with different materials will allow you to make beautiful and customized stepping stones that will enhance the beauty of your garden for years to come.
Pouring Mixture
Once you have mixed your chosen materials into the concrete mixture, it’s time to pour it into the mold. One important thing to keep in mind is that the mixture should be poured evenly throughout the mold. This can be achieved by pouring small amounts of the mixture at a time while making sure to spread it out with a trowel or similar tool.
Another important consideration when pouring the mixture is to tap the mold gently on a flat surface after each pour. This will help to eliminate any air bubbles that may have formed during mixing and ensure that the finished stepping stone has a smooth surface. Additionally, make sure to level off the top of the mixture with a trowel before letting it dry.
If you want to experiment with different mixing techniques and alternative materials, keep in mind that some materials may require additional steps before being added to the concrete mixture. For example, if using broken glass pieces, they should be thoroughly cleaned and dried before being mixed into the concrete. It’s also important to remember that heavier materials such as rocks or large stones may need extra support within the mold to prevent them from sinking too deeply into the wet concrete.
Finishing The Mold
After pouring the mixture into the mold, it’s time to focus on finishing the mold. One way to add a personal touch to your stepping stone is by choosing from a variety of color options available in the market. You can use concrete pigments or dyes to tint the mixture and create a unique look that complements your garden design.
Another way to enhance the appearance of your stepping stone is by using texturing techniques. You can achieve this by pressing decorative objects like leaves, shells, or stones onto the surface of the wet mixture. This will create an impression that will remain visible even after the concrete has dried. You can also use a trowel or other tools to create patterns or designs on the surface of the concrete.
Once you have finished adding color and texture, let the stepping stone dry for at least 24 hours before removing it from the mold. Carefully turn over the mold and gently tap around its edges until it releases from the concrete. Then, flip over your new stepping stone and admire your handiwork. With these techniques, you can make beautiful stepping stones that are not only functional but also add beauty to your garden design.
Adding Decorative Elements To Your Stepping Stone
Design options for your garden stepping stones are abundant. You can create a mosaic pattern with various colors and shapes of glass or ceramic tiles. Another option is to use stamped concrete molds to create intricate designs, such as flowers or leaves. If you prefer a more natural look, consider embedding small pebbles, shells, or even colored sand into the surface of your stepping stone.
Color choices are also essential when designing your stepping stone. Consider incorporating colors that complement the surrounding landscape or choosing shades that contrast sharply with existing foliage to create a focal point. You can also combine different hues to create a unique color palette that adds depth and interest to your garden pathway.
Adding decorative elements to your stepping stone is an excellent way to personalize it and make it stand out in your garden. Whether you choose intricate designs or bold colors, take the time to carefully plan out your project before starting. With the right design options and color choices, you can add beauty and functionality to your outdoor space for years to come.
As you finalize the design of your garden stepping stone, remember that allowing it to cure properly is essential for long-lasting durability. In the next section, we’ll discuss how long it takes for concrete stepping stones to cure and what steps you need to take during this process.
Allowing Your Stepping Stone To Cure
As the saying goes, patience is a virtue when it comes to creating stepping stones for your garden. After pouring the concrete mixture into your mold, it’s important to allow enough curing time before adding any finishing techniques. Curing time varies depending on the type of concrete mix you’re using, but generally takes at least 24-48 hours.
During this time, it’s important to keep the mold in a cool and dry place away from direct sunlight. This will ensure that the concrete cures evenly and doesn’t crack or warp. Once the curing process is complete, you can remove the stepping stone from the mold and begin adding your finishing touches.
When it comes to finishing techniques, there are countless ways to make your stepping stones unique. You can add decorative stones or glass pieces on top of the concrete before it dries, or paint designs onto the surface once it’s fully cured. The possibilities are endless, so get creative and have fun with this step!
Removing The Stepping Stone From The Mold
- To begin the process of creating garden stepping stones, the first step is to remove the mold the concrete was poured into.
- To facilitate the removal of the mold, it is important to ensure the concrete has been given adequate time to set and harden.
- When removing the mold, it is beneficial to sprinkle water on the concrete to help it to slide out and prevent cracking.
- After the mold has been removed, it is important to water down the concrete to ensure it cures properly and will be strong enough to withstand foot traffic.
Removing The Mold
To remove the stepping stone from the mold, it is crucial to address the issue of mold build-up. This can be done by using release agents that prevent the stone from sticking to the mold. These agents come in various forms such as cooking oils and petroleum jelly, which can be applied on the inside of the mold before pouring in the concrete mix. Using a release agent ensures that your stepping stone comes out smoothly without any cracks or damage.
For those who do not want to use release agents, alternative molds are available for use. These can include plastic or silicone molds which are flexible and easy to remove once the concrete mix has set. However, it is important to note that these molds may not always give you a perfect finish as they tend to be less rigid than traditional molds. On the upside, they offer more versatility in terms of shape and size, allowing you to create unique designs for your garden.
Removing mold from stepping stones requires careful attention to detail and patience. Once your stepping stone has dried completely, gently tap on all sides of the mold with a soft object like a rubber mallet or wooden block until it loosens up. Then slowly turn over the mold onto a flat surface and carefully lift it off. If any parts of the stone remain stuck in the mold, use a screwdriver or similar tool with a pointed edge to pry them loose without causing any damage. By following these steps, your stepping stone will be ready for use in no time!
Watering Down The Concrete
In creating a stepping stone for your garden, removing it from the mold is one of the crucial steps that require careful attention. After applying release agents or choosing alternative molds, you must let the concrete mixture dry completely before removing it from the mold. However, another technique that you can use is watering down the concrete mix.
Watering down the concrete mix involves adding water to thin it out and make it easier to pour into the mold. This mixing technique helps in reducing air bubbles and ensures a smoother finish on your stepping stone. Additionally, it also reduces the risk of cracking during drying time as it lessens stress on the drying surface.
Before using this technique, ensure that you do not add too much water to your concrete mix as this may weaken its strength and affect its durability in the long run. Remember to always follow instructions carefully and experiment with small batches of concrete before creating larger projects. By incorporating this mixing technique, you can create stepping stones with a better finish and improve their overall quality.
Cleaning And Finishing Your Stepping Stone
Now that you have successfully removed your stepping stone from the mold, it is time to move on to the next step: cleaning and finishing. Before beginning this process, make sure that your stepping stone is completely dry. Any moisture will interfere with sealing techniques and creative embellishments.
Cleaning your stepping stone involves removing any excess concrete or debris that may have accumulated during the molding process. Use a wire brush to scrub off any rough spots or bumps, and then rinse the stone with water. Once your stepping stone is clean, you can begin adding creative embellishments such as mosaic tiles or decorative stones.
After adding any desired embellishments, it’s time to seal your stepping stone. Sealing not only protects your finished product from weathering but also enhances its overall appearance. There are various sealing techniques available in the market; choose one that suits your needs and preferences. Once sealed, let the stone cure for at least 24 hours before placing it in your garden.
Incorporating these techniques into your garden design can add a personal touch and create a unique outdoor space. Placing your stepping stone in your garden is an exciting moment as it marks the completion of this project. Carefully choose the location of where to place it, ensuring it complements other elements in your garden design. With proper care and maintenance, this DIY project can last for years to come, enhancing the beauty of your outdoor living space.
Placing Your Stepping Stone In Your Garden
Despite being a centuries-old garden tradition, the use of stepping stones remains a popular choice for homeowners. Once you’ve made your own stepping stones, it’s time to start thinking about decorative placement in your garden. The right placement can add texture and visual interest to your outdoor space.
When deciding where to place your stepping stone, consider safety considerations first and foremost. Ensure that each stone is level and stable, with no wobbling or shifting. Avoid placing stones on steep inclines or in areas prone to flooding. If you have children or elderly individuals who will be using the path, make sure the steps are evenly spaced and easy to navigate.
Once you’ve ensured safety considerations are met, it’s time to think about decorative placement. Consider using stepping stones as part of a winding pathway through your garden or placing them strategically near fragrant flowers or herbs. You can also experiment with different colors and textures of stones for added visual appeal. With careful consideration, your garden stepping stones can become both functional and beautiful additions to your outdoor space.
As important as it is to place your stepping stones properly in the beginning stages of creating a path through your garden, maintaining them over time is equally vital. In order to keep them looking their best year-round, regular cleaning and upkeep may be necessary. In the next section, we’ll take a closer look at how to maintain your garden stepping stones for long-lasting beauty and functionality.
Maintaining Your Garden Stepping Stones
Proper maintenance of garden stepping stones can ensure their longevity and keep them looking beautiful for years to come. One common issue that arises when using stepping stones is weed growth around them. Luckily, there are several tips you can follow to prevent this problem from occurring. Firstly, make sure to remove any existing weeds before laying down your stepping stones. Secondly, consider using a weed barrier fabric under the stones to prevent new growth. Finally, regularly apply a weed killer spray or solution around the edges of the stepping stones.
In addition to preventing weed growth, it is important to address any cracks or chips in your garden stepping stones as soon as possible. This not only helps maintain their appearance but also prevents further damage. To repair cracks or chips, clean the affected area thoroughly and apply a patching compound specifically designed for stone surfaces. Allow ample time for the compound to dry before walking on the repaired area.
By following these simple maintenance tips, your garden stepping stones will remain functional and aesthetically pleasing for many years. In the next section, we will explore some design ideas and inspiration for incorporating these beautiful features into your garden landscape.
- A winding path of natural stone stepping stones leading through a lush garden
- Circular stepping stone patio surrounded by vibrant flowers and plants
- Stepping stone pathway bordered by river rocks or pebbles
- Staggered placement of differently sized stepping stones creating an organic feel
Now that we have covered some essential maintenance tips for your garden stepping stones let’s explore some creative design ideas to inspire your next project!
Design Ideas And Inspiration For Your Stepping Stones
Now that you’ve learned how to make your own garden stepping stones, it’s time to start thinking about the design and aesthetic of your project. Creating unique and visually appealing stepping stones can add a personal touch to your garden and bring it to life. One way to achieve this is by using color combinations that complement each other or create a bold contrast. For example, combining shades of blue and green with pops of yellow can create a calming yet vibrant atmosphere.
In addition to color, consider incorporating unique shapes into your stepping stone design. This can be achieved by using molds in various shapes and sizes or by creating irregular shapes on your own using materials like rocks or glass pieces. These unique shapes can add an element of surprise and whimsy to your garden, making it feel more playful and inviting.
When designing your stepping stones, don’t forget to incorporate elements from the surrounding environment as well. Consider the plants, trees, and other natural features in the area and try to create a cohesive look that blends seamlessly with its surroundings. By doing so, you’ll be able to create a harmonious garden space that not only looks beautiful but also serves as a sanctuary for both yourself and others.
As you begin planning your perfect garden oasis with these design ideas in mind, keep in mind that there may be some common issues that arise during the creation process. Don’t worry – our next section will provide helpful tips for troubleshooting any problems you may encounter while making your stepping stones so that you can enjoy them for years to come!
Troubleshooting Common Issues With Your Stepping Stone Project
Stepping stones play a crucial role in garden design, providing both functionality and aesthetic appeal. However, despite your best efforts, problems may arise during the stepping stone installation process. Luckily, many common issues with garden stepping stones can be easily resolved.
One such issue is cracking. Cracks can occur during the curing process or due to the weight of foot traffic over time. To prevent this problem, make sure to mix your concrete thoroughly and apply it evenly across the mold. If cracking does occur, you can try filling the cracks with a concrete patching compound or simply re-pouring the affected area.
Another issue that commonly arises is an uneven surface on your stepping stones. This can be caused by an inadequate amount of concrete within the mold or improper leveling when pouring. To fix this problem, add more concrete to low areas or use a trowel to even out the surface as much as possible before it sets.
Lastly, air bubbles and discoloration are two other problems that may arise during the stepping stone creation process. To prevent air bubbles from forming in your concrete mixture, tap the mold on a hard surface several times after pouring to release any trapped air pockets. Discoloration can be caused by moisture or improper mixing of pigments into your mixture. Be sure to follow manufacturer instructions carefully and avoid using too much water in your mix.
- Use natural elements like pebbles or seashells in your stepping stones for added visual interest.
- Consider adding solar lights around your stepping stones for nighttime ambiance and safety.
- Create a mosaic pattern using broken pieces of ceramic tile or colored glass for a unique touch.
- Incorporate native plants around your stepping stone path to create a cohesive garden design.
In summary, while issues with garden stepping stones may seem daunting at first, they can often be resolved with simple solutions. By taking care during each step of the process and addressing any problems as soon as possible, you can create a beautiful and functional garden path that will last for years to come.
Conclusion
Garden stepping stones are like the punctuation marks in a beautifully written sentence. They add structure, flow, and interest to your garden design. Creating your own stepping stones is not only cost-effective but also allows you to personalize your garden with unique designs and colors.
When making garden stepping stones, it is important to select the right materials for durability and aesthetic appeal. Proper preparation of your work area and creating a mold that fits your vision will ensure success. If issues arise during the project, troubleshooting techniques can be applied.
Incorporating garden stepping stones into your landscape design can elevate the beauty of your outdoor space. Just as a carefully crafted piece of literature tells a story, each step taken on a garden stepping stone adds depth and character to your garden’s narrative. With careful planning, attention to detail, and dedication to creating something beautiful, you too can add charm and elegance to your outdoor haven with custom-made garden stepping stones.
Image Credits
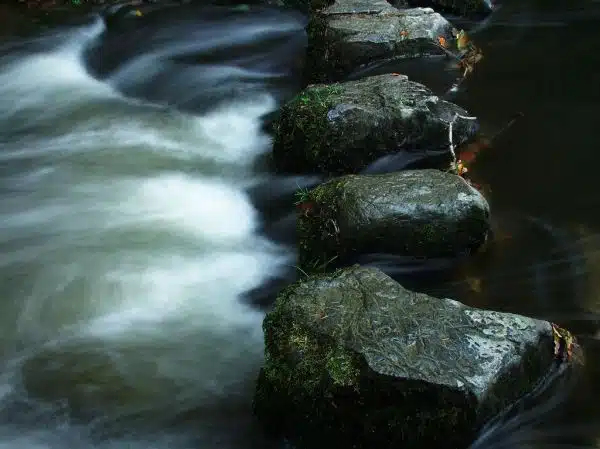
- “Stepping Stones – Bodnant Gardens” by Phil @ Delfryn Design (featured)





![Calculating How Much Stone Dust You Need 8 [Blog Post]Stone Dust © Oxfam Australia](https://green-life.blog/wp-content/uploads/2023/05/GdZVzgTqPhjq-150x150.jpg.webp)

