Floating candles are a popular decoration item for many events such as weddings, romantic dinners or even just a relaxing evening bath. The beauty of these candles lies in their ability to float on water and create a magical ambiance. Buying these candles can be expensive, but making them yourself is easy and cost-effective. In this article, we will guide you through the process of making DIY floating candles so that you can enjoy their beauty without breaking the bank.
To make your own DIY floating candles, you need only a few materials that can be easily found at any craft store or online. With some simple steps and a little creativity, you can create stunning floating candle displays that will impress your guests and add an elegant touch to any occasion. Whether you’re looking for a way to enhance your home décor or simply want to show off your creative skills, learning how to make DIY floating candles is an excellent choice that will surely satisfy your desire for serving others. So let’s get started!
Choosing The Right Wax
When making floating candles, choosing the right wax is important. There are several types of wax that can be used, each with its own melting techniques and properties. The most common waxes used for floating candles are paraffin, soy, and beeswax.
Paraffin wax is the most popular choice for making floating candles due to its affordability and ease of use. It has a low melting point, which makes it easy to work with and allows it to hold fragrance oils well. Soy wax is another option that is becoming increasingly popular due to its natural properties. It has a higher melting point than paraffin wax but burns cleaner and longer.
Beeswax is the most expensive of the three types of wax but offers a unique natural scent when burned. It also has a high melting point, which requires extra care when working with it. Regardless of which type of wax you choose, make sure to follow proper melting techniques to ensure safety and achieve the desired results in your DIY project. With this in mind, let’s move on to selecting the perfect mold for your floating candle creation.
Selecting The Perfect Mold
When it comes to selecting the perfect mold for making DIY floating candles, size and material are two important considerations to keep in mind. Firstly, it is important to select a mold that is the right size for the desired candle, as the mold should be able to contain the wax and wick with ease. Secondly, the material of the mold should be chosen carefully, as it must be able to withstand the heat of the melted wax without warping or melting itself. By following these tips, DIY crafters can easily select the perfect mold for their project.
Choosing The Right Size
When it comes to selecting the perfect mold for your DIY floating candles, choosing the right size is crucial. Measuring techniques will play a significant role in determining the size of your mold. You can use a ruler or measuring tape to measure both the height and diameter of your preferred candle size. This will ensure that your candles fit perfectly into their intended space.
Once you have determined the right size for your mold, it’s time to think about creative displays. Consider grouping candles of varying sizes together to create an eye-catching centerpiece or display. Alternatively, you could choose to make several identical candles and line them up along a mantel or table runner for an elegant look.
Remember, when choosing your mold size, it’s important to consider both function and aesthetics. Don’t be afraid to experiment with different sizes and shapes until you find what works best for your needs. With a little creativity and some careful measuring techniques, you’ll be well on your way to making beautiful DIY floating candles that are sure to impress!
Finding The Right Material
When it comes to creating DIY floating candles, selecting the perfect mold is just one piece of the puzzle. Another important factor to consider is finding the right material for your candles. This can involve finding affordable materials that fit within your budget while also considering sustainable options that are better for the environment.
There are a variety of materials that can be used to make floating candles, including beeswax, soy wax, and paraffin wax. Beeswax is a popular choice for those who prefer natural and sustainable options, as it is renewable and biodegradable. Soy wax is another eco-friendly option that is made from soybeans and burns cleanly. Paraffin wax, on the other hand, is a more traditional choice that is widely available and easy to work with.
Ultimately, the material you choose will depend on your personal preferences and values. If sustainability is important to you, consider exploring natural or organic options like beeswax or soy wax. However, if affordability or convenience are your top priorities, paraffin wax may be a better choice. Whatever material you select, remember to always follow proper safety precautions when working with hot wax to ensure a safe and enjoyable crafting experience.
Deciding On The Desired Shape And Size
After selecting the perfect mold, it is time to move on to the next step. Choosing the right materials is essential for creating a successful floating candle. First and foremost, it is important to select a high-quality wax that will burn cleanly and evenly. Beeswax or soy wax are both great options for a natural, eco-friendly choice.
Once you have chosen your wax, it’s time to find unique molds that will give your candles the desired shape and size. There are countless options available, from traditional round molds to more unconventional shapes like seashells or flowers. Silicone molds are especially popular as they are flexible and easy to remove the finished candle from.
When selecting your mold, keep in mind any additional embellishments you may want to add to your candles later on. If you plan on adding fragrance or color, consider choosing a simpler mold with fewer details so as not to detract from these elements. With the right materials and molds in hand, you’re ready to move on to the next step: adding fragrance and color.
Adding Fragrance And Color
To enhance the ambiance of your floating candles, you can add fragrance oils and experiment with hues to complement your decor. Adding scent is a delightful way to elevate the sensory experience of your candles. Choose from a wide variety of scents, such as lavender for relaxation or cinnamon for a warm and cozy atmosphere. Remember to use only high-quality fragrance oils that are safe for candle making.
When it comes to adding color, there are numerous options available. You can use dye chips, liquid dyes, or natural colorants like beetroot powder or turmeric. Experiment with different hues and shades until you find the perfect match for your decor. Keep in mind that too much dye can affect the burning time of your candles, so be mindful when adding color.
Adding fragrance and color to your DIY floating candles is an excellent way to personalize them and create a unique ambiance in your space. Take some time to experiment with different scents and hues until you achieve the desired effect. In the next section, we will discuss how to prepare the wick for your floating candles.
Preparing The Wick
To make your own floating candles, you’ll need to prepare the wick. The type of wick you use will depend on the size and shape of your candle. Flat braided wicks are great for small floating candles, while square braided wicks work best for larger ones. Be sure to choose a wick that is appropriate for the size of your candle.
Once you’ve chosen your wick, it’s important to cut it to the right length. This will ensure that your candle burns evenly and doesn’t produce too much smoke or soot. To determine the right length, measure the height of your container and add an extra inch or two to allow for trimming later on. Then, tie one end of the wick to a pencil or chopstick and lay it across the top of the container. Cut the other end so that it reaches just above the bottom.
By preparing your wick properly, you can create beautiful floating candles that burn cleanly and evenly. Whether you’re using flat braided or square braided wicks, be sure to choose a length that’s appropriate for your container size. Once you’ve prepared your wick, it’s time to move on to melting the wax and adding fragrance and color.
Melting The Wax
As you prepare to make your DIY floating candles, the first step is to melt the wax. Wax melting techniques vary, but one popular method involves using a double boiler. This technique involves filling a pot with water and heating it up until it reaches boiling point. Once the water starts boiling, place another pot on top of it and add your wax in the upper pot. Stir the wax continuously until it melts completely.
Another way to melt your wax is by using a microwave oven. In this case, you will need DIY candle making tools such as a microwavable container and a thermometer. Place the wax in a microwavable container and heat it up for about 30 seconds or until it starts melting. Check its temperature using a thermometer and stir gently until fully melted.
Whichever method you choose, ensure that you melt your wax slowly and under low heat to avoid burning or overheating it. Once melted, remove the pot from heat source or microwave oven and let it cool for a few minutes before pouring into molds.
Pouring The Wax Into The Mold
- To create diy floating candles, begin by melting the wax of your choice in a double boiler.
- Make sure to stir the wax and keep an eye on the temperature to ensure that it does not overheat and burn.
- The right mold can make a big difference in the appearance of the final product; choose a mold that fits the desired size and shape of the finished candle.
- Once the wax is melted and the mold chosen, it is time to pour the wax into the mold to create the floating candle.
Melt Wax
In order to make your own floating candles, it is crucial to understand the technique of melting wax. To start off, you will need to acquire a set of wax melting equipment. This includes a pot, thermometer, spoon, and heat source. The key to melting wax is using low and slow heat; this will ensure that the wax melts evenly without burning or boiling over.
Once you have gathered all of the necessary equipment and materials, it’s time to begin melting your wax. Firstly, cut your wax into small pieces so that it melts faster and more evenly. Place the wax in a pot on top of your heat source and stir occasionally until fully melted. It’s important to keep an eye on the temperature; different types of wax have different melting points, so be sure to check what temperature is best for your specific type.
As the wax starts to melt down into a liquid form, continue stirring gently until it reaches its desired consistency. Once fully melted, you can then pour the hot liquid into your chosen mold for creating floating candles. Remember that safety comes first when working with hot wax – always wear gloves and keep children away from the workspace. With these candle making techniques mastered, you’ll be able to create stunning homemade floating candles that are perfect for any occasion!
Choose Mold
Moving on from melting the wax, the next step in making floating candles is to choose a mold for pouring the melted wax. There are various mold options available in the market, or you can make your own DIY molds using everyday household items. The most commonly used molds for floating candles are small glass bowls, tea light containers, and silicone molds.
If you opt for glass bowls or tea light containers as your mold, it’s important to ensure that they are heat-resistant and sturdy enough to hold hot wax without breaking. On the other hand, silicone molds offer more flexibility in terms of shape and size options. You can find a variety of shapes such as flowers, stars, and hearts in silicone molds.
When choosing a mold for creating floating candles, consider the occasion or event for which you’ll be using them. For example, if you’re making floating candles for a wedding reception, you may want to choose heart-shaped molds to match the theme of love. Alternatively, if you’re making them for a pool party, you may want to opt for sea creature-shaped silicone molds.
Overall, choosing a mold is an important step in making floating candles as it determines the final shape and size of your candles. With several mold options available in the market or by creating your own DIY molds using household items; it gives room for creativity and personalization while keeping safety measures in mind.
Inserting The Wick
After pouring the wax into the mold, it is time to insert the wick. This step is crucial in ensuring that your DIY floating candles look and function as they should. The wick placement will determine the stability of your candle when placed on water.
To start with, measure the length of your wick by placing it alongside your mold. Cut it about an inch longer than the height of your mold to allow for adjustments during placement. Next, dip one end of the wick into melted wax to coat it and make it stiff. This will help when threading it through the candle.
Once coated, insert the coated end of the wick through the center hole at the bottom of your mold until about two inches stick out at the top. Use a pencil or toothpick to hold down the wick while you pour more hot wax to fill up your mold. Be sure not to disturb or move the wick as this could compromise its stability. Allow a few minutes for cooling before proceeding with removing from mold.
Bullet Point List:
Here are five tips to keep in mind when inserting your candle’s wick:
- Measure and cut your wick properly
- Coat one end of your wick in melted wax before insertion
- Hold down your wick firmly while pouring more hot wax into mold
- Keep a steady hand and avoid jostling or disturbing candle during this step
- Allow enough time for cooling before removing from mold
With these tips in mind, you can ensure that your DIY floating candles will be sturdy and stable when placed on water. In addition, proper wick placement guarantees that they will burn evenly throughout their use without any risk of tipping over or falling apart.
Moving forward, let’s discuss how to cool and remove our candles from their molds without any damage or mishaps.
Cooling And Removing The Candle From The Mold
After pouring the melted wax into the mold, it is essential to allow it to cool completely before removing it. Cooling time varies depending on the size and shape of the mold and can range from a few hours to overnight. It’s important not to rush this step as attempting to remove the candle before it has fully set can result in damage or deformity of the candle.
To ensure that the candle releases easily from the mold, there are several mold release techniques you can use. Spraying or brushing a thin layer of cooking oil or vegetable shortening onto the interior walls of the mold is an effective way to prevent sticking. Alternatively, dusting cornstarch or talcum powder onto the mold’s interior before pouring in the wax can also help release the candle.
Once sufficiently cooled, gently remove the candle from its mold using appropriate techniques such as twisting or tapping on all sides. If you have difficulty releasing your DIY floating candles, place them in a refrigerator for 10-15 minutes to firm up before trying again. Now that your candles are out of their molds, it’s time to decorate them and add some personal flair!
| Mold Type | Release Technique |
|---|---|
| Silicone | Apply thin layer of cooking oil |
| Plastic | Dust with cornstarch/talcum powder |
| Metal | Freeze for 10-15 minutes before removal |
| Glass | Run under hot water for a few seconds before removal |
Transitioning into decorating your candles, there are countless ways to customize your DIY floating candles and make them unique! From adding essential oils for scent, incorporating food coloring for color variation, or even embedding small items like flowers or beads into your wax while it’s still warm – there are endless possibilities for making beautiful and personalized floating candles.
Decorating The Candle
After the candle has cooled and been removed from the mold, it’s time to start adding some creative flair. Creating texture is a great way to make your floating candles stand out. One option is to use a toothpick or small knife to score the surface of the candle with lines or patterns. This will create a unique texture that will be enhanced when the candle is lit and floats on water.
Choosing accents can also add interest to your DIY floating candles. Consider using metallic paints or glitter to add shine and sparkle. Another idea is to embed small objects, such as seashells or beads, into the wax before it cools. These accents will give your candles a personal touch that sets them apart from store-bought versions.
Personalizing with embellishments is another way to make your floating candles truly unique. You can tie ribbons or twine around the base of the candle, attach charms or pendants with wire, or even paint designs onto the surface of the wax. Using natural elements like dried flowers, leaves, or herbs can also add an earthy touch that complements the warm glow of a candle.
Now that you’ve added all your finishing touches, it’s time to test your candle. Place it in a bowl of water and light it up! Watch as it gracefully floats and illuminates its surroundings. With just a few simple steps, you’ve created beautiful DIY floating candles that are perfect for decorating any space or occasion.
Testing The Candle
Did you know that the average burning time for a floating candle is about 4-6 hours? This means that when making your DIY floating candles, it is crucial to test their performance before using them for an event. Testing methods can vary depending on personal preference, but one popular way is to place the candle in water and observe its behavior.
When testing the candle, pay attention to how long it takes to fully melt and whether or not it leaves any residue in the water. A well-made floating candle should burn evenly and cleanly, without leaving behind any debris. Additionally, observe how much light it emits and whether or not it stays afloat throughout its burning time.
Once you have tested your candles and are satisfied with their performance, you can confidently use them for your next event. Remember to always keep safety in mind and never leave burning candles unattended. In the next section, we will discuss proper storage techniques to ensure your candles stay in good condition until their next use.
Storing The Candles
After making your own DIY floating candles, it is important to store them properly to maintain their quality and prevent any damage. Creative storage is the key to keeping your homemade candles in their best condition. Here are some ideas for storing your candles:
Firstly, you can keep them in a cool, dry place away from direct sunlight and heat. This will ensure that the candles maintain their shape and don’t melt or warp due to high temperatures. You can also choose to display your candles in a DIY display case made out of wood or glass jars.
Secondly, storing your candles with other scented items like potpourri or essential oils can infuse them with extra fragrance. Be sure to wrap the candles in plastic wrap before placing them next to other scented items so that they don’t absorb any moisture or odors.
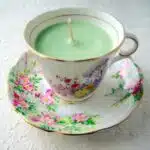
Lastly, you can get creative with how you store your floating candles by using unique containers such as vintage teacups or mason jars. This will not only add an aesthetic touch to your home decor but also keep your DIY project organized and easily accessible.
Now that you have learned about creative storage options for your DIY floating candles, let’s move onto using these beautiful creations in different ways.
Using The Candles
After storing the candles, it’s now time to use them to create a warm and cozy atmosphere in your home. One way to do this is by using candle holders that complement the theme and décor of your living space. You can opt for vintage-inspired candle holders made of brass or copper, or you can go for modern geometric designs that add a touch of elegance to any room.
Another way to use floating candles is by creating ambiance during special occasions like weddings, birthdays, and dinner parties. Place several candles in a large glass bowl filled with water to give off a soft and romantic glow. You can also add flower petals or small seashells around the candles for an added touch of beauty. This is an easy yet effective way to elevate any event without breaking the bank.
Using floating candles is not only about adding aesthetic value but also providing therapeutic benefits. The flickering light from the candles creates a relaxing ambiance that helps calm the mind and body after a long day at work. So, whether you’re looking to unwind after a busy day or hosting guests over for dinner, floating candles are sure to add warmth and coziness to any setting.
If you encounter any issues while using floating candles, don’t worry; there are simple troubleshooting tips you can follow. For instance, if your candle keeps going out while floating on water, try adjusting its wick by trimming it down slightly. If your candle burns too quickly, ensure that your wick isn’t too long as this can cause it to burn faster than necessary. By following these simple tips, you’ll be able to enjoy the full benefits of using floating candles in your home without encountering any problems along the way.
Troubleshooting Tips
Back in the day, people used to light candles for various reasons. Some did it for spiritual purposes, while others used it as a source of light. Today, candles remain a popular decorative item that can add a touch of warmth and ambiance to any space. However, making DIY floating candles can be tricky, especially if you are new to candle-making.
One common issue that people face when making DIY floating candles is troubleshooting the wick. Sometimes, the wick may not stay upright or may not light properly. To avoid this problem, make sure that your wick is long enough and centered in the mold before pouring your wax mixture. You can also use a pencil or chopstick to keep the wick in place until the wax hardens.
Another potential problem you might encounter when making DIY floating candles is troubleshooting fragrance. While adding fragrance oils to your candle can enhance its aroma and create a more relaxing environment, using too much fragrance oil can cause your wax mixture to become unstable and result in poor burn quality. To avoid this issue, stick to the recommended amount of fragrance oil per pound of wax and test your candle’s scent strength before burning it.
When making DIY floating candles, remember that troubleshooting is part of the process. Don’t be discouraged if your first attempt doesn’t turn out as expected – just take note of what went wrong and try again! In the following section, we will discuss some important safety precautions that you should keep in mind when making DIY floating candles.
Safety Precautions
Safety Precautions:
When it comes to making DIY floating candles, safety should be the topmost priority. Fire safety is of utmost importance when dealing with candles. Before starting the project, make sure you have a fire extinguisher nearby, in case of any accidents. Keep the area well-ventilated and ensure that there are no flammable materials around.
Personal Protective Equipment (PPE) is also crucial while making floating candles at home. Always wear protective gloves to avoid burns or any skin irritation caused by wax or other materials used in the project. Additionally, wearing an apron can help protect your clothes from wax spills and stains.
It’s essential to follow all safety precautions when working on this project. With a little care and attention, you can enjoy making beautiful DIY floating candles while staying safe.
Safety Precautions Checklist:
- Have a fire extinguisher nearby.
- Keep the area well-ventilated and free from flammable materials.
- Wear protective gloves and an apron to avoid burns and wax spills.
Conclusion
Making DIY floating candles is a wonderful way to add a touch of elegance and ambiance to any room. With the right materials and techniques, you can create beautiful candles that will impress your guests and make your space feel cozy and inviting.
When choosing the perfect wax, it’s important to consider factors such as burn time, scent throw, and melting point. Selecting the right mold is also crucial for achieving the desired shape and size. Adding fragrance and color can further enhance the beauty of your candles.
Preparing the wick requires attention to detail, as even a small mistake can impact how well your candles float. It’s also important to store your finished product in a cool, dry place to ensure they stay in top condition.
While making DIY floating candles can be a fun and rewarding experience, it’s important to take safety precautions seriously. Always work in a well-ventilated area and wear protective gear when working with hot wax or other materials. With these tips in mind, you’ll be able to create stunning floating candles that will add warmth and charm to any space.
Image Credits
- “Floating Holiday Candles in Reflection Pool” by aimilino01 (featured)




![How To Clean A Wax Warmer 10 [1425] Wax Moth (Galleria mellonella)](https://green-life.blog/wp-content/uploads/2023/05/TlTgCqusrajq-150x150.jpg.webp)


