Candle wax is an essential element of any home decor, and it’s a shame to throw it away once it has burned out. As a candle wax reuse expert, I can assure you that there are several ways in which you can make the most out of your leftover candle wax instead of tossing it in the trash. Not only will you be helping the environment by reducing waste, but also saving money by avoiding having to purchase new candles.
There are many creative ways in which you can reuse your candle wax; from making new candles to using it as a lubricant for squeaky doors or drawers. In this article, I will provide you with tips and tricks on how to reuse your candle wax effectively without compromising its quality or safety. Follow these steps and discover the endless possibilities of repurposing your leftover candle wax!
Understanding The Benefits Of Reusing Candle Wax
Reusing candle wax is akin to giving a new lease of life to the old and used. It is an excellent way of reducing waste and saving money. According to recent studies, reusing candle wax can significantly reduce the amount of waste going into landfills, thereby benefitting the environment.
The benefits of reusing candle wax are numerous. For starters, it reduces the amount of waste generated from candles and thus contributes to environmental sustainability. Additionally, it also saves money, as buying new candles every time can be expensive. Reusing wax also allows for customization of candle colors and scents, which is not always possible when buying ready-made ones.
The process of reusing candle wax can seem overwhelming at first but becomes effortless once you get the hang of it. With the right tools and techniques, one can melt down old candles and use them to create new ones with different colors and fragrances. In the subsequent section, we will explore one such method – melt and pour – that enables you to make beautiful new candles from old wax in no time.
Melt And Pour Method For Making New Candles
To reuse candle wax, one of the most common methods is using the melt and pour technique to create new candles. This technique involves melting down the old wax, adding fragrance oils and colorants if desired, then pouring the mixture into a new container with a wick in place. One of the keys to success with this method is mastering the different melting techniques available.
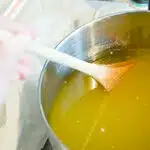
There are several ways to melt candle wax for reuse, including double boiler melting and microwave melting. Double boiler melting involves placing the old wax in a heatproof container over simmering water until it melts completely. Microwave melting can be done by placing the old wax in a microwave-safe container and heating it on high for short intervals until melted. Regardless of which method you choose, it’s important to keep an eye on the wax at all times to avoid overheating or burning.
Proper wick placement is also crucial when making new candles through melt and pour. The wick should be centered in the container and held in place with a wick holder or pencil while pouring in the melted wax. It’s important to make sure that there is enough space between the top of the wax and the top of the container to allow for proper burning once lit. By following these tips, anyone can successfully create new candles from used candle wax using melt and pour techniques.
Moving forward, creating layered candles with different colors and scents is another way to repurpose used candle wax while adding a unique touch to your home decor or gifting options. By carefully layering different colored and scented waxes, you can achieve beautiful gradient effects that are both functional and visually pleasing. With proper planning and execution, this technique can result in stunning creations that showcase your creativity while reducing waste.
Creating Layered Candles With Different Colors And Scents
Choosing Colors: When creating layered candles with different colors, it is important to consider the color combinations that will best suit the desired look of the finished product.
Choosing Scents: The scents used for layered candles should be carefully selected based on what type of scent combination will best suit the desired outcome.
Preparing Wax: Before layering different colors and scents of wax, it is important to ensure that the wax is prepared properly by melting it and straining it to remove any debris.
Pouring Layers: Once the wax is melted and strained, it must be poured in layers to create the desired candle design.
Choosing Colors
When it comes to creating layered candles with different colors and scents, choosing the right colors can make all the difference in the final product. As a candle wax reuse expert, I highly recommend experimenting with color mixing to achieve unique and interesting hues. This can be done by melting down old candles of different colors and blending them together until you achieve your desired shade. Additionally, using natural dyes such as beetroot or turmeric can add a pop of color while also being environmentally friendly.
When considering color combinations, it’s important to think about how they will blend together once melted. Some colors may appear differently when combined with others, so it’s best to start with small batches and test them before committing to a full candle. It’s also important to consider the overall aesthetic you’re going for – do you want bold and bright colors or something more subtle and muted? By playing around with different color combinations, you can create truly unique layered candles that are sure to impress.
Overall, choosing the right colors is an important step in creating layered candles with different colors and scents. With a little bit of experimentation and creativity, you can come up with endless possibilities for beautiful and fragrant candles. Whether you choose to use natural dyes or experiment with color mixing, don’t be afraid to get creative – after all, that’s what makes candle making so fun!
Choosing Scents
Blending scents is an essential step in creating layered candles with different colors and scents. Choosing the right scent combinations can enhance the overall experience of burning the candle while also creating a harmonious blend of fragrances. As a candle wax reuse expert, I recommend experimenting with different scent combinations to find what works best for you.
When choosing scents, it’s important to consider their individual properties and how they will work together. Some scents may overpower others, while some may complement each other perfectly. It’s best to start with a few key scents and experiment by blending them in different ratios until you achieve your desired fragrance. Additionally, using natural essential oils can add an extra level of complexity to your scent profile while also being environmentally friendly.
It’s also important to consider the overall aesthetic you’re going for when choosing scents. Do you want something fresh and clean or warm and cozy? Different scent combinations can evoke different moods and feelings, so it’s important to choose scents that align with your desired ambiance. By taking the time to experiment with different scent blends, you can create truly unique layered candles that not only look beautiful but smell amazing as well.
Using Candle Wax As A Lubricant For Squeaky Doors And Drawers
Lubricating Hinges and Quieting Drawers with Candle Wax
Candle wax is an excellent lubricant for squeaky doors and drawers. This method of reuse not only saves money, but it also helps to reduce waste. Lubricating hinges and quieting drawers are simple tasks that can be done quickly with leftover candle wax.
To lubricate hinges, simply apply a small amount of candle wax to the hinge pin or directly onto the metal hinge itself. Wipe away any excess wax with a cloth, leaving only a thin layer on the hinge. This will help to reduce friction and eliminate any squeaking sounds when opening or closing the door.
Similarly, candle wax can be used to quiet drawers that may be sticking or making noise when opened or closed. Apply a small amount of wax to the drawer slides or tracks, focusing on areas where there may be friction. This will help them glide smoothly and quietly without any annoying sounds.
Incorporating this simple method of reusing candle wax into your household tasks can provide a cost-effective solution to common problems. Not only does it save you money, but it also reduces waste by giving new life to something that would otherwise be thrown away. In our next section, we will explore another creative way to reuse candle wax by making wax melts for your wax warmer.
Making Wax Melts For Your Wax Warmer
Gathering Supplies: The necessary supplies for making wax melts for a wax warmer include old candle wax, a wax warmer, a mold for the wax, and fragrance oils. Preparing Wax: To prepare the wax, ensure it is free from any wick or metal remnants. It is then advisable to melt the wax slowly in a double boiler. Adding Fragrance: Fragrance oils should be added to the melted wax in small increments until the desired aroma is achieved. The amount of fragrance oil should not exceed the manufacturer’s recommended percentage for the wax.
Gathering Supplies
When it comes to making wax melts for your wax warmer, gathering supplies is essential. You will need a double boiler, a mold or container for the wax melts, fragrance oils or essential oils, and of course, candle wax. It is important to note that not all types of candle wax are suitable for making wax melts. Be sure to use soy or beeswax as they have a lower melting point which makes them perfect for this project.
In addition to the necessary supplies, it’s important to consider storage options for any leftover candle wax. One option is to reuse the same container you used for your previous batch of wax melts. Another option is to pour the melted wax into silicone molds and store them in a cool, dry place until you are ready to use them again. Remember that storing candle wax in an area with high humidity can cause it to become soft and sticky over time.
Overall, gathering supplies and considering storage options can help make the process of making wax melts easier and more efficient. By using proper materials and taking steps to store any leftover candle wax correctly, you can continue creating beautiful and fragrant homemade products long after your initial batch of wax melts has been enjoyed.
Preparing Wax
As an expert in candle wax reuse, preparing the wax is a crucial step in making wax melts for your wax warmer. It is important to choose the right type of wax that has a lower melting point like soy or beeswax to avoid overheating and prevent the risk of fire hazards. The next step is to prepare your melting tools, such as a double boiler, to ensure that the wax melts evenly without burning.
Before melting the wax, it is essential to measure and weigh the amount needed for your recipe accurately. Overfilling the container can cause spills and waste while underfilling can result in uneven melting. Once you have measured out the required amount of wax, place it in your double boiler over low heat until it melts entirely.
After melting, allow the wax to cool briefly before adding any fragrance oils or essential oils. Adding them too soon can cause them to evaporate quickly or lose their scent altogether. By taking these necessary steps, you can create high-quality homemade wax melts that are both fragrant and visually appealing for your home or gift-giving needs.
Adding Fragrance
Now that you have prepared your wax, the next step is to add fragrance to your wax melts. Adding essential oils can create a lovely aroma that can fill the room with your desired scent. It is important to choose high-quality essential oils that are safe for use in wax melts and experiment with different wick sizes to achieve the desired scent throw.
When adding fragrance oils or essential oils, it is crucial not to overdo it as too much oil can cause irritation or even a fire hazard. As a candle wax reuse expert, I recommend using no more than 10% of fragrance oil or essential oil for every pound of wax. This ratio will ensure that the fragrance is not overpowering but still strong enough to smell.
To add fragrance, simply stir in the desired amount of oil after melting the wax and before pouring it into your molds. Be sure to stir well to distribute the fragrance evenly throughout the melted wax. Once poured into molds, allow the wax melts to cool completely before removing them from their molds and placing them into your wax warmer for use. With these steps, you can create beautiful and fragrant homemade wax melts perfect for any occasion or gift-giving needs.
Creating Decorative Wax Bowls Or Flower Pots
If you’re looking for a unique way to repurpose your used candle wax, consider making decorative wax sculptures, such as bowls or flower pots. These DIY candle wax planters are not only functional but also visually appealing and easy to make at home. With just a few simple materials, you can create beautiful pieces that are perfect for both indoor and outdoor decor.
To make decorative wax bowls or flower pots, you’ll need the following items:
- Candle wax – either leftover from used candles or purchased in bulk
- A double boiler or two pots (one larger than the other)
- Molds – these can be silicone molds, metal containers, or even plastic cups
Once you have gathered your materials, begin by melting the candle wax in the double boiler or pot on low heat. Once melted, pour the hot wax into your chosen molds and let them cool down completely before removing them from their molds.
Creating decorative wax sculptures is an excellent way to utilize your old candle wax while adding an artistic touch to your home decor. With some creativity and imagination, you can craft beautiful pieces that will impress guests and beautify your space. In the next section, we will explore another practical use for used candle wax – making fire starters for your fireplace or campfire.
Making Fire Starters For Your Fireplace Or Campfire
After creating decorative wax bowls or flower pots, you may still have some leftover candle wax. Don’t let it go to waste! There are numerous ways to reuse candle wax, including making fire starters for your fireplace or campfire. These homemade fire starters can save you money and provide a fun DIY activity.
To make fire starters, start by gathering up any leftover bits of paper, cardboard, or sawdust that you have lying around the house. Next, melt down your leftover candle wax in a double boiler until it becomes liquid. Then, dip your paper scraps into the melted wax and lay them on a sheet of parchment paper to dry. Once they’re completely dry, these fire starters can be used to light your fireplace or campfire with ease.
Not only do these homemade fire starters save you money on expensive commercial products, but they also make great gifts for friends and family who love camping or enjoy using their fireplace regularly. You can even customize them by adding essential oils or other scents to the melted wax before dipping the paper scraps. By reusing candle wax in creative ways like this, you can reduce waste while also adding useful items to your collection of fireplace accessories and camping essentials.
Using Candle Wax To Waterproof Matches
One of the most practical uses of candle wax is as a waterproofing agent for matches. Waterproof matches are essential when camping or hiking in wet conditions, and they can be easily made with candle wax. The process involves dipping the match heads in melted candle wax, which creates a barrier that prevents water from reaching the matchstick.
Waterproofing techniques like using candle wax can also be considered as one of the best DIY camping hacks. In addition to matches, other outdoor gear such as tents, tarps, and backpacks can benefit from being waterproofed with melted candle wax. This method is cost-effective, easy to do, and can save you from unexpected emergencies while enjoying the great outdoors.
In conclusion, learning how to reuse candle wax is not only an eco-friendly practice but also a practical solution for many household and outdoor needs. From repairing scratched wood surfaces to waterproofing gear, there are countless ways to repurpose this versatile material. The next section will provide insights on how to use it effectively in repairing scratched wood surfaces with candle wax.
Repairing Scratched Wood Surfaces With Candle Wax
- To prepare the wood surface for repairing with candle wax, it is important to clean the surface with a damp cloth and remove any dust or debris.
- To apply the candle wax, use a soft cloth and gently rub the wax in a circular motion throughout the scratched area.
- Place a warm iron over the waxed area to further melt and distribute the wax.
- After the wax has cooled, use a clean cloth to buff the waxed area until the wax is evenly distributed throughout the scratched surface.
- To finish the surface, use a furniture polish or wax to seal and protect the repair.
- When using candle wax to repair scratched wood surfaces, it is important to remember that the wax is only a temporary solution and should be reapplied periodically to ensure the best results.
Preparing The Surface
As a candle wax reuse expert, I know how to repair scratched wood surfaces using this versatile material. However, before applying the wax, it is essential to prepare the surface properly to ensure maximum effectiveness. The first step in preparing the surface is to clean it thoroughly. Use a soft cloth and warm soapy water to remove any dirt or debris present on the scratched area.
After cleaning, ensure that the scratched area is completely dry before proceeding. Next, use sandpaper with a grit of 220 or higher to sand down any rough edges around the scratch. This will ensure that the wax adheres smoothly to the surface and takes on an even finish. Remember to wear protective gloves when sanding and handling potentially sharp wood splinters.
Before applying the candle wax, make sure you have all necessary tools in place, including a hairdryer, a soft cloth, and your chosen candle wax color. Take adequate safety precautions by ensuring proper ventilation in your workspace and avoiding contact between hot wax and skin or clothing. With these steps taken care of, you can now proceed confidently with repairing your scratched wood surfaces using candle wax!
Applying The Wax
Now that the surface has been properly cleaned and prepped, it’s time to move on to applying the wax. Wax application techniques can vary depending on the type of wood and the extent of the damage. However, one common method is to melt a small amount of candle wax over the scratched area using a hairdryer set on low heat. As the wax melts, use a soft cloth to spread it evenly over the scratch, making sure to fill any gaps or holes.
Choosing the right tools for wax reuse is crucial in achieving a successful repair outcome. For instance, if you’re working with dark-colored wood, choose a candle wax color that matches its tone as closely as possible. Additionally, make sure that your soft cloth is lint-free and won’t leave behind any fibers that could mar the finished surface. Finally, remember to work quickly and efficiently when applying the wax as it can dry fast and become difficult to manipulate.
Once you’ve applied enough wax to cover and fill in all scratches or damages completely, take another clean cloth and buff off any excess wax from the surface gently. Polishing will help give your repaired wood surface a smoother finish while removing any leftover residue from sanding or cleaning. With these tips in mind, repairing scratched wood surfaces with candle wax doesn’t have to be complicated!
Finishing The Surface
The process of repairing scratched wood surfaces with candle wax doesn’t end with the application and buffing of wax. A crucial step in achieving a polished finish is to polish the furniture. Polishing helps remove any remaining residue from sanding or cleaning, making the surface smoother and shinier. It also adds another layer of protection against scratches and other damages.
To polish the furniture, use a clean cloth and apply a small amount of wax over the entire surface. Then, gently rub and buff the surface until it shines. You can repeat this process until you achieve your desired level of shine. Keep in mind that polishing should be done regularly to maintain the beauty of your furniture.
If you want to add an extra touch of elegance to your repaired wood surface, consider using DIY wax seal stamps. These stamps come in various designs and are easy to use. Simply melt some wax over the area you want to decorate, press the stamp onto it, and wait for it to cool before removing it. This simple yet sophisticated technique can add personality and character to your furniture while protecting it from scratches and other damages.
Preserving Leaves And Flowers With Candle Wax
Preserving techniques are important in extending the lifespan of flowers and leaves that have sentimental value. One way to preserve them is by using candle wax, which acts as a natural preservative. The process involves dipping the flowers or leaves into melted wax and allowing it to cool and harden. This not only preserves their beauty but also creates a unique and creative design.
To begin, gather the materials needed for this project: candle wax, a double boiler, dried flowers or leaves, and wax paper. Melt the candle wax in the double boiler until it reaches a liquid state. Once melted, dip each flower or leaf into the wax and gently shake off any excess. Place them onto a sheet of wax paper to cool and harden.
Using candle wax to preserve leaves and flowers is an aesthetically pleasing way to keep cherished memories alive. The resulting product can be used as decor in your home or given as a meaningful gift to loved ones. Get creative with different types of flowers and leaves, experiment with colors of wax, or even add glitter for an extra touch of sparkle.
Transition:
Now that you have learned how to preserve flowers and leaves using candle wax, let’s explore another interesting use for recycled candle wax – creating aromatherapy wax sachets.
Creating Aromatherapy Wax Sachets
- When creating aromatherapy wax sachets, it is important to choose essential oils that have the desired scent and therapeutic properties.
- To prepare the wax for reuse, the candle should be melted and strained to remove any debris.
- The wax can then be poured into molds or liners to create the desired shape.
- For the sachets, fabric liners should be chosen to absorb the wax and hold the essential oils.
- The liners should then be filled with the melted wax and essential oils, and allowed to cool and solidify.
- Once cooled, the sachets can be tied off with ribbons or string to create an attractive and functional aromatherapy product.
Choosing Essential Oils
To create aromatherapy wax sachets, choosing the right essential oils is crucial. Blending techniques and scent combinations are important factors to consider when making these sachets. One should choose essential oils that complement each other well to create a unique and pleasant scent.
When blending different essential oils, it is important to keep in mind their intensity levels. Some essential oils have a stronger scent than others, so it is necessary to use them sparingly. One should also consider the purpose of the sachet when selecting the oils. For example, lavender oil can be used for relaxation while peppermint oil can be used for energy and focus.
Scent combinations are another important factor to consider when creating aromatherapy wax sachets. Some popular combinations include lavender and chamomile for relaxation, grapefruit and lemon for energy, and eucalyptus and peppermint for respiratory support. It is important to experiment with different blends to find the perfect combination that suits your needs. With these tips in mind, one can create a personalized aromatherapy experience with reusable candle wax.
Preparing The Wax
As a candle wax reuse expert, preparing the wax is a crucial step in creating aromatherapy wax sachets. Before starting the process, it is essential to clean the used candle wax properly. Cleaning techniques may vary depending on the type of candle wax being reused. For example, soy wax can be easily cleaned with hot water and soap, while paraffin wax may require additional cleaning agents such as vinegar or rubbing alcohol.
Safety precautions should also be taken when handling the used candle wax. Always use a double boiler or a heat-resistant container when melting the wax to prevent any fire hazards. Never leave the melting wax unattended and always keep it away from children and pets.
Once the used candle wax has been cleaned and safety precautions have been taken, it is time to prepare the wax for creating aromatherapy sachets. Melt the cleaned candle wax in a double boiler over low heat until it becomes liquid. Stir occasionally with a wooden spoon to ensure even melting. Afterward, remove from heat and let it cool down slightly before adding your chosen essential oils and stirring well. The melted scented wax can then be poured into small fabric bags or silicone molds to create reusable aromatherapy sachets that provide relaxation, energy boost, respiratory support, among others.
Making The Sachets
After properly cleaning and preparing the used candle wax, the next step in creating aromatherapy wax sachets is making the sachets themselves. Sachet filling can be done using various materials such as muslin cloth or DIY pouches made from natural fibers like cotton or linen. These pouches are better alternatives to synthetic materials that may emit toxic chemicals when heated.
To make the sachets, cut the fabric into small squares or circles and sew three sides together to form a pouch. Leave one side open for filling with the scented wax. Once filled, sew the remaining side of the pouch securely to prevent any spillage of wax. Alternatively, silicone molds can be used to create shaped sachets that offer more visual appeal.
After filling and sealing the sachets, let them cool down completely before use. These aromatherapy wax sachets can be placed in drawers, closets, or under pillows for a relaxing and calming atmosphere. Different essential oils can be used to achieve specific effects such as lavender for relaxation, peppermint for energy boost or eucalyptus for respiratory support. With these easy steps, anyone can enjoy the benefits of aromatherapy in their homes while reducing waste by reusing old candle wax.
Making Your Own Lip Balm With Candle Wax
Creating homemade lip balm is a fantastic way to repurpose old candle wax. Not only does this save you money, but it’s also an environmentally-friendly alternative to buying store-bought products. Before starting, ensure that the wax is clean and free of any debris. One easy and effective way to do this is by melting the wax in a double boiler.
To make DIY lip balm with candle wax, gather the necessary materials: beeswax pellets, coconut oil, shea butter, and essential oils. Melt these ingredients together in a double boiler until fully combined. Pour the mixture into a container and let it cool until hardened. For added exfoliation benefits, consider making your own DIY lip scrub using sugar and honey.
For those who prefer a pop of color on their lips, try making tinted lip balm using old candle wax. Mix in natural colorants such as beetroot powder or cocoa powder for a subtle tint or use mica powder for a more dramatic effect. Experiment with different colors to find what works best for you. With just a few simple steps, you can create your own personalized and eco-friendly lip products at home using leftover candle wax.
Repurposing old candle wax doesn’t stop at just creating homemade lip balm; you can also use melted candle wax to seal envelopes! This adds an extra touch of elegance to invitations or letters while also providing an excellent opportunity for upcycling. Simply melt the wax in a double boiler and pour it onto the envelope flap before pressing down with a stamp or sealing tool. It’s an easy way to add some flair while also reducing waste!
Sealing Envelopes With Melted Candle Wax
After making your own lip balm with candle wax, you may be wondering what else you can do with all that leftover wax. One idea is to use it for envelope decoration by creating a wax seal. Wax seals have been used throughout history as a way to secure letters and add a personal touch to correspondence. Today, they can still serve the same purpose while also providing a unique and elegant aesthetic.
To create a wax seal, start by melting your candle wax in a double boiler or using a heat gun to melt it directly on the envelope. Once melted, pour a small amount onto the desired location on the envelope and quickly press a seal into it before it hardens. Seals come in various designs and can even be customized with initials or logos. The end result will be a beautiful and personal touch to any letter or invitation.
The history of wax seals dates back centuries when they were used as an official way to authenticate documents and letters. They were often imprinted with symbols of power such as crests or coats of arms. Over time, they became more decorative and even fashionable, with different colors and designs being used for different occasions. Today, they are less commonly used but still hold their charm as an artistic expression of sealing envelopes.
Transitioning into creating artistic wax paintings: Another way to reuse candle wax is by creating artistic wax paintings. By melting different colored waxes onto canvas or paper, you can create unique works of art that are both beautiful and long-lasting. In the next section, we will explore this method in more detail and provide tips for getting started on your own masterpiece.
Creating Artistic Wax Paintings
With the magic of wax art techniques, you can turn your old candle wax into a stunning masterpiece. The process of creating artistic wax paintings is not only visually appealing but also therapeutic. Wax painting inspiration can be found anywhere—whether it’s a beautiful sunset or an abstract pattern on your favorite shirt.
One popular technique used in wax painting is encaustic art, which involves applying layers of hot wax to a surface and then fusing them together with heat. This method allows for endless possibilities in terms of texture and color blending. Another technique is batik, where melted wax is applied to fabric prior to dyeing, resulting in unique patterns and designs.
Creating artistic wax paintings is an excellent way to reuse candle wax while expressing your creativity. With the right tools and techniques, you can turn something that would otherwise be discarded into a beautiful piece of art that can be enjoyed for years to come.
Transitioning into the subsequent section about recycling candle jars for storage or decoration: Once you’ve finished creating your beautiful wax paintings, don’t throw away those empty candle jars! There are many ways to repurpose these jars for storage or decoration around your home.
Recycling Candle Jars For Storage Or Decoration
When it comes to reusing candle wax, there are a variety of upcycling ideas that can be implemented. One such idea is recycling candle jars for storage or decoration. This not only helps in reducing waste but also provides an opportunity for creativity.
To start with, consider cleaning the candle jars thoroughly by removing any remaining wax residue and labels. Once cleaned, these jars can be used to store small items such as jewelry, buttons, or office supplies. Additionally, they can be decorated using various techniques such as painting, decoupage, or adding embellishments like ribbons or beads.
Another decorative technique involves repurposing candle jars as planters. Simply add soil and a small plant to create an eye-catching display that can brighten up any room in the house. Alternatively, use them as decorative vases by filling them with flowers or branches.
In conclusion, recycling candle jars for storage or decoration is a great way to reuse candle wax and reduce waste. With a little creativity and effort, these jars can be transformed into beautiful and functional pieces that serve both practical and aesthetic purposes. So next time you finish burning your favorite scented candle, don’t throw away the jar – instead, consider how it can be repurposed into something new and useful!
Conclusion
The benefits of reusing candle wax cannot be overstated. Not only is it a cost-effective way to create new candles, but it also reduces waste and helps the environment. Through the melt and pour method, you can easily make new candles with different colors and scents. Additionally, candle wax can be used as a lubricant for squeaky doors and drawers or made into wax melts for your wax warmer.
Furthermore, you can create your own lip balm with candle wax, seal envelopes with melted wax, or even use it to create artistic wax paintings. Recycling candle jars for storage or decoration is also an excellent way to reuse candle wax. With so many creative options available to reuse candle wax, there is no need to throw away leftover wax after each use.
According to a recent study by the National Candle Association, 7 out of 10 households in the United States use candles regularly. This statistic shows just how prevalent candles are in our daily lives and highlights the importance of finding ways to reuse candle wax instead of simply discarding it after each use. By incorporating these new techniques into your daily routine, you will not only save money but also contribute towards reducing waste and protecting our environment. As a candle wax reuse expert, I highly recommend trying out these methods today!
Image Credits
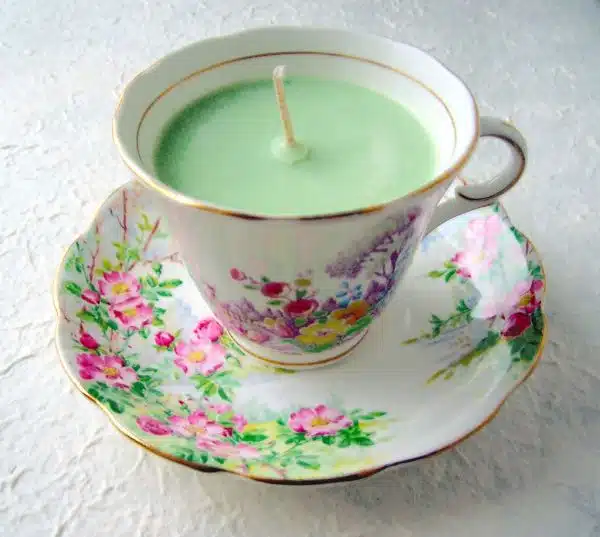
- “Tea Garden Soy Wax teacup Candle” by ecram1 (featured)


![How To Clean A Wax Warmer 7 [1425] Wax Moth (Galleria mellonella)](https://green-life.blog/wp-content/uploads/2023/05/TlTgCqusrajq-150x150.jpg.webp)


