Concrete is a common material used in construction due to its strength, durability, and versatility. However, over time, concrete can deteriorate and lose its aesthetic appeal. Resurfacing the concrete is an effective way to restore its appearance and extend its lifespan. In this article, we will discuss the steps involved in resurfacing concrete and provide helpful tips for achieving a high-quality finish.
As a concrete resurfacing expert, I have seen firsthand the benefits of restoring damaged or worn-out concrete surfaces. Resurfacing not only enhances the appearance of the concrete but also improves its functionality by increasing resistance to wear and tear. Whether you are looking to improve the look of your driveway, patio, or pool deck, resurfacing can be a cost-effective solution compared to replacing the entire surface. With proper preparation and execution, resurfacing can transform your old or damaged concrete into a beautiful and functional asset for years to come.
Evaluating The Condition Of Your Concrete
According to a recent survey, over 50% of homeowners in the United States have concrete surfaces on their property. While concrete is a popular and durable material, it can become damaged and unsightly over time. Therefore, it is essential to assess the damage before resurfacing to determine if repair or replacement is necessary.
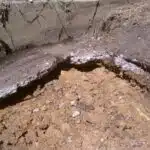
Assessing damage begins with identifying cracks, chips, and unevenness on the surface of your concrete. These types of damages may occur due to weather exposure, heavy foot traffic, or even improper installation. If you notice any of these issues, it’s crucial to address them as soon as possible. Otherwise, they can worsen over time and affect the overall stability of your concrete.
Preventative measures can also help maintain your concrete’s appearance and prevent future damage. For example, applying a sealant every few years can protect against moisture penetration and UV rays. Additionally, avoiding heavy equipment or vehicles on your concrete surfaces can help prevent cracks and other forms of damage. By taking good care of your concrete surfaces from the outset, you can save yourself time and money down the road when resurfacing becomes necessary.
To prepare for resurfacing your concrete surface after assessing its condition thoroughly, you must take specific steps that will ensure that the new layer will bond adequately with the existing surface without any problems occurring later down the line.
Preparing The Surface For Resurfacing
- Prior to resurfacing concrete, it is important to thoroughly clean the surface in order to remove any dirt, dust, oil and other debris that may be present.
- After cleaning, any existing cracks and holes should be filled with a patching compound to ensure a smooth and even surface for the resurfacing material.
- Spot repairs should be made with a concrete patching material that is compatible with the existing concrete.
- All patching material should be allowed to cure according to the manufacturer’s instructions prior to the resurfacing process.
Cleaning The Surface
To achieve a durable and long-lasting concrete resurfacing, it is critical to prepare the surface for the new overlay. The first step in the preparation process is cleaning the surface. Cleaning removes all debris, dirt, grease, and oil that can hamper the bonding of the new overlay. Pressure washing techniques are ideal for cleaning exterior surfaces as they can remove even tough stains without damaging or etching the concrete.
When preparing for resurfacing, choosing the right cleaning solution is also essential. The type of cleaner used depends on the severity of stains and dirt on the concrete surface. For instance, a mild detergent can be used to clean light dirt or grime while tougher stains may require a more potent cleaning solution. Using harsh chemicals or acids should be avoided as they may damage or weaken the concrete surface.
Overall, proper cleaning of your concrete surface ensures that it is smooth and free from dirt and debris before resurfacing. This will help ensure that your new overlay adheres well to the substrate, thus improving its durability and longevity. As an expert in concrete resurfacing, we always emphasize thorough cleaning as one of the most important steps in preparing a surface for resurfacing.
Patching Cracks And Holes
After thorough cleaning of the concrete surface, the next step in preparing it for resurfacing is patching cracks and holes. Filling gaps and smoothing the surface ensures that the new overlay adheres well to the substrate and prevents future damage or cracking. Neglecting this step can result in a failed resurfacing project.
To patch cracks and holes, first, remove any loose debris or particles from the gap using a chisel or wire brush. Then, apply a bonding agent to improve adhesion between the existing concrete and the patching material. Next, fill the crack or hole with a suitable concrete patching compound. The type of compound used depends on the size of the gap and its location (interior vs. exterior). After filling, smooth out any excess material using a trowel.
It is crucial to ensure that all patches are level with the surrounding surface after drying to avoid unevenness in the final resurfacing layer. Properly patched surfaces provide a strong foundation for overlays and increase their longevity. As an expert in concrete resurfacing, we prioritize careful filling of cracks and holes during preparation to achieve long-lasting results for our clients’ projects.
Repairing Cracks And Holes
After preparing the surface for resurfacing, it is important to tackle any cracks and holes before beginning the actual resurfacing process. Cracks and holes can be caused by a variety of factors, such as freeze-thaw cycles, settling of the concrete, or simple wear and tear over time. Neglecting to repair these areas will result in a less-than-perfect final product.
There are different types of fillers that can be used to fix cracks and holes in concrete. Epoxy-based fillers are popular because they have a high strength and can withstand heavy traffic. However, they can be expensive compared to other options. Cement-based fillers are more cost-effective but may not provide the same level of durability as epoxy-based fillers. It is important to choose the best option based on your specific needs.
Cost comparison should not be the only factor when deciding on which filler to use for repairing cracks and holes. The size and severity of the damage should also be taken into consideration. For smaller cracks, a simple injection of filler may suffice. For larger areas or deep holes, more extensive repairs may be necessary. Consulting with a professional concrete resurfacing expert can help determine the best course of action for your specific situation.
Once all repairs have been made, it is crucial to clean the surface thoroughly before beginning the resurfacing process. This ensures that any debris or contaminants do not interfere with proper adhesion between the new surface layer and existing concrete substrate. Cleaning methods will vary depending on factors such as location and type of stains present on the surface. Proper cleaning is essential for achieving optimal results in your concrete resurfacing project.
Cleaning The Surface
Scrubbing the surface is an essential part of concrete resurfacing, as it helps to remove any dirt, oil, and other build up. Cleaning the cracks is vital to ensure any contaminants do not interfere with the resurfacing process. Utilizing a pressure washer can help to break up the dirt and debris for easier removal. Stains can be removed with chemical cleaners, and should be tested on a small area first to ensure safe usage. Acidic cleaners should be avoided where possible, as they can create a hazardous working environment. It is important to wear protective equipment when dealing with concrete stains, such as goggles and gloves. Appropriate ventilation should also be considered to avoid any long term health effects.
Scrubbing The Surface
Deep cleaning and stain removal are critical steps in resurfacing concrete. Neglecting this critical step can result in a poor final product that will not last long. As a concrete resurfacing expert, I highly recommend starting with deep cleaning of the surface to ensure that the new layer of concrete adheres correctly.
Scrubbing the surface is an essential part of deep cleaning. The process involves using a stiff-bristled brush or a pressure washer to remove dirt and debris from the surface. A thorough scrubbing is necessary to eliminate all contaminants that could prevent proper adhesion of the new layer of concrete. It’s crucial to use the right products and techniques for effective results.
Stain removal is equally important as deep cleaning in resurfacing concrete. Stains such as oil, grease, and rust can be challenging to remove but must be addressed before adding a new layer of concrete. There are several stain removal products available on the market that work well on these types of stains, but it’s important to follow manufacturer instructions carefully. Only after deep cleaning and stain removal can you proceed with resurfacing your concrete with confidence.
Cleaning The Cracks
Another important aspect of cleaning the surface in concrete resurfacing is addressing cracks. Cracks on the surface can compromise the integrity of the new layer of concrete, leading to premature failure. As a concrete resurfacing expert, I highly recommend using epoxy fillers for filling in the cracks. Epoxy fillers are a durable and long-lasting solution that provides excellent adhesion to both old and new concrete surfaces.
To clean the cracks before filling them with epoxy, it’s essential to remove any debris or contaminants that could prevent proper adhesion. Using a stiff-bristled brush or pressure washer can help remove dirt and dust from the cracks. Once cleaned, apply an appropriate amount of epoxy filler into the crack, ensuring it is level with the surrounding surface. Allow ample time for curing before proceeding with resurfacing.
Properly cleaning and filling in cracks is critical to ensure a successful concrete resurfacing project. Neglecting this step can lead to subpar results that may not last long. As a concrete resurfacing expert, I recommend taking your time and investing effort into properly cleaning and repairing any cracks before proceeding with adding a new layer of concrete.
Removing Stains
Another critical aspect of cleaning the surface in concrete resurfacing is removing stubborn stains. Stains can be unsightly and can negatively impact the appearance of a concrete surface. In addition, they can also compromise the adhesion of the new layer of concrete, leading to premature failure. As a concrete resurfacing expert, I highly recommend using eco-friendly cleaning solutions for removing stains.
Eco-friendly cleaning solutions are an excellent alternative to traditional harsh chemicals that can harm both humans and the environment. These solutions are made from natural ingredients that are safe and effective in removing stubborn stains from concrete surfaces. To use eco-friendly cleaning solutions, simply dilute them with water as directed on the label and apply them to the stained area. Allow them to sit for a few minutes before scrubbing with a stiff-bristled brush or pressure washer.
Properly removing stains is crucial in ensuring a successful concrete resurfacing project. Neglecting this step can lead to subpar results that may not last long. As a concrete resurfacing expert, I recommend investing effort into properly removing any stains before proceeding with adding a new layer of concrete. By doing so, you will achieve a clean and beautiful surface that will last for years to come while also protecting our environment through the use of eco-friendly cleaning solutions.
Applying A Bonding Agent
Before resurfacing concrete, it is essential to apply a bonding agent to ensure proper adhesion between the existing surface and the new layer. A bonding agent acts as an intermediary layer that helps bind the old and new concrete. Bonding agents are available in liquid or spray forms, and selecting the right one can make a significant difference in the final outcome of your project.
When selecting a bonding agent, consider its compatibility with the existing concrete surface. Some bonding agents work better with certain types of concrete surfaces than others. Additionally, ensure that the agent you choose is capable of penetrating deep into the pores of your existing concrete surface for maximum adhesion.
Once you have selected a suitable bonding agent, it’s time to apply it using proper techniques. The application technique will depend on the type of bonding agent you choose. For instance, if using a liquid-based bonding agent, apply it evenly over the entire surface using a roller or sprayer. Conversely, if using a spray-based bonding agent, ensure that you maintain an appropriate distance between the nozzle and surface during application.
- Proper preparation of the existing concrete surface is critical before applying a bonding agent.
- Ensure that there are no loose materials or debris on the surface before applying any bond coat.
- Selecting an appropriate curing time for your chosen bonding agent is crucial to achieve optimal adhesion.
- Avoid applying excessive amounts of bond coat as this may lead to poor adhesion.
- Always follow manufacturer instructions when using any type of bonding agent.
Now that we have discussed how to select and apply appropriate bonding agents let’s move onto mixing resurfacing material.
Mixing The Resurfacing Material
Imagine you are building a house and the foundation is the most important part. Without a solid foundation, the rest of the structure will not be able to withstand external pressures. The same applies to resurfacing concrete, as choosing the right material is crucial for ensuring its durability. When mixing your resurfacing material, you must take into account several factors such as weather conditions and desired texture. A good mix will ensure that your surface lasts longer and remains cost effective.
One option for mixing resurfacing material is to use bagged concrete mix. This type of mix is readily available at hardware stores and can be mixed with water and other additives to achieve desired consistency and texture. However, it is important to note that this option may not always be cost effective in larger projects due to its higher price point compared to other options.
Another alternative for mixing resurfacing material is by using a polymer-modified cementitious overlay. This type of overlay has increased bond strength, flexibility, and durability compared to traditional concrete mixes. It also provides a smoother finish that can be customized with various textures and colors, making it an attractive option for decorative purposes.
When selecting your resurfacing material, consider both the cost-effective options as well as those that offer long-lasting durability. A good mix will provide you with a surface that looks great while lasting for years to come. In the next section, we will discuss applying the first coat of resurfacing material onto your concrete surface.
Applying The First Coat
Prior to applying the first coat of concrete resurfacing material, it is essential to prepare the surface. This includes removing any existing coatings, cleaning the area, and repairing any cracks or damage.
The first coat of concrete resurfacing material should be applied with a brush or roller. It is important to ensure the material is spread evenly and that no bubbles or voids are present.
The material should be applied in thin, even layers. Multiple coats may be necessary to achieve the desired finish.
Once the first coat has been applied, it should be allowed to dry completely before applying additional coats. This will help ensure a strong and lasting finish.
Preparing The Surface
When it comes to resurfacing concrete, surface preparation techniques are crucial for a successful outcome. As an expert in this field, I cannot stress enough the importance of preparing the surface before applying the first coat. Surface preparation involves removing any existing coatings, cleaning the area thoroughly, and repairing any cracks or holes. Neglecting these steps will result in a poor bond between the new layer and the old surface.
One of the common mistakes to avoid during surface preparation is not using the right tools and equipment. It is essential to use appropriate machinery to remove any existing coating or adhesive from the surface, such as shot blasting or grinding machines. Additionally, cleaning the area with soap and water is not enough; you should use specialized cleaners that are formulated for concrete surfaces. Failure to do this can lead to poor adhesion between layers.
Another common mistake is not allowing enough time for curing before applying the first coat. Concrete requires at least 28 days of curing time before resurfacing, depending on weather conditions and other factors. Rushing this process may result in cracks and other defects in your finished project. Therefore, it is crucial to follow all recommended guidelines for curing before beginning your resurfacing project.
In conclusion, surface preparation is an essential step when resurfacing concrete surfaces. Using proper techniques and avoiding common mistakes will ensure a successful outcome and reduce future maintenance costs. Remember always to follow manufacturer’s instructions when resurfacing concrete surfaces.
Applying The First Coat
When it comes to resurfacing concrete, applying the first coat is perhaps the most critical step for achieving a smooth and durable finish. As an expert in this field, I understand the importance of choosing the right finish and achieving a consistent thickness in your first coat. These factors can make or break your project’s success, so it’s essential to pay attention to every detail.
One of the biggest decisions you’ll face when resurfacing concrete is whether to choose a smooth or textured finish. Both options have their advantages and disadvantages, depending on your preferences and needs. A smooth finish is ideal for indoor surfaces such as floors because it’s easier to clean and maintain. On the other hand, a textured finish provides better traction and grip, making it perfect for outdoor surfaces like patios or pool decks.
When applying your first coat of resurfacer, one important tip is to achieve a consistent thickness throughout the entire surface area. This can be challenging if you’re working with irregularly shaped areas or corners that are hard to reach. To ensure an even application, use a notched trowel or squeegee to spread the material evenly across the surface. Be sure to follow all manufacturer’s instructions regarding mixing ratios and drying times for optimal results.
Adding Texture Or Design Elements
After applying the first coat, it’s time to add texture or design elements to your concrete surface. Textured overlays are an excellent way to do so. They can give a plain concrete surface a unique look and feel. You can choose from various patterns and textures that will suit your style and preferences.
Stenciled patterns are another option for adding design elements to your concrete surface. They create intricate designs that mimic natural stone or tile surfaces. Stencils come in different shapes, sizes, and designs, giving you the flexibility to choose one that suits your taste.
Adding texture or design elements is a crucial step in resurfacing concrete. It enhances not only the appearance but also the overall durability of the surface. Once you have applied textured overlays or stenciled patterns, you can proceed with applying the final coat of sealer to protect your new surface against stains, weather damage, and wear and tear.
Applying The Final Coat
As we near the end of the concrete resurfacing process, it’s time to apply the final coat. This stage is crucial for achieving a smooth, uniform surface that will last for years to come. Before diving into the application process, let’s discuss some color options and troweling techniques that can make your newly resurfaced concrete stand out.
When it comes to color options, there are a variety of choices available that can enhance the look of your surface. From earthy tones to bright colors, you can select a shade that complements your property’s aesthetic. Additionally, by adding color pigments or dyes to the mix during the application process, you can create a unique finish that stands out from standard gray concrete.
As for troweling techniques, these play an essential role in creating an even surface. One technique is known as “float and trowel,” which involves using a steel float to spread and level out the material before using a trowel to smooth it out further. Another technique is called “slick troweling,” which involves using a steel trowel at various angles to create different textures on the surface. By experimenting with these techniques, you can achieve a custom finish that meets your desired specifications.
Now that we’ve covered color options and troweling techniques let’s move onto curing the surface. This step is necessary for allowing the resurfaced concrete to dry completely and reach its full strength potential. By following proper curing procedures, you’ll ensure that your newly resurfaced concrete remains durable and long-lasting for many years ahead.
Curing The Surface
Once the concrete has been applied, it is essential to cure the surface to achieve a hardened and durable finish. Moisture control is a crucial aspect of curing the surface, as it helps prevent cracking and shrinkage. The key to proper moisture control is maintaining a consistent level of moisture throughout the curing process.
Finishing techniques are also an important factor in achieving a smooth and even surface. The use of trowels and floats can help level out any imperfections or high spots on the concrete surface. It’s vital to apply these techniques properly, as improper finishing can lead to weakened areas on the surface.
To ensure a successful curing process, it’s essential to follow industry best practices for curing concrete surfaces. Here are three key steps you can take:
- Keep the surface moist: Use a fine mist spray or cover with plastic sheeting to maintain constant moisture levels during curing.
- Control temperature: Avoid extreme temperatures that may cause cracking or shrinkage.
- Monitor for cracks: Inspect the surface regularly for any signs of cracking or damage and address them promptly.
By following these steps, you can achieve a durable and long-lasting concrete surface that will stand up to wear and tear over time.
Transition into subsequent section:
While proper curing is essential for achieving a strong and resilient concrete surface, sealing is also an important step in protecting against damage from water, chemicals, and other factors that can cause deterioration over time. In the next section, we’ll explore how sealing can help prolong the life of your newly resurfaced concrete surface.
Sealing The Surface
Proper surface preparation is essential to a successful concrete resurfacing project, and includes clearing away any debris, cleaning the surface, and etching the concrete in order to provide a better bond for the new surface.
The best method for sealing a concrete surface is to use a high-quality concrete sealer, as this will help to protect the surface from future staining and degradation.
After the sealer has been applied, it is important to properly finish the surface by smoothing out any bumps or imperfections with a trowel or other finishing tool.
The sealer should also be allowed to fully cure before any foot traffic is allowed on the surface, as this will help to ensure that the new surface is well sealed and will last for years to come.
Finally, any furniture or other items that will be placed on the surface should be moved carefully, as it is important to avoid scratching or damaging the newly sealed surface.
To ensure the best results, it is recommended that a professional be consulted in order to properly assess the condition of the existing concrete surface and determine the best course of action for sealing the surface.
Preparation
To achieve a successful concrete resurfacing project, proper preparation is key to sealing the surface. One of the most important tips and tricks that every expert in the field should know is to start by assessing the condition of the existing concrete. This involves checking for any cracks, holes, or other damage that may require repair before proceeding with the resurfacing. Common mistakes often involve overlooking these issues, which can cause further problems down the road.
Once any necessary repairs have been made, it’s time to thoroughly clean and prepare the surface for sealing. This step involves removing any dirt, debris, or other contaminants from the concrete. Failure to do so will prevent proper adhesion of the resurfacing material. Experts recommend using a pressure washer to blast away any loose material and then applying a high-quality degreaser to remove any oil or grease stains. Properly preparing the surface greatly increases the chances of a long-lasting and aesthetically pleasing final product.
Lastly, it’s important to ensure that all cracks are properly filled before applying a sealant. These small imperfections can lead to larger problems if left untreated and may cause premature wear on your new concrete surface. By following these tips and tricks while avoiding common mistakes such as incomplete preparation or inadequate crack filling, you’ll be well on your way to a durable and attractive concrete resurfacing project that will serve you for years to come.
Sealing Method
As a concrete resurfacing expert, sealing the surface of the concrete is crucial to achieving a long-lasting and visually appealing final product. The benefits of sealing include protecting the surface from stains, UV damage, and wear caused by foot traffic or vehicles. Additionally, sealing helps to maintain the color and texture of the new surface for years to come.
There are different types of sealers available in the market, including acrylics, epoxies, and polyurethanes. Acrylic sealers are affordable and easy to apply but may require frequent reapplication. Epoxy sealers provide a durable and glossy finish but can be expensive and challenging to apply. Polyurethane sealers offer a balance between durability and ease of application but can be costly.
Choosing the right sealer depends on various factors such as the condition of the existing concrete, location, climate conditions, and desired appearance. As an expert in concrete resurfacing, it’s essential to evaluate these factors before selecting a sealer that meets your project’s needs. Properly applying the selected sealer ensures that it adheres correctly to the surface and provides maximum protection against environmental elements.
By understanding the benefits of sealing and selecting the appropriate sealer type for your project, you can achieve a beautiful concrete resurfacing job that will last for many years while serving others who will use it regularly.
Finishing Touches
After sealing the surface of the concrete, it is essential to add finishing touches to enhance its appearance and durability. One popular option is adding color to the concrete surface. Color options range from subtle earth tones to bold bright hues, giving customers the flexibility to choose a color that suits their preferences. Adding color can transform a dull and unappealing concrete surface into a vibrant and aesthetically pleasing one.
Another way to elevate the look of a sealed concrete surface is by applying protective coatings. Protective coatings are available in different types, such as epoxies and polyurethanes. These coatings provide an extra layer of protection against wear and tear caused by foot traffic or vehicles, making them ideal for high-traffic areas like driveways or commercial properties. Additionally, protective coatings can give the surface a glossy finish or enhance its texture, further enhancing its overall visual appeal.
In conclusion, adding finishing touches after sealing the concrete surface can significantly improve its appearance and longevity. By offering color options and protective coatings, you can provide customers with a personalized experience while also ensuring that their new surface is adequately protected against environmental elements. As a concrete resurfacing expert, it’s crucial to understand these options and guide your clients towards achieving their desired outcomes while serving them with excellence.
Maintaining Your Resurfaced Concrete
Sealing the surface of your newly resurfaced concrete is a crucial step in ensuring its longevity. However, there are other preventative measures that must be taken to maintain the quality and appearance of your concrete. One common theory is that adding more layers of sealer will increase durability. While this may seem logical, it is not necessarily true. In fact, applying too much sealer can lead to a buildup that can cause discoloration and flaking.
To ensure the longest possible lifespan for your resurfaced concrete, consider these tips for longevity:
- Regular cleaning: Dirt and debris can accumulate on the surface of your concrete over time, leading to discoloration and potential damage. Regular sweeping or rinsing with a hose can prevent this buildup.
- Avoid harsh chemicals: While some cleaning solutions may work well on other surfaces, they can be damaging to concrete. Avoid using bleach or ammonia-based cleaners and opt for a mild detergent instead.
- Use caution when moving heavy objects: Dragging heavy furniture or equipment across your concrete surface can cause scratches and gouges. Use furniture pads or lift heavy items when possible.
By taking these preventative measures, you can help ensure that your resurfaced concrete stays looking great for years to come.
| Preventative Measure | Explanation |
|---|---|
| Regular cleaning | Sweeping or rinsing with a hose prevents dirt buildup |
| Avoid harsh chemicals | Mild detergents are safer than bleach or ammonia-based cleaners |
| Use caution when moving heavy objects | Furniture pads and lifting equipment reduces scratches |
In conclusion, while sealing the surface is an important step in maintaining your resurfaced concrete, it’s not enough on its own. By following these tips for longevity and taking preventative measures against common problems like scratches and discoloration, you can keep your concrete looking great for years to come.
Common Problems And Solutions
Concrete resurfacing is a popular solution for those who want to restore their old and worn-out concrete surfaces. However, there are common problems that may arise during the process that can affect the durability and longevity of your newly resurfaced concrete. Here are some solutions to these common problems:
Firstly, one of the most common issues when it comes to concrete resurfacing is cracking or chipping. This can happen due to a variety of reasons such as improper mixing of the resurfacing material, uneven surface preparation, or insufficient curing time. To prevent this from happening, it is important to properly prepare the surface by cleaning and repairing any damages before applying the new layer of concrete. Additionally, make sure to follow the manufacturer’s instructions carefully when mixing and applying the resurfacing material.
Secondly, another issue that you may encounter is discoloration or fading of your newly resurfaced concrete. This can be caused by exposure to sunlight or other environmental factors that can cause UV damage over time. To avoid this problem, consider using a high-quality sealer that can protect your newly resurfaced concrete from harmful UV rays and other environmental factors.
Lastly, many people are choosing concrete resurfacing because of its economic benefits and minimal environmental impact compared to tearing out old concrete and replacing it with new materials. By choosing this option, you not only save money but also help reduce waste in landfills while reducing your carbon footprint.
- Use a sealer with a UV-resistant additive to protect against discoloration.
- Consider using recycled materials in your resurfacing project.
- Hire a professional contractor with experience in concrete restoration for best results.
Tools and materials you will need for your concrete resurfacing project include: trowel, pressure washer or hose with high-pressure nozzle attachment for cleaning, power drill with paddle mixer attachment for mixing the new layer of cementitious material, squeegee or roller for applying the new layer of material, and a sealer with UV-resistant additive. With these tools and materials, you can achieve a beautiful and long-lasting resurfaced concrete surface that will enhance the appearance and value of your property.
Tools And Materials You Will Need
Are you tired of the dull and cracked surface of your concrete driveway or patio? Resurfacing may be the solution for you. Before we dive into the tools and materials needed, let’s discuss safety precautions that should be taken when resurfacing concrete.
First and foremost, it is essential to protect yourself with proper attire. Wear a respirator mask, gloves, and eye protection to prevent inhaling dust or getting any chemicals in your eyes. Additionally, make sure the area is well ventilated as some resurfacing products can emit fumes.
When it comes to cost estimation for resurfacing concrete, it varies depending on the size of the area and type of product used. DIY resurfacing kits can range from $50 to $200 per 50-pound bag. However, keep in mind that if you are not experienced in this field, mistakes can lead to costly repairs or even replacing the entire surface.
Hiring a professional versus DIY resurfacing ultimately depends on your level of experience and confidence in completing such a project. Professionals have access to high-quality materials and have extensive knowledge in resurfacing techniques. On the other hand, DIY projects can save money but require significant time and effort while also having a higher risk of error. Consider these factors before making your decision on which route to take for your concrete resurfacing project.
Hiring A Professional Versus Diy Resurfacing
When it comes to resurfacing concrete, there are two options: hiring a professional or doing it yourself. While DIY projects can be rewarding, they come with their fair share of challenges. For one, the process of resurfacing concrete is labor-intensive and requires a certain level of skill. This means that you’ll need to invest time in research and practice before attempting the project.
Moreover, DIY resurfacing may not always be cost-effective. While it’s true that you won’t have to pay for labor costs, you’ll still need to purchase the necessary materials and tools. This can add up quickly, especially if you’re working with a large area or complex design. Additionally, mistakes made during the process can result in additional expenses for repairs or replacement materials.
On the other hand, hiring a professional concrete resurfacing company has its benefits. For one, you’ll have access to experienced professionals who have completed similar projects before. They will also have access to specialized tools and equipment that can ensure a high-quality finish. Moreover, hiring a professional can save you time and stress associated with DIY projects while providing added peace of mind knowing that the job will be done correctly.
Ultimately, whether to hire a professional or attempt DIY resurfacing depends on your budget, timeline, and skill level. While DIY projects may seem like an attractive option due to their perceived lower costs, they come with challenges that should be considered beforehand. Hiring a professional may come at an added cost but provides expert guidance and ensures quality workmanship. It’s important to weigh both options carefully before making your decision.
Conclusion
Concrete resurfacing is a task that requires proper evaluation, preparation, and execution to achieve optimal results. It involves repairing cracks and holes, cleaning the surface, applying a bonding agent, and maintaining the concrete to prevent future damage. To resurface concrete, one needs specific tools and materials that can be easily sourced from hardware stores. However, if you lack the expertise or time required for the job, it is advisable to hire a professional.
As an expert in concrete resurfacing, I understand that there are common problems such as peeling, cracking or discoloration of the surface. These can be mitigated by ensuring that your concrete is properly evaluated before resurfacing begins. Proper preparation of your surface will provide an even substrate for application resulting in a smooth finish. Regular maintenance will ensure your newly resurfaced concrete lasts longer.
In conclusion, resurfacing your concrete can transform your outdoor space into an attractive area that is durable and weather-resistant. By following proper steps during evaluation, preparation, and execution of the project you can achieve this transformation with ease. If you choose to do it yourself make sure you have all necessary tools before starting the job. Alternatively hiring a professional will save you time and stress while guaranteeing high-quality workmanship. Start today and enjoy beautiful outdoor spaces!
Image Credits
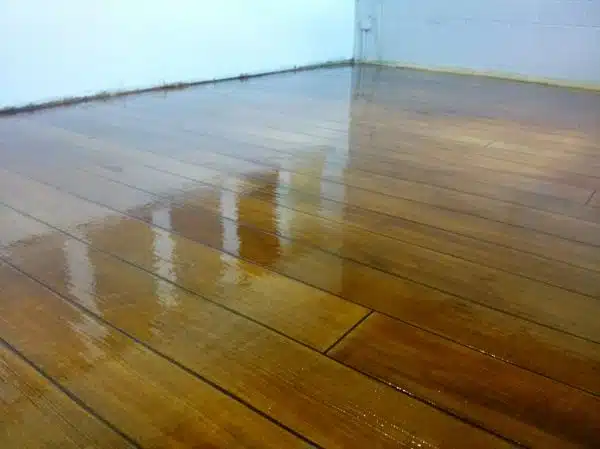
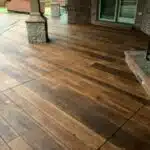
- “Concrete Resurfacing – Concrete Wood – Philadelphia TCP Training” by Decorative Concrete Kingdom (featured)

