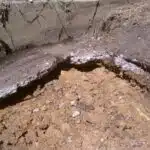
As a concrete floor repair specialist, I have seen numerous cases where small cracks in concrete floors have caused significant damage and inconvenience. These cracks can develop due to various reasons, including shrinkage, settling of the soil below the slab, or heavy loads on the surface.
Repairing small cracks in concrete floors is essential to prevent them from becoming bigger and causing more damage. In this article, we will discuss the different methods used to repair small cracks in concrete floors and provide you with step-by-step instructions on how to do it yourself. By following these instructions, you can save money and time by avoiding costly repairs in the future. So let’s dive in and learn how to repair those pesky cracks!
Identifying The Type Of Crack
Concrete floors are prone to cracks due to various reasons, including poor installation, weather changes, and heavy traffic. Identifying the type of crack is crucial in determining the appropriate repair method. There are generally two types of concrete cracks: structural and non-structural.
Structural cracks result from problems with the concrete’s foundation or load-bearing capabilities. These types of cracks can cause damage to the building and require immediate attention from a professional. Non-structural cracks, on the other hand, do not affect the integrity of the structure and are mainly cosmetic issues. They include shrinkage cracks caused by water evaporation during curing or thermal expansion/contraction due to temperature changes.
To properly identify the type of crack, it is essential to determine its cause. For instance, if a crack occurs at a joint area, it may be due to inadequate jointing or joint spacing. If it runs parallel to reinforcement steel bars, it could be indicative of overloading or insufficient reinforcing steel. Understanding what caused the crack can help determine whether it is structural or non-structural and guide you in selecting an effective repair method.
Understanding the different types of concrete cracks and their causes is vital when repairing small cracks in concrete floors. By accurately identifying what caused them, you can make informed decisions about how best to address them properly. The next step is assessing their severity before determining which repair method will work best for your situation.
Assessing The Severity Of The Crack
After identifying the type of crack, the next step is to assess its severity. This is crucial because it determines the right repair method to use. Some cracks may only need simple repairs, while others require extensive measures. As a concrete floor repair specialist, I have seen many DIY enthusiasts who assume that all cracks are the same and attempt to fix them without proper measuring techniques. This often leads to subpar results or even more damage.
Measuring techniques are essential in determining the extent of damage on your concrete floor. A professional assessment involves using specialized tools such as a moisture meter, laser level, and infrared camera to detect any underlying issues that may cause further cracking after repairs. On the other hand, DIY methods usually involve visual inspections that may miss some critical aspects of the damage. Therefore, it’s always best to seek professional help when dealing with severe or complicated cracks.
To prepare for repair, you must first clean and clear the surface area surrounding the crack thoroughly. This ensures that there are no loose debris or contaminants that may interfere with bonding during repairs. Additionally, preparing the surface area allows for better adhesion between the new material and existing concrete surfaces. The following are some preparation tips for repairing small cracks in concrete floors:
- Use a wire brush or vacuum cleaner to remove dust and debris from around the crack
- Apply a concrete cleaner to remove any grease or oil stains
- Rinse thoroughly with water and allow drying completely before proceeding with repairs
- Use a chisel and hammer to widen hairline cracks for better filling
With these preparation steps in mind, you can now proceed with repairing small cracks in your concrete floor.
Preparing The Surface For Repair
Surface preparation is crucial when it comes to repairing small cracks in concrete floors. Before beginning any repairs, the surface must be cleaned and free of debris. This includes removing any loose concrete or dust that has accumulated in the cracks. Once the surface is clean, it should be allowed to dry completely before proceeding with the repair.
To properly prepare the surface for repair, there are a few necessary tools that one should have on hand. These include a wire brush, a vacuum cleaner, and a putty knife. The wire brush is used to remove any loose concrete or debris from the crack, while the vacuum cleaner can be used to remove any remaining dust or debris. The putty knife is used to apply the repair material into the crack.
It is important to note that if the crack is wider than ¼ inch, additional steps may need to be taken to ensure proper adhesion of the repair material. This may include using a chisel and hammer to widen and deepen the crack before cleaning and filling it. By taking these necessary steps for surface preparation and having the right tools on hand, one can ensure that their concrete floor repairs will last for years to come.
Transition: Now that we have discussed how to properly prepare the surface for repairing small cracks in concrete floors, it’s important to consider choosing the right repair product for your specific needs.
Choosing The Right Repair Product
Imagine you are building a house, and the foundation is the most critical component. A solid foundation ensures that the structure will last for decades. Similarly, choosing the right repair product for small cracks in concrete floors is crucial to ensure that they remain stable and do not become larger over time.
Product comparison is essential when selecting a repair product. There are many options available in the market, each with different properties and applications. Two of the most common types of products used for repairing small cracks in concrete floors are epoxy-based products and polymer-modified cement-based products. Epoxy-based products have excellent adhesion properties and can fill even hairline cracks, while polymer-modified cement-based products have more flexibility and can withstand heavy traffic.
Expert recommendations are always beneficial when it comes to choosing the right repair product for your specific needs. Consulting with an experienced concrete floor repair specialist can help you determine which product is best suited for your application. They can also provide guidance on how to properly use the product to achieve maximum results.
Moving forward into our next section, mixing the repair product requires attention to detail and precision.
Mixing The Repair Product
Choosing the right repair product is critical to achieving a successful repair of small cracks in concrete floors. However, even with the best repair product, improper mixing techniques can result in a failed repair job. Therefore, it is essential to understand proper mixing techniques to ensure that the repair product performs as intended.
Mixing techniques vary depending on the type of repair product used. Some products require manual mixing with a trowel or putty knife, while others are designed for use with a drill and paddle mixer. Regardless of the mixing method, it is crucial to follow the manufacturer’s instructions carefully. Additionally, it is important to mix only enough material that can be applied within the recommended working time.
Alternative materials may also be used for repairing small cracks in concrete floors. For example, epoxy fillers are known for their strength and durability and are ideal for heavy traffic areas. However, they can be more challenging to work with than other types of fillers and require precise mixing techniques. On the other hand, acrylic-based sealers are easy to apply and dry quickly but may not have the same level of durability as epoxy fillers. Ultimately, choosing an alternative material will depend on various factors such as budget, location of crack, and desired outcome.
As mentioned earlier, proper mixing techniques are crucial when repairing small cracks in concrete floors. Alternative materials may offer unique advantages such as faster drying times or increased durability; however, they may require different mixing methods than traditional concrete patching products. In the next section, we will discuss how to apply the repair product correctly once it has been mixed appropriately.
Applying The Repair Product
To apply the repair product, you will need a few tools. Firstly, you’ll need a putty knife or trowel to help spread and smooth out the repair product. Secondly, gloves and safety goggles are necessary to protect your skin and eyes from the chemicals in the product. Lastly, ensure that you have adequate ventilation in the area where you’re working.
Before starting with the repair work, it’s important to take certain safety precautions. Make sure that pets and children stay away from the area while you’re working. Additionally, read all instructions on the repair product packaging thoroughly before beginning any work. Wear protective clothing such as long pants and sleeves to protect your skin from any accidental spills.
In order to apply the repair product correctly, follow these steps: Firstly, mix the repair product according to manufacturer instructions. Use a putty knife or trowel to apply an even layer of the mixture over each crack. Fill each crack until it’s slightly raised above the surface of your concrete floor. In preparation for smoothing out the surface of your concrete floor, wait for at least 24 hours before continuing with further steps.
Transition: Once you’ve applied an even layer of the mixture over each crack in your concrete floor, it’s time to start smoothing out its surface.
Smoothing The Surface
- Filling the crack is an important step in repairing small cracks in concrete floors as it provides a base for further smoothing.
- The recommended method for filling the crack is to use an epoxy filler, which provides a strong bond and is long-lasting.
- After the crack has been filled, the surface must be sanded to ensure the area is smooth and even.
- Sanding the area should be done with a rotary sander and appropriate sandpaper, making sure to evenly sand the area until the desired level of smoothness is achieved.
Filling The Crack
As a concrete floor repair specialist, I’ve noticed that many homeowners tend to overlook small cracks in their concrete floors until they become larger and more difficult to fix. Filling the crack is one of the most important steps in smoothing out the surface of a concrete floor. It’s crucial to use the right tools and avoid common mistakes when filling these cracks.
Firstly, you’ll need to gather all the necessary tools for this job, such as a chisel, hammer, wire brush, vacuum cleaner, and a caulking gun. Once you have these tools ready, begin by using the chisel and hammer to widen the crack slightly. Then, use the wire brush and vacuum cleaner to remove any debris or loose particles from within the crack. This ensures that your filler will adhere well and last longer.
One common mistake people make when filling cracks is using too much filler at once. This can cause it to overflow and create an uneven surface. Instead, apply several thin layers of filler until the crack is level with the rest of the floor. Additionally, make sure to choose a filler that matches your floor’s color for a seamless finish. By following these steps carefully and avoiding common mistakes, you’ll be able to repair small cracks in your concrete floor with ease.
Sanding The Area
Now that we’ve discussed the importance of filling cracks in concrete floors, let’s move on to the next step in smoothing out the surface: sanding the area. Sanding is crucial to ensure that the filled crack blends seamlessly with the rest of the floor. However, it’s important to use proper sanding techniques and tools to avoid damaging the surrounding area.
The tools needed for this task include a hand-held sander or sandpaper, a vacuum cleaner, and a soft-bristled brush. Begin by using the soft-bristled brush to remove any loose debris from around the filled crack. This will prevent any damage to the surrounding area during sanding. Next, use a hand-held sander or sandpaper to gently smooth out the surface of the filled crack until it is level with the rest of the floor. Be sure not to oversand as this can cause unevenness in your floor.
Proper sanding technique is essential for achieving a smooth surface on your concrete floor. Always remember to start with a coarse grit sandpaper and gradually work your way up to a finer grit until you have achieved your desired level of smoothness. By following these steps carefully and using proper tools and techniques, you can achieve professional-quality results when repairing small cracks in your concrete floor.
Allowing The Repair To Cure
After completing the repair, it is important to allow the concrete to cure properly. Curing refers to the process of keeping the concrete moist and at a consistent temperature for a certain period of time. This allows the concrete to reach its maximum strength and durability potential.
Tips for faster curing include covering the repaired area with plastic sheeting or a tarp to retain moisture and heat. It is also important to keep the area well-ventilated, as proper ventilation helps prevent mold growth and ensures that moisture evaporates evenly from all parts of the surface.
Proper ventilation during curing is crucial, as it helps prevent various problems such as cracking, scaling, and discoloration. In addition, it helps ensure that any chemicals used in the repair process do not linger in the air or become trapped in the concrete. By following these tips, you can ensure that your repaired concrete floor cures quickly and effectively.
To prepare for sanding the surface after curing takes place, there are several precautions that need to be taken beforehand.
Sanding The Surface
As a concrete floor repair specialist, surface preparation is an essential step in repairing small cracks in concrete floors. Before sanding the surface of the floor, it should be thoroughly cleaned to remove any dirt or debris that may affect the sander’s efficiency. This ensures a smooth and even finish.
When it comes to sanding techniques, there are several options available depending on the severity of the crack and the type of flooring. For minor cracks, a handheld sander with fine-grit sandpaper can be used to smooth out any imperfections. However, for larger cracks, a floor buffer with diamond grinding pads may be necessary to level the surface properly.
Proper surface preparation and sanding techniques are crucial for achieving a seamless finish when repairing small cracks in concrete floors. Once the sanding process is complete, it is important to clean the surface thoroughly before moving on to the next step – cleaning the surface.
Cleaning The Surface
- In order to repair a small crack in a concrete floor, it is important to first remove any dirt and debris that has collected in the area.
- Care should be taken to ensure the area is properly cleared before any repair work is undertaken.
- The next step is to prepare the area for repair, including the removal of any loose material and the application of a sealant or primer.
- Once the area is prepared, it is essential to follow the specific instructions of the product being used to ensure the repair is correctly completed.
Removing Dirt
Cleaning the surface of a concrete floor is an essential step in repairing small cracks. Before any repair work can be done, the surface must be free of dirt and debris to ensure proper adhesion of the repair materials. Removing dirt requires specific cleaning techniques and equipment to achieve optimal results.
To begin with, it’s essential to remove any loose debris or dust from the surface using a stiff-bristled broom or vacuum cleaner. This will prevent the debris from being pushed into the cracks during cleaning. Afterward, use a pressure washer or garden hose with a high-pressure nozzle to blast away any remaining dirt or grime. For stubborn stains, consider using a chemical cleaner that is specifically designed for concrete surfaces.
When selecting cleaning equipment, it’s crucial to choose tools that are safe for use on concrete floors and won’t cause damage. Avoid using acidic cleaners as they can eat away at the surface of the concrete and cause more harm than good. Instead, opt for mild alkaline cleaners that are gentle enough not to damage your floor but strong enough to remove dirt effectively.
In conclusion, removing dirt from a concrete floor is an important step in repairing small cracks. Using appropriate cleaning techniques and equipment can ensure that your floor is free from debris so that you can proceed with confidence when repairing minor damages. By taking care during this process, you’ll improve the longevity of your repairs while maintaining your floor’s overall appearance and functionality.
Preparing The Area
After thoroughly cleaning the surface of a concrete floor, the next essential step in repairing small cracks is to prepare the area. This process involves clearing away any obstacles or debris that may hinder the repair work. It’s crucial to ensure that the surrounding environment is safe and secure for both workers and equipment.
When preparing the area, it’s vital to use appropriate safety measures to avoid accidents or injuries. Depending on the location of the crack, you may need to cordon off the area using caution tape or barricades. Additionally, ensure that there is adequate lighting to prevent any tripping hazards during repairs. It’s also important to have suitable cleaning tools nearby in case any spills or debris occur during repair work.
Before beginning any repair work, it’s essential to check for any underlying issues that may have caused the crack in the first place. Identifying and addressing these root causes can prevent further damage and ensure that future repairs are effective and long-lasting. By taking these necessary precautions when preparing the area, you can ensure a safe and successful repair job that will restore your concrete floor’s appearance and functionality.
Sealing The Surface
After cleaning the surface of the concrete floor, the next step is to seal it to prevent further damage. Sealing techniques vary depending on the severity of the cracks. For small cracks, a simple concrete patching compound can be used to fill in the gaps and make the surface level again. The compound is applied using a trowel or putty knife and smoothed out until there are no more air pockets.
For larger cracks, a more extensive sealing process may be necessary. This involves using an epoxy resin or polyurethane sealant that is injected into the crack and left to dry before sanding down any excess material. These types of sealants are also effective at preventing water from seeping into the concrete and causing further damage.
Preventive measures can also be taken to avoid future cracks in concrete floors. One way is to add steel reinforcement bars during construction to strengthen the floor’s structure. Another way is to maintain proper subfloor support by ensuring that it is level and free of debris that can cause uneven settling over time. Additionally, regular cleaning and maintenance will help prevent dirt and debris from accumulating on the surface and potentially causing damage.
To prevent future cracks in your concrete floor, it’s essential to take preventive measures such as reinforcing with steel bars, maintaining proper subfloor support, and regularly cleaning and maintaining the surface. By following these guidelines, you can extend your floor’s lifespan while saving money on expensive repairs down the road.
Preventing Future Cracks
Studies have shown that small cracks in concrete floors can lead to major structural issues if left unaddressed. As a concrete floor repair specialist, it is important to not only fix the current issue but also take preventive measures to ensure long-term solutions. By doing so, you can save your clients from costly repairs down the line and give them peace of mind.
One effective way to prevent future cracks is by reinforcing the concrete with fiber mesh or rebar. These materials add strength and stability to the floor, making it more resistant to cracking under pressure. Additionally, proper installation and curing techniques can reduce the likelihood of future cracks forming. It’s important for clients to understand that prevention is key when it comes to maintaining their concrete floors.
Another way to protect against future damage is by applying a sealer or coating to the surface of the concrete. These products act as a barrier against moisture, chemicals, and other elements that can weaken the structure over time. Regular maintenance of these coatings can prolong their lifespan and minimize the need for repairs in the future.
By taking these preventive measures, you can help your clients avoid costly repairs down the line and ensure long-term solutions for their concrete floors. However, if cracks do appear or if there are other issues with their flooring, it may be necessary to hire a professional concrete repair specialist for more extensive repairs or replacements.
Hiring A Professional Concrete Repair Specialist
Now that we have discussed ways to prevent future cracks, it is time to consider hiring a professional concrete repair specialist for any existing cracks. While there are benefits to repairing small cracks in concrete floors yourself, such as cost savings and the satisfaction of completing the job on your own, it is important to weigh the potential risks and costs before making a decision.
One benefit of hiring a professional is their expertise and experience in identifying the root cause of the crack and providing a long-lasting solution. They have access to specialized equipment and materials that are not readily available for DIY repairs. Additionally, they can offer warranties or guarantees on their workmanship which gives you peace of mind knowing that your investment is protected.
However, it is also important to consider the costs associated with hiring a professional. The cost can vary depending on factors such as the extent of damage, location, availability of materials, and labor costs. It is recommended to obtain multiple quotes from different specialists before making a decision. This will give you an idea of what is reasonable for your specific situation and help you find the right specialist for your needs.
Common Mistakes to Avoid: In order to ensure that you get the best results from your concrete floor repair project, there are some common mistakes that should be avoided. These include using improper techniques or materials, neglecting necessary prep work before beginning repairs, underestimating the scope of work required, and failing to properly maintain or protect repaired areas after completion. By avoiding these mistakes and finding the right specialist for your needs, you can enjoy a durable and aesthetically pleasing concrete floor for years to come.
Common Mistakes To Avoid
A concrete floor is like a sturdy foundation that provides support for heavy loads. It is designed to withstand the test of time and endure extreme weather conditions. However, just like any other foundation, it can develop small cracks over time that need to be repaired before they worsen. As a concrete floor repair specialist, I have seen many common mistakes that people make when repairing small cracks in their concrete floors.
One common mistake is lack of preparation. Before starting any repair work on a concrete floor, it is essential to clean the surface thoroughly and remove all dirt and debris. Failure to do so can result in a poor bond between the new patching material and the existing concrete surface, leading to further problems down the line.
Another common mistake is improper mixing of patching materials. It is crucial to follow the manufacturer’s instructions carefully when mixing patching materials as even a small error can affect the final outcome of your repair work. Overmixing or undermixing can lead to weak spots in your repaired area and may cause further damage in the future.
To avoid these common mistakes, it’s essential to take your time and follow proper procedures when repairing small cracks in your concrete floors. With proper preparation and careful mixing of patching materials, you can ensure that your repairs will last for years to come. However, if you do encounter any issues during the repair process, don’t worry; there are troubleshooting tips available that can help you get back on track quickly and easily.
Troubleshooting Tips
One of the common problems that homeowners face is small cracks in their concrete floors. Though these cracks may seem like a minor issue, they can lead to severe structural damage if left unaddressed. When it comes to repairing small cracks in concrete floors, homeowners have two options – DIY repair or professional repair.
DIY repair of small cracks in concrete floors can be done using a variety of methods such as injecting epoxy or polyurethane foam into the crack, filling the crack with grout or cement, or applying a concrete patching compound. While DIY repairs are relatively cheaper than hiring a professional, they come with their own set of risks. Inexperienced homeowners may not be able to identify underlying structural issues that may be causing the cracks. Additionally, improper application of repair materials can cause further damage to the floor and compromise its structural integrity.
Professional repair of small cracks in concrete floors involves identifying and addressing underlying structural issues before commencing with repairs. Professionals use specialized equipment and techniques to ensure that repairs are done correctly and that the floor’s structural integrity is preserved. Although more expensive than DIY repairs, professional repairs offer long-lasting solutions that prevent recurrent cracking and minimize future maintenance costs.
In conclusion, while DIY repair of small cracks in concrete floors can save you money upfront, it comes with significant risks if not done correctly. On the other hand, professional repairs offer a more reliable and long-lasting solution but come at a higher cost. It is important to weigh these options carefully before deciding which approach to take for your specific situation.
Conclusion
In conclusion, repairing small cracks in concrete floors requires a thorough understanding of the type and severity of the crack, as well as careful preparation and selection of the appropriate repair product. For those who are not experienced in this field, hiring a professional concrete repair specialist is highly recommended to ensure that the job is done properly and effectively.
As a concrete floor repair specialist, I have seen numerous cases where homeowners attempt to fix cracks on their own with little success. One particular client had attempted to use a generic repair product on a crack in their basement floor. However, due to improper mixing and application, the product did not set correctly and ultimately failed to fix the issue.
To avoid such mistakes, it is important to follow proper techniques and guidelines when repairing small cracks in concrete floors. With the right tools and knowledge, these repairs can be completed successfully and prevent future damage. Remember that just like any other structure, your concrete floor needs regular maintenance and care to last for many years to come.
Image Credits
- “* Cracked Cement *” by pareeerica (featured)


