Concrete steps are an essential part of any building structure as they provide access and safety to the occupants. However, over time, these stairs can become cracked, chipped, or damaged due to various reasons such as weathering, heavy traffic, or structural problems. Repairing concrete steps is crucial to maintain the integrity and safety of the building while enhancing its curb appeal. As a concrete repair technician/specialist, I have seen various cases of damaged concrete stairs and learned effective ways to repair them.
Repairing concrete steps requires proper techniques and tools that are specific to each case. It is crucial to identify the root cause of the damage and assess its severity before proceeding with any repair work. This article will provide step-by-step instructions on how to repair concrete steps using various methods such as patching, resurfacing, or replacing the entire staircase. By following these guidelines, you can ensure that your repaired concrete steps will be safe, durable, and aesthetically pleasing for years to come.
Identifying The Root Cause Of Damage
Concrete steps can be a durable and reliable addition to any property. However, over time, they may develop cracks and other forms of damage that require repair. Before repairing concrete steps, it is essential to first identify the root cause of the damage. Moisture infiltration and heavy traffic are two common causes of concrete step damage.
Moisture infiltration occurs when water seeps into the concrete, causing it to expand and contract as it freezes and thaws. This can lead to cracking and crumbling of the concrete surface. Heavy traffic is another common cause of concrete step damage. As people walk up and down the steps, they put pressure on the surface, causing it to crack or break.
Preventative measures can help reduce the risk of moisture infiltration and heavy traffic damage to concrete steps. One effective measure is waterproofing. This involves applying a sealant or coating to the surface of the steps to prevent water from penetrating into the concrete. Additionally, using slip-resistant materials on the surface can help reduce wear and tear caused by heavy foot traffic. By taking these preventative measures, property owners can extend the lifespan of their concrete steps and reduce repair costs in the long run.
Understanding what causes damage is crucial before attempting any repairs on concrete steps. After identifying whether moisture infiltration or heavy traffic is responsible for your particular case, you will then need to assess how severe this damage has become before proceeding with any repairs or replacements necessary for your property’s safety and longevity.
Assessing The Severity Of The Damage
Concrete steps are often subjected to wear and tear and may eventually begin to show signs of damage. Like any other structure, concrete steps have a lifespan, which can be affected by various factors such as weather, usage, and quality of installation. As a concrete repair technician/specialist, it is imperative to assess the severity of the damage before embarking on any repairs.
Assessing Damage: Repair vs Replace When assessing the extent of damage on concrete steps, consider whether repair or replacement is necessary. Small cracks or chips may require simple repairs using patching compounds or sealants. On the other hand, severe damage such as extensive cracking or crumbling may necessitate complete replacement. Repairing extensively damaged concrete steps may only offer temporary solutions that could lead to more significant problems in the future.
Cost of Concrete Step Repairs As a concrete repair technician/specialist, it is essential to consider the cost implications involved in repairing or replacing damaged concrete steps. While repairing small cracks and chips may seem like an inexpensive option compared to replacing them entirely, extensive repairs could end up costing more than replacement costs in some cases. However, complete replacement can be costly too and should only be considered if necessary.
Transition: Before gathering your tools and materials for repairing your damaged concrete step(s), it is vital first to identify what type of repair you will need based on the extent of damage present.
Gathering The Necessary Tools And Materials
- It is important to ensure that the appropriate tools are gathered before attempting any concrete repair. These tools may include a hammer, chisel, drill, saw, sandpaper, and safety equipment.
- The materials needed for concrete repair may include a concrete mix, gravel, reinforcing bars, and sealant.
- It is important to ensure that the correct type and amount of materials is gathered to ensure that the repair is completed correctly.
- To ensure the best outcome, it is important to practice safe working habits throughout the entire repair process.
Gathering Tools
Tool organization is key when it comes to repairing concrete steps. As a concrete repair technician, I always make sure to have all the necessary tools before starting any repair job. This ensures that the repair process goes smoothly and efficiently. It’s important to have a designated area for tool storage so that tools are easily accessible and organized.
Budgeting for materials is another important factor when it comes to repairing concrete steps. It’s crucial to determine the amount of material needed based on the size of the damaged area. Overestimating or underestimating can lead to wastage of materials or an incomplete repair job, respectively. Keeping track of expenses and pricing different materials from different suppliers can help in budgeting and choosing the most suitable one.
In summary, being well-organized with tools and budgeting for materials are essential aspects of repairing concrete steps. By having a designated tool storage area and keeping track of expenses, concrete repair technicians can ensure that they are efficient and effective in their work while staying within budget constraints.
Gather Materials
Gathering the necessary tools and materials is crucial for any concrete repair job. In addition to having well-organized tool storage, technicians must also gather the appropriate materials needed for the repair process. These materials may include concrete mix, bonding agents, reinforcing steel bars, and sealants. It’s important to purchase high-quality materials from reputable suppliers to ensure the longevity and effectiveness of the repair.
One key factor in gathering materials is determining the amount needed for a specific repair job. This can be done by measuring the damaged area and calculating the required quantity based on product specifications. Additionally, different types of repairs may require different materials or application methods, so it’s important to assess each situation individually before purchasing any materials. It’s also helpful to have some extra material on hand in case of unforeseen circumstances.
When selecting where to purchase materials, it’s important to consider factors such as price, delivery options, and product quality. Some suppliers may offer bulk discounts or special deals that can help reduce overall costs. Online ordering options can also be convenient for those who need to quickly source specific items or quantities. Ultimately, choosing reliable suppliers with a good reputation in the industry can help ensure that high-quality materials are being used for every repair job.
Safety Precautions To Take Before Starting
When it comes to repairing concrete steps, safety should always be the top priority. Before starting any repair work, it is crucial to take the necessary precautions to protect yourself from harm. This includes wearing the appropriate protective gear such as safety goggles, gloves, and a dust mask.
Protective gear is important because concrete contains harmful chemicals that can cause serious health problems if inhaled or touched. In addition, concrete dust can irritate your eyes and skin. By wearing protective gear, you can prevent injuries and ensure that you are safe while working on the project.
Another important step before starting any repair work on concrete steps is preparing the surrounding area. This involves removing any loose debris or objects that may obstruct your work area. Additionally, it is advisable to cover nearby plants or structures with plastic sheets to protect them from damage caused by dust or debris.
By taking these safety precautions before starting your repair work, you can ensure that your project will be completed safely and effectively. The next step in repairing concrete steps is preparing the surface for repair. This involves cleaning and prepping the damaged area so that it is ready for patching or resurfacing.
Preparing The Surface For Repair
To ensure that the concrete repair will last, it is crucial to prepare the surface properly. Before starting any repairs, it is important to note that failing to prepare the surface can lead to more severe and costly damage in the future. In fact, research has shown that over 80% of all concrete repairs fail due to improper surface preparation.
The first step in preparing the surface for repair is to remove any loose or damaged concrete. This can be done using a chisel and hammer or a masonry saw. After removing any loose material, ensure that there are no large cracks or holes in the surface. If there are any large cracks or holes, fill them with fresh concrete before proceeding with the repair.
Mixing concrete correctly is also crucial for ensuring a strong repair. The ratio of water to cement must be precise, as too much water can weaken the mixture and cause cracking later on. Additionally, when filling in large cracks, it may be necessary to use a bonding agent to ensure that the new concrete adheres properly to the old.
In order for your concrete steps to look like new again, patching small cracks and chips is an essential step in repairing them. This process involves filling in small imperfections in the surface with an epoxy or polyurethane-based product. The key here is attention to detail – carefully fill each crack or chip until it’s level with surrounding areas. Once all repairs have been made, allow enough time for curing before using your newly repaired steps again.
Patching Small Cracks And Chips
When it comes to repairing concrete steps, one of the most common issues is small cracks and chips. Fortunately, these types of damage can be easily fixed with the right tools and techniques. Repairing cracks involves filling them in with a patching compound that matches the color and texture of the surrounding concrete. Filling chips is a similar process, but requires a slightly different approach.
To repair cracks, start by cleaning the damaged area thoroughly with a wire brush and water. Once the surface is clean and dry, apply a concrete patching compound using a trowel or putty knife. Smooth out the surface of the patch so that it blends in seamlessly with the surrounding concrete. Allow the compound to dry completely before sanding any rough spots or applying a sealant.
Filling chips follows a similar process, but involves mixing in some sand or gravel with the patching compound to create a thicker consistency that can fill in deeper holes. It’s important to use an appropriate amount of sand or gravel depending on how deep and wide the chip is. Otherwise, you may end up with an uneven surface that will need additional repairs down the line.
- Don’t let small damage go unchecked – it can quickly turn into bigger problems.
- Taking care of your concrete steps now will save you time and money in repairs later.
- A little bit of maintenance goes a long way in keeping your home safe for you and your loved ones.
- Remember that even small repairs can improve curb appeal and increase property value.
With these simple tips for repairing cracks and filling chips, you’ll be able to restore your concrete steps to their original condition quickly and easily. However, if your steps have more extensive damage or require resurfacing, it’s best to call in a professional contractor who has experience working with concrete surfaces. In our next section, we’ll discuss how resurfacing can give your stairs an entirely new look without having to replace them entirely.
Resurfacing The Steps
- Proper preparation is essential when resurfacing concrete steps, which includes removing all existing sealers, and repairing any cracks or spalling.
- A primer coat should be applied to the clean and dry surface, which helps to bond the resurfacer to the substrate.
- The resurfacer should be mixed per manufacturer instructions, and applied in multiple coats for best results.
- Care should be taken to not exceed the maximum thickness when applying the resurfacer, as this can lead to cracking.
- The resurfacer should be allowed to dry thoroughly between coats, and the entire surface treated uniformly.
- For a smooth finish, the surface should be troweled after the last coat of resurfacer has been applied.
Preparation
Before resurfacing your concrete steps, it is necessary to prepare the surface properly. This step ensures that the new layer of concrete will adhere correctly, resulting in a durable and long-lasting repair. Cleaning techniques are essential to remove any debris or loose materials from the surface. Pressure washing is an effective way to rid your steps of dirt, grime, and moss buildup. Additionally, you should use a wire brush to remove any stubborn stains or paint residue.
Weather considerations are also crucial when preparing your concrete steps for repair. You want to ensure that the weather conditions are optimal for applying new concrete. Avoid working on rainy or humid days as moisture can interfere with the resurfacing process and cause it to fail prematurely. Conversely, hot and dry weather can cause the new layer of concrete to dry too quickly, leading to cracking or shrinkage.
Finally, it is important always to wear protective gear such as gloves and safety goggles when preparing your stairs for repair. This will protect you from harmful chemicals used in cleaning solutions and prevent injuries from flying debris during pressure washing. Taking appropriate safety measures will make the preparation process more manageable and guarantee a successful repair job in the end.
Priming
In resurfacing concrete steps, proper preparation is vital to ensure that the repair job is effective and long-lasting. One of the essential aspects of preparation is priming. Primers are coatings applied to the surface to improve adhesion and create a strong bond between the old and new layers of concrete. The best priming practices involve selecting the appropriate primer type for your specific repair needs.
There are several types of primers available for concrete repairs, including epoxy, acrylic, and polyurethane primers. Epoxy primers are ideal for surfaces exposed to heavy traffic or chemicals as they provide excellent resistance against abrasion and corrosion. Acrylic primers are perfect for outdoor applications as they offer superior weather resistance and UV stability. Polyurethane primers are suitable for both indoor and outdoor use as they have high flexibility, which helps prevent cracking.
Before applying any primer, it is essential to thoroughly clean and prepare the surface according to manufacturer instructions. This step ensures that the primer adheres correctly and penetrates deeply into the substrate, creating a strong bond between the old and new concrete layers. Following proper priming practices will help ensure a successful concrete repair job that lasts for years to come.
Applying Resurfacer
After properly preparing the surface through cleaning and priming, the next crucial step in resurfacing concrete steps is applying the resurfacer. Resurfacers are designed to provide a new layer of concrete over an existing surface, providing a smooth, durable, and aesthetically pleasing finish. Before applying the resurfacer, it is essential to follow the manufacturer’s mixing instructions carefully. Improper mixing can result in an inconsistent texture and weak spots that may lead to cracking or chipping.
Once the resurfacer is mixed correctly, apply it to the surface using a trowel or squeegee. It is essential to work quickly as resurfacers have a limited working time before they start to harden. When applying multiple coats, wait until each coat dries before adding another layer. Finishing techniques can be used to achieve various textures and patterns on the surface of the concrete steps. For instance, broom finishing creates a rough texture that provides excellent slip resistance for outdoor surfaces.
In summary, applying a resurfacer is one of the final steps in repairing and rejuvenating old concrete steps. Proper mixing and application techniques are critical in ensuring that the repair job lasts for years to come. With finishing techniques like broom finishing or stamping, one can achieve an aesthetically pleasing appearance while providing functional benefits like slip resistance.
Replacing Damaged Treads
While resurfacing concrete steps is a viable solution to improve their appearance, it may not always address underlying structural issues. In cases where the damage is severe or widespread, tread replacement alternatives should be considered. This involves removing damaged treads and replacing them with new ones.
One cost-effective solution for damaged steps is to use precast concrete treads instead of pouring new concrete on-site. Precast treads are manufactured in controlled environments, ensuring consistent quality and durability. They also come in a range of sizes and finishes to match the existing steps. Another option is to install composite treads made from recycled materials, which can be less expensive than traditional concrete.
When replacing damaged treads, it’s important to reinforce weak spots in the underlying structure to prevent future damage. This may involve adding additional support or repairing cracks and other damage in the surrounding areas. It’s also crucial to ensure proper drainage to prevent water buildup that can lead to further deterioration over time. By taking these measures, you can extend the life of your repaired concrete steps and ensure they remain safe and functional for years to come.
Reinforcing Weak Spots
Concrete steps are known for their durability and longevity, but even the strongest material can develop weak spots over time. If you notice any cracks or signs of wear on your concrete steps, it’s important to address them before they become a safety hazard. Reinforcing weak spots is an effective way to strengthen the structure of your concrete steps and prevent further damage.
One method for reinforcing weak spots in concrete steps is using mesh reinforcement. This involves placing a layer of wire mesh over the damaged area and securing it with fasteners. The mesh acts as a support system for the concrete, distributing weight evenly and reducing stress on any one point. It also helps to prevent cracks from spreading or forming around the repaired area.
Another option for reinforcing weak spots is applying epoxy coating. Epoxy is a strong adhesive that can be used to fill in small cracks or gaps in the concrete surface. It bonds tightly with the existing material, creating a seamless repair that resists moisture and other environmental factors. Additionally, epoxy coatings can be tinted or colored to match the surrounding concrete, giving your repair job a professional finish.
By reinforcing weak spots in your concrete steps, you’re taking proactive measures to ensure their longevity and safety. Whether you choose mesh reinforcement or epoxy coating (or both), these methods will help fortify your steps against future wear and tear. In the next section, we’ll discuss how to apply a concrete sealer to further protect your newly reinforced stairs from damage caused by weathering and everyday use.
Applying A Concrete Sealer
When choosing a sealer to use for concrete steps, it is important to understand the type of concrete and the environment the sealer will be applied in. Before applying a sealer, the concrete must be properly prepared by cleaning and etching the surface. After preparation, the sealer should be applied in thin, even coats with a paint roller, brush, or airless sprayer. Make sure to allow for sufficient dry time between coats. Depending on the type of sealer used, a second or third layer may be necessary for optimal protection. Applying a sealer to concrete steps is an important step in preserving and protecting the concrete from the elements.
Choosing A Sealer
When it comes to repairing concrete steps, applying a sealer is a crucial step to ensure longevity and durability. Sealing your concrete steps can provide numerous benefits, including protection against water damage, stains, and harsh weather conditions. Additionally, sealing your concrete steps can enhance their appearance and prevent the accumulation of dirt and debris. However, choosing the right sealer for your concrete steps is essential to achieve optimal results.
There are various types of sealers available for repairing concrete steps, each with its unique properties and advantages. For instance, acrylic sealers are an excellent option for enhancing the color of your concrete while providing adequate protection against water damage. Epoxy sealers offer exceptional durability and resistance to chemicals and abrasions. On the other hand, polyurethane sealers offer superior protection against UV rays and harsh weather conditions while also providing a glossy finish.
When selecting a sealer for your concrete steps, it’s crucial to consider the specific needs of your project. Factors such as location, exposure to sunlight or moisture, and foot traffic should be taken into account when choosing a sealer. Additionally, it’s recommended that you consult with a professional technician or specialist to determine the most suitable type of sealer for your specific situation.
In conclusion, choosing the right sealer is vital when repairing concrete steps to ensure optimal protection and durability. By understanding the different types of sealers available and considering factors such as location and exposure to elements, you can choose a sealer that meets your specific needs effectively. Consulting with a professional technician will provide invaluable guidance in determining which type of sealer will best suit your project requirements.
Preparing The Surface
Preparing the surface is a critical step in applying a concrete sealer. Before sealing your concrete steps, it’s essential to ensure that the surface is clean, dry, and free from any contaminants or debris. This will help the sealer adhere properly and provide optimal protection for your concrete steps. One common preparation technique is sandblasting, which involves using high-pressure air to blast abrasive materials onto the surface of the concrete. This method removes any existing coatings or stains on the surface and creates a rough texture that promotes adhesion of the sealer.
Another crucial aspect of preparing the surface is filling any cracks or holes in your concrete steps. Epoxy filler is an excellent option for repairing these types of damages as it provides superior durability, strength, and resistance to chemicals and abrasions. Applying epoxy filler requires careful attention to detail, as it must be applied evenly and allowed to dry completely before sealing.
After sandblasting and filling in any cracks or holes, it’s time to clean the surface thoroughly using a pressure washer or other cleaning techniques. It’s crucial to remove all dirt, dust, and debris from the surface before applying a sealer to ensure proper adhesion. Once you’ve completed all preparation techniques, you’re ready to apply your chosen sealer effectively.
In conclusion, preparing the surface is a vital step in applying a concrete sealer effectively. Sandblasting techniques can help remove existing coatings or stains while creating a rough texture for optimal adhesion. Filling cracks or holes with epoxy filler provides additional durability and strength. Finally, cleaning the surface thoroughly ensures proper adhesion before sealing your concrete steps for ultimate protection against harsh weather conditions and other elements.
Applying The Sealer
Once the preparation of the surface is completed, it’s time to apply the concrete sealer. There are different types of sealers available in the market, each with its own set of advantages and disadvantages. The two primary categories of sealers are penetrating and topical. Penetrating sealers penetrate into the pores of the concrete, while topical sealers sit on top of the surface.
Penetrating sealers provide a natural finish that doesn’t change the appearance of your concrete steps. They also offer excellent protection against water and salt damage. However, they are not as effective against oil stains and can take longer to dry than topical sealers. Topical sealers, on the other hand, provide a glossy or matte finish that enhances the appearance of your concrete steps. They also protect against oil stains but may require more frequent reapplication than penetrating sealers.
To apply a sealer effectively, use a sprayer or roller to ensure even coverage over the entire surface area. It’s crucial to follow manufacturer instructions for application and drying times carefully. Applying too little sealer can leave areas unprotected, while applying too much can cause bubbling or cracking later on. With proper application and maintenance, your sealed concrete steps will last longer and look better than ever before!
Painting Or Staining The Steps
A well-maintained set of concrete steps can last for decades, but that doesn’t mean they have to look the same for all that time. Painting or staining concrete steps is a great way to give them a fresh look, but it’s important to understand the pros and cons of each option before you begin.
One of the main benefits of painting concrete steps is that it offers a wider range of color options compared to staining. Paints are also thicker than stains, so they can cover up any minor imperfections in the surface of your steps. However, keep in mind that paint can chip or peel over time, especially if the surface isn’t properly prepared beforehand. Additionally, painted surfaces may become slippery when wet, which could be hazardous if your steps are located outside.
On the other hand, staining concrete steps allows you to enhance the natural beauty of the material by bringing out its unique texture and color variations. Stains penetrate deeply into the concrete surface and provide long-lasting color that won’t fade or peel away like paint. However, stains offer a more limited range of colors than paints and may not be able to hide as many imperfections on your steps’ surface. Keep in mind that some types of stains require a sealant to protect against moisture damage and UV rays from sunlight.
When considering painting or staining your concrete steps, it’s important to choose high-quality products designed specifically for this purpose. Look for paints and stains labeled as suitable for use on concrete surfaces outdoors. Some top-rated brands include Behr Premium Concrete & Masonry Bonding Primer and Sherwin-Williams H&C Concrete Stain Solid Color Water-Based. By selecting quality products and following proper application techniques, you’ll ensure a durable finish that will stand up to foot traffic over time.
Moving forward with maintaining repaired concrete steps requires attention to detail just as much as repairing them does. It should come as no surprise that maintenance is key in keeping your steps looking as good as new. In the next section, we’ll discuss some tips on how to keep your newly painted or stained concrete steps in great condition for years to come.
Maintaining Repaired Concrete Steps
Now that you have painted or stained your concrete steps, it’s time to focus on maintaining them. Proper maintenance is crucial to ensure that your repaired steps last for years to come. Here are some tips for preventing future damage and the best products for maintaining repaired concrete steps.
Firstly, it is important to keep your concrete steps clean and free of debris. Regular sweeping and occasional pressure washing can help remove dirt, leaves, and other debris that can cause staining and accelerate wear and tear. Additionally, be mindful of the types of shoes you wear on your steps. High heels and cleats can damage the surface of the concrete, while heavy boots can cause cracks.
Secondly, applying a sealer to your repaired concrete steps can help protect them from water damage, freeze-thaw cycles, and chemicals such as de-icing salts. There are various sealers available in the market such as acrylic-based sealers, penetrating sealers or epoxy coatings depending upon the type of finish you want. It is important to select a sealer that is appropriate for your specific climate conditions.
Lastly, using an anti-slip agent on your repaired concrete steps will help prevent slips and falls especially during wet or icy conditions. Anti-slip agents like grip tape or slip-resistant coatings can be applied to provide extra traction without compromising the look of your steps. By following these tips and using the best products for maintaining repaired concrete steps you can avoid costly repairs in the future.
Moving forward with repairing your concrete stairs requires careful consideration of every detail. Even with proper application techniques there are still common mistakes that should be avoided when repairing damaged stairs.
Common Mistakes To Avoid
Common mistakes that people make when repairing concrete steps include improper mixing of materials and inadequate curing. Both of these issues can lead to weak and brittle concrete that won’t stand up to regular use. It’s important to follow the manufacturer’s instructions for mixing, including the ratios of water to cement and sand, as well as the recommended curing time.
Another common mistake is failing to properly clean and prime the surface before beginning repairs. Concrete needs to be free of dirt, debris, and other contaminants in order for repair materials to bond effectively. A primer should also be applied to help create a strong bond between the old and new concrete.
Proper cleaning and priming are essential steps in any concrete repair project, but they’re just part of a larger process. If you’re not confident in your ability to mix materials correctly or cure the concrete properly, it’s always best to call in a professional. They have the experience and knowledge necessary to get the job done right, ensuring that your repaired concrete steps will be safe and durable for years to come.
Transition: While some repairs are easy enough for a DIY approach, others require specialized skills and equipment. When facing more complex problems with your concrete steps, it’s important to know when it’s time to call a professional for assistance.
When To Call A Professional
Common Mistakes to Avoid when repairing concrete steps include improper mixing of concrete, inadequate surface preparation, and insufficient curing time. However, despite your best efforts, some repairs may still require the expertise of a professional. Knowing when to hire a professional is crucial in ensuring that your concrete steps are repaired correctly and safely.
One of the biggest DIY risks when repairing concrete steps is the lack of experience in identifying underlying issues that could cause further damage down the line. A professional can assess these potential problems and offer solutions that prevent future repairs or replacements. Additionally, professionals have access to specialized equipment and materials that may not be available to the average homeowner.
When it comes to hiring a professional for concrete step repair, consider their experience, qualifications, and insurance coverage. Make sure they are licensed to perform work in your area and have a proven track record of quality workmanship. Remember that investing in a professional repair job now can save you money in the long run by preventing future repairs or replacements.
Next up: Frequently Asked Questions about Concrete Step Repair .
Frequently Asked Questions
Now that we have discussed how to repair concrete steps, let’s address some frequently asked questions. One common question is about the cost estimation of the repair process. The cost of repairing concrete steps depends on various factors such as the extent of damage, size of the area, and materials used. It could range from a few hundred dollars for minor repairs to several thousand dollars for major reconstruction.
Another question that arises often is whether one should opt for DIY repairs or hire a professional for the job. While DIY repairs may seem like a cost-effective solution, it is essential to remember that concrete repair requires specialized skills and tools. Without proper knowledge and equipment, there is a risk of causing further damage to the steps or even injuring oneself. It is always recommended to seek professional help for any significant concrete repair work.
In conclusion, repairing concrete steps can be a challenging task but seeking professional help can ensure a more efficient and safer solution. Cost estimation varies based on many factors, so it is advisable to get an estimate from an expert before making any decisions. Always prioritize safety over cost savings when dealing with any home improvement project involving concrete repairs.
Conclusion
Concrete steps are an essential part of any building’s exterior, providing access and safety to the inhabitants. However, over time, they can suffer from various types of damage that require repair. As a concrete repair technician/specialist, it is crucial to identify the root cause of the problem and assess its severity before proceeding with the repair work.
Gathering the necessary tools and materials and taking adequate safety precautions is also essential to ensure a successful repair job. Preparing the surface for repair and maintaining the repaired concrete steps are equally critical in extending their lifespan. Avoiding common mistakes during the repair process is vital to prevent further damage or safety risks. Knowing when to call a professional can save time, money, and effort in more complicated cases.
In conclusion, repairing concrete steps requires a systematic approach that involves identifying the root cause of damage, assessing its severity, gathering necessary tools and materials, taking safety precautions, preparing surfaces for repairs, maintaining repaired steps and avoiding common mistakes. A well-executed repair job can extend the life of concrete steps while ensuring safety for all those who use them. Remember to always follow best practices and seek professional help when needed for optimal results.
Image Credits
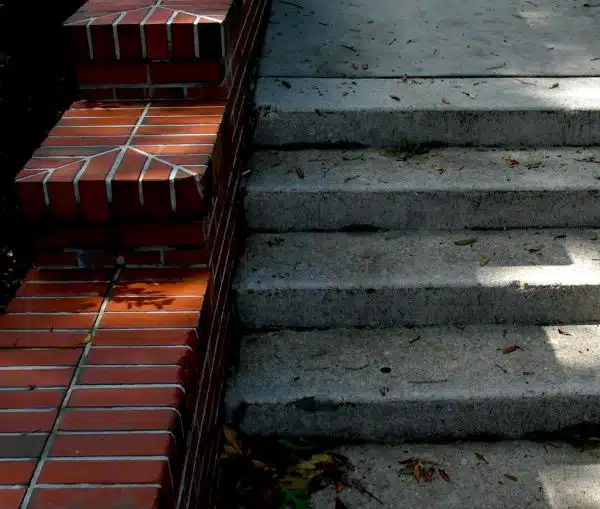
- “UF Norman Stairs Concrete Brick Wall Steps” by cdsessums (featured)

