As a concrete slab laying expert, I have encountered many individuals who desire to learn how to lay a concrete slab. It is a task that requires patience, skill, and attention to detail. A well-laid concrete slab can provide a solid foundation for any structure and can last for decades if laid correctly.
In this article, I will be sharing my expertise on how to lay a concrete slab. From preparing the site to finishing the surface, every step is crucial in ensuring a successful project. Whether you are a DIY enthusiast or a professional contractor, this guide will provide you with valuable insights and practical tips that will help you achieve the best results possible. So let’s get started!
Understanding The Basics Of Concrete Slab Laying
Concrete slab laying is an essential component of construction, providing a durable and stable foundation for buildings. One of the benefits of using concrete slabs is their longevity, as they can last for decades without requiring major repairs or replacements. Additionally, concrete is resistant to fire, pests, and moisture damage, making it a reliable choice for homes and commercial structures alike.
However, laying a concrete slab requires careful planning and execution to ensure its structural integrity. One common mistake that should be avoided is neglecting to properly prepare the site before pouring the concrete. This includes leveling the ground and ensuring proper drainage to prevent water buildup that can weaken the foundation over time. Additionally, it’s important to remove any debris or vegetation from the site that could interfere with the slab’s stability.
Another mistake to avoid is underestimating the amount of materials needed for the project. This can lead to delays and additional expenses if more supplies are required mid-project. It’s crucial to accurately calculate how much concrete will be needed based on the dimensions of the area where it will be poured. Consulting with experts in concrete slab laying can help ensure that all necessary materials are acquired before beginning work on the project.
To prepare a site for a concrete slab, several steps must be taken to ensure its success.
Preparing The Site For A Concrete Slab
Before you can lay a concrete slab, it’s crucial to prepare the site properly. Think of it like preparing a canvas before painting a masterpiece. Choosing the location and preparing the subgrade are two essential steps that will set the foundation for your project.
Choosing the location involves finding an area that is level and free from any obstructions such as roots or debris. Once you have found the ideal spot, it’s time to start preparing the subgrade. This step involves removing any topsoil or vegetation in the area to get down to a solid base.
Now that you have cleared away any potential obstacles, it’s time to create a stable surface for your concrete slab. Here are three things to consider when preparing your subgrade:
- Compact the soil: Use a plate compactor or similar tool to compact the soil firmly.
- Add gravel: Lay down a layer of crushed gravel and use another compactor to create an even more stable surface.
- Install reinforcements: For larger slabs, add reinforcement mesh or rebar to provide extra support.
By taking these steps, you’ll ensure that your site is ready for pouring your concrete slab. In our next section, we’ll discuss choosing the right tools and materials needed for this project.
Choosing The Right Tools And Materials
Selecting the right tools for laying a concrete slab is key for a successful result. It is important to ensure that the tools are suited for the job and are of good quality. Gathering the necessary materials is also essential, as the wrong type of materials can compromise the integrity of the slab. Quality materials such as concrete, reinforcing mesh, sand, and gravel are essential for a successful slab.
Selecting The Right Tools
When it comes to laying a concrete slab, selecting the right tools is crucial for achieving a quality finish. The comparison of tools and their functions is an essential aspect that every expert must consider. For instance, using a hand trowel instead of a bull float may cause the concrete to dry unevenly, resulting in cracks and poor aesthetic appeal. Therefore, it is necessary to understand each tool’s purpose and use them appropriately.
Another common tool mistake that can lead to poor results is failing to clean the tools after use. This mistake often leads to rusting or corrosion of metallic equipment, compromising their durability and effectiveness. Additionally, not storing the tools properly may also lead to damage or loss, which calls for extra costs in replacements or repairs. Thus, ensuring that all equipment is cleaned and stored correctly will guarantee their longevity and reliability.
In conclusion, choosing the right tools when laying a concrete slab is vital for achieving a high-quality finish. A proper understanding of each tool’s function and appropriate usage will prevent common mistakes that may result in faulty outcomes. Moreover, maintaining the tools’ cleanliness and storage will ensure their durability and effectiveness for future projects.
Gathering The Necessary Materials
In addition to selecting the right tools, gathering the necessary materials is also crucial for achieving a high-quality concrete slab. One important factor to consider is the concrete slab thickness, which will determine the strength and durability of the final product. The thickness requirement varies depending on the intended use, with thicker slabs being necessary for heavy-duty applications such as parking lots or industrial flooring. Therefore, it is essential to consult with experts and follow industry standards when determining the appropriate thickness for a particular project.
Another critical aspect of material selection is ensuring quality. Using substandard or low-quality materials may result in poor outcomes such as cracking or crumbling of the slab, which can be costly to repair in the long run. It is advisable to source materials from reputable suppliers who guarantee quality and consistency. Additionally, testing samples of the materials before use can help identify any potential issues and prevent problems during construction.
In summary, gathering the necessary materials is a crucial step that requires careful consideration when laying a concrete slab. Factors such as concrete slab thickness and material quality play significant roles in achieving a durable and aesthetically pleasing final product. By consulting with experts, following industry standards, and sourcing quality materials from reputable suppliers, one can ensure successful outcomes for any concrete slab project.
Calculating The Amount Of Concrete Needed
Before you begin laying a concrete slab, it is important to calculate the amount of concrete needed. The first step in this process is determining the desired thickness of the slab. This will depend on the intended use of the space and any weight-bearing requirements. For example, a patio may only require a 4-inch thick slab, while a driveway may need to be at least 6 inches thick.
Once you have determined the desired thickness of your concrete slab, you can use this information to estimate the amount of concrete needed. This can be done by calculating the volume of the space and multiplying it by the thickness of the slab. Keep in mind that concrete is typically sold by cubic yards, so your final calculation will need to be converted accordingly.
Cost estimation is also an important factor when calculating how much concrete is needed for your project. In addition to considering the cost per cubic yard of concrete, you should also factor in delivery fees and any additional costs associated with pouring and finishing the slab. It is always a good idea to obtain multiple quotes from different suppliers to ensure that you are getting a fair price.
Transitioning into the subsequent section about mixing the concrete, it is important to note that once you have determined how much concrete is needed for your project and obtained all necessary supplies, mixing the concrete correctly is key to achieving optimal results.
Mixing The Concrete
Calculating the amount of concrete needed is just one step in laying a concrete slab. The next critical step is to prepare the mix, and this involves understanding different concrete mixing methods. Mixing concrete requires precision, and there are different methods for achieving a consistent mix. The most common approach is to use a cement mixer or wheelbarrow. In either case, it’s essential to ensure that all ingredients are thoroughly mixed.
One common issue when mixing concrete is maintaining the consistency of the mix. If the mixture is too wet or dry, it can compromise the strength of the final product. To troubleshoot mix consistency, you can adjust the water ratio or add more sand and aggregates as needed. It’s critical to maintain a consistent batch size and avoid overmixing as well.
To lay a perfect slab, you need to be meticulous about every detail of your preparation process. Here are some tips for mixing concrete effectively:
- Use high-quality materials: Lower-grade materials will result in weaker slabs.
- Measure ingredients carefully: Precise measurements ensure an accurate mix ratio.
- Mix small batches at a time: This ensures consistency throughout your project.
- Clean your tools right away: Dried concrete makes it challenging to clean tools properly.
With these tips in mind, you can prepare your ideal concrete mixture for laying your slab with confidence. Troubleshooting any issues with consistency will ensure that your final product meets safety standards and lasts for years to come. Now that you have prepared your perfect mixture let us move on to pouring the concrete onto the prepared site.
Pouring The Concrete
Once you have prepared the ground and set up your forms, it is time to pour the concrete. Before you begin, make sure that everything you need is close at hand. This includes tools such as shovels and trowels, a wheelbarrow, and any additional materials such as reinforcing mesh.
To pour the concrete, start at one corner of the slab and work your way across. Using a wheelbarrow, pour the concrete into the formwork until it reaches around 50mm below the top of the forms. Once this is done, use a shovel to spread out the concrete evenly throughout the formwork. Then use a screed board or straight edge to level off the surface of your slab.
Using forms is important when pouring your concrete because it will help ensure an even thickness throughout your slab, which will help prevent cracking over time. Once you have poured your concrete, smoothing its surface with a trowel or float can also help ensure that it sets evenly and dries smoothly without any bumps or lumps. Additionally, adding texture to your concrete can help improve its grip and prevent falls in wet conditions.
In order to avoid cracks in your newly poured slab, be sure to take extra care when pouring near edges or joints in the formwork – these areas are particularly vulnerable to cracking due to changes in temperature or moisture levels. Adding small amounts of water over time can also help keep your concrete from drying out too quickly and cracking prematurely. Next up we’ll discuss how spreading the concrete evenly is essential for achieving optimal results on your finished product.
Spreading The Concrete Evenly
- Preparing the surface requires adequate planning and the correct materials, including a layer of gravel and a moisture barrier.
- The concrete should be of the correct consistency, with a shovel test being used to assess the mix.
- The concrete should be applied to the surface evenly, using a concrete float to smooth the surface.
- Finishing touches can be added afterwards, such as using a broom to create a pattern or a edger to create a neat border.
Preparing The Surface
Achieving a level surface is crucial when laying a concrete slab. Surface leveling ensures that the finished product is not only aesthetically pleasing but also safe to walk on. Therefore, before pouring the concrete mixture, it is essential to level out the ground that will serve as the base for the slab. This can be achieved by using a straight board or a long level and scraping off any high spots.
Another vital step in preparing the surface for laying a concrete slab is to install moisture barriers. These barriers help prevent water from seeping through the soil and reaching the foundation of your structure, which could lead to structural damage over time. Moisture barriers are typically made of plastic sheets and should be installed after leveling out the surface but before adding any reinforcement.
It’s important to note that all surfaces must be properly prepared before spreading concrete evenly. Any bumps or dips in the ground can affect how well your concrete sets and ultimately compromise its strength. By leveling out the surface and installing moisture barriers, you not only ensure a safe and durable slab but also avoid costly repairs down the line.
Applying The Concrete
Once the surface has been properly prepared, it’s time to apply the concrete mixture. This is a crucial step that requires precision and expertise to ensure a smooth and even finish. Concrete finishing techniques are essential in achieving the desired result, as they help remove any excess water from the surface and prevent cracking.
To begin, pour the concrete mixture onto the prepared surface and spread it evenly using a rake or shovel. Be sure to work quickly as concrete sets rapidly, making it difficult to adjust once it begins to harden. Once you’ve spread the mixture evenly, use a screed board or bull float to level out any bumps or dips.
After leveling out the surface, you can add decorative touches such as colored pigments or stamped patterns to enhance its appearance. However, it’s important to note that these additions may require additional steps such as applying sealers or coatings for added protection against wear and tear.
Troubleshooting concrete cracks is also an important aspect of applying concrete. While proper preparation can help prevent cracks from forming, sometimes they can still occur due to factors such as weather changes or improper curing techniques. If cracks do appear, be sure to address them promptly by filling them with patching materials and sealing them with appropriate products. By taking these measures, you can ensure that your finished product not only looks great but also stands up against time and wear.
Using Reinforcing Materials
After ensuring that the concrete has been spread evenly, it is now time to consider using reinforcing materials. Reinforcement helps to increase the strength and durability of a concrete slab. There are two main types of reinforcement that can be used in concrete slab laying: steel rebar and wire mesh.
Steel rebar is a popular choice for reinforcing concrete slabs. It is made from high-quality steel and comes in various sizes and lengths. Steel rebar is placed strategically within the concrete to provide additional support and stability. Wire mesh, on the other hand, is made from thin, flexible wires that are woven together to form a mesh-like structure. This type of reinforcement is usually used for smaller projects.
The benefits of using reinforcement in concrete slab laying cannot be overstated. Reinforcement increases the overall strength and durability of the slab, making it more resistant to cracking and damage over time. It also helps to distribute weight more evenly across the surface of the slab, reducing the risk of structural failure or collapse. With these benefits in mind, it is clear that incorporating reinforcement into your concrete slab laying process is crucial for achieving optimal results.
Now that we have discussed the different types of reinforcement and its benefits in concrete slab laying, it’s time to move on to adding control joints. Control joints help prevent cracks from forming in your slab by providing a designated area for them to occur. This technique involves cutting straight lines into the surface of the fresh concrete before it dries completely. By doing this, you create natural points at which cracks can form without affecting the structural integrity of your slab. Properly placed control joints can greatly increase the lifespan and durability of your concrete slab project.
Adding Control Joints
- Control joints should be placed at regular intervals throughout a concrete slab, typically at 4-6 feet apart.
- Placement of control joints should be considered carefully as these are used to reduce the risk of cracking within the slab.
- Control joints are typically cut into the concrete slab using a saw before the slab is cured.
- Cutting control joints should be done after the concrete has been poured and allowed to dry for a few hours, but before it has been fully cured.
Placement Of Control Joints
When it comes to laying a concrete slab, the placement of control joints is an essential step to ensure the longevity and structural integrity of the slab. Control joints are designed to manage the natural shrinkage and expansion that occurs as concrete cures, preventing unsightly cracks and potential damage. It is crucial to understand the importance of spacing, depth, and sealing of control joints to avoid common mistakes that can compromise the slab’s durability.
Proper spacing between control joints is critical in preventing cracks from forming due to stress buildup caused by temperature changes or soil movement. The industry standard recommends spacing control joints at intervals no greater than 24 times the slab thickness. Additionally, it’s important to cut control joints deep enough so that they extend through the entire depth of the slab. This ensures that any movement in one section of the slab will not affect adjacent sections.
Another common mistake when placing control joints is failing to properly seal them after cutting. Sealing helps prevent debris and moisture from entering the joint and causing damage over time. Proper sealing materials should be used according to manufacturer specifications for optimal performance. Neglecting this step can result in water infiltration, which can lead to erosion, weakening of subgrade support, and ultimately cause failure.
In conclusion, understanding how to properly place control joints when laying a concrete slab is crucial in ensuring its long-term durability. By paying attention to factors such as spacing distance, depth, and sealing materials, you can prevent common mistakes that could otherwise compromise your project’s success. With careful planning before pouring your concrete mix and attention during placement of control joints after curing begins; you can rest assured that you have taken all necessary steps towards achieving a strong structure for years to come.
Cutting Control Joints
When it comes to adding control joints to a concrete slab, cutting them is an essential step. Control joints are designed to manage the natural shrinkage and expansion that occurs as concrete cures, preventing unsightly cracks and potential damage. Properly placed control joints can significantly improve the longevity and structural integrity of your slab. In this article, we will discuss the benefits of control joints and best practices for cutting them.
One of the main benefits of adding control joints is that they reduce the likelihood of unsightly cracks forming on your concrete surface. Cutting control joints at the right intervals allows for natural movement in the slab without causing any significant damage or stress buildup. This can help ensure a long-lasting and visually appealing finish for your project.
When it comes to cutting control joints, there are some best practices to follow. Firstly, it’s important to cut control joints deep enough so that they extend through the entire depth of the slab. This ensures that any movement in one section of the slab will not affect adjacent sections. Additionally, proper spacing between control joints is critical in preventing cracks from forming due to stress buildup caused by temperature changes or soil movement. The industry standard recommends spacing control joints at intervals no greater than 24 times the slab thickness.
By following these best practices when cutting control joints, you can ensure that your concrete slab will be able to withstand natural movements without compromising its structural integrity. Proper placement of control joints is crucial in ensuring its long-term durability and visual appeal while reducing potential repair costs over time.
Finishing The Surface Of The Concrete
Once the concrete has been poured and leveled, the next step is to finish the surface. This involves ensuring that the surface is smooth and even, with no bumps or rough spots. One way to achieve this is by using a bull float to smooth out any high spots and fill in any low spots. It’s important to work quickly, as the concrete will begin to set within 30 minutes of being poured.
After smoothing out the surface, it’s time to add texture. This can be done using a variety of tools, such as a broom or trowel. The texture helps to prevent slips and falls by providing traction for shoes or tires. Additionally, it can add visual interest to an otherwise plain surface. Once the texture has been added, it’s important to let the concrete dry completely before applying sealant.
Applying sealant is an important final step in finishing the surface of a concrete slab. The sealant helps to protect against moisture damage and staining from spills or other contaminants. It also gives the surface a glossy sheen that can be visually appealing. There are a variety of sealants available on the market, so it’s important to choose one that is appropriate for your specific needs and application method.
Transition: Now that we have discussed how to finish the surface of a concrete slab by adding texture and applying sealant, it’s time to move on to the next step: curing the concrete.
Curing The Concrete
- Moisture retention is an important aspect of curing concrete slabs, as it helps to preserve the strength and durability of the material.
- Optimal curing temperatures vary depending on the climate, but generally range between 50 and 70 degrees Fahrenheit.
- Proper curing methods involve covering the concrete with a curing compound, plastic sheeting, or damp burlap to keep it from drying out too quickly.
- Curing the concrete slab should begin as soon as possible after it has been poured and finished.
- The curing time is typically between three and seven days, depending on the size and thickness of the slab.
- It is important to monitor the slab during the curing process to ensure that the curing methods are effective and that the slab reaches the desired strength.
Moisture Retention
Moisture retention is a crucial factor in the curing of concrete slabs. The hydration process of curing requires moisture, which means that the concrete must retain enough water to complete this process successfully. However, excessive moisture can lead to problems such as cracking and deformation. To prevent this, experts recommend using a moisture barrier or vapor retarder to control the amount of moisture in the slab.
A moisture barrier is a layer of material that prevents water from seeping into the concrete from below. It is typically made of plastic or rubber and is placed on top of the ground before pouring the concrete. A vapor retarder, on the other hand, is a layer of material that controls the rate at which moisture evaporates from the concrete’s surface. This layer is usually applied after pouring the concrete and can be made from materials such as polyethylene or asphalt.
Both moisture barriers and vapor retarders are essential for ensuring proper curing of a concrete slab. Without them, excess water can cause damage to the slab’s integrity over time. By controlling moisture levels throughout the curing process, these barriers help ensure that your concrete slab will remain strong and durable for years to come.
Curing Temperatures
Curing techniques play a crucial role in ensuring the strength and durability of concrete slabs. Proper curing is achieved when optimal temperatures are maintained during the process. Temperature control is essential because it affects the rate at which hydration occurs, which determines the strength and durability of the final product. As a concrete slab laying expert, I highly recommend controlling temperatures during curing to achieve maximum strength and durability.
The optimal temperature for curing concrete is between 50°F – 75°F (10°C – 24°C). Temperatures higher or lower than this range can negatively affect the curing process. High temperatures can cause rapid evaporation of moisture, leading to cracking and reduced strength. On the other hand, low temperatures can slow down hydration, affecting the final strength of the slab. Therefore, it is vital to maintain consistent temperatures within this optimal range throughout the curing process.
Maintaining optimal curing temperatures requires proper planning and execution. The use of insulation blankets or heated enclosures may be necessary in cold weather conditions to maintain warm temperatures, while shading and misting techniques may be required in hot weather conditions to prevent excessive heat buildup. By following these recommendations, you can ensure that your concrete slab achieves maximum strength and durability through proper temperature control during curing.
Curing Methods
Moisture management and temperature control are crucial factors affecting the curing process of concrete slabs. Without proper curing, the strength and durability of the final product can be compromised. As a concrete slab laying expert, I highly recommend using effective curing methods to ensure optimal moisture management and temperature control.
Curing methods vary depending on various factors such as weather conditions, project size, and budget constraints. The most common methods include ponding, wet covering, membrane curing, and spray-on curing compounds. Ponding involves creating a shallow pool of water on the surface of the newly poured slab to prevent evaporation. Wet covering involves covering the slab with wet burlap or other fabrics to maintain moisture levels. Membrane curing involves applying a liquid membrane to seal in moisture while spray-on curing compounds involve spraying an evaporative retarder on the surface to slow down moisture loss.
Choosing the right method for your project requires careful consideration of several factors such as environmental conditions, project timeline, and budget constraints. However, regardless of which method you choose, ensuring proper moisture management and temperature control during curing is essential for achieving maximum strength and durability in your concrete slab.
Protecting The Concrete From Weather Conditions
Let’s face it; weather conditions can be unpredictable and can cause significant damage to a concrete slab. Therefore, it is crucial to protect the slab from any adverse weather elements that might be encountered during and after construction. The use of covering techniques such as tarps or plastic sheets can help shield the concrete surface from rain, snow, or excessive sunlight.
Moreover, protective coatings such as sealers or curing compounds are also essential in safeguarding the concrete slab against harsh weather conditions. These coatings not only help prevent water penetration but also enhance the durability of the concrete surface. Applying these coatings immediately after pouring and finishing the concrete is necessary for optimal results.
In summary, protecting a concrete slab from weather conditions involves using covering techniques and applying protective coatings such as sealers or curing compounds. By taking these measures, you can ensure that your project will withstand even the toughest weather conditions. In the next section, we will discuss how to clean up after completing your project without leaving behind any debris or messes that could pose a hazard to others.
Cleaning Up After The Project
After protecting the concrete from weather conditions, it is important to clean up the site once the project is complete. Post cleanup tips include removing all tools and equipment from the area, sweeping up any debris or excess concrete, and disposing of any waste materials properly. It is also essential to ensure that all leftover concrete is disposed of in accordance with local regulations.
To effectively clean up after a concrete slab laying project, there are certain pieces of equipment that are necessary. This includes brooms, shovels, wheelbarrows, and a hose for washing down the site. Additionally, protective gear such as gloves and goggles should be worn during cleanup to prevent injury.
Overall, proper post-project cleanup ensures a safe and efficient work environment, as well as preventing any environmental hazards or fines for improper disposal of waste materials. By taking the time to clean up thoroughly after a project, you will be able to inspect your finished concrete slab with pride and confidence.
With the site cleaned up and all tools put away, it’s time to inspect the finished concrete slab. This involves checking for any cracks or imperfections in the surface and ensuring that it meets all required specifications. By thoroughly inspecting your workmanship, you can ensure that your customer will be satisfied with their new slab for years to come.
Inspecting The Finished Concrete Slab
It is estimated that approximately 10% of concrete slabs fail due to cracking. This can be the result of a variety of factors including improper mixing, inadequate curing time, or heavy loads. As such, it is important to inspect the finished concrete slab for any signs of cracking before moving forward with any subsequent steps.
One key aspect of inspecting the finished concrete slab is checking for cracks. Even small cracks can lead to larger issues down the line if left unchecked. It is recommended to use a magnifying glass to check for hairline fractures that may not be visible to the naked eye. In addition, a hammer or mallet can be used to gently tap on the surface of the slab; if any hollow sounds are heard, this could indicate an underlying crack.
Another important factor in inspecting the finished concrete slab is testing the surface hardness. This can be done using a simple scratch test; if a key or coin cannot leave a scratch on the surface, then it should be hard enough for most applications. However, if scratches are easily visible, this may indicate weakness in the structure and further investigation may be necessary.
Moving forward with troubleshooting common issues, it is important to address any cracks or weaknesses in the finished concrete slab before attempting any further work on top of it. One common issue that can arise is uneven settling due to poor soil conditions; this can cause cracks and other structural issues over time. By identifying and addressing these issues early on, you can ensure that your concrete slab will last for years to come without requiring costly repairs or replacement.
Troubleshooting Common Issues
Identifying cracks in a concrete slab is a common issue that can occur due to several reasons. The most prevalent reason for this problem is the poor preparation of the sub-base before pouring the concrete. When the sub-base isn’t compacted properly, it results in voids beneath the slab. These voids can cause the slab to settle unevenly over time, eventually leading to cracks.
To deal with cracks, you need to identify their severity first. Hairline cracks are usually not a concern and can be left as they are. However, if you notice wider or deeper cracks, it’s essential to address them immediately. You can use epoxy fillers or cement-based patching compounds to fill these gaps and prevent further damage.
Another common issue while laying a concrete slab is dealing with uneven surfaces. If your sub-base isn’t leveled correctly or contains high and low spots, it can make your concrete surface uneven too. To level an uneven surface, you can use self-leveling compounds or add more concrete mix over the low areas. In case of high spots, grind them down using an angle grinder with a diamond blade.
Numeric list:
Here are four tips for dealing with common issues when laying a concrete slab:
- Always ensure proper preparation of sub-base before pouring the concrete.
- Identify and address any cracks immediately before they worsen.
- Use epoxy fillers or cement-based patching compounds to fix wider or deeper cracks.
- Level out any uneven surfaces using self-leveling compounds or adding more concrete mix where needed.
Remember that by following these tips and taking action promptly when issues arise while laying your concrete slab, you’ll be able to prevent future problems and enjoy a smooth surface for years to come!
Conclusion
Laying a concrete slab is a fundamental skill for any construction project. From driveways to patios, this technique can be used in various applications. Understanding the basics of laying a concrete slab is crucial for success. Preparing the site and choosing the right tools and materials are essential steps in ensuring that the end result is sturdy and durable.
Calculating the amount of concrete needed, mixing it correctly, protecting it from weather conditions, and cleaning up after the project are equally important to achieve excellent results. Inspecting the finished product and troubleshooting common issues can ensure customer satisfaction. Remember, laying a concrete slab may seem daunting at first, but with practice and knowledge, anyone can become an expert in this field.
In conclusion, laying a concrete slab requires attention to detail and careful planning. The beauty of this technique lies in its versatility as it can be applied to various projects. Whether you are starting out or have been doing this for years, there is always room for improvement. By following these guidelines and taking precautions such as wearing protective gear, you can produce quality workmanship that will endure over time. So go ahead and put your skills to the test! You’ll be amazed at how rewarding it can be when you get it right – trust me on this one!
Image Credits
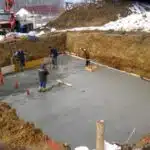
- “Strip footing and concrete slab laying – small garage” by DrJohnBullas (featured)

