Curtains are an essential part of any home decor, providing privacy, insulation, and a touch of elegance to any room. However, purchasing curtains from the store can be costly, and finding ones that match your style preference can be challenging. Making your own curtains not only allows you to save money but also gives you full control over the design and material choices.
In this article, we will guide you through the process of making simple lined curtains that will add beauty and functionality to any room in your home. Whether you’re an experienced seamstress or a beginner looking to improve your skills, this step-by-step tutorial will provide you with all the necessary information needed to create stunning curtains tailored to your needs and preferences. So grab your measuring tape, fabric scissors and let’s get started on creating beautiful curtains that will transform your living space.
Choosing The Right Fabric
Selecting the right fabric for your lined curtains is an essential step in ensuring a successful outcome. When choosing colors, it’s important to consider the overall theme of your room. Neutral shades like white, beige, and gray are versatile and complement any design style. If you’re looking to add some color to your space, choose a hue that complements your existing decor or go bold with a statement color.
Pattern selection is another critical factor when selecting curtain fabric. The pattern you choose should be complementary to the rest of your room’s decor while adding interest without overwhelming the space. Subtle patterns like stripes or polka dots provide visual interest without being too busy, while larger prints like florals or geometrics can make a dramatic statement.
Take the time to consider all options before making a final decision on fabric choices. Keep in mind that curtains not only serve as functional window treatments but also contribute significantly to the overall aesthetic of your home. Once you’ve chosen your fabric, it’s time to move on to measuring your windows for the perfect fit.
Measuring Your Windows
Window measurements are the first step in making lined curtains. It is important to take accurate measurements to ensure that your curtains fit perfectly on your windows. Start by measuring the width of your window frame, from one side to the other. Then, measure the height of your window frame from top to bottom.
Once you have measured your window frame, it’s time to determine the placement of your curtain rod. The curtain rod should be mounted at least 4 inches above the top of the window frame, and extend beyond each side by at least a few inches, depending on how wide you want your curtains to be. Take note of these measurements as they will be necessary when calculating fabric yardage.
It is recommended that you measure each window individually, as windows can vary in size even within the same room. Make sure to use a tape measure for accuracy and write down all measurements in a notebook or on a piece of paper for future reference. With these measurements in hand, you can move on to calculating fabric yardage needed for your lined curtains.
- Measure width and height of window frame
- Determine placement of curtain rod
- Measure each window individually
- Use tape measure for accuracy and write down all measurements – Add extra length for hemming, headers, and bottom weights if desired
Calculating Fabric Yardage
Moving on from measuring your windows, let’s dive into the exciting world of fabric options for your simple lined curtains. When choosing a fabric, consider the weight and texture you desire. A heavier weight fabric will provide more insulation and light-blocking properties, while a lighter weight fabric will create a breezier atmosphere in your space. As for texture, options range from smooth to nubby and everything in between. Keep in mind that patterned fabrics may require more yardage to match up the pattern properly.
Calculating yardage for patterned fabric can be tricky but fear not! Before heading to the store, measure the length of your window from the curtain rod to where you want the curtains to fall. Add 4 inches for hemming at both ends and double it for each panel you plan on making. Next, determine how many widths of fabric you need per panel by dividing the width of your chosen fabric by the width of your window (multiply by 1.5 if you want fuller curtains). Round up to ensure enough coverage and add an additional half-width if necessary to properly match up any patterns.
Now that you have determined your yardage needs, it’s time to move on to cutting your fabric. Remember to always prewash and dry your chosen material before cutting to avoid any shrinking or warping after construction. Use a rotary cutter or sharp scissors and a straight edge for accuracy when cutting long lengths of fabric. With these tips in mind, you are ready to move on with confidence towards creating beautiful simple lined curtains for any room in your home!
Cutting Your Fabric
When it comes to making simple lined curtains, choosing the right fabric is key. There are various types of fabrics that you can use for your curtains, including cotton, linen, silk, or even polyester. The type of fabric you choose will depend on your specific needs and preferences. For instance, if you want a lightweight and breathable fabric, then cotton or linen may be ideal. On the other hand, if you prefer a more luxurious look and feel, then silk or velvet may be better suited.
Once you have selected your preferred fabric type, the next step is to cut it to size. This may seem like a daunting task at first, but with the right cutting techniques, it can be quite straightforward. Before you begin cutting your fabric, ensure that it is clean and free of any wrinkles or creases. You can do this by ironing it beforehand or washing it if necessary.
To cut your fabric accurately, measure the length and width of your window and add an additional 4 inches to each measurement to account for seam allowances and hems. Afterward, mark these measurements onto your fabric using a measuring tape and chalk or pins before cutting along the lines carefully. Remember that precision is essential when cutting your fabric as any mistakes made during this stage can affect the overall appearance of your curtains.
Now that you have successfully cut your main fabric to size for your simple lined curtains project let’s move on to preparing your lining fabric in the subsequent section topic.
Preparing Your Lining Fabric
Preparing Your Lining Fabric:
Your lining fabric is the backbone of your curtains, just like a strong foundation is the backbone of a house. It provides the necessary support to your curtains, keeping them in place and maintaining their shape. Therefore, it is essential to choose a good quality lining fabric that complements your main fabric. Check the weight and texture of your main fabric before selecting a lining material. A lightweight cotton or polyester lining will work best with sheer fabrics, while heavier fabrics like velvet may require a thicker lining for added structure.
Once you have chosen your lining fabric, it’s time to prepare it for use. Before cutting out the panels, make sure to iron out any wrinkles or creases using these ironing tips: Set your iron on medium heat and avoid using steam as it can cause shrinkage or distortion. Place a pressing cloth over the fabric to protect it from heat damage. Use gentle sweeping motions with the iron until all wrinkles are gone.
Fabric weight plays an important role in how well your curtains will hang once they are completed. If your main fabric is heavy, opt for a lightweight lining fabric to prevent bulkiness at the seams. On the other hand, if your main fabric is lightweight, choose a slightly heavier lining material that will provide some insulation and help block out light. Remember, proper preparation of your lining fabric will lead to stunning curtains that hang beautifully and last for years to come.
Next up: sewing the side seams – this step requires precision and attention to detail so make sure you’re ready!
Sewing The Side Seams
After you have prepared your lining fabric, it’s time to move on to sewing the side seams. Pressing seams is an important step that should not be skipped in making simple lined curtains. This ensures that your seams are crisp and flat, giving a professional finish to your curtains.
Using a serger is also helpful in achieving a neat and durable seam. A serger trims the edges of the fabric while sewing, preventing fraying and unraveling. If you don’t have a serger, you can use a zigzag stitch on a regular sewing machine to finish the edges. Make sure to align the raw edges of your lining fabric with the main fabric before stitching them together.
In summary, pressing seams and using a serger are essential steps in creating well-made simple lined curtains. By taking these extra steps, you can ensure that your curtains will not only look great but also last longer. Next up is sewing the bottom hem – an important finishing touch that adds weight and helps keep your curtains in place.
Sewing The Bottom Hem
Before proceeding with the next section, it is important to ensure that the bottom hem of your lined curtains is neat and tidy. This can be achieved through a simple ironing technique that will help you achieve perfectly straight lines. Begin by placing your curtains on an ironing board with the lining facing upwards. Use a steam iron to press down on the bottom edge of the fabric, making sure that there are no creases or wrinkles.
Once you have completed this step, it is time to hem the bottom edge of your lined curtains using hemming tools. These tools are designed to make the process easier and more efficient. Begin by folding up the raw edge of the fabric towards the lining side by approximately 1 inch. Then, fold it over once more by another 1 inch, ensuring that both folds are even and straight.
To secure your hem in place, use a sewing machine or hand-stitching techniques to create a straight seam along the folded edge. Once you have finished sewing, trim away any excess fabric and give your curtains one final press using your ironing technique. With this step successfully completed, you can now move on to attaching the lining to the curtain fabric seamlessly without compromising on appearance or functionality.
Attaching The Lining To The Curtain Fabric
- When preparing the fabric for attaching the lining to the curtain fabric, it is important to ensure that the curtain fabric is ironed flat and all the seams are securely pinned together.
- The lining should be prepared by pressing it flat with an iron and then basting it along the top and sides of the fabric.
- Sewing the lining to the curtain fabric can be done either by hand or machine depending on the type of fabric being used.
- After attaching the lining to the curtain fabric, the edges should be finished by either hemming or binding for a professional-looking result.
Preparing The Fabric
When preparing the fabric for lined curtains, it is important to first choose the appropriate pattern or color scheme that will complement the space in which the curtains will be hung. Consider factors such as wall color, furniture style, and overall aesthetic when choosing a fabric. Once a fabric has been chosen, it is necessary to hem all four sides of the curtain panels before attaching the lining.
When hemming the fabric, use a technique that will create a clean and professional look. One method is to fold over the edge of the fabric twice and sew along the fold line. Another option is to use bias tape or ribbon to cover the raw edge before sewing in place. Whichever technique you choose, make sure to measure and mark each panel carefully to ensure consistency across all panels.
After hemming, it’s time to attach the lining to the curtain fabric. This can be done by sewing them together with right sides facing each other and leaving an opening for turning right side out. Then, press flat and topstitch around all four edges for a finished look that will also help keep light from shining through any gaps between panels. With these steps completed, your lined curtains are now ready for hanging and serving as both functional window treatments and stylish accents in your home decor.
Sewing The Lining
With the fabric and lining prepped, it’s time to sew them together. Choosing the right thread is crucial for achieving a professional finish. A thread color that matches the fabric as closely as possible will blend in seamlessly, while a contrasting color can add a decorative touch. Hemming corners can be a tricky task, but taking your time and following the hemming technique used for the sides should result in crisp, clean corners.
When attaching the lining to the curtain fabric, start by laying them with right sides facing each other and pinning along all four edges. Leave an opening at one end for turning right side out. Once you have sewn around all four edges, turn the curtain right side out through the opening and press flat. Take care to ensure that no part of the lining is visible from the front of the curtain.
Finally, topstitching around all four edges will give your curtains a finished look while also helping to prevent light from shining through any gaps between panels. To achieve even stitches, use a sewing machine with a straight stitch setting or hand-sew using small running stitches. With these steps completed, your lined curtains are now ready for hanging and adding both style and function to your home decor.
Sewing The Top Hem
The next step in making simple lined curtains is to sew the top hem. This is crucial because it provides a sturdy foundation for hanging the curtains. You want to make sure that your hem is straight and even so that your curtains hang nicely.
To begin, fold down the top of your curtain panel about 1 inch and press with an iron. Then, fold down another inch and press again. Pin in place and sew along the bottom edge of the fold, creating a straight line of stitches across the entire width of your panel.
When sewing your top hem, you can use different types of stitches depending on your preference. A simple straight stitch will do just fine, but you can also use a decorative stitch if you want to add some flair to your curtains. Additionally, there are different pleat styles you can create when hanging your curtains, so keep this in mind as you sew your top hem.
Creating The Pleats
After sewing the top hem of your lined curtains, it’s time to create neat pleats. Pleats not only add a decorative touch but also help the curtains hang nicely and stay in place. There are different pleating styles to choose from, including pinch pleats, goblet pleats, and pencil pleats.
Pinch pleats are the most popular type of curtain pleat and consist of three folds pinched together at the top. Goblet pleats have a more formal look with a rounded shape at the top that resembles a wine glass. Pencil pleats are smaller and tighter than pinch pleats, creating a more casual look.
To create your desired pleating style, measure out equal spaces between each fold and mark them with pins. Then, carefully fold and sew along these marks to secure the pleats in place. Once you’ve finished creating the pleats, iron them flat to ensure they look crisp and neat.
- Achieving perfectly aligned folds can be satisfying
- The right choice of fabric can complement any room décor
- Custom-sized curtains can save you money in the long run
- Well-designed window treatments can increase home value
- DIY projects provide great opportunities for creativity
Moving forward, attaching the rings or hooks is an important step in hanging your curtains properly.
Attaching The Rings Or Hooks
As you have measured, cut, and hemmed your curtains, it is now time to attach the rings or hooks. This final step is crucial as your hardware will not only support the weight of the curtains but also affect their overall appearance. Think of it as choosing jewelry for an outfit – the right hardware can elevate a piece from ordinary to elegant.
When choosing hardware, consider the style of your curtains and your personal preferences. Rings are a classic choice and work well with most curtain types. They come in various materials such as plastic, wood, and metal and can be easily attached to eyelets sewn onto the top of your curtains. Hooks, on the other hand, are discreet and allow for a cleaner look by attaching directly onto the fabric itself. They are best used with tab-top or pinch-pleated curtains.
Different styles of rings and hooks can also add visual interest to your curtains. For example, decorative rings with intricate designs or unique shapes can make a statement while simple metal hooks blend seamlessly into neutral-colored fabrics. Consider using contrasting colors or materials to create a focal point in your room.
| Types | Pros | Cons |
|---|---|---|
| Rings | Easy to attach, classic design | Visible hardware |
| Hooks | Discreet, clean look | Difficult to remove |
Now that you have chosen your hardware and attached them securely onto your curtains, it’s time to hang them up! With this final step completed, you can sit back and enjoy your newly decorated space with its beautifully lined curtains adding warmth and texture to any room.
Hanging Your Curtains
Now that you have attached the rings or hooks to your curtains, it’s time to hang them up. There are several different hanging styles to choose from depending on your preference and the look you want to achieve. The most common options include a simple rod pocket, tab top, and grommet top.
A rod pocket is the easiest and most traditional way to hang curtains. Simply slide the curtain rod through the pocket at the top of the panel and adjust as needed. Tab top curtains have loops sewn onto the top of each panel that slip over the rod. This style creates a more relaxed and informal look. Grommet top curtains have metal rings at the top that slide onto the curtain rod, providing a sleek and modern appearance.
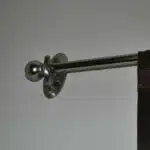
When selecting a curtain rod for your lined curtains, there are also several options available. Choose from a standard rod with decorative finials, a tension rod that fits inside your window frame, or a traverse rod with cords for opening and closing your curtains. Consider both function and style when making your selection.
Now that you have selected your preferred hanging style and curtain rod option, it’s time to add finishing touches to complete your new window treatment.
Adding Finishing Touches
To truly complete the look of your simple lined curtains, you may want to consider adding tie backs. Tie backs are a great way to keep your curtains open and let in natural light while also giving your room an added touch of elegance. There are many different types of tie backs available, from simple fabric loops to ornate tassels and braids. When selecting tie backs for your curtains, consider the style of your room and the type of fabric used for your curtains.
Once you have chosen the perfect tie backs for your curtains, it is important to select the right curtain rod. The curtain rod should be sturdy enough to support the weight of your curtains and should be long enough to extend beyond the width of your window frame, allowing your curtains to fully open and close without obstruction. There are many different types of curtain rods available, including wooden rods, metal rods, and decorative rods with unique finials.
To properly hang your curtains with tie backs and a curtain rod, follow these steps:
- Install the curtain rod according to manufacturer instructions
- Slide the curtain panels onto the rod
- Position the tiebacks at an appropriate height on either side of the window
- Securely attach each tieback around its corresponding panel
With these finishing touches in place, you can sit back and enjoy the beauty and functionality that simple lined curtains bring to any space.
Moving forward into troubleshooting common issues when making simple lined curtains…
Troubleshooting Common Issues
Common mistakes are often made when creating lined curtains. One of the most common issues is uneven hems, which can make the curtains look sloppy and unprofessional. To troubleshoot this problem, be sure to measure and cut your fabric carefully before sewing. Using a straight edge or ruler can help ensure that your hems are even and straight.
Another common mistake is not using enough lining material, which can result in the curtains looking thin and flimsy. To avoid this issue, make sure you use enough lining material to give the curtains a full and luxurious look. Additionally, be sure to choose a high-quality fabric for both the curtain and lining material.
If you find that your finished curtains have wrinkles or puckering in the seams, don’t worry! This is a common issue that can be easily fixed with some simple troubleshooting techniques. Try pressing your seams with an iron before sewing to ensure they lay flat, or adjust your tension settings on your sewing machine if needed.
Now that you know how to troubleshoot common issues with lined curtains, it’s time to move onto customizing them to fit your personal style. Here are some tips for adding unique touches like trim or tassels to make your curtains truly one-of-a-kind.
Tips For Customizing Your Curtains
Like a canvas waiting for an artist’s brush, plain curtains offer endless opportunities for customization. From adding trim to changing the length, customizing options can transform basic curtains into unique decor elements that express your style. To get started, consider using a figure of speech like “the curtain is a blank slate” to visualize the possibilities.
Customizing options:
- Add trim such as tassels or pom poms
- Use stencils or fabric paint to add patterns or designs
- Attach tiebacks in a contrasting color or texture
- Change the length of the curtains to fit your space
- Layer curtains with sheers or other fabrics for added dimension
When selecting fabric for your curtains, keep in mind the overall design scheme of your space. Consider colors and patterns that complement other pieces in the room, but also think about practicality. For example, if you have children or pets, choose durable and easy-to-clean fabrics. As a sewing/interior design expert, I recommend choosing high-quality materials that will hold up over time.
Ultimately, customizing your own curtains can be a fun and rewarding process that allows you to create personalized decor. By exploring different options and selecting fabrics carefully, you can transform plain curtains into functional and stylish elements of your home.
Conclusion
Lined curtains can add elegance and function to any room in your home. By following these simple steps, you can create custom curtains that fit perfectly with your decor. When choosing your fabric, consider the weight and color of the material. Measure your windows carefully to ensure that you have enough fabric for your project.
Calculating your yardage is an important step in the process, as it will determine how much fabric you need to purchase. Once you have cut your fabric, prepare the lining by hemming the edges. Finally, hang your curtains and add any finishing touches such as tiebacks or trim.
Did you know that according to a recent survey, 85% of homeowners prefer lined curtains over unlined? Not only do they add privacy and light control, but they also provide insulation and noise reduction. By following these simple steps, you can create custom lined curtains that not only look beautiful but also provide practical benefits for your home. Don’t be afraid to customize your curtains with unique fabrics or embellishments to make them truly one-of-a-kind!
Image Credits


