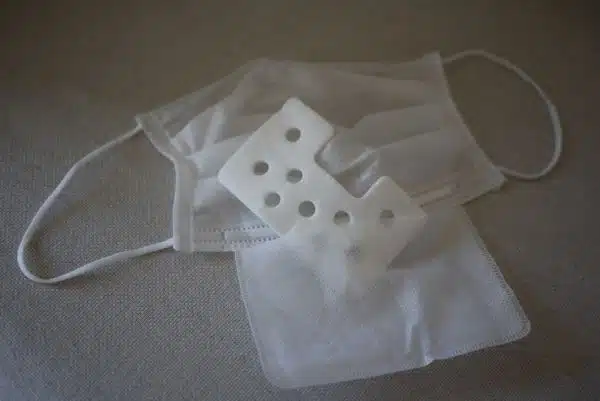
Face masks have become an essential item in our daily lives as we continue to battle the ongoing pandemic. With the shortage of medical-grade masks, many people have turned to making their own face masks at home. While there are several types of face masks available, a basic face mask is easy to make and can provide adequate protection.
As a sewing expert, I believe that making your own face mask is not only budget-friendly but also allows you to contribute towards the safety of yourself and others around you. In this article, I will be sharing step-by-step instructions on how to sew a basic face mask using materials that are easily accessible at home. Whether you’re a beginner or an experienced sewer, this guide will help you create a comfortable and effective face mask that can be worn for everyday use.
Necessary Materials And Tools
In order to sew a basic face mask, you will need a few necessary materials and tools. The most important material is fabric. You can find suitable fabric at your local craft store or online. Make sure to choose a tightly woven fabric such as cotton or polyester blend. If you are unable to find suitable fabric, you can also use an old t-shirt or pillowcase as an alternative option.
Additionally, you will need elastic for the ear loops or ties that go around the head. You can purchase elastic at most craft stores or online retailers. If you are unable to find elastic, you can also use ribbon or bias tape as an alternative option.
Finally, you will need basic sewing tools such as a sewing machine, thread, scissors, and pins. Most households have these items readily available but if not, they can be purchased at your local craft store or online retailer. With these necessary materials and tools at hand, let’s move on to choosing the right fabric for your face mask.
Choosing The Right Fabric
After gathering all the necessary materials and tools, the next step is to choose the right fabric. When it comes to face mask making, not all fabrics are created equal. It is important to understand the different types of fabrics and their properties before making a decision.
There are various fabric types that can be used for face masks such as cotton, silk, polyester, and nylon. However, not all fabrics offer the same level of protection or breathability. In general, a tightly woven 100% cotton fabric is recommended as it offers good filtration while still allowing for comfortable breathability. Other options include silk which is gentle on the skin and provides excellent filtration but may not be as durable as cotton or polyester blends which offer good filtration and durability but may not be as breathable.
When selecting your fabric pattern, it is important to consider its functionality in addition to its aesthetic appeal. Patterns with small prints or solid colors tend to work better compared to large prints or busy patterns which may make it difficult to distinguish if there are any contaminants on the mask’s surface. Ultimately, choosing a fabric that meets both your needs and preferences will ensure that you create a functional and stylish face mask.
To draw attention to important considerations when selecting your fabric type and pattern:
- Fabric types must provide both protection and breathability.
- Cotton: Tightly woven 100% cotton offers good filtration with comfortable breathability.
- Silk: Offers excellent filtration but may not be as durable.
- Polyester blends: Offer good filtration and durability but may not be as breathable.
- Fabric patterns should be chosen based on functionality in addition to aesthetics.
- Small prints or solid colors are recommended for ease of detection of contaminants on the surface.
As an experienced sewer or tailor creating functional items for others can be very rewarding. With this in mind, it’s important to thoughtfully consider each aspect of our sewing projects from start to finish. Choosing the right fabric and pattern for your face mask can make all the difference in its effectiveness and level of comfort. Now that we’ve covered the importance of selecting the appropriate fabric, let’s move on to measuring and cutting our fabric.
Measuring And Cutting The Fabric
Like a painter with a blank canvas, the fabric is where the magic begins. Before cutting any fabric, ensure that you have measured accurately to avoid mistakes and wastage. Keep in mind that the thickness of your fabric will affect how it drapes and feels against your skin. Thicker fabrics may be more durable but less breathable.
When measuring, use a ruler or measuring tape to mark out the required dimensions on the fabric. Double-check your measurements before making any cuts. It is important to measure accurately so that your mask fits well and provides adequate protection. If you are uncertain about any measurements, seek guidance from an expert or refer to detailed instructions.
Once you have confirmed your measurements, carefully cut out the necessary pieces of fabric for your mask. Remember to account for seam allowances when cutting – this will ensure that your mask fits properly and does not fray at the edges. With your fabric cut out, it’s time to move on to creating pleats for a snug fit around the nose and mouth area without sacrificing breathability.
Creating The Pleats
After measuring and cutting the fabric, it’s time to create the pleats. The purpose of pleats is to make the mask fit better over your face, creating a more secure and comfortable fit. To start, fold the fabric in half lengthwise, with the wrong side facing out. Mark the center point at the top of the fabric with a pin or chalk.
Next, create accordion folds on both sides of the center point. These folds will be your pleats. You can adjust the size of your pleats depending on your preference. A standard pleat size is ½ inch for each fold, but you can increase or decrease this measurement as needed. Once you have created your first set of pleats, pin them in place before creating additional sets of pleats.
There are different styles of pleating that you can try out to achieve different looks and fits for your mask. For example, box pleats create a flatter look while still allowing room for expansion when you breathe. Alternatively, knife pleats create a more tapered look that fits closer to your face without compromising breathability. Experiment with different styles until you find one that works best for you and your needs. Now that your pleats are complete, it’s time to move on to sewing the side seams for a finished product.
Sewing The Side Seams
Sewing the Side Seams is where the magic happens! It is where we bring together the front and back pieces of our mask and create a 3D shape that will fit perfectly on your face. Using a sewing machine will make this process much faster, but hand sewing techniques can also be used for those who do not have a machine available.
To sew the side seams, place the right sides of the fabric together and pin along the edges. Start sewing from the top of one side of the mask to the bottom, making sure to reinforce with backstitches at both ends. Repeat this process for the other side of the mask. Once complete, trim any excess fabric and turn your mask inside out.
If you are using a sewing machine, remember to adjust your stitch length to ensure that it is strong enough to hold up against wear and tear. For those using hand sewing techniques, use a sturdy needle and thread that won’t easily break or fray. With these simple steps, you can now move onto adding a nose wire for added protection and comfort.
Adding A Nose Wire
A nose wire is a thin metal strip that can be added to the top of a face mask to help shape it around your nose and create a more comfortable fit. This addition is especially useful for those who wear glasses, as it reduces fogging and slipping. Here are some steps to add a nose wire to your basic face mask:
- Cut a 6-inch length of wire, such as floral wire or pipe cleaners.
- Fold the wire in half and twist the ends together.
- Insert the twisted end of the wire into the top seam of your face mask, making sure it is centered and extends to both sides.
- Sew along the top seam, encasing the wire between two layers of fabric.
- Gently shape the nose wire around your nose for a secure fit.
When adding a nose wire to your face mask, it is important to choose a flexible but sturdy material that will hold its shape without breaking or poking through the fabric. You may need to experiment with different types of wire until you find one that works best for you. Additionally, make sure that the placement of the wire does not interfere with breathing or cause discomfort.
By shaping the nose wire around your nose, you can create a more customized and comfortable fit for your face mask. In addition to reducing fogging and slipping for those who wear glasses, this addition can also help prevent air from escaping out of gaps in the mask. With this simple modification, you can improve both the effectiveness and comfort of your basic face mask.
To further enhance your face mask’s comfort level, attaching elastic bands can ensure that you have a snug fit around both ears without any rubbing or irritation.
Attaching The Elastic Bands
- Accurately measuring and cutting the elastic is an essential step in attaching elastic bands to a face mask.
- Sewing the elastic bands onto the mask requires knowledge of the best stitching techniques to ensure the elastic bands remain securely attached.
- Utilizing the appropriate tools to cut the elastic, such as scissors or a rotary cutter, is essential to ensure a clean and even cut.
- When sewing the elastic to the mask, it is beneficial to use a zig-zag stitch to ensure the elastic remains securely attached and the edges of the fabric do not fray.
Measuring Elastic
When it comes to attaching the elastic bands on a face mask, measuring the elastic is an essential step. There are two types of elastic that can be used for this purpose: stretchy and non-stretchy. Stretchy elastic is perfect for those who want a snug fit around their ears, while non-stretchy elastic is ideal for those who prefer a looser fit. It’s important to choose the right type of elastic based on personal preference.
The sizing of the elastic bands also differs depending on different face shapes. For instance, if you have a smaller face, you may need shorter pieces of elastic than someone with a larger face. Similarly, if your ears are located further back on your head, you may require longer pieces of elastic to ensure a comfortable and secure fit. It’s crucial to measure accurately so that the mask fits well and doesn’t slip off while in use.
In conclusion, measuring the elastic correctly is crucial when attaching it to a face mask. The type of elastic chosen should depend on individual preference and comfort level. Additionally, measuring according to different face shapes ensures that the mask fits securely and comfortably in place for maximum effectiveness. Take your time and measure carefully to create a well-fitted and functional face mask.
Sewing On Elastic
When it comes to creating a face mask, attaching the elastic bands is an essential step in providing a secure and comfortable fit. There are various types of elastic that can be used for this purpose, including stretchy and non-stretchy options. However, some people may prefer alternatives to elastic, such as bias tape or ribbon.
To sew on elastic, it’s important to first measure the length needed based on the individual’s face shape and preference. Stretchy elastic is ideal for those who want a snug fit around their ears, while non-stretchy elastic is better for those who prefer a looser fit. Once the elastic has been cut to size, it can be attached to the mask using a zig-zag stitch or by sewing it directly into the seam allowance.
If you prefer not to use elastic, there are several alternatives available. Bias tape can be used as a substitute for elastic by cutting strips of fabric and folding them in half before sewing them onto the mask. Ribbon can also be used as an alternative by attaching it to both sides of the mask and tying it behind the head. Regardless of which option you choose, measuring accurately and taking your time during sewing will ensure that your face mask fits well and provides optimal protection.
Making Ties Instead Of Elastic Bands
“Out of all the materials, elastic bands have been a popular choice for fastening face masks. However, alternative materials like ties have started to gain attention due to their convenience and accessibility. Ties are easy to make and can be fashioned out of many fabrics such as ribbon, bias tape, shoelaces, or even strips of t-shirt material.
When it comes to tying techniques, there are several options that can be utilized based on personal preference. One option is the classic tie behind the head technique. This method involves two long pieces of fabric that are tied together at the back of the head. Another option is the ear loop technique in which shorter pieces of fabric are looped around each ear. The table below compares these two techniques side by side:
| Tying Technique | Pros | Cons |
|---|---|---|
| Tie Behind Head | More secure fit, adjustable | Can be more time consuming |
| Ear Loop | Quick and easy, less pressure on ears | May slip off if not secured tightly |
Ultimately, choosing a tying technique and materials depends on individual preferences and needs. Experimenting with different options can help find what works best for you.”
“Aside from making ties instead of using elastic bands, another way to customize your face mask is by adding a filter pocket. This allows for an additional layer of protection by inserting a filter inside the mask. Stay tuned for our next section on how to add a filter pocket to your basic face mask.”
Adding A Filter Pocket
When it comes to face masks, adding a filter pocket is an excellent way to increase the mask’s effectiveness. A filter can help trap small particles that may be present in the air, which is particularly important when dealing with respiratory illnesses. There are many types of filters available, including HEPA filters, furnace filters, and vacuum bags. However, it is essential to note that not all filters are created equal.
Before choosing a filter type, it is crucial to consider its filtration efficiency and replacement frequency. HEPA filters are among the most effective at filtering out particles, but they also have a higher resistance to airflow, making breathing more difficult. Furnace filters and vacuum bags may be more breathable but are less effective at filtering out smaller particles. Regardless of the filter type chosen, it should be replaced regularly as recommended by the manufacturer.
Adding a filter pocket to a face mask is relatively easy – simply create a small opening on the inside of the mask where the filter can be inserted and removed as needed. It is essential to ensure that the opening is securely closed after inserting the filter to prevent any particles from escaping or entering through the gap. With proper care and attention to detail, adding a filter pocket can significantly enhance the effectiveness of your homemade face mask.
Inserting The Filter
One of the most important aspects of a face mask is its ability to filter out harmful particles. While a basic face mask can provide some level of protection, adding in a filter can greatly improve its efficacy. However, it’s important to understand the different types of filters available and how they should be placed within the mask.
There are several types of filters that can be used in a face mask, including HEPA filters, coffee filters, and vacuum bags. Each type has its own level of effectiveness and should be selected based on the intended use of the mask. Additionally, it’s important to ensure that any filter used is breathable and doesn’t restrict airflow too much.
Once you’ve selected your filter material, it’s time to place it within the mask. Depending on the design of your mask, there are a few different options for filter placement. Some masks have pockets built into them specifically for inserting filters, while others may require you to sew in your own pocket or simply place the filter between layers of fabric. Whichever method you choose, make sure that the filter is securely in place and won’t shift around during use.
As we continue with our face mask sewing project, we now know how essential it is to add a filter for maximum protection against harmful particles. With proper selection and placement techniques in mind for various types of filters available out there such as HEPA filters, coffee filters or vacuum bags – we can confidently create an effective barrier against airborne viruses. In our next section let’s learn about hemming the edges for a neat finish!
Hemming The Edges
- Prior to sewing the hem, the fabric chosen for a face mask should be ironed to remove any wrinkles and to ensure a smooth surface for sewing.
- Hemming is a process of folding the edge of the fabric over and then stitching it in place to create a neat edge.
- To create a basic hem on a face mask, the fabric should first be folded over 1/4 inch and then pressed with an iron.
- Then, the fabric should be folded over an additional 1/4 inch and pressed again with the iron. 5.Finally, a sewing machine should be used to stitch the hem in place.
- To finish the edges, a serger can be used to create a neat, professional look.
Ironing The Fabric
Before hemming the edges of your face mask, ironing the fabric is essential to achieve a professional finish. Ironing helps remove any wrinkles or creases that may have formed during pre-washing and cutting. A smooth and even fabric ensures that the hemming process goes smoothly without any puckering or bunching.
The importance of pre-washing cannot be emphasized enough as it ensures that the fabric shrinks before being cut and sewn. However, pre-washed fabrics tend to wrinkle easily, making ironing necessary before working on them. If you do not have access to an iron, you can use a pressing cloth and a hairdryer to get rid of wrinkles alternatively.
Ironing also helps in creating crisp folds while hemming the edges. It is crucial to press along the fold line before sewing because it creates a visible guide for stitching. Additionally, pressing after completing each edge ensures that there are no lumps or bumps left behind that could interfere with a tight-fitting face mask.
In summary, ironing is an important step in hemming the edges of your face mask. It helps in removing wrinkles, creating crisp folds and ensuring a professional finish overall. Remember to always pre-wash your fabric before starting any sewing project and if you do not have access to an iron, using alternatives such as a pressing cloth and hairdryer can work just as well.
Sewing The Hem
After ironing the fabric, the next step in hemming the edges of your face mask is sewing. Hemming the edges helps prevent fraying and creates a neat and finished look. There are different techniques for sewing hems, but using a pressing technique can make it easier to create a straight and even edge.
To start, fold the raw edge of the fabric towards the wrong side about ¼ inch or as specified in your pattern. Then, press along the fold line with an iron to create a crease that will serve as your guide for stitching. Afterward, fold the fabric again by another ¼ inch and press once more before sewing along the folded edge.
If you don’t have access to an iron or prefer not to use one, there are alternative hemming techniques you can use such as zigzag stitching or using fabric glue. However, these methods may not be as durable as traditional hemming and could fray over time. It’s also important to note that different fabrics may require specific hemming methods depending on their weight and texture. Experiment with different techniques until you find one that works best for your project.
Finishing The Edges
After hemming the edges of your face mask, the next step is finishing them. Finishing the edges will not only enhance the appearance of your mask but also prevent fraying and increase its durability. There are different edge finishes that you can use depending on your preference and skill level.
One common edge finish is using a zigzag stitch on a sewing machine. This technique involves setting your sewing machine to a zigzag stitch, then stitching along the raw edge of the fabric, which will create a neat finish while also preventing fraying. Another option is using pinking shears, which have serrated blades that cut fabric in a zigzag pattern, creating a finished edge that won’t fray easily.
For those who prefer hand-sewing or don’t have access to a sewing machine, there are other options such as using bias tape or binding strips to finish the edges. Bias tape can be folded over the raw edge of the fabric and sewn in place by hand or with a sewing machine. Binding strips can also be used by folding them over the raw edge of the fabric and stitching them down with either hand-sewing or machine-stitching.
It’s essential to experiment with different finishing techniques until you find one that works best for your project. Also, remember to adjust your sewing machine settings based on your fabric’s weight and texture to ensure you get optimal results from each technique you try out. By taking these steps, you’ll end up with finished edges that will enhance both the appearance and durability of your face mask.
Cleaning And Maintaining Your Face Mask
Washing techniques are important to keep your face mask clean and safe for reuse. It is recommended to wash your mask after each use, especially if you have been in a crowded area or around someone who is sick. Hand washing with soap and hot water is the best way to clean your mask. Make sure to scrub the fabric thoroughly for at least 20 seconds before rinsing.
If you prefer to machine wash your mask, it’s important to place it in a mesh laundry bag or pillowcase to protect it from getting tangled with other clothes. Use a gentle cycle and mild detergent, making sure the water temperature is at least 60°C (140°F) to kill any germs. Avoid using bleach or fabric softeners, as they can damage the fabric and reduce its effectiveness.
Storage solutions are also important to keep your face mask clean between uses. After washing, let the mask air dry completely before storing it in a clean, dry place. Avoid folding or crushing the mask as this can damage the shape and seal of the mask. Consider using a breathable container such as a paper bag to store your mask when not in use. And always make sure to wash your hands before handling your stored face masks.
Transition: Now that you know how to properly clean and store your face mask, the next step is adjusting the fit for maximum protection and comfort.
Adjusting The Fit
- To ensure a snug fit, the ear loops of a face mask should be adjusted by tightening them in the back.
- To provide a closer fit to the face, a bridge of fabric can be added across the nose area of the mask.
- To create a more custom fit, pleats of different sizes can be added to the face mask to adjust the depth of the coverage.
- It is important to note that the fabric of the mask should be folded outward when adding pleats.
- Additionally, it is advisable to sew the pleats in place with a zig-zag stitch to secure the fabric.
- Lastly, for the optimal fit, the fabric of the mask should be stretched slightly when sewing the ear loops in place.
Tightening The Ear Loops
Achieving a snug fit for your face mask is essential to ensure maximum protection against airborne particles. One of the most common ways of securing a face mask is through ear loops, yet not all masks come perfectly fitted for every individual. Hence, one must know how to adjust them accordingly. In this article, we will explore alternative methods for tightening ear loops and adjusting tension for a more comfortable and secure fit.
To begin with, you can try tying knots at the base of each ear loop to shorten their length. This method is simple and effective as it allows you to customize the fit according to your preference. You can also use elastic cord stoppers or silicone cord locks to cinch the ear loops tighter around your ears. These items are readily available online or in craft stores, and they work by gripping onto the elastic band, thereby preventing it from slipping off.
Another useful technique for tightening ear loops is by adding a twist or pleat on each side of the mask before securing it behind your ears. This method increases the tension on the elastic band and creates a more secure seal around your nose and mouth. Additionally, if you have a sewing machine at home, you can adjust the tension on your machine’s foot pedal to control how tightly it sews over the elastic bands when attaching them to your mask.
In conclusion, knowing how to adjust the fit of your face mask is crucial in these times when wearing one has become necessary for our safety. Alternative methods such as tying knots, using elastic cord stoppers or silicone cord locks, adding twists or pleats, and adjusting sewing machine tension are all viable options that allow you to achieve a tighter and more comfortable fit for your mask. Remember that finding the perfect fit may require some trial-and-error but once achieved; you will be able to wear your face mask with confidence knowing that it provides maximum protection against airborne particles.
Adding A Nose Bridge
Achieving a snug fit for your face mask is essential to ensure maximum protection against airborne particles. As a sewing expert or tailor, I understand that having a well-fitted face mask can provide comfort and security during these unprecedented times. One way to improve the fit of your mask is by adding a nose bridge. This simple addition can provide numerous benefits, including reducing glasses fogging, preventing air leakage around the nose area, and providing a more secure seal.
A nose bridge is a flexible piece of material that sits across the top of the mask and molds to the shape of your nose. The most common material used is aluminum wire, which can be easily bent and shaped to fit comfortably on the face. However, there are alternative materials such as pipe cleaners or twist ties that can also be used if aluminum wire is not available.
To add a nose bridge to your mask, simply insert it into the top seam of your mask before sewing it shut. Alternatively, you can sew in a separate channel for the wire to sit in. Once inserted, mold the wire to fit comfortably around your nose and adjust as necessary. Adding a nose bridge can significantly improve the fit of your mask and provide added protection against airborne particles.
In conclusion, adjusting the fit of your face mask is crucial for maximum protection against airborne particles. Adding a nose bridge provides numerous benefits such as reducing glasses fogging, preventing air leakage around the nose area, and providing a more secure seal. With alternative materials readily available and simple installation methods such as inserting it into the top seam or creating a separate channel for it to sit in; adding a nose bridge is an effective way to achieve greater comfort and security while wearing your face mask.
Adjusting The Pleats
Achieving the perfect fit for your face mask is essential to ensure maximum protection against airborne particles. As a sewing expert or tailor, I understand that adjusting the pleats of your mask can make a significant difference in its overall fit. Variations in pleat styles can affect how the mask fits around the nose and mouth area, and it’s essential to troubleshoot any issues with pleat placement.
When adjusting the pleats of your mask, consider the style of pleats used. Some masks have accordion-style pleats, while others have box pleats or gathers. Each style affects how the mask fits on the face differently. Additionally, it’s crucial to troubleshoot any problems with pleat placement. If you find that your mask gaps at the sides or doesn’t sit securely on your face, adjusting the placement of the pleats may help.
Overall, adjusting the pleats of your face mask is an effective way to improve its fit and provide greater comfort and security while wearing it. By considering variations in pleat styles and troubleshooting any issues with placement, you can achieve a snug and secure fit that provides maximum protection against airborne particles.
Troubleshooting Common Issues
To ensure that your face mask is properly fitted, you may need to make some adjustments depending on your facial features and the type of mask you are making. One common issue that many people encounter is foggy glasses while wearing a mask. This can be prevented by ensuring that the mask fits snugly over the bridge of your nose, and using a wire or pipe cleaner to mold the top edge of the mask to fit your face.
Another important factor in achieving a proper fit is ensuring that there is a good seal around the edges of the mask. This means that there should be no gaps between your skin and the fabric, as this can allow air to escape or enter through the sides. To achieve this seal, try adjusting the ear loops or ties and making sure that they are not too loose or too tight.
If you find that your mask still doesn’t fit quite right, don’t worry! There are many ways to customize your face mask for a better fit, such as adding extra layers of fabric, adjusting the length or width of certain parts, or even creating a completely custom design from scratch. With a little bit of creativity and some basic sewing skills, you can create a comfortable and effective face covering that fits perfectly and helps keep you safe.
Customizing Your Face Mask
Now that you know how to sew a basic face mask, it’s time to add some personal touches to make it your own. One way to customize your face mask is by choosing different color options. You can use bright colors or fun patterns to express your personality and style. You can also choose colors that complement your outfits or match the season.
Another way to embellish your face mask is by adding decorations or accessories. For example, you can add sequins, buttons, or beads for a more festive look. You can also attach ribbons or bows on the sides of the mask for a more feminine touch. Just be sure that any decorations you add do not interfere with the effectiveness of the mask’s filtration.
Incorporating these ideas will not only make wearing a face mask more enjoyable and fashionable but will also encourage others around you to wear one as well. Remember, serving others by protecting their health is essential during these times. So go ahead and get creative with your face masks!
Conclusion
In conclusion, creating a basic face mask is an essential skill that everyone should have in these trying times. With the right materials and tools, as well as careful attention to detail, anyone can make a face mask that fits comfortably and provides adequate protection. Remember to choose the right fabric for your mask, measure and cut it carefully, create neat pleats, sew strong side seams, and clean and maintain your mask regularly.
If you encounter any issues while making or wearing your mask, don’t be discouraged. Troubleshoot common problems such as loose fit or uncomfortable ear loops by adjusting the pattern or trying different materials. And if you’re feeling creative, feel free to customize your mask with unique designs or embellishments.
By following these basic steps and taking care to create a well-made face mask, we can all do our part to protect ourselves and those around us during this pandemic. Let’s come together as a community of sewers and tailors to help keep each other safe.
Image Credits
- “Face Mask” by shibuya246 (featured)

