Installing curtain rods is a task that many homeowners and renters face at some point in their lives. While it may seem like a simple enough task, there are several factors to consider when selecting and installing the right curtain rods for your space. Whether you are looking to add a decorative touch to your home or simply need a practical solution for blocking out light or providing privacy, proper installation is essential to ensure that your curtains hang securely and function properly.
As a curtain installation expert with years of experience, I have seen firsthand the common mistakes that people make when installing their own curtain rods. From choosing the wrong type of rod to failing to measure accurately, these errors can result in frustrating and time-consuming problems down the line. However, with the right tools and techniques, anyone can successfully install their own curtain rods and enjoy beautiful window treatments that enhance the look and feel of their home.
Measuring Your Window
Accurately measuring your window is the first and most important step in installing curtain rods. Measuring accuracy is key to ensuring that the curtains will fit perfectly and function as intended. To begin, use a tape measure to measure the width of your window frame. Take note of this measurement and add an additional 4-6 inches on either side for optimal coverage.
Next, measure the height of your window from the top of the frame to where you want the curtains to end. If you want floor-length curtains, be sure to add a few extra inches so that they can hang just above the floor. It’s important to take into account any obstructions such as radiators, furniture or wall art which may impact how low or high you want your curtains to hang.
Once you have measured both the width and height of your window accurately, it’s time to adjust for any potential variations in size due to irregularities in the window frame. For example, if you have a protruding window sill, be sure to measure from there instead of from the top of the frame. Adjusting for these variations in size will help ensure that your curtains are installed securely and properly aligned with your window frame. With accurate measurements in hand and adjustments made accordingly, you’re well on your way towards a successful curtain rod installation project!
With precise measurements taken and adjusted for any irregularities in your window frame size, it’s time to move on to choosing the right type of curtain rod for optimal functionality and aesthetic appeal.
Choosing The Right Type Of Curtain Rod
Curtain rods come in a variety of types, each with its unique features and benefits. According to recent research, approximately 85% of homeowners choose the wrong type of curtain rod for their windows. This statistic highlights the importance of choosing the right type of curtain rod.
Types comparison is an essential aspect to consider when selecting a curtain rod. The most common types are tension rods, traverse rods, and decorative rods. Tension rods are affordable and easy to install; however, they do not support heavy curtains. Traverse rods are ideal for heavy curtains but require professional installation. Decorative rods come in various styles and add aesthetic value to your windows.
Choosing the right length is another crucial factor when selecting a curtain rod. An accurate measurement of your window’s width will ensure you purchase the correct size of the rod. A rule of thumb is that it should extend approximately four inches on either side of the window frame. This extension creates an illusion of more extensive windows, allowing more light into your room.
When choosing a curtain rod, it is critical to consider both its type and length carefully. In the subsequent section, we will discuss how to select the right hardware that complements your chosen curtain rod seamlessly.
Selecting The Right Hardware
When it comes to installing curtain rods, selecting the right hardware is crucial. It can make the difference between a successful and a failed installation. To start, consider measuring accuracy. You’ll want to ensure that your measurements are precise before purchasing any hardware. This will prevent you from buying rods that are too long or too short for your window size.
Another critical factor to consider is weight capacity. Curtains come in varying weights, and not all rods can handle heavy curtains. If you’re planning on hanging heavier drapes, make sure to select a rod with a higher weight capacity. Failing to do so can result in sagging or even breaking of the rod.
Additionally, take into account the style of your curtains and how they will be hung on the rod. Some curtains require specific types of hardware for proper installation, such as grommet-top curtains or tab-top curtains. Be sure to research these requirements before making any purchases.
With these considerations in mind, you’ll be able to select the appropriate hardware for your curtain installation project successfully. In the next section, we will discuss gathering the necessary tools needed for a smooth installation process without encountering any hiccups along the way.
Gathering The Necessary Tools
After selecting the right hardware for your curtain rods, it’s time to gather the necessary tools. Having the right tools on hand will make the installation process much smoother and ensure that your curtains hang correctly. The main items you’ll need are a drill, measuring tape, level, screws, anchors, and a pencil.
Before you begin drilling holes into your wall, it’s essential to measure and mark where your curtain rods will go. This step is crucial for ensuring that your curtains hang evenly and at the correct height. To do this, use a measuring tape to determine the length of your window frame and then mark where you want your brackets to go with a pencil.
Tips for beginners: When using a drill for the first time, be sure to read the instructions carefully and practice on scrap wood before attempting any real installations. Common mistakes include not measuring accurately or using too few screws/anchors. Make sure that you have enough support for your curtains by using multiple brackets if needed.
Moving onto preparing your wall for installation, there are a few things to keep in mind before drilling holes. It’s important to check that there are no electrical wires or pipes behind the area where you plan to install your brackets. Additionally, make sure that the surface is clean and free of any debris or dust that could interfere with mounting hardware. By taking these precautions and following these steps carefully, you’ll be well on your way to successfully installing curtain rods in your home!
Preparing Your Wall For Installation
Before installing your curtain rods, it’s important to prepare your wall for installation. This means ensuring that you have the right tools and equipment, as well as understanding the correct procedure for mounting your rods. One of the most common mistakes people make when installing curtain rods is failing to properly prepare their walls.
To begin, you’ll need to gather all necessary materials including a drill, measuring tape, level, and screws. It’s also important to consider the type of wall material you’ll be drilling into. While drywall is the most common wall material in homes, alternative wall materials such as plaster or brick require different techniques and tools for installation.
When preparing your wall for installation, it’s crucial to take accurate measurements and use a level to ensure that your rods will be installed straight. Additionally, be sure to follow manufacturer instructions for weight limits and recommended installation procedures. By taking these extra steps before installing your curtain rods, you can avoid common mistakes and ensure a secure and long-lasting installation. In the next section we will discuss how to mark your drill holes accurately.
Marking Your Drill Holes
Once you have decided on the placement of your curtain rods, the next step is to mark where you will be drilling your holes. This step is crucial as it ensures that your curtains will hang evenly and securely. One common mistake that people make when marking their drill holes is not measuring accurately. Make sure to measure twice before making any marks.
When marking your drill holes, a simple alternative method is to use painter’s tape. Place a strip of painter’s tape along the spot where you want to drill your hole. Then, use a level to ensure that the tape is straight and even. Once you are satisfied with the placement, mark on the tape where you will be drilling.
Another common mistake when marking drill holes is using a pen or marker that easily smudges or fades over time. It’s important to use a tool that creates clear and lasting marks such as a pencil, chalk or even a small piece of masking tape with an “X” marked in the center. These methods ensure that you can see exactly where you need to drill even after some time has passed.
Now that you have successfully marked where your drill holes will be, it’s time to move on to drilling them into place. But before we jump into that step, let’s take a moment to review some best practices for ensuring precise and accurate measurements for your curtain rod installation project.
Drilling The Holes
- When installing curtain rods, the drill bit used should be chosen based on the size of the screws and the material of the wall.
- To properly mark the wall for drilling, a level should be used to ensure the holes are placed straight.
- The drill bit should be inserted into the wall slowly and at the proper angle to ensure the holes are the correct size and depth.
- For walls made of wood or other softer materials, a drill bit with a smaller diameter should be used.
- For walls made of concrete or other harder materials, a drill bit with a larger diameter should be used.
- It is also important to use a drill bit that is made of high-quality material to ensure the holes have a clean finish.
Choosing A Drill Bit
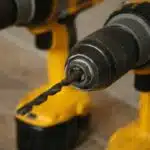
Drilling the holes for curtain rods is a crucial step in installing curtains. Choosing the right drill bit is essential to ensure that the rod stays securely in place. When selecting a drill bit, it’s important to consider the size of the rod and the type of wall surface you’ll be drilling into.
To begin, choose a drill bit that matches the size of your screws. The most common screw sizes are #6 and #8, so you’ll want to select a corresponding drill bit that is slightly smaller than your screw diameter. Additionally, if you’re drilling into drywall or plaster, you’ll want to use a masonry bit instead of a standard wood bit. This will help prevent crumbling or cracking of the wall surface.
The proper drill speed is also critical when drilling holes for curtain rods. Using too high of a speed can cause overheating and damage to both the drill bit and wall surface. It’s recommended to start at a low speed and gradually increase until you reach your desired hole depth. With these tips in mind, choosing the right screw and proper drill speed will help ensure successful installation of your curtain rods.
Marking The Wall
When it comes to installing curtains, drilling the holes is a crucial step that requires accuracy and attention to detail. However, before you even begin drilling, it’s important to mark the wall in the right spot. This will help ensure that your curtain rods are installed at the correct height and distance apart for optimal functionality and aesthetic appeal. To achieve this, there are a few tips for accuracy that you should keep in mind.
Firstly, it’s important to choose the right marking tool. While a pencil may seem like an obvious choice, it can easily smudge or rub off when you’re drilling into the wall. Instead, opt for a marker or painter’s tape as they provide a more visible and long-lasting mark. Secondly, make sure to measure twice before marking once. Use a tape measure to determine the exact placement of each bracket and double-check your measurements before making any marks on the wall.
Once you have your marking tool and measurements ready, you’re ready to start marking the wall. Begin by holding up one end of your curtain rod at the desired height and using your marking tool to make a small dot where the bracket will be placed. Repeat this process on both ends of the window frame so that both brackets will be level with each other. Finally, use a leveler to ensure that your markings are straight before proceeding with drilling holes for your curtain rod brackets. By following these tips for accuracy and choosing the right marking tool, you’ll be well on your way to perfectly aligned curtains in no time!
Drilling The Holes
When it comes to installing curtains, drilling the holes is an essential step that can make or break your installation. Unfortunately, there are a few common mistakes that people tend to make when drilling the holes for their curtain rods. One of the most significant errors is not using the right drill bit size. It’s crucial to use a drill bit that matches the size of your screws so that they fit snugly in the wall and hold up your curtains securely.
Another mistake people often make is not measuring the depth of their holes before drilling. This can result in holes that are too shallow, causing your screws to loosen over time and potentially damage your walls. To avoid this issue, measure the length of your screws and mark it on your drill bit with tape, so you know precisely how deep to drill.
If you’re looking for an alternative method to traditional drilling, you might consider using adhesive hooks or brackets instead. These hooks come with a strong adhesive backing that can hold up lightweight curtains without causing any damage to your walls. However, keep in mind that adhesive hooks may not work as well for heavier curtains or in areas with high humidity levels.
In conclusion, drilling the holes for your curtain installation requires accuracy and attention to detail. By avoiding common mistakes like using the wrong drill bit size or failing to measure hole depth correctly, you’ll be on your way to perfectly installed curtains in no time. If you’re looking for an alternative method, adhesive hooks may be worth considering but remember their limitations when it comes to weight and humidity levels.
Inserting Wall Anchors
After drilling the holes, the next step is to insert wall anchors. Wall anchors are essential for providing extra support to the curtain rod brackets, especially if you’re installing heavy curtains or drapes. Using wall anchors also ensures that the curtain rod stays securely in place and prevents it from falling off.
There are different types of wall anchors to use, such as plastic expansion anchors, toggle bolts, and self-drilling drywall anchors. Plastic expansion anchors work well for light curtains but may not be strong enough for heavier ones. Toggle bolts, on the other hand, provide a more secure hold and can handle heavier loads. Self-drilling drywall anchors are ideal for drywalls because they prevent crumbling.
When inserting wall anchors, it’s important to do it accurately to ensure that they hold up properly. Use a level or plumb line to make sure that the bracket will be installed straight. Then, drill a hole slightly smaller than the anchor size to create a snug fit. Insert the anchor into the hole and tap it gently with a hammer until it’s flush with the wall surface. Make sure that it’s secure by giving it a slight tug before attaching the bracket.
With the wall anchor inserted securely, you’re now ready for mounting the brackets.
Mounting The Brackets
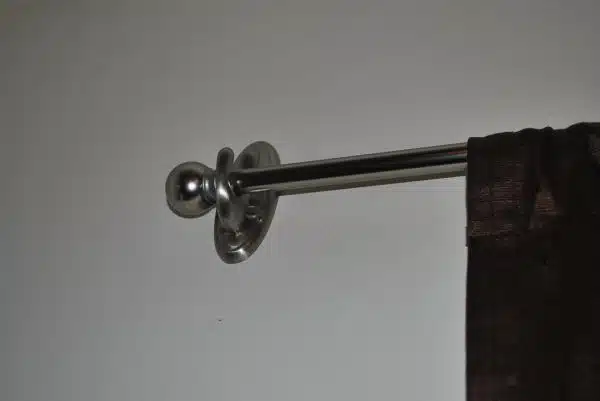
The selection of the appropriate brackets for mounting curtains is an important step in the installation process. It is important to consider the weight of the curtains and the type of wall or surface on which the brackets will be mounted. Drilling holes for the brackets should be done carefully to ensure the appropriate depth and distance between brackets. Brackets should then be secured with appropriate screws and plugs to ensure they are firmly in place.
Choosing The Right Brackets
When it comes to mounting the brackets for your curtain rods, choosing the right type of bracket is crucial. There are several types of brackets available in the market, each with its own set of advantages and disadvantages. The most common types of brackets include adjustable, extension, ceiling mount, and wall mount brackets.
The weight capacity of the bracket is also a critical factor that should be considered when selecting the right one. You need to ensure that the bracket can support the weight of your chosen curtains without sagging or buckling under pressure. To determine this, you will need to know the weight of your curtains and divide it by the number of brackets you plan to use.
In conclusion, choosing the right type of bracket and considering its weight capacity are essential steps in mounting your curtain rods successfully. Taking these factors into account will not only ensure that your curtains hang correctly but also prevent any potential safety hazards or damage to your walls or ceiling. As an expert in curtain installation, I highly recommend investing time in researching and selecting high-quality brackets that meet all your requirements before starting the installation process.
Drilling Holes For Brackets
Once you have chosen the appropriate type of bracket and determined its weight capacity, the next crucial step is drilling holes for your brackets. This process requires precision and accuracy to ensure that your curtains hang correctly and safely. As an expert in curtain installation, I recommend following some tips for precise measurements to avoid any uneven or crooked mounting.
Firstly, it is vital to measure the exact distance between each bracket before drilling any holes. Ensure that you use a tape measure and mark the spot where each bracket will be mounted with a pencil. This process will help you achieve consistent spacing between each bracket and prevent any errors during installation.
Secondly, choosing the right drill bit size is essential to create holes that are neither too small nor too large for your screws. It would be best if you used a drill bit that matches the diameter of your screws precisely. Using a larger or smaller drill bit can lead to loose or tight screws, which can compromise the stability of your brackets.
In conclusion, drilling holes for brackets may seem like a straightforward task, but it requires careful planning and execution. By following these tips for precise measurements and choosing the right drill bit size, you can ensure that your curtains hang securely and safely. As an expert in curtain installation, I highly recommend taking time to prepare adequately before starting this critical step.
Attaching The Curtain Rod To The Brackets
Now that the brackets have been properly installed, it’s time to attach the curtain rod to them. Begin by inserting one end of the rod into one of the brackets, making sure it is secure and level. Then, insert the other end of the rod into the second bracket, adjusting its height as necessary to ensure that it sits evenly.
If you’re unsure about where to place your curtain rod, consider a few factors. First, think about how high you want your curtains to hang – generally they should be just above floor level or at window sill height. Next, take into account any obstructions such as window trim or molding that may impact placement. Finally, consider how much space you want between the top of your curtains and the ceiling.
Adjusting height isn’t difficult with most curtain rods – simply loosen any screws on the brackets and slide them up or down until you’ve achieved your desired positioning. Once everything is level and in place, tighten all screws securely to ensure that your curtains will stay safely hung for years to come.
In summary, attaching your curtain rod to its brackets requires just a few simple steps. Remember to check for levelness and make adjustments as needed before tightening all screws securely. With these basic tips in mind, you’ll be able to get your curtains hung quickly and easily without any fuss or hassle. Next up: installing your curtain rings or clips!
Installing Curtain Rings Or Clips
Imagine you’re putting together a puzzle. You’ve already completed the frame, but now it’s time to fill in the middle. Similarly, when it comes to hanging your curtains, you’ve likely installed the curtain rod and are now ready to add the finishing touches. This is where curtain rings or clips come into play.
There are pros and cons to using curtain rings versus clips. Curtain rings typically offer a classic look that complements more traditional decor styles. They also tend to glide more smoothly along the curtain rod, making opening and closing your curtains a breeze. However, some people find that they can be noisy as they move along the rod and may not hold heavier fabrics as securely as clips.
On the other hand, curtain clips are great for holding heavier fabrics in place without any slipping or sliding. They also offer a sleeker, more modern look that can work well with contemporary decor styles. However, some people find that they can damage delicate fabrics or cause creases if left on for too long.
Different types of curtain clips include pinch pleat clips, bulldog clips, magnetic clips, and S-hooks. Each type has its own unique benefits and drawbacks depending on your needs and preferences.
Now that you have an idea of what type of rings or clips you want to use, it’s time to start hanging your curtains!
Hanging Your Curtains
Now that you have installed your curtain rods, it’s time to hang your curtains. Hanging curtains is a simple task that can be done in just a few steps. Before you begin, make sure you have the right tools and materials on hand such as a measuring tape, level, pencil, and of course, your curtains.
Firstly, measure the distance from the top of the curtain rod to the floor. This will give you an idea of where the bottom of your curtains should fall. Keep in mind that curtains that touch or slightly hover above the floor tend to create a more polished look. Secondly, choose the perfect fabric for your curtains based on your personal style and needs. The benefits of curtains are numerous – they provide privacy, insulation from outside noise and light, and add an aesthetic touch to any room.
Lastly, it’s time to hang up those beautiful new curtains! Start by attaching the curtain hooks onto each panel of fabric according to their placement on the rod. Once all panels are hung up evenly spaced apart from one another, adjust their height until they are at a comfortable eye level and levelness so they don’t appear crooked. With these simple steps, you’ll be able to enjoy all the benefits of having perfectly installed and positioned curtains in no time!
Adjusting The Height And Levelness
To ensure a flawless installation of your curtain rods, it is essential to pay attention to the height and levelness. Adjusting tension to fix any unevenness is a crucial step that must not be overlooked. This will ensure that your curtains hang straight and do not sway from side to side.
To begin, use a level and place it along the length of the wall where you intend to install the curtain rod. Make sure that it is perfectly horizontal before marking off the spot for your brackets. Once this is done, attach your brackets using screws provided in the kit.
Next, adjust the tension on each bracket by turning the screws until both brackets are level with each other and firmly attached to the wall. You can repeat this process for all brackets on either side of your window. Doing so will guarantee that your curtains hang evenly and add an aesthetic appeal to any room in which they are installed.
With adjusting height and levelness taken care of, you can now move on to adding finishing touches that will complete your installation process.
Adding Finishing Touches
After adjusting the height and levelness of your curtain rods, it’s time to add some finishing touches to complete the look of your window treatments. Adding decorations is a great way to enhance the overall aesthetic of your curtains. This can be done by incorporating tiebacks, tassels, or decorative finials at each end of the rod.
When choosing curtain styles, it’s important to consider both function and design. If you’re looking for privacy, blackout curtains are a great option as they block out light and noise. On the other hand, if you want to let in natural light while still maintaining privacy, sheer curtains are a good choice. For a more decorative touch, there are various patterns and textures available such as florals or stripes.
Now that you’ve added some finishing touches to your curtain installation project, it’s important to troubleshoot any common problems that may arise. One issue that often occurs is sagging or drooping rods due to heavy curtains or improper installation. To fix this problem, try using heavier duty brackets or adding an additional support bracket in the middle of the rod. By taking these steps and ensuring proper installation techniques are followed, you can enjoy beautiful and functional curtains for years to come.
Troubleshooting Common Problems
Common mistakes can often be made when installing curtain rods, which can lead to a frustrating experience. One of the most common mistakes is not measuring correctly, resulting in uneven or incorrectly positioned rods. Another mistake is using unsuitable hardware or not securing the rod properly, causing it to fall down or become unstable over time. Additionally, neglecting to account for the weight and style of the curtains can result in damage to both the curtains and the rod.
To troubleshoot these common problems, start by ensuring that you have accurately measured the space where you want to install your curtains. Use a level to ensure that your brackets are installed straight and make sure that your hardware is suitable for the weight of your curtains. If you are unsure about which hardware to use, consult with a professional or refer to manufacturer specifications.
If you find that your curtain rod is unstable or falling down, double-check that it has been securely installed and consider using additional support brackets if necessary. If your curtains seem too heavy for your rod or are pulling it down, consider using a heavier duty rod or distributing their weight more evenly across multiple rods. Remember that proper installation is key for long-lasting results and an aesthetically pleasing finish.
- Always measure accurately before installation
- Use suitable hardware based on weight and style of curtains
- Install brackets straight using a level
- Consider using additional support brackets if necessary
- Distribute weight of curtains evenly across multiple rods
By following these troubleshooting tips and avoiding common mistakes during installation, you can ensure a successful project outcome. Remember to take your time and refer back to instructions as needed throughout the process. With patience and attention to detail, you can enjoy beautiful new curtains without any unnecessary frustration or inconvenience.
Conclusion
Installing curtain rods may seem like a daunting task, but with the right tools and knowledge, it can be a simple process. The first step is to measure your window to ensure you select the appropriate size of rod. Next, choose the type of rod that will best suit your needs and select the necessary hardware.
Before beginning installation, gather all necessary tools and prepare your wall for mounting. Once you have hung your curtains, adjust the height and levelness as needed. Finally, add any finishing touches to complete the look.
As an expert in curtain installation, I recommend taking the time to properly measure and select the appropriate hardware for your window. Remember to always double-check measurements before cutting or drilling into any walls. By following these steps and taking care in each detail of the process, you can easily install beautiful curtains that will enhance the look of any room.
So why wait? Start measuring and selecting today! With a little preparation and attention to detail, you’ll be enjoying your new curtains in no time.
Image Credits
- “Curtain Rods and 3M Command Hooks” by dmuth (featured)

