Creating a warm and inviting atmosphere in your backyard can be as simple as building a DIY firepit. Not only does a firepit provide warmth on cool evenings, but it also serves as a gathering spot for family and friends. Building your own firepit can seem like a daunting task, but with the right materials and instructions, it can be a fun and rewarding project.
Before starting any construction project, it is important to research and plan accordingly. Building a firepit requires consideration of local codes and regulations, as well as choosing the appropriate location in your yard. Additionally, selecting the right materials for your firepit can impact its durability and safety. With proper planning and execution, building a DIY firepit can add value to your outdoor living space while creating lasting memories with loved ones.
Assessing Your Backyard For Firepit Placement
Before embarking on a DIY firepit project, it is essential to assess your backyard terrain. While you may have the perfect spot in mind, it is crucial to ensure that the location is safe and suitable for a firepit. Consider factors such as wind direction, proximity to trees or structures, and any potential hazards that might compromise the safety of your firepit. Additionally, check local regulations to ensure that open fires are allowed in your area.
Once you have identified a safe location for your firepit, measuring the area is the next step. Determining the size of your firepit will depend on several factors, including how many people you plan to accommodate around it and how much space you have available in your backyard. A larger fire pit will require more materials and incur added costs; therefore, it’s important to strike a balance between functionality and affordability.
Assessing your backyard terrain and measuring for firepit size are crucial steps before starting on this DIY project. Taking into account different variables such as safety measures and local regulations will guarantee that you’ll be able to use this space safely for years to come. In the next section, we’ll discuss choosing the right materials for your fire pit that can withstand various weather conditions while fitting into your desired aesthetic look.
Choosing The Right Materials For Your Firepit
When building a firepit, it is important to consider the durability, heat resistance, and cost of the materials used. Quality materials will ensure the firepit is sturdy and long-lasting, even after frequent use. Heat resistance is critical to ensure the firepit can handle high temperatures while avoiding potential damage to nearby surfaces. Cost is also an important factor, as more durable materials tend to be more expensive. It is important to consider the pros and cons of each material before making a decision. Ultimately, the best material for a firepit will depend on the consumer’s needs and preferences.
Durability
When it comes to building a DIY firepit for your backyard, choosing the right materials can make all the difference in terms of durability and longevity. One important consideration is balancing your budget with the desire for a long-lasting firepit. While it may be tempting to skimp on materials in order to save money, investing in high-quality options will ultimately pay off in the long run.
Another aspect to consider when selecting materials is their eco-friendliness. Sustainable options made from recycled or natural materials not only benefit the environment but also provide added durability. For example, using recycled steel or bricks can create a sturdy base for your firepit that will withstand years of use while also reducing waste and promoting sustainability.
Ultimately, choosing durable materials for your DIY firepit project is crucial for ensuring its safety and longevity. By weighing factors such as budget, eco-friendliness, and overall quality, you can select the best possible options to create a backyard feature that will serve you and your family well for years to come.
Heat Resistance
When it comes to building a firepit, choosing materials that are heat resistant is crucial. Firepits can reach extremely high temperatures, and using materials that cannot withstand the heat can lead to safety issues and damage to your backyard. It is important to select materials specifically designed for high-temperature applications and that have been tested for heat tolerance.
Choosing fire-resistant materials for your firepit can also increase its longevity. Materials like concrete and natural stone are known for their durability and ability to withstand high temperatures. These materials may cost more upfront but will ultimately save you money in the long run by reducing the need for repairs or replacement.
Testing heat tolerance before building your firepit is essential. Some materials may appear heat-resistant but may not perform well when exposed to extreme temperatures. Make sure to research each material’s maximum temperature capacity and test samples before starting your project. By selecting the right materials with proper testing, you can ensure that your DIY firepit is safe, durable, and enjoyable for years to come.
Cost
When it comes to building a firepit, choosing the right materials is crucial not only for safety but also for longevity. While heat resistance is important, budget constraints may limit your options. However, there are cost-saving tips you can consider when selecting materials for your DIY firepit.
One way to save money on firepit materials is to opt for alternatives that mimic the look of natural stone or concrete. For example, pavers or bricks can be used instead of expensive stones to achieve the same aesthetic at a lower cost. Additionally, recycled materials like broken concrete or glass can add unique texture and color to your firepit while reducing waste and expenses.
Another way to save money on firepit materials is to repurpose existing items. Old metal barrels or washing machine drums can be transformed into affordable and durable firepits with a little creativity and some basic tools. Repurposing items not only saves money but also adds character and personality to your backyard space.
In conclusion, building a firepit on a budget doesn’t mean sacrificing quality or safety. By considering alternative materials and repurposing existing items, you can create an affordable DIY firepit that meets your needs and enhances your outdoor living experience.
Tools You’ll Need For Building A Firepit
Now that you have an idea of the materials you’ll need for your DIY firepit, it’s time to gather the essential equipment. First and foremost, you’ll need a shovel and a rake to clear the area where you plan to build your firepit. A wheelbarrow can also come in handy for transporting heavy materials such as bricks or stones.
Next, you’ll need tools for digging and leveling the ground. A sturdy spade or garden trowel will work well for digging, while a level will help ensure that your firepit is even and balanced. You may also want to consider purchasing a compacting tool such as a tamper or plate compactor to ensure that the base of your firepit is stable.
Finally, safety should be a top priority when building your own firepit. Make sure you have protective gear such as gloves and safety glasses. It’s also important to have a bucket of water or sand nearby in case of emergency. With these DIY firepit tools and essential equipment in hand, you’re ready to start building!
Understanding local firepit regulations is crucial before beginning construction on your backyard project. Depending on where you live, there may be specific guidelines regarding the size and location of outdoor fires. For example, some areas require that fires only be built in designated pits or areas with proper ventilation. Others may ban outdoor fires altogether during particularly dry seasons or times of high fire danger. Be sure to research local regulations and obtain any necessary permits before starting your DIY firepit project.
Understanding Local Firepit Regulations
Firepits can be an excellent addition to any backyard, providing warmth and ambiance for outdoor gatherings. However, before building a firepit, it’s crucial to understand local regulations that may affect your project. Failure to comply with these regulations can result in fines or legal action.
Permit requirements vary depending on where you live. Some municipalities may require permits for installing or using a firepit, while others may not. It’s essential to check with your local government authority to determine whether you need a permit and what the requirements are. In some cases, you may need to submit plans for your firepit and have it inspected before use.
Fire safety is another critical consideration when building a firepit. You should choose a location that is at least 10 feet away from any structures, including trees and overhanging branches. Additionally, the area around the firepit should be cleared of any flammable material such as dry leaves or grass. It’s also important to have a source of water nearby in case of emergencies.
With proper planning and attention to local regulations and fire safety guidelines, you can build a safe and enjoyable firepit in your backyard. The next step is preparing the site for construction by choosing the right location and materials for your project.
Preparing The Firepit Site
Before you start digging, it is important to prepare the site for your DIY firepit. The first step is to clear all debris from the area where you plan to build. This includes any grass, stones, or other materials that may be in the way of your firepit. Once you have cleared the area, you can begin leveling the ground.
To level the ground, use a shovel or rake to remove any high spots and fill in any low spots. It’s important that the ground is level so that your firepit will be stable and safe. You can check for levelness by placing a spirit level on top of the ground.
After clearing debris and leveling the ground, it’s time to mark out where your firepit will go. Use stakes and string to create a circle where your firepit will sit. This will give you an idea of how much space you’ll need and help guide you when digging out your firepit area.
Markdown list:
- Clear all debris from the site.
- Level the ground using a shovel or rake.
- Check for levelness with a spirit level.
- Mark out where your firepit will go using stakes and string.
As an outdoor living expert, ensuring safety in all aspects of building a fire pit is crucial. Clearing debris from potential burn areas is essential before starting a project such as this one. Leveling the ground properly guarantees safety since an unstable surface could cause accidents while enjoying your backyard with loved ones. Marking out where your fire pit will go helps obtain accurate measurements needed for proper installation while providing guidance during excavation.
Transition sentence: Now that we’ve prepared our DIY fire pit site correctly let’s move onto creating a design plan for our project.
Creating A Firepit Design Plan
With the site preparation complete, it’s time to move on to designing your firepit. A well-designed firepit can easily become the centerpiece of your backyard, and there are a variety of design options available to suit your personal tastes and needs. Consider factors such as the size of your yard, the number of people you plan to entertain, and any existing landscaping when selecting a firepit design.
When creating your firepit design plan, keep in mind that it should complement the overall layout of your backyard. You don’t want it to look out of place or disrupt the flow of your outdoor living space. Take into account any furniture or other outdoor structures you already have in place and consider how they will fit in with your new firepit.
Once you have a solid firepit design plan in place, it’s time to start laying the foundation for your firepit. This is a crucial step that requires careful attention to detail to ensure that everything is done correctly. In our next section, we’ll cover everything you need to know about preparing the foundation for your DIY firepit so that you can enjoy it safely and securely for years to come.
Laying The Foundation For Your Firepit
When it comes to laying the foundation for your firepit, the first decision you’ll need to make is choosing between brick or stone. Both materials have their advantages and disadvantages. Brick is affordable and easy to work with, but it may not be as durable as stone in the long run. Stone, on the other hand, is more expensive and requires more skill to install, but it’s incredibly sturdy and can withstand harsh weather conditions.
Once you’ve decided on your foundation material, it’s important to start leveling the area where you plan to build your firepit. This process involves digging a shallow hole that’s slightly wider than your desired firepit size and then filling it with gravel until it’s level. You can use a spirit level to ensure that everything is even. It’s also a good idea to check local building codes before beginning construction to ensure that you’re following all necessary regulations.
One of the most important tips for leveling your firepit foundation is taking your time. Rushing through this step could lead to an unstable firepit that poses a safety hazard. Remember that the foundation is what will support your entire firepit structure, so it needs to be done correctly from the start. Once you’ve finished leveling and compacting the gravel layer, you’ll be ready to move on to building the wall of your firepit.
Building The Firepit Wall
Building a firepit wall is like building the foundation of a house. It provides structure, stability, and support to ensure that your firepit lasts for years to come. There are several building techniques that you can use to construct your firepit wall, including dry stacking and mortaring. Dry stacking involves layering stones or bricks without any adhesive, while mortaring involves using a special type of cement.
When selecting building materials for your firepit wall, consider both aesthetics and durability. Decorative options such as natural stone or decorative brick can add visual interest to your backyard while providing a sturdy base for your firepit. It’s important to choose materials that are heat-resistant and weather-resistant, especially if you plan on using your firepit frequently.
Once you’ve constructed the wall of your firepit, it’s time to add finishing touches that truly make it stand out in your backyard oasis. From custom seating options to adding accents like potted plants or string lights around the perimeter of the pit, there are endless ways to customize your firepit space for maximum comfort and enjoyment. Stay tuned for our next section on how to add those perfect finishing touches to create an inviting outdoor living area that you’ll love spending time in with family and friends.
Adding Finishing Touches To Your Firepit
Now that your DIY firepit is complete, it’s time to add some finishing touches to make it look more aesthetically pleasing. Decorating ideas for your firepit can range from simple and rustic to elegant and modern. One easy way to decorate your firepit is by adding a border of stones or bricks around the perimeter. This not only adds a decorative touch but also serves as a safety precaution by keeping people at a safe distance from the flames.
Another decorating idea is to place potted plants or flowers around the firepit area. This helps to create a cozy atmosphere while also adding some color and life to the space. For those who prefer a more rustic look, consider using reclaimed wood or metal accents in your decorations. These materials are not only cost-effective but also add a unique touch that can’t be found in store-bought items.
Remember, safety should always be a top priority when using your firepit. Be sure to follow all safety precautions, such as keeping flammable items away from the pit and having a fire extinguisher nearby. Additionally, never leave your fire unattended and always fully extinguish it before leaving it for the night or when you’re done using it.
With these decorating ideas and safety precautions in mind, your DIY firepit will not only provide warmth and light but also serve as an attractive centerpiece in your outdoor living space. In the next section, we’ll discuss how adding a grate or screen can further enhance both the appearance and functionality of your firepit area.
Adding A Grate Or Screen To Your Firepit
Adding a grate or screen to your firepit can add both safety features and cooking options. Safety features are important when using an open flame, especially if you have children or pets in the yard. A grate can provide a barrier between the flames and surrounding area, preventing accidental fires and burns. Additionally, a screen can help contain sparks and embers, reducing the risk of starting a wildfire.
Cooking options are another benefit of adding a grate to your firepit. With a grate in place, you can easily cook hot dogs, burgers, and other outdoor favorites over an open flame. Some grates even come with adjustable levels so you can control the heat for different types of cooking. If you’re looking for more advanced cooking options, consider investing in a cast iron Dutch oven or grill plate that fits on top of your firepit grate.
When choosing a grate or screen for your firepit, there are several factors to consider. First, make sure it’s the right size for your firepit so it sits securely in place without wobbling or shifting. Second, think about what materials it’s made from – cast iron is durable and long-lasting while stainless steel may be easier to clean but not as sturdy. Finally, consider any additional features like adjustable height or pivoting sections that make cooking easier.
Transition: Now that you have added safety features and cooking options to your backyard firepit with a grate or screen, let’s take a look at how to choose the right fuel for optimal performance.
Choosing The Right Fuel For Your Firepit
Ah, the joys of sitting around a firepit with friends and family on a cool evening, roasting marshmallows and enjoying each other’s company. However, before you can start enjoying your backyard firepit, you need to decide what type of fuel to use.
There are several options available, each with its pros and cons. One popular choice is wood. It’s easy to come by and creates an authentic campfire experience. Plus, it produces that lovely crackling sound we all love. However, wood-burning firepits have a significant environmental impact as they release harmful pollutants into the air.
Another alternative is propane gas. It’s clean-burning and easy to control the flame size. Additionally, propane is readily available at most hardware stores, making it convenient for homeowners. Yet, propane isn’t exactly the most eco-friendly option either – it’s a fossil fuel that contributes to climate change.
Finally, there are natural gas firepits that provide a consistent flame without producing smoke or ash. Natural gas may be environmentally cleaner than propane but requires professional installation as it needs a dedicated gas line installed in your yard.
Choosing the right fuel for your firepit depends on your preferences and values – do you prioritize convenience or sustainability? Keep in mind the environmental impact of your decision when making your choice. In the next section, we’ll explore how maintaining your firepit can ensure longevity and safety for years to come.
Maintaining Your Firepit For Longevity
After choosing the right fuel for your firepit, it’s important to maintain it properly for longevity. A well-maintained firepit can last for many years and provide warmth and ambiance for countless evenings spent outdoors.
Tips for cleaning, storing, and covering your firepit include using a wire brush to remove any debris from the bowl or ring, wiping down the exterior with a damp cloth and mild soap if needed, and storing it in a dry place when not in use. It’s also important to cover your firepit when not in use to protect it from the elements.
Another way to enhance your outdoor living space is by decorating your firepit area for different seasons and occasions. Consider adding string lights or lanterns for a cozy atmosphere in the fall and winter months, or incorporating colorful throw pillows and outdoor rugs for a festive summer gathering.
As you enjoy your backyard oasis, keep in mind some safety precautions to consider when using your firepit. Always have a bucket of water or sand nearby in case of any emergencies, keep children and pets away from the flames, and never leave your fire unattended. With proper maintenance and care, your DIY firepit can be a staple of outdoor entertaining for years to come.
Safety Precautions To Consider When Using Your Firepit
As you sit around your firepit, it’s easy to get lost in conversation or the warmth of the flames. However, it’s important to prioritize safety precautions to ensure a hazard-free environment. Remember, fire is unpredictable and can quickly get out of hand.
Firstly, make sure you have a fire extinguisher nearby in case of emergencies. A First Aid kit should also be easily accessible in case anyone gets hurt. As an outdoor living expert, I recommend having a designated area for these items so that they are always within reach.
Secondly, protective clothing and footwear recommendations are crucial when using your firepit. Clothing made from natural fibers such as cotton or wool is less likely to catch fire than synthetic materials like nylon or polyester. Additionally, closed-toe shoes with good traction will prevent slipping on uneven ground.
Lastly, don’t forget about landscaping around your firepit. It’s important to keep any flammable materials at least 10 feet away from the pit to reduce the risk of accidental fires spreading. In the next section, we’ll explore ways to enhance your firepit with surrounding landscaping while still prioritizing safety precautions.
Enhancing Your Firepit With Surrounding Landscaping
Landscaping ideas can take your DIY firepit from functional to fabulous. Adding greenery, rocks, and other decorative elements can enhance the look of your backyard and make it a more inviting space. Here are a few landscaping ideas to consider:
- Planting shrubs or small trees around the perimeter of the firepit can create a natural boundary and add privacy to your outdoor space.
- Incorporating decorative rocks or stones into your landscaping design not only adds visual interest but also provides a practical solution for drainage issues that may arise around the firepit area.
- Using colorful flowers or plants in pots or hanging baskets nearby can create pops of color and provide an opportunity for seasonal changes.
Decorative elements, such as lighting fixtures or outdoor art pieces, can also complement your DIY firepit and make it a focal point in your backyard. Consider these ideas:
- String lights above the firepit area can create ambiance and extend the use of your outdoor living space into the evening hours.
- A metal sculpture or art piece near the firepit can add interest to an otherwise plain setting while creating conversation with guests.
- Customized seating options, such as built-in benches or Adirondack chairs, can provide comfortable seating while also adding style to your backyard.
By incorporating landscaping ideas and decorative elements into your DIY firepit project, you’ll create an inviting outdoor living space that will be enjoyed by family and friends for years to come. Next up: enjoying your new DIY firepit with friends and family.
Enjoying Your New Diy Firepit With Friends And Family
Having built your own DIY firepit, it’s time to think about how you can make the most of it with your friends and family. One way to enhance the experience is by incorporating firepit recipes into your outdoor gatherings. There are many delicious options, from s’mores to grilled vegetables and meats that can be cooked directly on the flames. Experimenting with different recipes will add an exciting element to your get-togethers.
Another way to take advantage of your newly constructed firepit is by planning entertaining activities around it. You could host a game night or movie screening, complete with blankets and popcorn. Alternatively, you could organize a storytelling session or a sing-along around the fire. The possibilities are endless, but what matters most is creating an atmosphere that fosters connection and relaxation.
In summary, building a DIY firepit not only adds value to your backyard but also provides opportunities for socializing and creating unforgettable memories. By incorporating firepit recipes and entertainment ideas, you can elevate your outdoor gatherings and make them even more enjoyable for everyone involved. With some creativity and effort, you’ll be able to create an inviting space that brings people together in a warm and relaxing environment.
Conclusion
In conclusion, building a DIY firepit for your backyard can be a fulfilling and rewarding project for any outdoor living enthusiast. Before starting, it is important to assess your backyard for the best firepit placement and choose the right materials. Tools needed for building a firepit are typical household items, making this project accessible to many.
Understanding local firepit regulations is crucial to avoid any legal issues. Preparing the site and maintaining the firepit are also important steps in ensuring longevity. Safety precautions must be considered when using the firepit, but enhancing its surroundings with landscaping can create an inviting and aesthetically pleasing atmosphere.
As an outdoor living expert, I encourage you to take on this DIY project with excitement and enthusiasm. Remember, “a roaring fire makes even the coldest night cozy.” With proper planning and execution, your new DIY firepit will become a beloved feature in your backyard oasis.
Image Credits
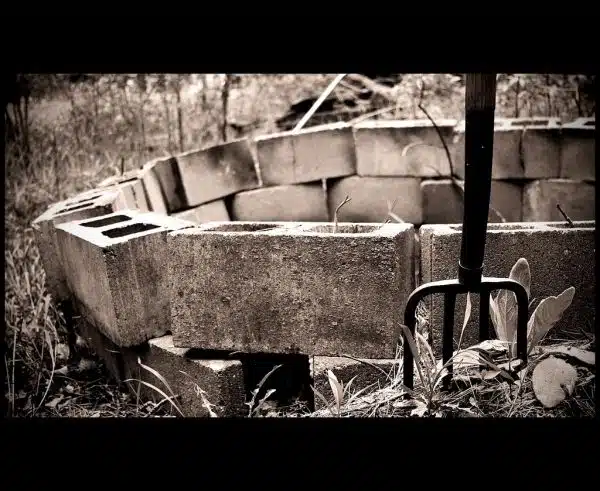
- “firepit-pitchfork” by blhphotography (featured)









![How To Build A Detached Deck 17 Force Reconnaissance Detachment Deck Shoot [Image 4 of 4]](https://green-life.blog/wp-content/uploads/2023/05/RJo3tlizSGjq-150x150.jpg.webp)






![Calculating How Much Stone Dust You Need 27 [Blog Post]Stone Dust © Oxfam Australia](https://green-life.blog/wp-content/uploads/2023/05/GdZVzgTqPhjq-150x150.jpg.webp)
