Pegboards are a versatile and practical storage solution that can be found in many workshops and garages. These boards provide ample space to organize tools, equipment, and other materials, making them easily accessible when needed. While pre-made pegboards can be purchased from hardware stores, building your own DIY pegboard can be a fun and rewarding project that allows you to customize the size, shape, and layout of the board to your specific needs.
In this article, we will guide you through the steps required to build your own DIY pegboard. We will cover everything from selecting the right materials to installing the board on your wall. With our comprehensive guide, even those with limited DIY experience will be able to create a functional and attractive storage solution that will help keep their workspace organized and efficient. So whether you’re a seasoned craftsman or just starting out in the world of DIY projects, read on to learn how to build your own custom pegboard.
Understanding The Benefits Of A Diy Pegboard
As a DIY enthusiast, building a pegboard is an excellent way to organize your workspace and tools. The benefits of having a DIY pegboard are numerous, making it a must-have for anyone who wants to keep their space tidy. One major benefit of having a DIY pegboard is its customization options. With this kind of pegboard, you can create the exact layout you need to fit your unique tools and accessories.
Customizing your DIY pegboard allows you to have complete control over the organization of your tools and equipment. You can add specific hooks, shelves, or bins that align with the shape and size of each tool. This makes it easier for you to find what you need quickly while also keeping everything in its place. In addition to this, customizing your DIY pegboard gives you the freedom to add some creativity and personality into your workspace.
Another benefit of having a DIY pegboard is that it helps in decluttering your workspace. Instead of leaving all your tools scattered all around the room or on top of tables, they will now have a designated spot on the wall where they belong. This not only saves space but also eliminates the stress that comes with misplacing tools or spending too much time searching for them.
Assessing your space and needs is essential before embarking on building a DIY pegboard. By doing so, you will be able to determine how much space you have available, what type of materials are required for construction, and which layout best suits your needs. Ultimately, assessing these factors will help ensure that you end up with a functional DIY pegboard while also saving time during construction.
Assessing Your Space And Needs
Assessing Your Space and Needs is a crucial step to building your own DIY pegboard. Before you start designing and customizing pegboard, take time to evaluate your space and needs. This will help you determine the size, type, and placement of your pegboard.
Customizing pegboard is a great way to create an organized storage solution for your tools, art supplies, and other items. You can customize the size of each panel according to your needs and preferences. Additionally, you can add hooks, shelves, baskets, or any other accessory that suits your specific storage requirements. Customization allows you to maximize the use of vertical space in your workshop or garage.
Benefits of vertical storage cannot be overstated. Vertical storage helps save floor space while keeping tools organized and easily accessible. Pegboards are particularly effective in this regard because they allow you to store a wide variety of tools without taking up too much space. Moreover, it enables quick identification of the right tool for the job without having to rummage through drawers or bins. By using vertical storage solutions like pegboards, you can create more workspace in your workshop or garage while improving overall efficiency.
Evaluating your space and needs before designing your DIY pegboard will help ensure that it’s functional and efficient. Customizing the size of each panel according to your requirements allows for maximum use of vertical space in your workshop or garage. The benefits of vertical storage cannot be overstated as it saves floor space while making tools easily accessible. In the subsequent section, we’ll discuss how choosing the right materials and tools is essential when building a DIY pegboard that meets all these requirements.
Choosing The Right Materials And Tools
When constructing a DIY pegboard, it is important to first select the right pegboard for the project. This entails researching the available pegboard options and purchasing the necessary supplies. Once the pegboard and supplies are acquired, one should measure the area to be worked on and gather the necessary tools, such as a hammer, nails, screws, hacksaw, level, pencil, saw, sandpaper, wall anchors, and drill. Finally, the appropriate hanging hardware should be chosen.
Selecting Pegboard
When it comes to building a DIY pegboard, selecting the right type and size of pegboard is crucial. There are several types of pegboards available in the market, including tempered wood, metal, and plastic. Each type has its own set of advantages and disadvantages. For instance, tempered wood pegboards are sturdy and durable but require regular maintenance to prevent warping or splitting. Meanwhile, metal pegboards are highly durable and resistant to corrosion but may be more expensive than other options.
As for the size of the pegboard, it depends on your specific needs and available space. Pegboards come in a range of sizes, from small panels that can fit into a tight corner to larger sheets that can cover an entire wall. Consider the tools you plan to store on the board and how much space they require before selecting a size.
Before installation, make sure to inspect your chosen pegboard for any defects or damage that could compromise its durability or functionality. Also, check if it comes with installation hardware or if you need to purchase them separately. Finally, ensure proper maintenance by regularly cleaning your pegboard to prevent dust buildup that could affect its appearance and functionality over time. By carefully selecting and maintaining your pegboard, you can create an organized workspace that will last for years to come.
Purchasing Supplies
To create a functional and efficient DIY pegboard, choosing the right materials and tools is essential. However, finding suppliers that offer the necessary supplies can be challenging. It is recommended to research and compare prices from different suppliers to ensure you get the best deal without sacrificing quality.
When it comes to purchasing supplies for your DIY pegboard, consider the type of hooks, baskets, and shelves that are suitable for your storage needs. Some suppliers offer pre-packaged kits that include all the necessary hardware for installation, while others allow you to mix and match items according to your preference. Be mindful of the material quality as well; cheaper options may be tempting, but investing in durable materials can save you money in the long run.
Comparing prices from different suppliers can help you save money on your pegboard project. However, don’t let price be the only deciding factor. Take into consideration other factors such as shipping costs, delivery times, and customer service reviews before making a purchase. With careful planning and research, you can find reliable suppliers that offer high-quality supplies at affordable prices for your DIY pegboard construction project.
Preparing Your Workspace
Preparing your workspace for a DIY pegboard may seem like an unnecessary step, but trust us, it will make all the difference in the world. You may be thinking, “Why would I bother organizing tools and creating space when I just want to get started on the actual project?” Well, dear reader, think of it this way: a cluttered workspace leads to a cluttered mind.
So before you even think about measuring and cutting your pegboard, take some time to declutter and organize your workspace. Get rid of any tools or materials that you no longer need or use, and find a designated spot for everything else. This could mean investing in storage bins or shelves if necessary. Not only will this make the actual construction process smoother, but it will also make future DIY projects much easier.
Once you’ve organized your tools and cleared some space, take a moment to appreciate your handiwork. Breathe in the fresh air of cleanliness and organization. And then get ready to dive into the fun part – measuring and cutting your pegboard!
Measuring And Cutting Your Pegboard
Before you can start assembling your pegboard, it is essential to measure and cut the board accurately. Measuring tips are crucial for ensuring that the pegboard fits perfectly into your desired space. To measure the board, use a measuring tape and mark the dimensions on the board using a pencil or marker.
When cutting the board, it is important to use appropriate cutting techniques to prevent damaging the board. Use a jigsaw or circular saw with a fine-toothed blade to cut through the board smoothly. Make sure to follow your markings precisely and cut slowly and steadily to avoid any errors.
It’s also important to wear safety gear such as gloves, goggles, and masks while cutting the board. This will protect you from potential injuries such as splinters or dust inhalation. With these measuring tips and cutting techniques in mind, you can proceed with confidence in creating your unique DIY pegboard.
- Measure twice before cutting once
- Use appropriate tools for precise cuts
- Always prioritize safety by wearing protective gear – and keeping the work area clear of hazards.
Sanding And Painting Your Pegboard
- When selecting a paint for a DIY pegboard project, consider the surface and the look you want to achieve, as well as the type of paint needed for the material of the pegboard.
- Once you have your pegboard, sand it down for a smooth, even finish.
- Use a sandpaper with a grit of at least 120 to ensure a good surface for the paint to adhere to.
- To apply the paint, start from the top and work your way down. Use even, long strokes for an even finish.
- For a more professional look, use a foam brush to apply the paint.
- Apply multiple coats of paint, allowing the paint to dry in-between coats.
Choosing A Paint
When it comes to setting up your own pegboard, choosing a paint is an essential step in the process. The right color can help make your tools pop and give your workspace a professional look and feel. With so many color options available, you can easily find one that matches your personal style or complements your existing décor. However, it’s important to keep in mind that the paint finish you choose will also play a significant role in the overall outcome.
For instance, if you’re looking for a glossy finish that will reflect light and give off a sleek look, you may want to opt for a high-gloss paint. On the other hand, if you prefer something more subtle that won’t show imperfections as easily, then a matte or eggshell finish might be more suitable. Ultimately, it all comes down to personal preference and what works best for your specific needs.
When selecting a paint for your pegboard project, take the time to consider both color options and finishes. By doing so, you’ll not only end up with a visually appealing result but also one that’s durable and long-lasting. With these tips in mind, you’ll be well on your way to achieving the perfect workspace setup that meets all of your DIY needs!
Sanding The Pegboard
Now that you’ve chosen the perfect paint for your pegboard, it’s time to move on to the next step: sanding. Sanding is an important process in preparing the surface for painting and ensuring that the finish adheres properly. It also helps smooth out any rough edges or imperfections in the board.
To start, use a fine-grit sandpaper (around 220 grit) to gently sand the entire surface of your pegboard. Be sure to remove any debris or dust that may have accumulated on the board before beginning. After sanding, wipe down the pegboard with a clean, damp cloth and let it dry completely before applying primer.
Applying primer is an essential step in achieving a professional-looking finish on your pegboard. It helps to create a smooth base for your paint and ensures that it adheres well to the surface. Once you’ve applied primer, let it dry completely before sanding again with a fine-grit sandpaper (around 320 grit). This will help create an even smoother finish and prepare your pegboard for the final coat of paint. With these finishing touches, your pegboard will be ready for use in no time!
Applying The Paint
Now that we have sanded and primed our pegboard, it’s time to apply the paint of our choosing. When selecting a paint, consider the finish you want to achieve. Different finishes provide varying levels of durability and shine. For example, a high-gloss finish is durable and easy to clean but will highlight any imperfections in the surface, while a matte finish hides imperfections but may not be as durable.
Before applying the paint, stir it thoroughly to ensure an even consistency. Use a brush or roller to apply a thin layer of paint over the entire surface of your pegboard. Be sure not to overload your brush or roller with too much paint, as this can result in drips or uneven coverage. Allow the first coat to dry completely before applying additional coats as needed.
Once you’ve achieved your desired level of coverage and finish, let the final coat dry completely before using your newly painted pegboard. With proper preparation and application techniques, your pegboard will not only look great but also function effectively for all your storage needs.
Creating Holes For Pegs
After sanding and painting your pegboard, it’s time to start creating the holes for the pegs. This step is crucial as it will determine how effective your pegboard will be in organizing your tools and other accessories. You’ll want to make sure that the holes are spaced correctly, drilled straight, and deep enough to hold your hooks securely.
Drilling techniques vary depending on what type of drill you have. A cordless drill is recommended for this project as it allows you more freedom of movement. When drilling, make sure to use a drill bit that is slightly smaller than the diameter of your pegs. This will ensure a snug fit for the hooks and prevent them from falling out due to weight or movement. Also, consider using a level or straight edge to make sure that all of your holes are aligned properly.
Peg placement strategies can depend on personal preference and the types of tools/accessories you plan on storing on your board. However, a general rule of thumb is to place larger items towards the bottom and smaller items towards the top for easier access. Additionally, consider grouping similar items together for better organization. Use this table as a guide when determining where to place your hooks:
| Item | Quantity | Placement |
|---|---|---|
| Small Screwdrivers | 10 | Top Row |
| Wrenches | 5 | Middle Row |
| Pliers | 4 | Bottom Row |
| Hammers/Mallets | 2 | Bottom Left Corner |
By following these drilling techniques and peg placement strategies, you’ll have an organized and functional pegboard in no time! In the next section, we’ll cover how to install hooks and accessories onto your board so that you can start utilizing its full potential.
Installing Hooks And Accessories
Imagine walking into your workshop and seeing all of your tools scattered on the floor. It would be impossible to find what you need, let alone complete a project efficiently. That’s where a pegboard comes in handy! Now that you’ve built your own DIY pegboard, the next step is installing hooks and accessories to make it even more functional.
There are many different types of hooks to use on your pegboard, depending on what you want to hang. For smaller items like screwdrivers and pliers, try using single hooks or double hooks. These come in various sizes and can hold multiple tools at once. If you have larger tools like hammers or saws, consider using pegboard brackets or angled hooks for stability.
In addition to hooks, there are plenty of creative accessory ideas to add to your pegboard. Magnetic strips can hold metal items like drill bits and screws, while baskets or shelves can hold larger items such as spray cans or power tools. You could even add a small whiteboard or chalkboard for notes and reminders while you work.
Now that you’ve added all the necessary hooks and accessories to your DIY pegboard, it’s time to mount it on the wall for easy access. But how do you do that without damaging the wall? Stay tuned for the next section where we’ll cover mounting options for your new pegboard.
Mounting Your Pegboard On The Wall
Once you have your pegboard constructed, it’s time to mount it on the wall. This can be done in a variety of ways, depending on your preferences and the tools you have available. Here are some tips and tricks to help you get started.
One popular way to mount a pegboard is to use furring strips. These are thin pieces of wood that can be attached to the wall with screws or nails. Once the furring strips are in place, you can attach the pegboard to them using screws or hooks. Another option is to use a French cleat system, which involves attaching one half of a cleat to the wall and the other half to the back of your pegboard. This allows you to easily hang and remove your pegboard as needed.
If you don’t want to use furring strips or a French cleat system, there are alternative mounting options available. For example, some people choose to mount their pegboards directly onto drywall using toggle bolts or molly bolts. Others opt for adhesive hooks or Velcro strips that can be attached directly onto the wall without damaging it. Whatever method you choose, make sure that it is secure enough to hold all of your tools and accessories.
In the next section, we will discuss securing your pegboard once it has been mounted on the wall. By following these tips and tricks for mounting your pegboard, you’ll be able to create an organized workspace that meets all of your DIY needs while also saving space in your garage or workshop.
Securing Your Pegboard
Now that you have constructed your DIY pegboard, it is essential to secure it correctly. The first step is to determine the wall’s material and choose the appropriate mounting hardware. Drywall requires toggle bolts or anchors, while wood paneling or studs can use screws directly into the wall. It is crucial to ensure that your pegboard is level before securing it to the wall.
Alternative mounting options for a pegboard include a French cleat system or attaching it to a freestanding frame instead of directly on the wall. A French cleat system uses two pieces of wood, one mounted on the pegboard and one on the wall, with an angled cut that slides together for easy installation and removal. A freestanding frame provides mobility for your workspace and allows you to move your pegboard around as needed.
Pegboard accessories such as hooks, baskets, and shelves can increase storage capacity and organization possibilities. Hooks come in various sizes and shapes suitable for hanging tools of different weights and sizes. Baskets can hold small items like screws or nails, while shelves provide flat surfaces for storing large items like power tools. Using these accessories helps keep everything in its place, making it easier to find what you need when you need it.
Now that your DIY pegboard is securely mounted, it’s time to organize your tools and materials efficiently. By grouping similar items together on hooks or in baskets/shelves, you save time searching for what you need during future projects. Keep frequently used tools within reach by placing them at eye level on the pegboard’s upper section. Organizing your workspace not only makes it more efficient but also creates a more satisfying experience knowing where everything belongs.
Organizing Your Tools And Materials
As DIYers, we all know how frustrating it can be when tools and materials are scattered all over the place. A disorganized workspace can not only affect productivity but also create a hazardous environment. Luckily, there is a simple solution to this problem: pegboard organization! Installing a pegboard system is an excellent way to keep everything in its place and create a visually appealing workspace.
Creative designs are endless when it comes to organizing your tools on a pegboard. You can arrange them by type or even color-code them for easy identification. With pegboards, you can customize your organizational system to fit your unique needs. Plus, they serve as an excellent backdrop for showcasing your favorite tools and adding some personality to your workshop.
Pegboard organization doesn’t have to break the bank either. Budget-friendly options include using recycled materials like old baking sheets or metal grates as hooks or creating shelves out of scrap wood. With just a little creativity and resourcefulness, you can have an organized workspace without spending a fortune. So why not give it a try? Your future self will thank you for it!
Transitioning into maximizing storage space, now that you have organized your tools and materials onto your new pegboards, it’s time to take things one step further by maximizing your storage space even more efficiently.
Maximizing Your Storage Space
Organizing your tools and materials is an essential first step in creating a functional and efficient workspace. Maximizing your storage space is the next logical step to take in achieving this goal. A well-designed pegboard can provide ample storage space for all of your tools, while also adding a touch of creativity to your workspace.
When it comes to designing your pegboard, there are many creative designs and alternative materials you can use. You might consider using different colors or patterns to make your board more visually appealing, or incorporating hooks and shelves for added functionality. Another option is to use alternative materials such as corkboard or wire mesh instead of traditional wooden pegboards.
No matter which design or material you choose, adding personal touches to your pegboard will help make it feel like a unique addition to your workspace. Consider adding photos or other decorative items that inspire you, or using custom-made hooks or hangers that reflect your personality. With a little bit of creativity and some careful planning, you can create a pegboard that not only keeps you organized but also adds character and style to your workspace.
Adding Personal Touches To Your Pegboard
Your pegboard is now built, but it’s not quite complete. Adding decorations and personalizing colors can make your pegboard stand out and reflect your personal style. Consider adding items such as framed pictures, plants, or even a clock to give your pegboard some character. These decorations can also serve a practical purpose by providing additional storage for small items like screws or nails.
When personalizing the colors of your pegboard, consider using colors that complement the decor of the room where it will be displayed. You can also use multiple colors to create an eye-catching design or pattern. To achieve this look, you will need to use painter’s tape to section off areas of the board before painting.
Incorporating these personal touches into your pegboard not only adds style but also makes it more functional and unique to you. It will be a conversation starter when guests come over and a source of pride every time you use it.
As you’ve learned, building a DIY pegboard is an excellent way to organize tools and other items in your workspace. Now that you’ve personalized it with decorations and color, maintaining its organization is crucial. In the next section, we’ll discuss tips for keeping your newly built pegboard tidy and clutter-free.
Maintaining Your Pegboard
DIY Pegboard Maintenance: Cleaning Tips, Repairing Holes
After successfully constructing your DIY pegboard, it’s important to maintain its functionality and appearance. Proper maintenance will not only prolong the lifespan of your pegboard but also keep it in good condition for years to come. Here are some tips on how to maintain your DIY pegboard.
Cleaning Tips: Regular cleaning is essential to maintaining a clean and organized workspace. To clean your pegboard, simply remove all the hooks and accessories from the board and wipe it down with a damp cloth. For dirtier or greasier areas, mix a small amount of dish soap with warm water and use a soft-bristled brush or sponge to scrub the affected areas. Rinse with clean water and dry thoroughly before reattaching hooks and accessories.
Repairing Holes: Over time, holes in your pegboard may become enlarged or damaged due to frequent use or accidental damage. Fortunately, repairing these holes is a simple process that can be done with a few basic tools. Begin by removing any hooks or accessories from the affected area. Then, fill the hole with spackle using a putty knife and smooth out any excess material. Allow the spackle to dry completely before sanding off any rough edges with fine-grit sandpaper.
In summary, maintaining your DIY pegboard is crucial for its longevity and functionality in organizing your workspace effectively. Regular cleaning using simple tools such as dish soap can help keep your board looking new while repairing holes ensures durability for years to come. In the next section, we will discuss troubleshooting common issues that may arise during maintenance of your DIY pegboard construction project.
Troubleshooting Common Issues
After maintaining your DIY pegboard, it is common to encounter issues that can affect its functionality. These problems can range from the pegboard not being sturdy enough to hold tools to difficulty in locating stored items. However, you do not need to panic as these issues are resolvable with some troubleshooting tips.
One of the most common solutions for a wobbly pegboard is to ensure that it is securely mounted on the wall. Check if the mounting screws are tightened and if they are firmly attached to the studs. You can also reinforce the back of your board with a wooden frame or metal brackets to prevent warping and sagging over time.
In addition, locating specific tools on your pegboard may also become challenging over time as you accumulate more items. To solve this issue, consider using labels or color codes for different categories of tools and accessories. This will make it easier for you to find what you need quickly and efficiently, saving you plenty of time during your projects. By applying these simple troubleshooting tips, your DIY pegboard will remain functional and serve its purpose effectively for a long time.
Conclusion
The construction of a DIY pegboard is a rewarding and practical project that can greatly enhance the organization and efficiency of your workspace. Through careful consideration of your space and needs, selection of appropriate materials and tools, precise measurements, and attention to detail during assembly, you can create a customized pegboard that maximizes storage space and reflects your personal style.
Just as each tool has its place on the pegboard, so too does each step in the construction process play an important role in achieving a successful outcome. It requires patience, persistence, and a willingness to troubleshoot any issues that may arise along the way. But with dedication and effort, the end result will be a functional and aesthetically pleasing addition to your workspace.
In the same way that each tool contributes to the larger task at hand, each step in constructing a DIY pegboard contributes to creating an optimal work environment. And just as proper maintenance is necessary for keeping tools in good condition, ongoing care is essential for maintaining the functionality of your pegboard. By embracing this mindset of attention to detail and continuous improvement, you can create a workspace that supports productivity and inspires creativity.
Image Credits
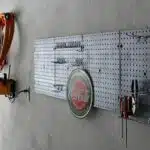
- “Garage Pegboard” by MDreibelbis (featured)


