Creating a stunning flower wall can be a great way to add a touch of elegance and charm to any event. Whether you’re planning a wedding, baby shower, or birthday party, a DIY flower wall is an affordable and creative option that can help you achieve the perfect ambiance for your special day. In this article, we will provide step-by-step instructions on how to create your own DIY flower wall that will transform any space into a beautiful and welcoming haven.
Flower walls have become increasingly popular in recent years, and it’s no surprise why. These stunning displays are not only visually appealing but also serve as the perfect backdrop for photos, creating lasting memories for guests. While it may seem daunting to create your own flower wall, with the right tools and guidance, anyone can do it. By following our simple steps and using quality materials, you’ll be able to create a beautiful and professional-looking floral display that is sure to impress. So roll up your sleeves and get ready to embark on a journey of creativity as we guide you through the process of making your own DIY flower wall.
Planning Your Design
Designing a flower wall requires careful planning to achieve the desired outcome. Consider the design elements that will complement your space and occasion. Think about the color schemes that you want to use, and decide on a theme that best suits your event or party.
When it comes to design elements, think about the overall style of your space, as well as any existing decor or furniture. If you’re going for a rustic look, consider using natural wood accents or vintage props to add character. For a modern feel, consider using metallic accents or geometric shapes in your design.
Color schemes are also important when designing a flower wall. Choose colors that complement each other and fit with the theme of your event. You can opt for monochromatic colors, complementary colors or even contrasting colors depending on what effect you want to achieve. Remember that color plays an important role in setting the mood and tone of your event.
Choosing your flowers and greenery is the next step in creating a stunning DIY flower wall.
Choosing Your Flowers And Greenery
- When selecting flowers and greenery for a DIY flower wall, it is important to consider the type of flowers, the type of greenery, and the combinations of both.
- Flowers come in a variety of colors, shapes, sizes, and textures, making them ideal for any flower wall.
- Greenery can range from simple and delicate ferns to larger and more dramatic plants, such as tropical palms.
- The color and shape of the flowers should be chosen to complement the overall design of the flower wall.
- Combining different types of flowers and greenery can create a unique and stunning effect.
- For a professional and polished look, it is important to ensure that the flowers and greenery are properly and evenly spaced.
Choosing Flowers
When it comes to choosing flowers for your DIY flower wall, you want to consider color combinations and seasonal options. Start by selecting a color scheme that will complement the overall aesthetic of your event or space. For example, if you’re creating a flower wall for a wedding, you may want to choose soft pastel colors or romantic shades of pink and red. If you’re creating a flower wall for a corporate event or photo shoot, you may want to choose more bold and vibrant colors.
Next, think about seasonal options when choosing your flowers. Certain types of flowers are only available during certain seasons, so it’s important to plan accordingly. For example, if you’re creating a flower wall in the fall, you may want to incorporate warm tones like orange and yellow with flowers such as dahlias or chrysanthemums. In the springtime, opt for lighter shades like lavender and blush with blooms like peonies or tulips.
Remember that the flowers you choose will ultimately determine the overall look and feel of your DIY flower wall. Take the time to research different options and don’t be afraid to play around with different combinations until you find what works best for you. With some creativity and careful planning, your DIY flower wall is sure to be a stunning addition to any space or event!
Greenery Types
When it comes to creating a DIY flower wall, flowers aren’t the only element you’ll need to consider. Incorporating greenery into your design can add texture and depth, making your creation even more visually stunning. Different greenery types can be found at local florists, farmers’ markets or even foraged from your own backyard.
Some popular greenery options include eucalyptus, ferns, ivy, and succulents. Eucalyptus is often used for its fragrant scent and long-lasting quality. Ferns offer a delicate touch while ivy adds a trailing effect. Succulents are perfect for adding texture and dimension to your floral wall design. When incorporating greenery into your DIY flower wall, remember that less is often more. Choose just a few varieties of greenery to avoid overwhelming the overall design.
Incorporating greenery into your DIY flower wall can seem intimidating, but with some tips and tricks, you’ll be able to create a beautiful display in no time. Adding greenery at the base of the wall can create an organic flow up towards the blooms. Another technique is to layer different types of greenery in front of each other to add depth and dimensionality. Play around with different combinations until you find what works best for you – creating a DIY flower wall is all about being creative!
Flower Combinations
Now that you have a good understanding of the different types of greenery to incorporate into your DIY flower wall, it’s time to start thinking about choosing your flowers. One important aspect to consider is flower color palettes. You want to choose colors that complement each other and create a cohesive look. Some popular color combinations include pastels for a soft and romantic feel, bold and bright colors for a fun and playful vibe, or monochromatic shades for an elegant look.
Another factor to consider when selecting your flowers is their symbolism. Different flowers can represent different emotions or meanings, so it’s important to choose blooms that align with the message you want to convey. For example, roses are often associated with love and passion while sunflowers can symbolize happiness and positivity.
When deciding on flower combinations, don’t be afraid to mix and match different types of blooms. A variety of textures and shapes can add interest and depth to your floral wall design. Consider using focal flowers such as peonies or dahlias paired with filler flowers like baby’s breath or waxflower. You can also add in some wildflowers or greenery sprigs for a more organic feel.
By following these tips for choosing your flowers and greenery, you’ll be able to create a stunning DIY flower wall design that will impress all who see it. Remember to consider color palettes, symbolism, and texture when selecting your blooms, but most importantly have fun experimenting with different combinations until you find what works best for you!
Determining Your Budget
Creating a budget is an essential step in planning for your DIY flower wall project. The cost of materials can add up quickly, so it’s important to set a realistic budget beforehand. To do this, you should consider the size of the wall you want to create, the types of flowers and greenery you plan to use, and any additional materials such as floral foam or wire.
Finding affordable options is key to staying within your budget. One way to save money is by selecting seasonal flowers that are readily available at lower prices. You can also purchase flowers in bulk from wholesale retailers or local farmers markets. Another option is to incorporate faux flowers into your design, which can be more cost-effective and allow your wall to last longer.
Ultimately, your budget will depend on your personal preferences and resources. It’s okay to adjust your plans accordingly if you find yourself exceeding your original budget. Remember that creating a stunning flower wall doesn’t have to break the bank – with some creativity and resourcefulness, you can achieve a beautiful result without overspending.
With your budget in mind, it’s time to move on to gathering your materials. Let’s explore how you can choose the perfect blooms for your DIY flower wall project!
Gathering Your Materials
Gathering the right materials is essential for making a successful DIY flower wall. Fabric, glue, flowers, felt, frame, wire, foam, paper, tape, ribbons, shears, floral mesh wrap, floral tape, floral foam, and stems all need to be taken into account. Floral mesh wrap is used to hold the flowers in place while floral foam can be used to support the stems. Floral tape and wire can also be employed to secure the flowers together and to the frame.
Fabric
When gathering materials for your DIY flower wall, one of the most important components to consider is fabric. Choosing the right type of fabric can make all the difference in achieving the desired look and feel of your floral masterpiece. Opt for lightweight fabrics such as cotton or linen to allow for easy manipulation and draping, while thicker fabrics like velvet add an element of luxury and drama. Additionally, incorporating texture and patterns into your fabric choices can create depth and interest within your floral design.
To take your fabric selection to the next level, consider dyeing or coloring techniques to create unique ombré effects. Dip-dyeing fabrics in a gradual color transition creates a stunning gradient effect that adds dimension to any flower wall. Alternatively, try tie-dyeing for a more eclectic and bohemian vibe. Experiment with different techniques such as shibori or batik to achieve a one-of-a-kind look that will set your flower wall apart from the rest.
Incorporating fabric into your DIY flower wall not only adds visual interest but also serves practical purposes such as creating a sturdy base for attaching flowers and greenery. With so many options available, choosing the right fabric can be overwhelming. However, by considering factors such as texture, pattern, and dyeing techniques, you’ll be well on your way to creating a stunning flower wall that will leave guests in awe.
Glue
Now that you have chosen the right fabric for your DIY flower wall, it’s time to focus on another essential component: glue. Using glue is an integral part of building a sturdy and long-lasting flower wall. Not only does it ensure that your flowers and greenery stay in place, but it also helps create a seamless look. There are different types of glue available for floral design, each with its unique properties and applications.
One of the most commonly used types of glue for flower walls is hot glue. Hot glue dries quickly and provides strong adhesion, making it perfect for attaching heavy flowers or stems to your fabric base. However, its fast-drying nature makes it challenging to reposition flowers once they’ve been attached. Another option is using floral adhesive or tacky glue, which allows more flexibility in positioning flowers while still providing a secure hold.
When selecting the type of glue to use for your flower wall, consider your specific needs and preferences. If you’re working with delicate blooms or want more control over placement, opt for a slower drying adhesive like white school glue. Alternatively, if you’re looking for an eco-friendlier option, consider using natural-based glues such as cornstarch paste or homemade gelatin glue.
Using the right type of glue can make all the difference in achieving a professional-looking flower wall that will impress guests at any event. Experiment with different types of adhesives to find one that works best for your project and remember to always follow safety precautions when handling hot glue or other chemicals.
Building Your Frame
Now that you have gathered your materials, it’s time to start building your frame. The first step is to decide on the size of your flower wall and purchase the appropriate materials. You can use PVC pipes or wooden planks as alternatives to metal grids.
Decorating tips: If you want to add a touch of elegance to your DIY flower wall, consider adding fairy lights or hanging lanterns. You can also incorporate other decorative elements such as ribbons, tassels, and mirrors for a unique look. When selecting flowers, choose colors and textures that complement each other for a cohesive and visually appealing design.
Frame alternatives: If you don’t have access to a metal grid or prefer another alternative, there are several options available. One is using chicken wire attached to a wooden frame or using wood lattice panels as the base for the flowers. These alternatives allow for more flexibility in terms of shape and size but may require more effort in terms of cutting and shaping the material.
As you prepare your flowers for the DIY flower wall, it’s important to keep them hydrated and fresh. Cut off any excess leaves or thorns and place them in water immediately after cutting. Keep them in a cool area until ready to use, misting with water occasionally to maintain their freshness. With these tips in mind, let’s move on to preparing your flowers for placement on the frame.
Preparing Your Flowers
Creating a flower wall can add an enchanting touch to any event or space. Before you start assembling your flower wall, it’s important to prepare your flowers properly. First, choose the types of flowers that best suit your design and color scheme. Consider the size of the wall, the lighting, and the environment where you will be placing it.
Once you have selected your flowers, it’s time to give them some TLC to ensure they last throughout your event or installation. Begin by trimming off any excess leaves or thorns with a sharp pair of scissors. This will help keep the water in the stems and prevent bacteria from growing. Next, place them in clean water for at least an hour before setting them up on the wall. You may also want to consider using floral foam as a base for your flowers, which can help keep them hydrated and in place.
Finally, maintaining your flower wall is crucial for its longevity and appearance. Check the water levels regularly and change it every two days to prevent bacteria buildup. If any flowers wilt or die, replace them immediately to maintain a cohesive look. Additionally, misting your flowers with water can help keep them looking fresh and vibrant throughout the day. By following these simple steps for preparing and maintaining your flowers, you are one step closer to creating a stunning flower wall installation.
As you move forward with attaching your flowers to the frame, there are several techniques you can use depending on the type of frame you have chosen. With these tips in mind and some creativity, you’ll soon have a beautiful DIY flower wall that adds charm and elegance to any space or occasion!
Attaching Your Flowers To The Frame
When it comes to attaching your flowers to the frame, there are many creative ways to do so. Using different adhesives is one option, such as hot glue or floral adhesive. Hot glue is a popular choice because it dries quickly and securely holds the flowers in place. Floral adhesive can also be used and has the added benefit of being transparent, so it won’t show through your flowers.
Another creative way to attach your flowers is by using wire or fishing line. Simply wrap the wire or fishing line around the stem of each flower and then attach it to the frame. This method allows for more flexibility in placement and can create a more natural-looking arrangement.
For a unique touch, you can also try attaching your flowers with small clothespins or clips. This works well if you want to easily switch out your flowers or add new ones in over time. Just clip the flower onto the frame and adjust as needed.
Now that you have your flowers attached, it’s time to fill in any gaps and create a cohesive look for your DIY flower wall.
Filling In The Gaps
Now that you have attached your flowers to the frame, it’s time to fill in the gaps. One way to achieve this is by using different textures. This will add dimension and interest to your flower wall.
Begin by selecting different types of foliage or greenery as a backdrop for your wall. You can also use dried flowers, moss, or feathers to create a unique texture. Make sure to mix and match different textures for an organic look.
Another way to add interest is by incorporating lights into your flower wall. Adding fairy lights or string lights can give a warm and cozy ambiance to the space. You can also opt for LED spotlights aimed at specific areas of the wall for dramatic effect.
Now that you’ve added texture and lighting, it’s time for the finishing touches. In the next section, we’ll discuss how to incorporate additional elements like ribbons, signage, and other decorative items into your flower wall design without overwhelming it. With these final steps in place, you’ll have a stunning DIY flower wall that will be perfect for any occasion!
Adding Finishing Touches
After creating your DIY flower wall, it’s time to add some finishing touches that will make it stand out. One of the best ways to do this is by incorporating lighting. Adding lights to your flower wall can create a whimsical and romantic ambiance, perfect for weddings or other special events. You can use string lights or LED lights to highlight specific areas on the wall or create a backlight effect behind the flowers.
Aside from lighting, choosing colors is another crucial aspect of adding finishing touches. The right color scheme can enhance the overall look and feel of your flower wall. Consider the occasion and theme of your event when selecting colors. For instance, if you’re hosting a baby shower, pastel hues like pink and blue are ideal choices. If you’re aiming for a more elegant and sophisticated vibe, opt for neutral shades such as white, cream, and champagne.
By adding lighting and carefully choosing colors, you can take your DIY flower wall to the next level. These simple yet effective finishing touches will transform an ordinary floral backdrop into a stunning masterpiece that will leave guests in awe. Once you’ve added these final touches, you’re ready to move on to hanging your flower wall – which we’ll cover in the next section!
Hanging Your Flower Wall
The finishing touches are what make your DIY flower wall truly unique and stunning. With just a few creative variations, you can make your wall stand out and add a personal touch that reflects your style. Adding ribbons, fairy lights, or even small picture frames to the wall can give it a charming look that is perfect for any occasion.
Alternative mounting options are also worth considering if you want to create a more versatile wall. Command strips or double-sided tape can be used to attach the flowers directly to the wall, which not only saves time but also makes it easier to remove and reuse them later. You can even use a pegboard as a base for your flower wall, which allows you to change the layout of the flowers as often as you like.
Now that you have added all the finishing touches and explored alternative mounting options, it’s time to focus on creating a stable base for your flower wall. This is an important step that cannot be ignored if you want your creation to last long and remain in good condition. There are several ways to create a stable base such as using chicken wire or floral foam, but whichever option you choose, make sure it is secure enough to hold all the weight of the flowers without collapsing.
Creating A Stable Base
Choosing a Wall: When selecting a wall to use for a diy flower wall, it is important to consider wall composition, the amount of weight the wall can support, and the type of adhesive used.
Securing the Wall: Sturdy and even wall surfaces are essential when creating a diy flower wall. Additionally, it is important to use appropriate adhesives to ensure the flower wall remains stable and secure.
Choosing A Wall
When creating a flower wall, choosing the right wall can make all the difference in ensuring a stable base for your design. If you plan to use your flower wall indoors, consider the type of surface you will be attaching it to. A smooth and flat surface, such as a painted or wallpapered wall, will allow for easier installation and better stability. On the other hand, if you plan to create an outdoor flower wall, choose a sturdy and waterproof material that can withstand weather conditions.
Another factor to consider when selecting a wall is the overall color scheme of your design. The wall color should complement or contrast with the flowers you will be using. For example, if you plan to use bright and bold colored flowers, choose a neutral-colored wall so that the flowers stand out more. Alternatively, if your flowers are more muted in color, selecting a brightly colored or patterned wall can add some extra interest.
Ultimately, choosing the right wall for your diy flower wall project requires careful consideration of both indoor vs outdoor options and color schemes. Taking these factors into account will not only create a stable base for your design but also enhance its overall aesthetic appeal. With some creativity and planning, your flower wall is sure to become a stunning focal point in any space!
Securing The Wall
Creating a stable base for your flower wall is crucial, but it’s not enough to ensure that it will last long. Securing the wall is equally important as it will prevent your design from falling apart, especially if you’re planning to hang heavy flowers. There are several tips for stability that you can follow to make sure that your flower wall stays in place. For starters, use strong adhesive materials such as industrial strength double-sided tape or mounting squares. You can also use screws and brackets if you’re attaching your flower wall on a wooden surface.
Aside from using sturdy materials, decorative accents can also help secure the wall while adding an extra touch of beauty to your design. Consider adding decorative elements such as ribbons, tassels, or even small floral arrangements on top of your flower wall. These accents will not only add visual interest but will also provide additional support for the structure.
Lastly, don’t forget to regularly check and adjust the stability of your flower wall over time. Depending on the weight and size of your flowers, they may need repositioning or additional support as time goes by. With proper care and maintenance, however, your flower wall will stay secure and beautiful for a long time!
Lighting Up Your Flower Wall
Creating ambiance is an essential aspect of setting up a flower wall that will leave a lasting impression on your guests. To achieve this, it is crucial to incorporate lighting into your flower wall design. The right lighting can add warmth and depth to your floral arrangement, creating a cozy and inviting atmosphere.
Choosing the right bulbs for your flower wall design is critical in creating the perfect ambiance. LED bulbs are a popular choice because they are energy-efficient, long-lasting, and come in various colors. Warm white LED bulbs create a soft glow that is perfect for indoor events, while colored LED bulbs can be used to add a pop of color or match the theme of your event.
To install the lighting on your flower wall, start by placing the bulbs evenly throughout the arrangement. You can use string lights or individual bulbs attached to wire stems to create a more natural look. Once you have placed the lights in their desired locations, test them out to ensure that they are working correctly before securing them in place.
Maintaining your flower wall requires careful attention to detail and regular upkeep. In the next section, we will discuss tips and tricks for keeping your floral arrangement looking fresh and vibrant for as long as possible. With proper maintenance and care, your flower wall can be an exquisite addition to any event or space.
Maintaining Your Flower Wall
One common misconception about flower walls is that they require a lot of maintenance. This is not entirely true, as with proper care, your flower wall can last for a long time without too much hassle. The first step to maintaining your flower wall is to establish a watering schedule. Depending on the type of flowers you use, they may require different amounts of water and sunlight. It is important to research the specific needs of each type of flower before planting them in your wall.
Another important aspect of maintaining your flower wall is pest control. Whether you are growing flowers indoors or outdoors, pests like aphids and spider mites can wreak havoc on your plants. One effective way to prevent infestations is to regularly inspect your flowers for signs of damage or pests. You can also use natural remedies such as neem oil or insecticidal soap to keep pests at bay.
By following these simple steps, you can ensure that your DIY flower wall stays healthy and beautiful for months or even years to come. However, even with proper care and maintenance, issues may arise from time to time. In the next section, we will discuss some common problems that may occur with your flower wall and how to troubleshoot them effectively.
Troubleshooting Common Issues
Troubleshooting tips are essential for any DIY project, and creating a flower wall is no exception. Common mistakes include using the wrong type of adhesive, choosing flowers that wilt quickly, or not having enough materials to complete the project. To avoid these issues, it’s important to plan ahead and gather all necessary supplies before starting.
One common mistake is using hot glue or tape to attach flowers to the wall. This can damage both the flowers and the surface of the wall. Instead, use floral foam or wire mesh as a base for your flowers, then attach them using floral wire or zip ties. This will ensure that your flowers stay in place without causing any damage.
Another issue is choosing the wrong type of flowers for your wall. Some flowers may be too delicate and prone to wilting quickly, while others may not hold up well over time. It’s important to do your research and choose hardy blooms that will last throughout your event or decor theme. Additionally, make sure you have enough materials on hand before starting your project to avoid running out mid-way through.
In summary, troubleshooting common issues when making a DIY flower wall can save you time and frustration in the long run. Using proper adhesives and choosing hardy blooms will help ensure that your creation lasts throughout your event or decor theme. Take the time to plan ahead and gather all necessary supplies before starting your project to avoid running into any unexpected roadblocks along the way.
Transition: Now that we’ve covered some troubleshooting tips for creating a DIY flower wall, let’s move on to finding inspiration for designing one that suits your unique style and needs.
Finding Inspiration For Your Flower Wall Design
Did you know that 80% of people feel happier when they are surrounded by flowers? Flowers have the power to uplift our mood and brighten up our space. If you’re looking to create a DIY flower wall, the first step is finding inspiration for your design. There are many sources of inspiration available, from Pinterest boards to floral design books.
When looking for inspiration, consider the color palette you want to use. The colors you choose will set the tone for your entire flower wall. You can go for a monochromatic look with shades of pink or blue, or mix and match bold colors like orange and purple. Look to nature for inspiration as well – wildflowers and greenery can add a natural touch to your design.
Don’t be afraid to think outside the box when it comes to finding inspiration. You can draw ideas from art, fashion, or even travel destinations. Incorporating unexpected elements into your flower wall can make it truly unique and personal. With so many sources of inspiration available, creating a beautiful DIY flower wall has never been easier or more fun!
Conclusion
Creating a beautiful flower wall is an art that requires patience, planning, and creativity. Just like a gardener who carefully tends to their plants, you too can cultivate your own DIY flower wall. By choosing the right flowers and greenery, building a sturdy frame, incorporating lighting, and maintaining your creation with care, you can transform any space into a stunning oasis.
Like a painter who selects their palette with care, choosing the right flowers and greenery for your DIY flower wall is essential. Consider the colors and textures that will complement your space and create the ambiance you desire. Once you have gathered your materials and built your frame, it’s time to let your artistic talents shine by arranging your blooms in an aesthetically pleasing way.
Creating a DIY flower wall is not only about beauty but also about nurturing something from its inception to its full potential. Like a parent watching their child grow into adulthood, you too will feel pride in seeing your creation flourish. With careful maintenance and attention to detail, your flower wall will continue to bloom for years to come. So go ahead and let your inner floral designer blossom as you embark on this delightful journey of creating a DIY flower wall!
Image Credits
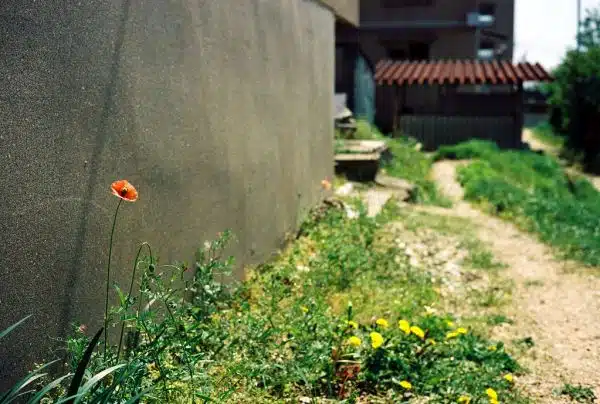
- “Wall and Flowers” by halfrain (featured)

