Welcome to the world of DIY mirror frame building! In this article, I will guide you through the steps necessary to create a custom mirror frame that will add a touch of elegance and uniqueness to your home decor. Whether you are a seasoned DIYer or just starting out, this project is perfect for those who want to showcase their creativity and craftsmanship.
Building your own mirror frame can be both challenging and rewarding. Not only does it allow you to personalize your space, but it also gives you the opportunity to learn new skills and techniques. By following my step-by-step instructions, you will gain knowledge in woodworking, measuring and cutting materials, sanding and finishing techniques, as well as installing hardware. So grab your tools and let’s get started on creating a beautiful mirror frame that will serve as a stunning focal point in any room!
Choosing The Right Materials
Did you know that a DIY mirror frame can add a touch of elegance to any room in your house? Not only is it an affordable way to upgrade your home decor, but it also allows you to showcase your creativity and craftsmanship. Before you start building, however, it’s important to choose the right materials for your project.
One of the first decisions you’ll need to make is whether to use wood or metal for your DIY mirror frame. Both materials have their advantages and disadvantages. Wood is easy to work with and can be stained or painted in any color or finish. On the other hand, metal frames are durable and sleek, perfect for modern interiors. Ultimately, the choice will depend on your personal preference and the overall style of the room.
Another consideration is whether to use natural or painted materials for your frame. Natural wood can bring warmth and texture to a space, while painted frames can add a pop of color or contrast. Keep in mind that if you choose to paint your frame, you’ll need to sand and prime it before applying any paint or finish.
Now that you’ve decided on the type of material for your DIY mirror frame, it’s time to move on to measuring and cutting your wood. By following these steps carefully and using the proper tools and techniques, you’ll be able to create a beautiful custom mirror frame that will enhance the ambiance of any room in your home.
Measuring And Cutting Your Wood
Before you begin measuring and cutting your wood, make sure you have all the necessary tools. Using power tools such as a miter saw or circular saw will make the process quicker and more accurate. However, if you do not have access to these tools or are uncomfortable using them, a hand saw can still achieve satisfactory results.
Safety precautions should always be taken when working with power tools. Wear protective eyewear and gloves to prevent injury from flying debris or accidental cuts. Additionally, work in a well-ventilated area to avoid inhaling sawdust, which can irritate the respiratory system.
Once you have your materials and safety gear in place, it’s time to measure and cut your wood. Begin by measuring the length and width of your mirror, then add an inch or two to each measurement to allow for overhang. Using a straight edge or square tool, mark where you need to cut and use your chosen saw to carefully cut along the lines.
- Nested bullet point list:
- Always double-check your measurements before making any cuts.
- Measure twice, cut once.
- Consider creating a template out of cardboard or paper first.
- This can help ensure accuracy and prevent mistakes on expensive wood.
In the next section, we’ll discuss how to sand your wood for a smooth finish that’s ready for staining or painting.
Sanding Your Wood For A Smooth Finish
Now that you have measured and cut your wood, it’s time to move on to the next step of building your DIY mirror frame. Sanding is an essential part of creating a smooth finish for your frame. Many people skip this step, but it can make a significant difference in the final product.
Sanding wood is not as complicated as it may seem. There are various techniques and tools that you can use to achieve a smooth finish. You can either sand by hand or use power tools such as sanders or sandpaper attachments for drills. The latter option will save you time and energy, but it requires some expertise.
When sanding wood for mirror frames, there are some tips and tricks that you should keep in mind. First, start with coarse-grit sandpaper and gradually move to finer grits for a smoother finish. Second, always sand in the direction of the wood grain to avoid leaving scratches or marks on the wood surface. Lastly, be patient and take breaks if necessary to avoid over-sanding and damaging the wood surface. With these techniques and tips, you’ll have a perfectly sanded frame ready for staining or painting in no time!
Staining Or Painting Your Frame
Choosing between staining or painting for your mirror frame is an important decision that will affect the overall look and feel of your finished product. Both options have their pros and cons, so it’s important to consider what you want to achieve with your project before making a decision. Staining can be a great option if you want to highlight the natural beauty of the wood grain, while painting allows you more freedom to add color and personality to your frame.
Tips for achieving the perfect finish on your DIY mirror frame include ensuring that your surface is clean and smooth before applying any stain or paint. Sanding down any rough spots or imperfections can help ensure a flawless finish. Additionally, using a high-quality brush or roller can make all the difference in achieving a professional-looking result. Finally, be sure to give ample time for drying before moving on to the next step.
Ultimately, whether you choose to stain or paint your DIY mirror frame comes down to personal preference and the desired look of your finished product. Taking the time to carefully consider which option is best for you, as well as following these tips for achieving the perfect finish, will help ensure that you end up with a beautiful and functional addition to your home decor.
As you move forward with adding decorative elements to your DIY mirror frame, keep in mind that there are many different options available depending on your style and budget. Whether it’s adding intricate carvings or simply layering different colors of paint, there are no limits when it comes to customizing your frame. With some creativity and patience, you’ll be able to create a truly unique piece that reflects both your personal style and skill as a DIY enthusiast.
Adding Decorative Elements
After staining or painting your frame, it’s time to add some personality to your DIY mirror. Mirror frame embellishments will give your project an extra touch of creativity and uniqueness. There are many options when it comes to adding decorative elements, such as using stencils to create patterns in paint or glueing on small accents like beads or buttons.
If you’re feeling stuck on DIY mirror frame inspiration, take a look online for ideas. Pinterest and Instagram are great places to start, as well as home decor blogs. You can also find tutorials for specific techniques, like how to create a distressed look or how to apply gold leaf. Don’t be afraid to think outside the box and try something new – this is your chance to make your mirror truly one-of-a-kind.
To help you get started with brainstorming ideas, here’s a table of different types of mirror frame embellishments and some examples of each:
| Embellishment Type | Examples |
|---|---|
| Paint Accents | Stenciled designs, ombre effect, metallic paint |
| Small Accents | Beads, buttons, seashells |
| Fabric Accents | Wrapped fabric strips, ribbon bows |
| Natural Materials | Driftwood pieces, twigs or branches |
| Metal Accents | Decorative brackets or corner pieces |
With so many options for adding decorative elements to your DIY mirror frame, the possibilities are endless. Remember that this is your chance to really express yourself through your project. Take the time to explore different techniques and styles until you find something that feels just right. Once you’ve finished embellishing your frame, you’ll be ready for the final step: assembling your frame into a beautiful and functional addition to any room in your home.
Assembling Your Frame
Once you have all the pieces cut and sanded, it’s time to start assembling your frame. First, lay out all of the pieces in the design that you have chosen. Make sure that they are all aligned properly and that everything is symmetrical. Double-check your measurements to ensure a perfect fit.
Begin by gluing each joint together, being careful not to use too much glue. A small amount will suffice. Use clamps to hold the joints tightly in place while the glue dries. Once the glue has fully cured, remove the clamps and sand down any excess glue or rough edges.
Now comes the fun part – adding creative embellishments to your frame design! This is where you can really let your creative juices flow. You can add details such as decorative molding, carved designs, or painted accents. The possibilities are endless! Just remember to keep it tasteful and within your skill level.
With your frame assembled and decorated, it’s almost time to mount your mirror. But before we get into that step, take a moment to admire your handiwork! Your DIY mirror frame is now a beautiful piece of functional art that you can be proud of for years to come.
Mounting Your Mirror
Once you have constructed your DIY mirror frame, the next step is to mount your mirror. This process involves two main steps: choosing a mounting method and securing hardware.
When it comes to mounting methods, there are several options available. One popular choice is to use mirror clips, which attach directly to the wall and hold the mirror in place. Another option is to use a French cleat system, which involves attaching one half of the cleat to the wall and the other half to the back of the mirror. This allows for easy hanging and removal of the mirror.
Regardless of which mounting method you choose, it is important to also consider securing hardware. This includes screws or nails that will be used to attach the mounting system to the wall or frame. Make sure to select hardware that is appropriate for your specific wall type and weight of your mirror.
Now that you have chosen a mounting method and secured your hardware, it’s time to hang your mirror! But before we get ahead of ourselves, let’s first discuss how to measure and cut your mirror for a perfect fit in our next section.
Measuring And Cutting Your Mirror
Now that you have mounted your mirror, it’s time to move on to the next step of building your DIY mirror frame: measuring and cutting your mirror. Before starting to measure, it’s important to decide on the design and size of your mirror frame. The design will determine the type of wood and tools needed for the project, while the size will determine the dimensions needed for your cuts.
Once you have decided on the design and size of your mirror frame, start by measuring the length and width of your mirror. Record these measurements accurately as they will be used to determine the dimensions for your cuts. Afterward, use a straight edge ruler and a pencil to draw out where you will make each cut on your lumber. Double-check these measurements before proceeding with any cuts.
When cutting your lumber, it’s important to take safety precautions such as wearing protective gear like gloves and goggles. Use a saw that is appropriate for the type of wood being used in order to ensure clean and precise cuts. Once all pieces have been cut according to measurements, use sandpaper or a sander to smooth down any rough edges or surfaces before assembling. With this step complete, let’s move on to preparing your mirror for installation.
Mirror Frame Design
Choose a design that complements your home decor
Consider using reclaimed wood for an eco-friendly option
Research different types of joints for added strength
Mirror Frame Size
Measure both length and width accurately
Consider adding extra inches around edges for overhang
Keep in mind thickness of lumber when calculating dimensions
Safety Precautions
Wear protective gear such as gloves and goggles
Use proper saw for type of wood being used
Sand down any rough edges or surfaces
Now that you have completed measuring and cutting your lumber, it’s time to focus on preparing your mirror for installation.
Preparing Your Mirror For Installation
Accurate measurements are essential for selecting the correct frame for the mirror. It is important to accurately measure the width and height of the mirror to ensure the frame will fit properly. When selecting a frame, consider the size, shape, style, color, and material of the mirror’s frame. Once the measurements are taken and the frame is selected, the mirror is ready for installation.
Measure Mirror
When it comes to building a DIY mirror frame, preparing your mirror for installation is crucial. One of the first steps in this process is measuring your mirror correctly. Measuring techniques will vary depending on the shape and size of your mirror, but there are some general guidelines you can follow.
Before you start measuring, consider the size of your mirror. The size of your mirror will determine how much material you’ll need for the frame. Additionally, larger mirrors may require more support from the frame to prevent warping or sagging over time. Once you’ve determined the size of your mirror, measure it carefully using a tape measure or ruler. Be sure to measure twice to ensure accuracy.
Another consideration when measuring your mirror is whether it has beveled edges or not. Beveled edges can add an additional 1-2 inches to the overall dimensions of the mirror, so be sure to account for this when measuring for your frame. Additionally, if your mirror is an irregular shape (such as oval or round), make sure to take measurements at multiple points along both axes to ensure accuracy.
Remember that accurate measurements are key when building a DIY mirror frame. Take your time and double-check all measurements before cutting any materials. With these measuring techniques and considerations in mind, you’ll be well on your way to creating a beautiful custom frame for your mirror!
Select Frame
Now that you’ve properly measured your mirror, it’s time to select a frame style that will best suit your needs. When choosing a frame, consider the overall aesthetic of the room where the mirror will be installed. A sleek and modern frame may work well in a contemporary space, while a more ornate or traditional frame may better complement a classic décor scheme.
Another important factor to consider when selecting a frame is color. You’ll want to choose a color that complements the existing color palette of the room, or one that creates an eye-catching contrast. Neutral tones like black, white, and natural wood are versatile choices that can work with many different styles and colors.
When selecting your DIY mirror frame, make sure to take accurate measurements of both the mirror and the selected frame to ensure that they fit together seamlessly. By following these guidelines and considering all aspects of your home’s design scheme, you can create a beautiful custom mirror that will add style and functionality to any space.
Adding Hardware For Hanging
Choosing and installing the right hardware is crucial when it comes to hanging your DIY mirror frame securely. To begin, you need to choose the appropriate hardware that can support the weight of your mirror. The most common options are D-rings, wire, and keyhole brackets. A great way to determine which one is best for you is by checking the mounting instructions provided by the manufacturer of your mirror.
Once you have chosen the appropriate hardware for your mirror frame, it’s time to install it. For D-rings or wire, measure and mark where you want them to be on both sides of the back of your frame. Use screws that are long enough to go through the frame but not too long that they poke out from the front. For keyhole brackets, hold them up against the back of your frame and mark where you want them to be installed. Then screw them into place.
By taking care in selecting and installing your hardware, you can ensure that your DIY mirror frame will hang securely and look professional. A table displaying different types of hardware options along with their pros and cons can help guide you in making this decision.
| Type of Hardware | Pros | Cons |
|---|---|---|
| D-Rings | Can hold a lot of weight | Requires precise measurements |
| Wire | Easy to use | May require additional support |
| Keyhole Brackets | Easy installation | Limited weight capacity |
Moving forward with confidence that your DIY mirror frame is well-supported will provide a sense of satisfaction every time you admire it on display in your home. In our next section, we’ll discuss tips for achieving a professional look when building a DIY mirror frame without breaking the bank or sacrificing quality materials.
Tips For A Professional Look
Now that you have added the hardware for hanging your DIY mirror frame, it’s time to focus on the finishing touches. No one wants a mirror that looks like it was hastily put together, so here are some tips for achieving a professional look.
First, use wood filler to cover any gaps or holes in the frame. This will give your mirror a seamless appearance and prevent any imperfections from showing through. Make sure to let the wood filler dry completely before sanding it down.
Next, consider installing brackets to secure the mirror within the frame. This will prevent it from shifting or falling out of place over time. Be sure to measure and mark where the brackets should go before screwing them in.
To really make your DIY mirror frame stand out, add some decorative trim along the edges. This can be anything from simple molding to intricate carvings, depending on your skill level and personal preference. Just be sure to choose a style that complements both the mirror itself and the room it will be hung in.
By following these tips, you can create a DIY mirror frame that looks just as good as one you’d buy in a store. However, even with careful planning and execution, issues may arise during the building process. In the next section, we’ll discuss some common troubleshooting techniques for when things don’t go quite as planned.
Troubleshooting Common Issues
Common mistakes can occur during the process of building a DIY mirror frame. One common issue is not measuring accurately, which can result in uneven cuts and a crooked frame. To avoid this mistake, make sure to measure multiple times before making any cuts and use a square to ensure your angles are precise.
Another common mistake is using the wrong type of wood or not preparing the wood properly before building. Using a softwood instead of hardwood can result in an unstable frame that may warp over time. Additionally, failing to sand or coat the wood before assembly can lead to rough edges and an unfinished appearance. To avoid these issues, research which type of wood will work best for your project and take the time to properly prepare it before beginning.
If you encounter problems during the building process, there are troubleshooting tips you can try. For example, if your frame appears crooked after assembly, try adjusting the hanging hardware on the back until it hangs straight. If you notice gaps between joints, use wood filler to fill them in and then sand smooth once dry. By taking your time during construction and being willing to problem-solve as needed, you can ensure that your DIY mirror frame turns out beautifully.
Moving forward with maintenance and care for your frame, there are several steps you should take to keep it looking its best over time. These include regular dusting with a soft cloth or duster as well as occasional cleaning with a damp cloth and mild soap solution. You should also avoid exposing your frame to direct sunlight or extreme temperatures, which can cause warping or fading over time. With proper care, your DIY mirror frame will provide years of enjoyment and be a beautiful addition to any room in your home.
Maintenance And Care For Your Frame
Some DIY mirror frame owners tend to overlook the importance of maintenance and care. They assume that once they have built the frame, they can just leave it hanging on the wall for years without any upkeep. This assumption is not true. Even though a well-built mirror frame can last for years, it requires proper maintenance to keep it in good condition.
Preventing warping is one of the key aspects of maintaining your DIY mirror frame. The main cause of warping is exposure to moisture or extreme temperatures. To prevent this from happening, you should ensure that your frame is hung in a dry and stable environment. Additionally, you should avoid hanging your mirror frame directly above heating vents or where direct sunlight hits the surface.
Cleaning and polishing are also important parts of maintaining your DIY mirror frame. Over time, dust and dirt can accumulate on the surface of the glass and in between crevices. To clean the glass, use a soft cloth or microfiber towel with a gentle cleaning solution. Avoid using harsh chemicals or abrasive materials that could scratch or damage the glass surface. For polishing, use a high-quality glass cleaner or rubbing alcohol to achieve a streak-free shine.
As a responsible DIY mirror frame owner, taking care of your creation should be part of your routine. By preventing warping and regularly cleaning and polishing your mirror frame, you can extend its lifespan and keep it looking as good as new for years to come. In the next section, we will explore some ideas for customizing your frame to make it truly unique and personalized.
Ideas For Customizing Your Frame
Now that you know how to take care of your mirror frame, let’s move on to the fun part: customizing it! One way to make your mirror frame unique is by choosing a color scheme that matches the decor of your room. If you have neutral-colored walls, consider adding a pop of color with your frame. On the other hand, if your walls are already brightly colored, opt for a more subdued frame.
Another way to customize your mirror frame is by adding embellishments. You can use paint, stencils, or even decoupage to add designs and patterns to your frame. If you’re feeling crafty, you can also glue on beads, buttons, or other small decorations for a more textured look. Just be sure not to overdo it – sometimes less is more!
Once you’ve finished customizing your mirror frame, it’s time to showcase it in your home. Consider hanging it in a well-lit area where it will catch people’s attention as they walk by. You can also prop it up on a table or shelf for a more casual look. No matter where you decide to display it, make sure that it’s level and secure so that it doesn’t fall and break. With these tips in mind, you’ll be able to create a beautiful DIY mirror frame that reflects not only your style but also your creativity and personality!
Showcasing Your Diy Mirror Frame In Your Home
Transforming a simple mirror into an aesthetically pleasing piece of wall decor can be a fun and exciting project. After building your own DIY mirror frame, the next step is to showcase it in your home. The way you present your creation can make all the difference in how it is perceived.
Ideas for displaying your DIY mirror frame are endless. One creative styling idea is to group several mirrors together to create a unique gallery wall. You can mix different shapes, sizes, and styles of frames for visual interest. Another option is to place your mirror on a mantel or shelf alongside other decorative objects such as books, vases, and candles. This will help to draw attention to the beauty of your handmade frame.
To add depth and dimension to your display, consider incorporating a 3-item numeric list in markdown format into the section. For example:
- Hang your mirror in an unexpected location, such as above the bed or on a bathroom ceiling
- Use lighting to highlight the details of your frame
- Experiment with different colored walls or wallpaper backdrops
As you experiment with various ways of showcasing your DIY mirror frame, remember that the possibilities are endless. The key is to have fun with it and let your creativity shine through. By following these tips and exploring new ideas for display, you’ll be able to transform any room into a stylish and personalized space that reflects your unique sense of style.
Conclusion
When it comes to building your own mirror frame, the process may seem daunting at first. However, with the right materials and a little bit of patience, anyone can create a beautiful and unique frame that will add character to any room in their home.
Begin by choosing the right materials for your project, measuring and cutting your wood to size, sanding for a smooth finish, and then staining or painting your frame to fit your personal style. Don’t be afraid to get creative with decorative elements such as trim or stenciling.
If you encounter any issues during the building process, don’t fret – there are easy solutions to common problems. And once your frame is complete, proper maintenance and care will keep it looking beautiful for years to come.
So why not take on this DIY project? With a little effort and some creativity, you can have a unique mirror frame that showcases both your personality and craftsmanship. What’s stopping you from creating something special for your home today?
Image Credits
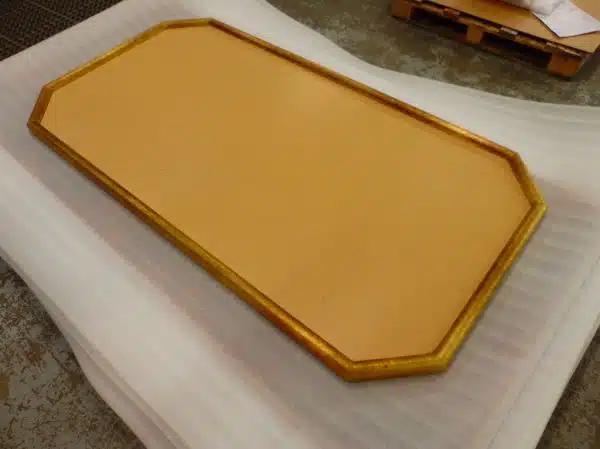
- “64 – Mirror Picture Frame in Aged Brass, 1.6m x 0.9m” by Metal Sheets Limited (featured)

