Building a DIY bar is an excellent way to add a touch of sophistication and style to your home. Whether you are entertaining guests or just relaxing after a long day, having a well-stocked and well-designed bar can be both practical and aesthetically pleasing. Creating a DIY bar may seem like an intimidating task, but with the right plan and tools, it can be a straightforward process.
Before embarking on your DIY bar building project, it is essential to consider several factors. First, you need to decide on the type of bar you want to build and the location where it will be installed. You will also need to assess your space requirements, budget, and skill level before purchasing materials or beginning any construction work. Additionally, understanding the basic principles of bar design and functionality will help ensure that your DIY bar is not only visually appealing but also functional for serving drinks and entertaining guests. In this article, we will provide you with expert tips on how to build a successful DIY bar that meets all your needs while adding value to your home.
Choosing The Right Location For Your Diy Bar
Picture yourself in a scenario where you were given two options to build your DIY bar. The first option is to build it indoors; the second option is to build it outdoors. Which location should you choose? Before answering that, let’s consider some Pros and Cons of both locations.
Building your DIY bar indoors will provide you with an opportunity to transform any unused space into a unique entertainment area. It also provides privacy and protection from external factors such as weather. However, building a bar inside your home could be potentially dangerous if not done correctly. For example, if there are no proper ventilation systems installed, the fumes from alcohol can cause health hazards.
On the other hand, building your DIY bar outdoors has its advantages too. It provides fresh air and scenic views that can enhance the overall experience for guests. Plus, outdoor bars offer more space and flexibility for accommodating large groups of people. However, safety considerations must be taken into account when building an outdoor bar as well. You need to take precautions against pests such as mosquitoes or flies and ensure that the area is well lit at night.
When choosing between an indoor or outdoor location for your DIY bar, consider both the Pros and Cons along with safety considerations before making any decisions. Once you have chosen your location, measuring the space comes next.
Measuring Your Space For Your Diy Bar
Before you start building your own bar, it is crucial to measure the space where it will be placed. Measuring accuracy is important to ensure that all materials will fit well in the designated area. Failure to do so might cause a significant delay in the construction process, or worse, lead to scrapping everything and starting from scratch.
One way to optimize your space is by creating a floor plan of your desired bar layout. This will give you an idea of how much space you need for each component, such as cabinets, shelves, and countertops. It is also essential to consider traffic flow and accessibility when designing your layout.
To further optimize your space, make use of vertical storage solutions like hanging racks or floating shelves. These can provide additional storage while taking up minimal floor space. With proper planning and execution, you can maximize every inch of your available space while still achieving a functional and aesthetically pleasing DIY bar.
Moving forward with the project requires careful planning and implementation of ideas. Now that you have accurately measured your space and optimized it with a foolproof layout design, it’s time to set a budget for your DIY bar project.
Setting A Budget For Your Diy Bar
Measuring your space for your DIY bar is an important step in creating a functional and aesthetic addition to your home. Now that you have a clear idea of how much space you have to work with, it’s time to consider the financial aspect of this project. Creating a budget for your DIY bar may seem daunting, but with some helpful tips, you can ensure that you stay within your means and still achieve the look and functionality you desire.
Creating a budget: How to? The first step in creating a budget for your DIY bar is determining how much money you’re willing to spend. This amount will vary from person to person, but it’s important to be realistic about what you can afford. Once you’ve determined your overall budget, it’s time to break down the costs of each component of your bar. These components may include materials such as wood, hardware such as screws and nails, tools such as saws and drills, and any additional features such as lighting or shelving.
DIY bar budget tips. To save money on materials, consider using reclaimed or salvaged wood instead of purchasing new lumber from a home improvement store. You can also shop around for hardware and tools to find the best deals. If there are certain features that are important to you but may be outside of your budget, consider scaling back on other components or waiting until you have more funds available. Remember that a DIY bar doesn’t have to be perfect or extravagant – focus on creating something functional and enjoyable for yourself and others.
As you begin gathering the necessary tools and materials for your DIY bar project, remember to keep your budget in mind at all times. With careful planning and smart decision-making, you can create an impressive addition to your home without breaking the bank. In the next section, we’ll discuss everything you need in terms of tools and materials – so let’s get started!
Gathering The Necessary Tools And Materials
Gathering the necessary tools and materials is the first step towards building your own DIY bar. Before you start, it is important to understand the benefits of building a DIY bar. First, it can save you a lot of money compared to buying one from the store. Second, it gives you the freedom to customize your bar according to your preferences and needs. Finally, building a DIY bar can be a fun and rewarding project that can increase your home’s value.
Once you are convinced that building a DIY bar is right for you, it’s time to gather the necessary tools and materials. The most important tool you will need is a good quality saw for cutting wood accurately. Other essential tools include measuring tape, drill bits, hammer, screwdrivers, clamps, leveler, sandpaper and safety gear such as gloves and goggles. As for materials, you will need lumber for framing and shelves as well as plywood or MDF board for the countertop.
To avoid wasting time searching for tools or tripping over materials during construction, it’s important to set up an organized workspace with proper storage systems. Invest in shelves or cabinets where you can store your tools and keep them easily accessible during construction. You may also want to consider using plastic bins or drawers to keep smaller items like screws and nails organized. Keeping everything in its place will not only make the work more efficient but also safer by reducing clutter on your work surface.
Now that you have gathered all necessary tools and materials for building your dream DIY bar it’s time to start designing! In our next section we’ll explore some tips on how to design your DIY bar so that it suits your style while being functional at the same time.
Designing Your Diy Bar
Before starting the actual building process, it is essential to design the layout of your DIY bar. This step includes planning where you want to position the bar, what size and shape you envision, and how many people you wish to accommodate. Keep in mind that the layout should complement its surroundings while also being functional and practical. Once you have a rough sketch of your plan, measure the space available, and adjust accordingly.
Choosing materials for your DIY bar is an exciting part of designing the build. There are various materials available in the market that can be used for constructing a bar, such as wood, metal, or concrete. Wooden bars are more traditional and give a classic look with a warm feel; metal bars offer durability and a modern look while concrete bars provide an industrial feel with excellent heat resistance. Depending on your preferences and style, choose materials that best fit your vision.
To create an engaging environment for serving others at your DIY bar, consider adding some personality to its design by incorporating creative elements. Here are some ideas:
- Installing shelving units behind the bar to keep bottles and glasses organized
- Adding hooks under the bar counter to hang towels or other accessories
- Using LED lights beneath the counter or illuminating shelves for added ambiance
By following these steps in designing your DIY bar’s layout and selecting suitable materials and creative elements, you will be ready to move onto selecting the perfect bar top without hesitation.
Selecting The Perfect Bar Top
When it comes to building a DIY bar, selecting the perfect bar top should be one of your top priorities. The type of finish and material you choose can greatly impact the overall look and feel of your bar, as well as its durability and maintenance requirements.
There are several types of finishes you can choose from for your bar top. Some popular options include oil-based finishes, polyurethane finishes, and epoxy resin coatings. Oil-based finishes provide a natural look and feel to the wood, but require regular maintenance to keep them looking their best. Polyurethane finishes offer excellent protection against spills and stains, but can be more difficult to apply evenly. Epoxy resin coatings provide a durable surface that is resistant to scratches and stains, but can be more challenging to work with than other finishes.
When it comes to materials for your bar top, there are several options available as well. Some popular choices include hardwoods like oak or maple, which offer a classic look and feel that is easy to maintain. Other options include granite or marble for a more upscale appearance, or concrete for an industrial vibe. Each material has its own pros and cons in terms of cost, durability, maintenance requirements, and overall aesthetic appeal.
In order to select the perfect bar top for your DIY project, consider the type of finish you prefer as well as the material that best suits your needs and budget. Once you have made your selection, you will be one step closer to building the perfect DIY bar for entertaining family and friends. In the next section, we will discuss how to build the base of your DIY bar using quality materials and expert techniques.
Building The Base Of Your Diy Bar
The first step in building a DIY Bar is to determine the materials needed and to gather them. This should include items such as lumber, glue, screws, nails, and any other components required to assemble the bar.
Once the materials are gathered, the next step is to design the base. This should include the size and shape of the base, as well as the type of wood and any other design features desired.
After designing the base, the next step is to assemble the base. This requires cutting the lumber to size, attaching the pieces together with screws, glue, and nails, and sanding and finishing the base.
The final step is to attach any other components needed for the bar, such as shelves, drawers, or a refrigerator. This should be done after the base is assembled and finished, to ensure the components fit properly and securely.
Gathering Materials
When it comes to building the base of your DIY bar, gathering materials is the first step. Sourcing materials can be a challenge, but with a little research and creativity, you can find affordable supplies. One option is to repurpose old furniture. Look for pieces that can be transformed into a bar top or shelving unit. For example, an old wooden door or pallets could be sanded and sealed to make a rustic bar top.
DIY bar themes are another consideration when gathering materials. Decide on the style you want to achieve before purchasing supplies. Rustic themes often incorporate natural wood finishes and vintage accents. Modern bars may feature sleek lines and minimalist designs. Tiki bars typically use bamboo and tropical-inspired decor, while sports bars may showcase team memorabilia on the walls.
When searching for materials, consider local hardware stores, thrift shops, and online marketplaces such as Craigslist or Facebook Marketplace. Don’t be afraid to haggle for a better price or negotiate bulk discounts if you need multiple items. With some patience and resourcefulness, gathering materials for your DIY bar can be an enjoyable part of the building process that will ultimately result in a unique and personalized addition to your home.
Designing The Base
Designing the base of your DIY bar is an important step in creating a functional and aesthetically pleasing space. One aspect to consider is the color scheme. Choose colors that complement each other and create a cohesive look throughout the room. Neutral tones such as beige, gray, or white are versatile options that can be paired with any accent color. Bold hues like red or blue can add a pop of personality to the space.
Another consideration when designing your DIY bar is the seating arrangement. Think about how many people you want to accommodate and how you want them to interact with each other. Bar stools are a classic option, but benches or couches can provide additional seating options for larger groups. Consider incorporating tables or counters for those who prefer standing while enjoying a drink.
When designing your DIY bar, it’s important to keep functionality in mind as well. Think about storage needs for bottles, glasses, and other accessories. Shelving units or cabinets can provide ample storage while also adding visual interest to the space. Don’t forget about lighting either – strategically placed lights can highlight features of the bar while also providing ambiance.
By carefully considering these design elements, you can create a DIY bar that not only serves its purpose but also adds value and personality to your home. With some creativity and planning, building your own custom bar is an achievable DIY project that will impress guests and provide countless nights of fun entertaining at home.
Creating Storage And Shelving
As you build the base of your DIY bar, it is essential to consider the overall design and functionality. The foundation of your bar should not only be sturdy but also provide enough space for storage. Maximizing storage is crucial in creating a functional DIY bar that can cater to different needs.
When it comes to building a DIY bar, creative shelving ideas are vital in making use of every available space. Take advantage of the walls by installing floating shelves or hanging racks for glassware and liquor bottles. For instance, repurpose old wooden crates into stylish open cabinets or construct an under-counter wine rack with PVC pipes.
In addition to providing ample storage, incorporating a sink and plumbing is necessary for hygiene purposes and convenience. Installing a sink will enable you to wash glasses, mix drinks, and clean up spills without having to leave the bar area. Plumbing should be done correctly to avoid leaks and ensure proper drainage. With these tips on maximizing storage and creative shelving ideas in mind, let us now move on to installing a sink and plumbing.
Installing A Sink And Plumbing
Sink placement is an important factor to consider when building a DIY bar. Before installing the sink, it’s crucial to determine the best location for it. One way to do this is by measuring the area and ensuring that there’s enough space for the sink, as well as any plumbing materials that will be used. It’s also important to consider the proximity of other fixtures such as the cabinets, countertop, and appliances.
When choosing plumbing materials for your DIY bar sink, it’s essential to pick high-quality items that will last for a long time. Stainless steel sinks are a popular choice due to their durability and resistance to corrosion and stains. You’ll also need pipes, fittings, valves, and other accessories necessary for proper installation. To ensure that you have all the correct pieces, make sure you have a detailed list of all required materials before beginning.
Properly installing a sink and plumbing in your DIY bar can be a challenging task, but with careful planning and attention to detail, it can be accomplished successfully. Once completed, this step sets the foundation for effective use of your bar. The next section will cover how to install wiring for lighting and electronics in your DIY bar while ensuring safety measures are put into consideration.
Wiring For Lighting And Electronics
Picture this: you’ve just finished building your DIY bar, and now it’s time to upgrade the lighting and manage electronics. This is an essential step in creating a perfect ambiance for your guests. Lighting can be used to enhance the mood of your space by providing subtle illumination or brightening up the room. It is important to select the right type of lighting that suits your bar’s theme. For example, if you have a modern-looking bar, consider using LED lights with cool colors like blue or white.
When managing electronics, it’s crucial to ensure proper wiring for safety reasons. We recommend hiring an electrician if you’re not familiar with electrical work. You don’t want to risk installing wires incorrectly and potentially causing a fire hazard. Additionally, make sure all outlets are easily accessible and strategically placed throughout the bar area so that guests can charge their devices while enjoying a drink.
Overall, upgrading lighting and managing electronics is essential in creating a great atmosphere at your DIY bar. If done right, it will help set the tone for your guests’ experience and make them feel welcome. In the next section, we’ll discuss adding finishing touches to your DIY bar that will take it from good to great!
Adding Finishing Touches To Your Diy Bar
After completing the construction of your DIY bar, it’s time to add finishing touches that will bring your vision to life. One essential aspect to consider is lighting. A dimly lit bar can create a cozy, intimate atmosphere, while bright lights can help highlight the bar’s features and make it more inviting. You may want to install overhead lighting or use strategically placed lamps or candles to achieve your desired effect.
Decorating your DIY bar is another way to add character and charm. Choose a theme that suits your style and personality, such as a sports bar or a tiki-themed oasis. Add decorative touches like wall art, mirrors, and plants to create an inviting ambiance for guests. You may also want to consider installing shelving units or display cases to showcase your favorite liquor bottles or glassware.
Overall, when adding finishing touches to your DIY bar, remember that attention to detail is key. Incorporate elements that speak to your personality and style while also considering functionality and comfort for guests. With the right lighting and decor choices, you can transform any space into an impressive home bar that you’ll be proud of.
As you put the final touches on your DIY bar, it’s important not to forget about stocking it with essential tools and ingredients. Having the right equipment on hand will allow you to mix up cocktails like a pro, impressing friends and family alike. In our next section, we’ll discuss the must-have tools every home bartender should own as well as some popular cocktail recipes that are sure to please any crowd.
Stocking Your Diy Bar With Essential Tools And Ingredients
To fully stock your DIY bar, it’s important to have essential tools and ingredients. First and foremost, you’ll need a cocktail shaker, strainer, jigger, and muddler. These tools will allow you to mix up a variety of cocktails with ease. Additionally, having a good set of glasses is crucial. Highball glasses, martini glasses, and old-fashioned glasses are all great options.
When it comes to essential ingredients for your DIY bar, there are a few key items that you’ll want to have on hand. Bitters are an absolute must-have for any home bartender. They add depth and complexity to cocktails and can be used in a variety of recipes. Other essentials include simple syrup, fresh citrus (lemons and limes), club soda or tonic water, and ice.
With your essential tools and ingredients in place, you’re ready to start mixing up some delicious cocktails! There are countless cocktail recipes out there to choose from. Some classic options include the Margarita, Martini, Manhattan, Old Fashioned, and Negroni. Experiment with different flavors and find what works best for you.
Transition: Now that you have all the necessary tools and ingredients stocked in your DIY bar, it’s time to put them to use by hosting a successful bar party.
Hosting A Successful Bar Party
Now that you have built your DIY bar, it’s time to throw a party! Hosting a successful bar party requires careful planning and execution. The first step is to determine the type of drinks you want to serve. You can keep it simple with beer and wine or create signature cocktails using DIY bar drink recipes. Make sure to stock up on all the necessary ingredients and garnishes.
Next, think about the atmosphere you want to create. Your DIY bar should be decorated in a way that reflects your personal style and makes guests feel at home. Consider adding DIY bar decoration ideas like lighting, table settings, and themed décor. Music is also an important aspect of any party, so create a playlist that matches the mood you’re going for.
Lastly, remember that hosting a successful party is all about making your guests feel welcome and comfortable. Be sure to greet everyone as they arrive and introduce them to one another if they don’t already know each other. Provide plenty of seating areas and keep the food and drinks flowing throughout the night. With these tips in mind, your DIY bar will be the perfect place for hosting unforgettable parties.
As you prepare for future parties at your DIY bar, remember that maintenance and upkeep are crucial for keeping everything running smoothly. In the next section, we’ll discuss some important steps you can take to ensure that your bar stays in top condition over time.
Maintenance And Upkeep For Your Diy Bar
Regular cleaning is essential to maintaining the longevity of your DIY bar. As it is a high-touch area, regular cleaning will not only keep it hygienic but also prevent any wear and tear that may occur due to neglect. Ensure that you clean all surfaces, including countertops, shelves, and even the accessories such as bottle openers and cocktail shakers. Use a mild detergent or soap water solution for wiping down surfaces.
Another crucial aspect of maintenance is rust prevention. Rust can occur due to exposure to moisture or humidity, which may be common in a home bar setting. To prevent rust from forming on your bar, ensure that you wipe down all metal surfaces with a dry cloth regularly. You can also use rust inhibitors or coatings available in hardware stores to protect against corrosion and rust.
Maintaining the cleanliness and structural integrity of your DIY bar will ensure its longevity and usability for years to come. Regular cleaning and rust prevention are simple yet effective methods to maintain the appearance and functionality of your bar. By incorporating these practices into your routine maintenance schedule, you’ll be able to enjoy serving your guests without worrying about any issues that may arise due to neglect.
Transition: While regular maintenance can go a long way in keeping your DIY bar in top shape, sometimes unforeseen issues may arise. In the next section, we’ll discuss some common problems that you may encounter when building your own bar and how to troubleshoot them effectively.
Troubleshooting Common Diy Bar Issues
Fixing leaks and handling uneven surfaces are common issues encountered during DIY bar building. It is important to diagnose the root cause of these problems before attempting to fix them. Leaks can be caused by faulty plumbing or poor sealing, while uneven surfaces may stem from an unstable foundation or improper installation of flooring.
To address leaks, start by checking all plumbing connections and ensuring that they are securely tightened. If the issue persists, it may be necessary to replace damaged pipes or fittings. Sealing any gaps or cracks in the bar’s structure can also prevent leaks from occurring. When dealing with uneven surfaces, consider using self-leveling compound to even out the area before laying down flooring materials. Alternatively, shimming can be used to adjust for minor level differences.
It is important to take preventative measures when building a DIY bar to avoid these common issues altogether. Proper planning and attention to detail during construction can minimize the likelihood of encountering leaks or uneven surfaces. However, if problems do arise, don’t panic – with some patience and troubleshooting skills, they can be easily resolved. By being proactive in addressing these issues, you can ensure that your DIY bar is a successful and functional addition to your home.
Conclusion
Building a DIY bar is like crafting a cocktail. You have to choose the right ingredients, measure them out precisely, and mix them together in just the right way to create something truly special. But, just like mixing drinks, building a DIY bar requires careful planning and attention to detail.
From choosing the right location to stocking your bar with essential tools and ingredients, there are many factors to consider when embarking on this project. But with the right tools, materials, and know-how, you can build a beautiful and functional DIY bar that will be the envy of all your friends.
So whether you’re an experienced DIYer or just starting out, don’t be afraid to take on this project. With some patience and perseverance, you can create a space that’s perfect for entertaining guests or simply enjoying a quiet drink at home. Remember: building a DIY bar is like crafting a cocktail – it takes time and effort, but the end result is always worth it.
Image Credits
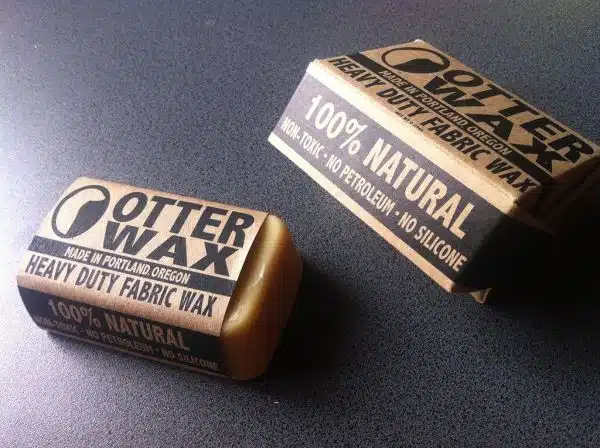
- “Project DIY Cambag: Bar of Otter Wax” by GuySie (featured)








![How To Build A Detached Deck 19 Force Reconnaissance Detachment Deck Shoot [Image 4 of 4]](https://green-life.blog/wp-content/uploads/2023/05/RJo3tlizSGjq-150x150.jpg.webp)

