As the winter season approaches, many people look forward to indulging in various snow-related activities, with building a snowman being one of the most popular ones. However, creating a perfect snowman requires more than just piling up some snowballs and sticking them together. It requires an understanding of the science behind it, as well as some artistic flair to bring your snowman to life.
As a seasoned snowman builder, I have witnessed countless people struggle with crafting the perfect snowman. With this ultimate guide, I aim to provide you with all the tools and knowledge necessary to build a magnificent snowman that will impress not only yourself but also your family and friends. From choosing the right type of snow to adding finishing touches, this guide covers every step of the process so that even beginners can create a stunning winter masterpiece. So grab your gloves and let’s get started!
The Science Of Snow
Like a painter’s brushstrokes, snowflakes fall delicately from the sky, each one unique in its design. The science of snow is as fascinating as it is beautiful. Snowflakes form when water droplets freeze in the atmosphere and combine with other droplets to create intricate ice crystals. The shape of the crystal depends on various factors such as temperature, humidity, and air pressure.
When it comes to building a snowman, understanding the science behind snow is crucial. The melting point of snow is 0 degrees Celsius (32 degrees Fahrenheit), which means that if your hands are warmer than this temperature, they will melt the snow and cause it to lose its structure. It’s important to wear gloves or use tools such as shovels or buckets when building a snowman to avoid damaging the delicate crystals.
Choosing the right location for your snowman is just as important as understanding the science of snow. Look for a spot where there is plenty of fresh powder that hasn’t been trampled on or contaminated by debris. Ideally, you want an area that has some shade but also receives enough sunlight to keep your creation from melting too quickly. With these key factors in mind, you’ll be well on your way to creating a masterpiece that will delight all who see it.
Choosing The Right Location
Temperature is an important factor to consider when choosing the right location for building a snowman. Snow that is too warm may not hold its shape, while snow that is too cold may be too dry and powdery.
Snow quality is also an important factor to consider. Snow that has a high moisture content will be easier to shape and pack, while snow that is too wet will be difficult to work with.
Space is also a factor when choosing the right location for building a snowman. Having ample space for gathering materials and building the snowman is important. Additionally, having a clear area to work will help ensure an even and stable snowman.
Temperature
As a snowman building expert, it is important to understand the impact of temperature on creating the perfect snowman. In warm climates, building a snowman can be challenging due to the lack of snow or the difficulty in finding a suitable location. However, with some creativity and patience, it is still possible to build a beautiful snowman.
When choosing the right location for your snowman, make sure that it is shaded and away from direct sunlight. This will help prevent melting and ensure that your snowman lasts longer. Additionally, consider using artificial snow or ice blocks if natural snow is not available. These materials can be purchased at most craft stores and are perfect for creating a sturdy base for your snowman.
With global warming affecting our climate, it is important to adapt our techniques and materials when building a snowman. Consider using cooler times of the day or evening to build your snowman and always check weather forecasts to ensure that temperatures will remain low enough for your creation to last. By being mindful of temperature and adapting our methods, we can continue to enjoy the art of building a beautiful snowman for years to come.
Snow Quality
When it comes to building the perfect snowman, choosing the right location is crucial. However, another factor that must be considered is the quality of the snow itself. Differentiating between wet and dry snow is important because wet snow is much heavier and stickier than dry snow. Wet snow can make it difficult to build a sturdy base for your snowman, while dry snow offers better consistency for building.
Snow consistency is also an important aspect to consider when building a snowman. If the snow is too powdery, it will not pack together properly and will not be able to support the weight of your creation. On the other hand, if the snow is too sticky or icy, it can make it difficult to mold into the desired shape. It’s important to find the right balance of moisture in the snow for optimal building conditions.
To ensure that you have the best possible consistency for building your snowman, try testing out different areas of your chosen location before committing to a spot. Pack some snow together in your hands and see how well it holds its shape. If it crumbles apart easily or feels too wet/sticky, keep searching for an area with better consistency. With these considerations in mind, you’ll be on your way to creating a sturdy and beautiful snowman that will last throughout winter!
Space
When it comes to building the perfect snowman, choosing the right location is essential. In addition to snow quality and consistency, one must also consider the available space. Adequate space is necessary for creating a snowman that stands out and looks impressive. Space exploration techniques are helpful in finding the perfect spot.
To begin exploring the area, walk around and search for an open area with enough space to build a snowman comfortably. The ideal spot should be free of obstacles such as trees or rocks that may obstruct your creation. Additionally, consider whether there is enough space around the snowman for people to admire it once it’s complete.
Exploration techniques can also help identify areas with unique features that can add character to your snowman. For instance, a location with a small hill can allow you to create a more elaborate design by incorporating different levels into your creation. With careful consideration of space and exploration techniques, you’ll find an excellent location to build your ideal snowman!
Preparing The Snow
After selecting the perfect location for your snowman, it’s time to start preparing the snow. The first consideration is snow density. If the snow is too dry and powdery, it will not pack well and your snowman may not hold its shape. On the other hand, if the snow is too wet and heavy, it will be difficult to work with and can make your snowman collapse.
To achieve optimal snow density, it’s important to choose the right water to snow ratio. Generally speaking, you want about 5 gallons of loosely packed snow for every gallon of water. This will help ensure that the snow is moist enough to pack well without being too heavy or wet.
Once you’ve determined the ideal water to snow ratio, it’s time to start mixing. Begin by packing a small amount of snow into a ball and adding a little bit of water at a time until you reach the desired consistency. Remember that it’s better to add too little water than too much; you can always add more if needed but removing excess water can be difficult.
With your perfectly prepared snowy mixture ready, it’s now time to move on to building the base for your magnificent creation. But before we get into that step, let’s take a closer look at some tips and tricks for ensuring that your base is solid and sturdy enough to support the weight of your entire snowman.
Building The Base
The first step in building a snowman is to create the base. This is the foundation upon which the rest of the snowman will be built, and it is crucial to get it right if you want your snowman to have stability and balance. Snowman height is an essential consideration when building the base. The taller you want your snowman to be, the larger the base needs to be.
Building on uneven terrain can present some challenges when creating a stable base for your snowman. To overcome this, start by packing down any areas where the ground is uneven or lumpy. Once you have created a level surface, you can begin gathering snow to build up your base. It’s important to pack each layer of snow firmly as you go so that it doesn’t collapse under the weight of the next layer.
To ensure that your snowman has a strong and sturdy base, follow these steps:
- Start with a wide circle of packed-down snow.
- Add another layer of slightly smaller circles on top, each one slightly smaller than the last.
- Use a shovel or other tool to smooth out any bumps or rough spots as you go.
Building a stable base for your snowman may take some time and effort, but it’s worth it in the end! With a little patience and attention to detail, you can create a solid foundation for your creation that will allow you to build it up into an impressive work of art.
As we move onto rolling snowballs, remember that this section builds on what we’ve just discussed about creating a solid base for our snowman. Rolling snowballs is an essential part of building up our creation and making sure that each layer stays put. Let’s dive in!
Rolling Snowballs
- When building a snowman, it is important to select the right type of snow. Heavy wet snow is preferable to light dry snow, as it can be more easily packed and rolled into snowballs.
- Rolling snowballs is a key step in building a snowman. Start by rolling a snowball in the snow, adding more as it grows, and keeping it in a round shape.
- For best results, use both hands to roll the snowball and keep it moving constantly.
- If desired, adjust the size of the snowball by packing it more tightly or adding more snow. This will ensure the snowman is the desired size and shape.
Choosing Snow
When it comes to building a snowman, the snow you choose can make all the difference. The consistency of the snow is key – it needs to be just wet enough to pack together but not so wet that it becomes heavy and difficult to roll. To test if your snow is suitable for rolling, grab a handful and squeeze it tightly. If it holds its shape without crumbling or falling apart, you’ve got the perfect consistency.
Melting prevention techniques are also important to consider when choosing your snow. Look for areas that are shaded from direct sunlight, as these will stay cooler and prevent your snow from melting too quickly. It’s also a good idea to avoid using snow from areas with foot traffic or where pets may have been, as these can introduce impurities into your snow.
Remember, the success of your snowman-building endeavor depends heavily on the quality of your snow. Take the time to find the right consistency and location, and you’ll be well on your way to creating a masterpiece in no time!
Rolling Snowballs
Rolling snowballs is a crucial step in building a snowman, and it requires careful attention to detail. The first thing to consider is the appropriate size for your snowballs. A good rule of thumb is to start with small balls that are easy to manage and gradually increase their size as you go. This will help prevent your snowballs from becoming too heavy or unwieldy, which can make them difficult to roll.
When it comes to rolling techniques, there are a few things to keep in mind. First, be sure to pack the snow tightly as you roll, pressing down on the ball with your hands or feet. This will help ensure that your snowball holds its shape and doesn’t fall apart during construction. Additionally, try rolling your snowball in different directions to create an even surface and prevent it from becoming lopsided.
One important tip for rolling snowballs is to avoid using too much force. While it may be tempting to push and press down hard on your snowball, this can actually cause it to break apart or become misshapen. Instead, use gentle pressure and focus on creating a smooth, even surface as you roll. With these techniques in mind, you’ll be able to create perfectly sized and shaped snowballs for all of your winter wonderland creations!
Creating The Body
After successfully rolling snowballs, it’s time to create the body of your snowman. This step is crucial in determining the size and shape of your snowman. The key to a perfect body is to stack the snowballs carefully on top of each other, ensuring that they are level and secure.
To create a stable base, pack snow around the bottom ball to create a flat surface. This will prevent your snowman from toppling over due to uneven ground or strong winds. Once you have a solid foundation, stack the second ball on top of the first one. Make sure that it is centered and level before pressing it firmly onto the lower ball.
| Decorating Techniques | Creative Variations |
|---|---|
| Carrot for nose | Snow-woman with a scarf |
| Coal for eyes and buttons | Snowman family holding hands |
| Sticks for arms | Snowman with hat and gloves |
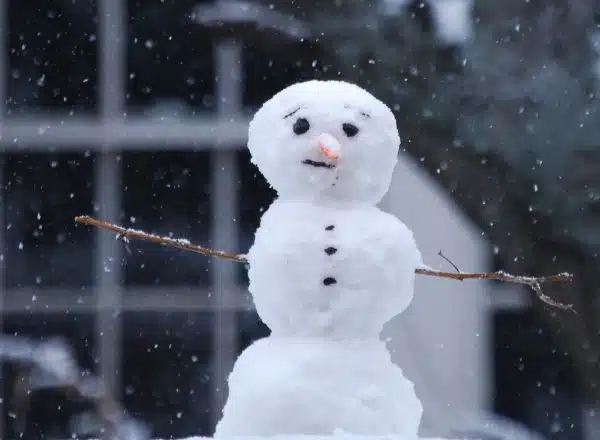
After creating the basic structure of your snowman, you can start adding personality by using various decorating techniques and creative variations. Use a carrot for its nose, coal for its eyes and buttons, sticks for its arms, and rocks or pebbles for its mouth. You can also add hats, scarves, gloves, or any other accessories that fit your desired theme.
When decorating your snowman’s face or body, be mindful of symmetry and balance. Place elements evenly on both sides to achieve an aesthetically pleasing look. You can also experiment with different colors by using food coloring mixed with water in spray bottles.
Now that you have created a unique body for your snowman, it’s time to add some arms and accessories. This will give your creation even more character and charm. With these simple steps, you can now make an impressive-looking snowman that will awe anyone who sees it!
Adding Arms And Accessories
Once your snowman has taken shape, it’s time to add some personality with accessories and arms. Snowman accessories can range from hats and scarves to buttons, carrot noses, and even sunglasses. These items not only add character but also serve practical purposes like keeping the snowman’s nose in place or adding warmth to its head.
When it comes to adding arms, there are endless possibilities for creative placement. Some builders opt for traditional stick arms while others may use branches or even broom handles. The key is to find materials that are sturdy enough to hold up against the weight of the snowballs. Once you have your materials, consider positioning them in fun and unique ways such as crossing them over the chest or holding a sign with a clever message.
Don’t be afraid to get creative when accessorizing and adding arms to your snowman! Remember, this is an opportunity for you to showcase your personality and style. In the next section, we’ll cover crafting the face of your snowman which will truly bring it to life.
Crafting The Face
After adding arms and accessories to your snowman, it’s time to move on to the most important feature – the face. The face of a snowman is where creativity and personality really come into play. The two most essential features of any snowman face are the carrot nose and coal eyes.
To start, find a carrot that is long and thin enough to look like a nose but not too thick that it overwhelms the rest of the face. Carefully insert the carrot nose into the center of the snowman’s head, making sure it’s secure enough so it doesn’t fall out. Next, use two pieces of coal or black rocks for eyes. Place them above the carrot nose with enough distance between them so they don’t look crowded.
Now comes the fun part – giving your snowman a unique personality through creative expressions on its face. You can use additional items such as sticks for eyebrows, a smile made out of rocks or small branches, or even add glasses made out of wire or twigs. Remember that every snowman has its own personality, so feel free to get creative with your designs! With these simple yet important steps, you can create a snowman with a truly remarkable character that will be admired by all who lay their eyes upon it.
Moving forward, let’s talk about making a hat for your snowman. A hat is not only practical in keeping your snowman warm but also adds an extra touch of style and charisma. Stay tuned for our next section on how to make an amazing hat for your beloved frosty friend!
Making A Hat
When making a hat for a snowman, the most important decision is the selection of the right material. The type of hat chosen should depend on the size of the snowman’s head, as well as its intended purpose. Decorating the hat is an essential step in completing the snowman’s look, and can be done with a range of materials, such as buttons, pompoms, and fabric. With the right choices, the hat can be used to bring the snowman to life and make it a fun creation for everyone.
Choosing A Hat
When building a snowman, choosing the perfect hat is an important step in completing the overall look. There are several hat styles to choose from, such as beanies, top hats, and earflap hats. Beanies are a popular choice for a modern and casual look, while top hats can give your snowman a more formal appearance. Earflap hats are great for keeping your snowman’s ears warm during colder weather.
If you want to get creative and make your own hat for your snowman, there are several DIY hat-making techniques that you can try. You can use felt or fabric to create a simple beanie or top hat. For a more intricate design, you can add embellishments such as pom-poms or embroidery. Another fun idea is to repurpose old clothing items like sweaters or scarves to create unique hats for your snowman.
Ultimately, the choice of hat will depend on the style and personality you want your snowman to have. Take some time to explore different hat styles and DIY techniques before making a decision. Remember that the right hat can really bring your snowman to life and make it stand out in any winter wonderland.
Decorating A Hat
When building a snowman, choosing the right hat is crucial in achieving the desired look. Along with selecting the perfect style of hat, decorating it can also add an extra touch of personality to your snowman. Whether you choose to purchase a pre-made hat or make one yourself, there are endless possibilities for customizing and creating a unique look.
Decorating a hat can be as simple or elaborate as you desire. One DIY idea is to add embellishments such as buttons or patches to a plain hat, creating a personalized design. Another fun option is to use fabric paint or markers to draw on patterns or designs that match your snowman’s overall theme. Using different materials like yarn, ribbon, or faux fur can also add texture and dimension to your snowman’s hat.
When making your own hat from scratch, consider incorporating decorations into the design itself. For example, knitting or crocheting a beanie with different-colored stripes or patterns can create a visually appealing look without needing additional decorations. Ultimately, decorating a hat allows for endless creativity and personalization when building your snowman’s perfect winter outfit.
Dressing Your Snowman
To fully dress your snowman, you must choose the right accessories that will make it stand out. From scarves to hats and mittens, these accessories not only provide warmth but also add a touch of creativity to your snowman. You can even use old clothing items from around the house to create unique looks for your frosty friend.
When choosing accessories for your snowman, consider the overall theme or style you want to achieve. For example, if you want a traditional look, opt for classic red and green scarves with matching hats and mittens. If you’re feeling more adventurous and want to add some creative customization, try using colorful fabrics or even adding a pair of sunglasses or a funky hat.
To make your snowman truly one-of-a-kind, don’t be afraid to get creative with its outfit. Consider adding unique items like jewelry or props such as a miniature guitar or book. The possibilities are endless when it comes to dressing up your snowman and making it stand out from the rest.
As you finish dressing up your snowman with its chosen accessories, remember that there is still one important step left: adding final touches. With just a few more additions like buttons for eyes or sticks for arms, you can bring your snowman to life in ways you never thought possible. Stay tuned for the next section on adding final touches and taking your snowman building skills to the next level!
Adding Final Touches
After building the perfect snowman, it’s time to add the final touches that will make it stand out. Snowman decorating ideas are endless and can be as simple or as creative as you want them to be. One classic idea is to use buttons for its eyes and mouth, and a carrot for its nose. You can also add a scarf around its neck, a hat on top of its head, and mittens on its hands. These simple additions can transform your snowman into a winter wonderland masterpiece.
If you’re feeling more creative, there are plenty of unique snowman designs that you can try. Consider using different types of materials to give your snowman some personality. For example, you could use rocks or twigs for the arms instead of sticks, or decorate it with colorful pom-poms for a festive look. Another fun idea is to create a themed snowman based on your favorite movie or book character.
No matter what decorating ideas you choose, remember that building a snowman is all about having fun and being creative. So don’t be afraid to experiment with different designs and styles until you find the one that suits your personality best. And once your snowman is complete, don’t forget to take some photos so that you can remember this special moment forever.
As we move onto the next section, taking photos of your creation is an essential part of the process. Not only does it allow you to capture the memory of building your snowman but sharing pictures with friends and family can spread joy beyond just yourself. There are many ways that you can take great photos of your snowman such as capturing it in different lighting conditions or angles. We’ll explore these techniques in more detail in the following section so that you can showcase your creativity in full display!
Taking Photos
There is a common belief that taking photos of snowmen is as simple as pointing and shooting, but the reality is that it requires some level of skill and creativity to capture a great shot. As a snowman building expert, I have come to understand that there are several factors that can make or break your snowman photos. However, with the right approach, you can create images that will bring joy to those who see them.
One way to take creative poses with your snowman is by incorporating props into your shot. Think about adding hats, scarves, and other winter accessories to add personality to your creation. Additionally, consider having your snowman interact with its environment by having it hold a shovel or broom. These small details can add depth and interest to an otherwise static subject.
Lighting tips are another important factor in achieving great snowman photos. Avoid direct sunlight because it can cause harsh shadows on your subject. Instead, opt for overcast or cloudy days where the light is diffused, making for softer shadows and more even lighting. If you’re taking photos at night, use artificial lighting sources such as flashlights or street lamps to create interesting effects.
To help you enjoy taking photos of your snowman, here are some tips:
- Experiment with different angles: move around your snowman and try out different perspectives such as low angle shots or bird’s eye view.
- Play with perspective: juxtapose objects in the foreground or background for added interest.
- Use props: incorporate objects such as hats, scarves or brooms into your composition.
- Get creative: think outside the box and try new things.
In preparation for maintaining your snowman’s appearance after construction, there are certain precautions you must take into consideration.
Maintaining Your Snowman
Once you have successfully built your snowman, it is important to learn how to maintain it properly. Snowman preservation techniques involve taking measures to prevent the snow from melting and losing its shape. One method is to cover the snowman with a layer of plastic wrap or cloth material that does not absorb moisture. This will act as a protective shield against direct sunlight and wind, which can cause the snow to melt quickly.
Another effective way to keep your snowman intact is by spraying it with a mixture of water and vinegar. This solution helps to harden the snow, making it less likely to melt quickly. You can also use other materials like cornstarch or salt to preserve your snowman. These substances work by creating an outer layer around the snow that acts as insulation against external factors that could cause it to melt.
Preventing your snowman from melting requires some planning and creative thinking. Snowman melting prevention strategies include placing your creation in a shaded area or keeping it indoors if possible. You can also use props like hats or scarves made of natural materials such as wool or cotton that will absorb any moisture present on the surface of the snowman. Additionally, avoid touching your snowman too much with bare hands, as body heat can also cause it to melt.
To ensure that your efforts in building a perfect snowman are not wasted, take steps to maintain and preserve its structure using proven techniques. In doing so, you can extend its lifespan for days or even weeks longer than usual. If you encounter any issues along the way, don’t worry! Troubleshooting common problems is something every expert builder should know how to do.
Troubleshooting Common Issues
Maintaining your snowman is critical to ensure its longevity. However, even with proper care, common mistakes may arise that can affect the outcome of your creation. One of these issues is a lopsided snowman. This issue often results from using different sizes of snowballs in each section or not packing the snow properly. A creative solution to this problem is to use props such as hats or scarves to disguise the unevenness.
Another common mistake that can occur while building a snowman is the inability to stack the snowballs correctly. This problem often leads to an unstable and wobbly structure. To solve this issue, you can add water between the layers of snowballs as this will freeze and stabilize them together. If you don’t have access to water, try using ice cream buckets or similar containers filled with snow instead.
It’s important to remember that building a snowman should be a fun and rewarding experience, so don’t get discouraged if things don’t go according to plan. Instead, embrace these challenges and use them as an opportunity for creative problem-solving. By troubleshooting these common issues and finding unique solutions, you’ll be one step closer to creating a perfect winter wonderland in your own backyard.
As you finish your masterpiece, take time to celebrate your creation with family and friends. Add some finishing touches such as a carrot nose or coal eyes for added character, and snap some photos for lasting memories. Whether it’s a small or large creation, building a snowman is an enjoyable activity that brings people together during the cold winter months.
Celebrating Your Creation
After building a snowman, it’s time to celebrate your creation. There are many ways to do this, but here we present two ideas for you: a snowman party and a snowman contest.
A snowman party is a fun way to celebrate the completion of your project. Invite your friends and family over for some hot cocoa and snacks while they admire your beautiful work of art. You can also play games like pin the nose on the snowman or build mini snowmen out of marshmallows.
If you want to take things up a notch, consider hosting a snowman contest. Invite others in your community to participate in creating their own snowmen and have judges determine the winner based on criteria such as creativity, size, and overall appearance. This is a great way to bring people together and create some friendly competition.
Whatever celebration you choose, remember that the most important thing is to have fun! Building a snowman is not just about creating something beautiful; it’s also about enjoying the process and sharing that joy with others. So go ahead and let loose – there’s no better way to celebrate your hard work than by having a good time.
Remember, building a snowman can be more than just an activity – it can also serve as an opportunity to connect with those around you. By hosting a party or contest, you can bring people together and share in the joy that comes from creating something special. So don’t be afraid to get creative and have some fun – after all, that’s what building a snowman is all about!
Conclusion
Building a snowman is an exciting winter activity enjoyed by children and adults alike. By understanding the science of snow, choosing the right location, and preparing the snow correctly, you can create a magnificent snowman that will impress everyone who sees it.
To begin with, it is crucial to understand the science behind snow. Snowflakes are formed when water vapor in the atmosphere freezes into ice crystals. The shape of these crystals determines the quality of the snow for building purposes. Once you have found a suitable location with ample amounts of good quality snow, you must prepare it by packing it tightly to ensure its stability.
Next, building a strong base for your snowman is essential. Uneven or weak bases can cause your creation to topple over easily. Rolling large balls of packed snow is an effective method for creating a sturdy base and body. Taking photos throughout the process ensures that you document your hard work and progress.
Maintaining your snowman’s shape requires ongoing attention and care, especially if there are changes in temperature or weather conditions. However, if any issues do arise, troubleshooting them promptly can improve your chances of success.
In conclusion, building a snowman requires patience, skill, and attention to detail. By following these guidelines, you can create an impressive masterpiece that will stand out from other snowmen in your neighborhood. Remember to celebrate your creation by sharing pictures on social media or inviting friends over to admire your work – after all, isn’t that what being a snowman-building expert is all about?
Image Credits
- “Snowman Neighbor” by MGShelton (featured)









![How To Build A Detached Deck 25 Force Reconnaissance Detachment Deck Shoot [Image 4 of 4]](https://green-life.blog/wp-content/uploads/2023/05/RJo3tlizSGjq-150x150.jpg.webp)


