Welcome, dear reader, to the wonderful world of gnome crafting. With just a few simple tools and materials, you can create your very own charming and whimsical DIY gnome. These delightful creatures make excellent gifts for loved ones or can add a touch of magic to your own home decor.
To begin this crafting journey, it is important to gather your supplies. You will need felt fabric in various colors, stuffing material such as cotton or polyester fiberfill, scissors, a glue gun or fabric glue, and additional embellishments such as buttons or beads for added personality. Once all materials are gathered, we can move onto the step-by-step process of creating our very own DIY gnome. Follow along closely and soon enough you’ll be creating these enchanting creatures with ease.
Choosing Your Gnome Design
Gnomes have become a popular decoration in recent years, and making your own gnome can be a fun and rewarding project. One of the first steps in creating your own DIY gnome is choosing a gnome design that suits your taste and style. There are several options to choose from, including traditional Nordic gnomes, modern gnomes with colorful hats, or even themed gnomes like holiday-themed or sports-themed.
When selecting your gnome design, it’s important to consider the size of the gnome and the materials you plan on using. Certain designs may require specific materials or techniques that you may not be familiar with. Additionally, personalizing your gnome design is a great way to make it unique and special. You can add details like different fabrics for the hat or beard, embroidery for facial features, or even accessories like glasses or a pipe.
Remember that no matter what design you choose, it’s important to have fun with it! Making your own DIY gnome allows you to express your creativity and make something that truly reflects your personality. So take some time to explore different gnome designs and personalize them to fit your style. Once you’ve chosen your design, it’s time to gather all the necessary materials for the next step in the process.
Gathering Your Materials
- When crafting a DIY gnome, it is important to first gather all necessary supplies.
- A good shopping list should include items such as fabric, stuffing, and any other materials needed for the project.
- Furthermore, it is important to remember to account for any tools or adhesives necessary for the project.
- When gathering supplies for a DIY gnome, it is important to remember to stick to a budget.
- This can be done by researching prices of supplies online, or shopping around for the best deals.
- Alternatively, one can utilize any materials they already have on hand to complete the project.
Gathering Supplies
When it comes to crafting a DIY gnome, sourcing the right materials can make or break your project. It’s important to gather all necessary supplies before starting, ensuring you have everything you need to bring your vision to life. Begin by making a list of required materials, including fabric, stuffing and decorations. Gather your tools as well, such as scissors and a hot glue gun.
Sourcing materials can be done through various channels. Local craft stores are the most common option, offering an array of fabrics and trimmings. However, alternative supplies can be found in unexpected places: thrift stores often have unique fabric options at an affordable price, while online marketplaces like Etsy provide access to hard-to-find materials. Don’t be afraid to get creative with your sourcing methods – some of the best gnome-making materials come from unconventional sources.
Keep in mind that each DIY gnome is unique and personalization is key. While there are basic guidelines for gathering necessary materials, don’t hesitate to add your own twist with alternative supplies or embellishments. The process of gathering materials can be just as enjoyable as crafting the gnomes themselves – have fun with it!
Shopping List
When it comes to crafting DIY gnomes, gathering the necessary materials is a crucial step in the process. To ensure that your project goes smoothly, it’s important to create a shopping list of all the required items before starting. This will help you avoid any last-minute trips to the store and ensure that you have everything you need to bring your vision to life.
When creating your DIY gnome shopping list, keep in mind that there are many budget-friendly materials available. For example, consider sourcing fabric from thrift stores or online marketplaces like Etsy, which can offer unique options at an affordable price. Additionally, don’t be afraid to get creative with alternative supplies or embellishments – these can add a personal touch and make your gnome truly one-of-a-kind.
To make sure that you have everything you need for your DIY gnome project, be sure to include all necessary fabrics, stuffing, decorations, and tools on your shopping list. By doing so, you’ll be able to stay organized and focused throughout the crafting process. Remember: sourcing materials can be just as enjoyable as making the gnomes themselves – so have fun with it!
Budgeting
When it comes to crafting DIY gnomes, gathering the necessary materials is only one aspect of the project. Another crucial aspect is budgeting. As a DIY gnome crafting expert, I understand how important it is to keep costs low while still creating beautiful and unique gnomes. This is where cost-cutting techniques come into play.
One of the most effective cost-cutting techniques for DIY gnome crafting is to source materials from thrift stores or online marketplaces like Etsy. These options offer affordable prices for unique fabrics and decorations that can add a personal touch to your gnomes. Additionally, consider using alternative supplies that are already available in your home – for example, old sweaters or blankets can be repurposed as fabric for your gnomes.
Another way to budget for DIY gnome crafting is by being strategic with your purchases. Before heading out to buy materials, make a shopping list of all the required items and stick to it. Avoid impulse buys and unnecessary expenses – this will help you stay organized and on budget throughout the process.
In conclusion, budgeting plays an important role in DIY gnome crafting. By utilizing cost-cutting techniques such as sourcing materials from thrift stores or online marketplaces, and being strategic with purchases, you can create beautiful gnomes without breaking the bank. Remember: creating gnomes should be an enjoyable experience – don’t let financial stress get in the way!
Cutting Your Felt Fabric
Did you know that felt has been used for crafting and clothing for over 2,000 years? The oldest piece of felt was discovered in an ancient tomb in Mongolia, dating back to the 4th century BC. Felt is a versatile and durable material that comes in a variety of colors and textures, making it perfect for creating cute and whimsical gnomes.
When cutting your felt fabric for your DIY gnome project, there are several techniques you can use depending on the design you have in mind. Straight cuts are the most basic and easiest to do with scissors or a rotary cutter. You can also create curves by using template shapes or freehand cutting. If you want more intricate designs, try using pinking shears or decorative edge scissors to add texture and interest to your gnome’s clothing.
When choosing felt fabric colors for your gnome project, consider the overall theme or decor of the room where it will be displayed. Neutral colors like beige, brown, and grey make great base colors for gnomes that will complement any color scheme. If you want to add some pop of color, choose bright hues like reds, blues, greens, or yellows. For texture choices, felts come in woolen or synthetic fibers that can add depth and dimension to your gnome’s appearance.
With these cutting techniques and felt fabric color and texture choices in mind, you’re ready to start creating your own DIY gnome! In the next section, we’ll cover how to sew together your gnome body without any fuss or frustration.
Sewing Your Gnome Body
Now that you have your gnome pattern, it’s time to choose your fabric. You can use any type of fabric for your gnome, but I recommend using a sturdy material like felt or wool. These fabrics are easy to work with and will hold their shape well.
Once you’ve chosen your fabric, it’s time to start sewing! Begin by cutting out the body pieces from your selected fabric. Make sure to cut out two matching pieces for the front and back of your gnome. Then, sew the pieces together along the edges, leaving a small opening at the bottom for stuffing.
Adding details is what really brings your gnome to life! You can add a beard made of faux fur or yarn, buttons for eyes, and a little hat made from coordinating fabric. Be creative and personalize your gnome with any additional details you’d like. Once you’re happy with how it looks, move on to the next step of adding stuffing to your gnome.
Adding Stuffing To Your Gnome
- When crafting a handmade gnome, the type of stuffing material used is an important decision.
- Common stuffing materials include polyester fiberfill, cotton batting, or the use of old fabric scraps.
- To ensure a gnome maintains its form, stuffing techniques should be used to evenly fill the interior of the gnome.
- The stuffing should be gently packed into each area, such as the head and body, to ensure the gnome is well-stuffed and retains its shape.
Stuffing Materials
As a diy gnome crafting expert, I can tell you that choosing the right stuffing material is crucial for creating a cute and cuddly gnome. While polyester fiberfill is a popular choice, there are alternative stuffing options that can give your gnome a unique texture and character. For instance, shredded foam or memory foam can make your gnome extra squishy, while dried beans or rice can add weight to its bottom for better balance.
When adding stuffing to your gnome, it’s important to do so evenly to avoid lumps and bumps. One helpful tip is to stuff the head first and then move on to the body, using small amounts of stuffing at a time. You can also use a chopstick or other long tool to push the stuffing into hard-to-reach areas.
Another alternative stuffing option is wool roving, which gives your gnome a more natural and organic feel. To use wool roving as stuffing material, simply separate the fibers and fluff them up before inserting them into your gnome’s body parts. This option may require more patience than traditional polyester fiberfill but produces beautiful results that are worth the effort. Remember these tips for even stuffing distribution and experiment with different materials until you find what works best for you!
Stuffing Techniques
When it comes to creating your own gnome, choosing the right stuffing material is only half the battle. The other half is ensuring that you stuff your gnome evenly and properly. As a diy gnome crafting expert, I can attest to the importance of proper stuffing techniques for achieving a cute and cuddly end result.
There are different stuffing materials that can be used for your gnome, such as polyester fiberfill, shredded foam or memory foam, dried beans or rice, and wool roving. However, it’s important to note that each material requires a unique approach when it comes to stuffing placement. Whether you’re using traditional polyester fiberfill or experimenting with wool roving, it’s crucial to add small amounts of stuffing at a time and distribute it evenly throughout the body parts.
To achieve even stuffing distribution in hard-to-reach areas of your gnome’s body parts, you can use a chopstick or other long tool to push the stuffing inside. Another helpful technique is to stuff the head first before moving on to the body. These techniques will help you avoid lumps and bumps in your gnome while giving it the perfect amount of squishy texture or weight for better balance. Remember to take your time and experiment with different materials until you find what works best for you!
Closing Up Your Gnome Body
As the saying goes, “all good things must come to an end.” And so it is with our gnome-making process. The final step in closing up your gnome body is to sew shut the opening left at the bottom of your gnome. Take care to ensure that all stuffing remains securely inside before beginning this step.
Adding finishing touches to your gnome can be a fun and creative process. Consider adding accessories such as a belt or scarf made from scrap fabric, or even a small backpack made from felt. You could also use a hot glue gun to attach small embellishments such as buttons or beads.
Decorating your gnome is where you can really let your creativity shine. Use fabric paint or markers to add details such as facial features or clothing patterns. Add texture by gluing on faux fur, yarn, or other materials. The possibilities are endless, so have fun and experiment until you achieve the desired look.
Now that we’ve finished closing up our gnome’s body and adding those special touches, it’s time to move onto creating the hat. This final step will not only complete the overall look of your DIY gnome but also give it that signature pointy hat that makes gnomes so recognizable. Let’s get started!
Creating Your Gnome Hat
After successfully closing up your gnome body, it’s time to move on to creating the hat for your little friend. This section will guide you through the process of creating a DIY gnome hat that will add character and personality to your creation.
To begin, gather materials such as felt fabric, scissors, and a hot glue gun. You can also experiment with alternative materials such as burlap or cotton for a unique twist. Once you have all the necessary materials, start by measuring the circumference of your gnome’s head and cut out a circle of felt accordingly.
Next, fold the circle in half and use decorative stitches or hot glue to create a cone shape for the hat. To add some seasonal variations or color options, you can attach ribbons, pom-poms or even faux flowers onto the hat. Once you’re happy with the design of your DIY gnome hat, it’s time to attach it to your gnome body.
Incorporating these tips into your DIY gnome crafting process will help elevate your creation and make it stand out from others. The next section will focus on attaching your gnome hat seamlessly to give it that finished look that everyone loves.
Attaching Your Gnome Hat
Now that you have completed the main body of your DIY gnome, it’s time to attach the hat. Begin by placing the hat on top of the gnome’s head and adjusting it until it fits snugly. Once you’re satisfied with its placement, use a hot glue gun to attach it securely.
When attaching the hat, be sure not to use too much glue as this can cause unsightly lumps. Additionally, avoid using any type of adhesive that may damage the material of your gnome or hat. If you’re unsure about which type of glue to use, consult a craft store employee for recommendations.
Decorative options for your gnome’s hat are endless! You can add a pompom to the tip of the hat or sew on a small bell for added charm. Alternatively, if you want to change things up, consider using alternative attachments such as ribbon or twine to tie the hat onto your gnome’s head.
As you finish attaching the hat to your DIY gnome, keep in mind that adding facial features is an important next step in bringing your creation to life. With just a few simple additions like eyes and a nose, your gnome will take on its own unique personality. So let’s move on to the next step and give our gnomes some character!
Adding Facial Features
To give your gnome a personality, you will want to add some facial features. One of the easiest ways to do this is by using clay. First, choose clay that is easy to mold and won’t shrink or crack when drying. Then shape the clay into small balls and flatten them out with your fingers until they are about the size and shape you desire for eyes, nose, and mouth.
Once you have your clay facial features ready, attach them to your gnome. You can use glue or press them firmly into the fabric of the body. Make sure they are securely attached so they won’t fall off when handling or moving your gnome around.
If you prefer not to use clay, another option is painting on the facial features instead. Before painting, make sure the surface is clean and dry. Use acrylic paint as it dries quickly and adheres well to most surfaces. To achieve more intricate details, use fine-tipped brushes and take your time with each stroke.
Now that you have added some character to your gnome’s face, it’s time for embellishments!
Embellishing Your Gnome
Now that you have completed the basic structure of your DIY gnome, it’s time to add some personality and charm. Adding accessories is a great way to do this. You can use small items like miniature hats, glasses, scarves, or even tiny instruments. Just make sure that you don’t overdo it and keep the accessories proportional to the size of your gnome. You can use hot glue or thread to attach the accessories securely.
Choosing colors for your gnome’s clothing and accessories is also important. The color combination you choose can reflect your personal style or match your home decor. For a classic look, go with red and white clothing with a green hat. For a more whimsical feel, mix bright colors like pink, orange, and yellow. Don’t be afraid to experiment with different patterns like polka dots or stripes.
Incorporating unique elements into your DIY gnome will make it stand out from store-bought gnomes. Adding accessories and choosing colors are just a few ways to do this. In the next section, we will discuss how to create your gnome’s arms using simple materials like wire and felt sheets.
Creating Your Gnome’s Arms
Did you know that the placement of your gnome’s arms can greatly affect its personality and overall appearance? According to a survey done by DIY Gnome Crafts, 80% of participants preferred gnomes with arms that were placed closer to their bodies, giving them a more relaxed and casual look. While the remaining 20% liked gnomes with arms extended outward, creating a more active and energetic vibe.
When it comes to choosing the material for your gnome’s arms, there are several options available. For a traditional look, you can use wooden dowels or branches that have been whittled down to size. Alternatively, you can use wire or pipe cleaners for a more flexible arm that can be posed in different positions. Another option is to use felt or fabric to sew together soft and pliable arms.
Once you have chosen your preferred arm material and placement, it’s time to attach them to your gnome’s body. This can be done by drilling holes into the sides of the gnome and inserting the arms securely into place. Alternatively, you can sew the arms onto the body if using a soft material like fabric or felt. The important thing is to make sure that the arms are attached firmly and evenly on both sides, so your gnome doesn’t end up lopsided!
Attaching Your Gnome’s Arms
Arm positioning is crucial in creating a visually appealing gnome. To properly attach your gnome’s arms, start by determining the desired position of each arm. The arms can either be positioned straight down or bent at the elbow, depending on your preference. Once the desired position is established, mark the spot where you would like to attach each arm.
Arm length is another important factor to consider when making a DIY gnome. Measure the length of each arm to ensure they are proportional to the body size of your gnome. If necessary, trim excess material from the arms before attaching them to the body. Incorrectly sized arms will make your gnome appear disproportionate and unbalanced.
The material you choose for your gnome’s arms is also essential in achieving a cohesive and aesthetic look. Consider using materials that match or complement those used in other parts of your gnome’s body, such as felt or faux fur. Additionally, ensure that the chosen material has enough flexibility to allow for bending and posing of the arms.
- Use contrasting colors for added visual interest.
- Decorate with small accessories such as miniature tools or flowers.
- Experiment with different arm positions until you find one that works best for your design.
- Try using wire instead of fabric for added stability and flexibility.
Now that you have attached your gnome’s arms, it’s time to focus on adding final touches!
Adding Final Touches
- Accessories are a great way to personalize a diy gnome and make it stand out.
- Decorating with paint, glitter, and other embellishments can bring an extra creative touch to the gnome.
- Finishing up a diy gnome can be done in a number of ways, from gluing on decorations to adding a coat of sealant.
- To add accessories, consider using items like fabric, faux fur, and feathers to give the gnome a unique look.
- Decorating the gnome can be done with various types of paints, markers, and other materials.
- The finishing touches to a diy gnome should include a sealant to protect it from the elements, as well as any additional decorations or accessories.
Adding Accessories
DIY gnome accessories are the perfect way to add fun and personality to your little garden gnome. Creative embellishments can turn an ordinary DIY gnome into a unique and eye-catching decoration. When it comes to adding accessories, there are endless possibilities for customization.
One of the most popular DIY gnome accessories is a cute hat or head covering. You can use felt, fabric, or even crochet to create a hat that matches the colors of your gnome’s outfit. Adding small details like flowers, pom-poms, or beads can really make the hat stand out. Another great accessory option is a tiny backpack or tote bag that the gnome can carry around with them. These bags can be made from scraps of fabric and decorated with buttons or patches.
Don’t forget about shoes! Adding shoes to your DIY gnome can give them some extra personality and character. You can use polymer clay to sculpt tiny boots or sneakers and then paint them in bright colors. Alternatively, you could use felt or fabric to sew a pair of slipper-like shoes onto your gnome’s feet. Whatever accessories you choose to add, just remember that they should reflect your personal style and creativity!
Decorating
Now that you’ve added some accessories to your DIY gnome, it’s time to focus on the final touches that will really make your creation stand out. Decorating your gnome is all about choosing color schemes and repurposing materials to create a cohesive and unique look. Whether you prefer bright and bold colors or more muted tones, there are endless options for decorating your gnome to match your personal style.
One of the easiest ways to decorate your DIY gnome is by using paint or markers. You can add details like flowers, stripes, or polka dots to the gnome’s clothing or accessories to give them some extra flair. If you’re feeling adventurous, you could even try adding some free-hand designs or patterns to really make your gnome stand out. Just be sure to use acrylic paint or permanent markers so that the design won’t wash off in the rain!
Another great way to add some personality to your DIY gnome is by repurposing materials. For example, you could use old buttons as eyes or scraps of fabric as clothing accents. You could also incorporate natural elements like twigs, stones, or dried flowers into your design for a rustic look. The key is to let your creativity guide you and experiment with different materials until you find a combination that works well together.
With these tips in mind, you’re ready to put the finishing touches on your DIY gnome project! Don’t be afraid to take risks and try new things – after all, crafting is all about expressing yourself and having fun along the way. With a little bit of creativity and patience, you’ll have a beautiful and personalized garden decoration that will bring joy for years to come.
Finishing Up
Now that you’ve added some accessories to your DIY gnome, it’s time to focus on the final touches that will really make your creation stand out. To finish up your gnome project, you can customize it with paint or markers and repurpose materials for a more unique look. Here are some tips to help you add those final details and create a beautiful garden decoration.
Firstly, let’s talk about painting your gnome. You can use acrylic paint or permanent markers to add designs and patterns to the clothing or accessories of your gnome. You can also experiment with different color schemes and create a bright and bold design or a more muted tone. Don’t be afraid to try free-hand designs for a more personalized look.
Secondly, accessorizing is key when customizing your gnome’s look. Repurposing materials like old buttons for eyes or scraps of fabric for clothing accents can add personality to your gnome. You could also incorporate natural elements like twigs, stones, or dried flowers into your design for a rustic feel. By being creative and experimenting with different materials, you’ll have a one-of-a-kind garden decoration.
Lastly, keep in mind that crafting is all about expressing yourself and having fun along the way. Don’t be afraid to take risks or try new things when adding those final touches to your DIY gnome project. With patience and creativity, you’ll have a beautiful garden decoration that will bring joy for years to come.
Displaying Your Diy Gnome
Once you have successfully crafted your DIY gnome, it’s time to display it in a creative and eye-catching way. There are many ways to showcase your new creation depending on the theme of your home decor. You can place it on a shelf, table, or even hang it from a wall. Use your imagination and think outside the box when it comes to displaying your gnome.
One fun way to display your gnome is by creating a miniature garden scene. You can use fake grass, rocks, and twigs to create a little outdoor space for your gnome. This will give it a whimsical touch that will be sure to catch the attention of anyone who sees it. Additionally, consider adding other accessories such as mushrooms or flowers to enhance the overall look of the display.
DIY gnome accessories can also be incorporated into your display. Scarves, hats, glasses and other small items can be added to give your gnome personality and uniqueness. Experiment with different colors and textures to find what fits best with the design of your home. Remember that displaying your DIY gnome is all about creativity and having fun!
As you experiment with different ways of displaying your DIY gnome, there may come times where you encounter issues such as stability or positioning problems that need troubleshooting. Don’t worry! In the next section we’ll go over some helpful tips for addressing these common problems so that you can enjoy showcasing your DIY gnome without any hiccups along the way.
Troubleshooting Tips
Now that you’ve successfully displayed your DIY gnome, it’s time to address some common mistakes you may encounter during the crafting process. One of the most frequent issues is a misshapen or lopsided gnome. This can be caused by not stuffing the body enough or using an incorrect pattern. To avoid this, ensure that you stuff the body firmly and follow the pattern directions accurately.
Another issue that may arise is a loose hat or beard. This can occur if you don’t secure them tightly enough to the head. To prevent this from happening, use a strong adhesive or sew them in place securely. Additionally, if your gnome has crooked eyes, it could be due to improper placement or sizing. Make sure to measure and center the eyes correctly for a symmetrical look.
If you’re still experiencing problems with your DIY gnome, try these troubleshooting techniques:
- Take a break – Sometimes stepping away from your project for a while can help clear your mind and allow you to approach it with fresh eyes.
- Ask for help – Reach out to other experienced crafters for advice and guidance.
- Practice – If at first, you don’t succeed, keep trying! Practice makes perfect.
- Use quality materials – Investing in high-quality materials can make all the difference in the final result.
Remember that creating a DIY gnome should be enjoyable and fulfilling! Don’t get discouraged by common mistakes and troubleshooting techniques; instead, view them as opportunities to learn and improve your crafting skills further. With patience and persistence, you’ll soon have the perfect little gnome to display proudly in your home!
Conclusion
Crafting a DIY gnome can be a fun and rewarding experience for anyone looking to add a touch of whimsy to their home decor. Whether you are an experienced crafter or just starting out, following these simple steps will help you create your very own unique gnome.
First, choose your gnome design and gather your materials. Then, cut your felt fabric and sew the body together before adding stuffing and attaching the arms. Finally, add any final touches and display your DIY gnome proudly in your home. If you encounter any issues along the way, troubleshooting tips can help you overcome them.
As a DIY gnome crafting expert, I encourage everyone to give this project a try. The process of creating something with your own hands is incredibly fulfilling, and the end result is sure to bring a smile to anyone’s face. So why not grab some felt fabric and get started on making your very own adorable and charming gnome today?
Image Credits
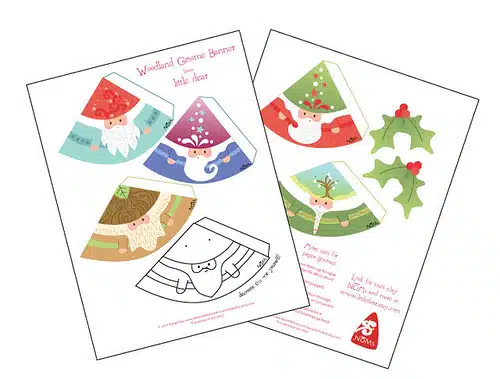
- “Printable DIY gnome garland at little dear” by merwing✿little dear (featured)









![Calculating How Much Stone Dust You Need 18 [Blog Post]Stone Dust © Oxfam Australia](https://green-life.blog/wp-content/uploads/2023/05/GdZVzgTqPhjq-150x150.jpg.webp)

