When it comes to above-ground pools, there are few things more important than the liner. Not only does it give the pool its aesthetic appeal, but it also serves as a protective barrier that keeps water from leaking out. Installing a liner may seem like an overwhelming task for some, but with the right approach and tools, it can be done easily and efficiently.
As an above-ground pool installation expert, I have seen firsthand the importance of proper liner installation. In this article, I will provide step-by-step instructions on how to install a liner on an above-ground pool. Whether you’re a seasoned DIY enthusiast or a first-time pool owner, you’ll find this guide informative and helpful in ensuring your pool is up and running in no time. So let’s dive in!
Assessing Your Pool And Liner Needs
Swimming pools are a great addition to any backyard, offering a refreshing escape from the heat of summer. However, over time, pool liners can become worn or damaged, necessitating a replacement. Before installing a new liner on your above-ground pool, it’s important to assess your needs and determine the right materials for the job.
To start, you’ll need some essential measuring equipment, such as a tape measure and level. Begin by measuring the length and width of your pool at its widest points. Next, measure the depth of your pool at each corner and in the center to ensure accuracy. These measurements will help you select the right size liner for your pool.
Once you have accurate measurements, it’s time to select the right liner material. Above-ground pool liners come in three main types: vinyl, beaded, and overlap liners. Vinyl liners are affordable and easy to install, while beaded liners offer a more secure fit but require specialized installation tools. Overlap liners are durable but may require periodic adjustments to keep them properly fitted around the edges of your pool. Consider factors such as durability, aesthetics, and budget when selecting your liner material to ensure that you choose one that meets all of your needs. With these initial steps completed successfully, let’s move on to preparing the pool area for installation.
Preparing The Pool Area
After assessing your pool and liner needs, it’s time to prepare the pool area. The first step is to level the ground. If the ground is not level, it can cause problems with the installation of the liner and could also affect the longevity of your above-ground pool. Use a long-handled level to check for any high or low spots.
Once you have leveled the ground, it’s important to clear any debris from the area where you will be installing your pool. This includes rocks, sticks, and any other items that could puncture the liner. You should also remove any grass or weeds in the area. This will prevent them from growing under your pool and causing damage to the liner or frame.
By leveling the ground and clearing debris, you are setting a solid foundation for your above-ground pool installation project. In the next section, we will discuss how to measure your pool and liner to ensure a proper fit and optimal performance from your new above-ground pool.
Measuring The Pool And Liner
Accurately measuring the pool and liner is a crucial step in the above-ground pool installation process. This step ensures that the liner fits perfectly to avoid any potential leaks or wrinkles. Before starting the process, make sure to have all necessary tools, including a tape measure and a pencil.
To ensure measuring accuracy, start by measuring the length and width of your pool at its widest points. Be sure to add an additional foot to these measurements to account for overlap when installing the liner. Next, measure the depth of your pool from top to bottom at various points around the perimeter. Take note of the deepest point as this will be where you place your liner’s seam.
Common mistakes when measuring include not accounting for overlap or not measuring accurately at various points around the edge of the pool. To avoid these errors, double-check all measurements before cutting any liner material. Accurate measurement is key in ensuring a successful installation process without any complications or setbacks. In the next section, we will discuss how to remove an old liner (if applicable) before proceeding with new liner installation.
Removing Old Liner (If Applicable)
What should you do if you find an old liner on your above-ground pool? The first thing you should consider is removing it. While it may seem like a daunting task, it is actually quite manageable if you follow the right steps. Removing an old liner is essential if you want to install a new one properly.
Before removing the old liner, inspect it for any tears or damage. If there are any noticeable tears, repairing them before removing the liner is a wise move. This will prevent water from seeping through and potentially causing further damage to your pool’s structure. If there are too many tears, hiring a professional to repair them may be necessary.
Once the liner has been inspected and repaired (if needed), it’s time to remove it carefully. Be sure to take your time so as not to damage any part of the pool’s structure. Use a utility knife or scissors to cut away at the liner in small sections until it can be removed completely. Dispose of the old liner properly and prepare for the next step: filling in low spots.
- Clear out any debris that may be in the low spots.
- Use sand or vermiculite to fill in any areas that need leveling.
- Compact each layer before adding another layer.
- Make sure that the surface is completely level before installing your new liner.
- Take care when using heavy equipment such as a tamper or plate compactor near the edge of your pool.
With these tips in mind, removing an old liner can be done safely and efficiently. Remember, taking care of your above-ground pool does not have to be difficult or expensive; with proper maintenance and attention, you can enjoy years of fun in your backyard oasis. Once all low spots are filled in, we can move on to installing the new liner with confidence and peace of mind that our hard work will pay off in spades!
Filling In Low Spots
To ensure a smooth and even surface, it is important to fill in any low spots that may be present before installing the liner. This can be done using sand or a pool base material specifically designed for above-ground pools. As an expert installer, I recommend using a pool base material as it provides a more stable and level surface.
Before beginning the process of filling in low spots, gather the necessary tools needed such as a rake, shovel, and tamper. Begin by removing any debris or rocks from the area where the low spot is located. Then, add the pool base material to the area and spread it evenly with a rake. Once you have added enough material to raise the low spot to an even level with the rest of the pool bottom, use a tamper to compact and level it out.
After filling in all low spots, it is important to smooth out any wrinkles that may be present in the liner. Use your hands to gently push any wrinkles towards the edges of the pool while also making sure not to create new wrinkles. This step is crucial as leaving wrinkles in the liner can cause damage over time and affect its lifespan. With this step complete, you are now ready to move on to laying out the liner properly for installation.
Laying The Liner Out
After filling in the low spots, the next step is to lay out the liner. This coincides with the smoothing technique necessary to ensure a perfect fit. Before laying out the liner, take note of any patterns on it and determine which side should face upwards. It is essential to get this right as reversing it may cause wrinkles or unsightly bumps.
Once you have determined which side faces up, lay out the liner over the pool area. Ensure that there are no wrinkles or creases and that it fits snugly into place. If you need to adjust the liner’s position, do so carefully, making sure not to stretch or pull it too much as this could lead to tearing.
Liner patterns come in various designs and colors and can make your above-ground pool more attractive. When selecting a pattern, consider how it will blend with your backyard decor and complement your home’s exterior. Once you have laid out the liner correctly, move on to securing it onto the wall for an even better fit.
Securing The Liner To The Wall
Once the liner is properly positioned at the bottom of the above-ground pool, it is time to secure it to the wall. This step requires attention to detail and precision, as any errors can lead to leaks and further complications down the line.
Firstly, applying adhesive is crucial in ensuring that the liner stays in place. It is important to choose an adhesive that is specifically designed for pool liners, as this will ensure maximum adhesion and longevity. The adhesive should be applied evenly and generously along the top edge of the pool wall using a paint roller or brush. Once applied, allow sufficient time for it to dry before proceeding with coping strip installation.
Secondly, using coping strips is essential in keeping the liner taut against the wall. These strips are made of durable plastic and come in various sizes depending on your pool’s dimensions. They should be placed over top of the liner, then snapped into place around the edge of the pool wall. A 3 item numeric list in markdown format can summarize key steps:
- Ensure proper alignment between each strip
- Use a rubber mallet to tap each strip securely into place
- Cut excess length from each strip with tin snips for a neat finish
By following these steps carefully, you can rest assured that your liner will remain securely fastened to your above-ground pool walls for years to come. The next section will cover how to fold and cut excess liner for a professional-looking finish.
Folding And Cutting Excess Liner
After securing the liner to the wall, it’s time to trim the edges and fold the excess liner. Trimming should be done using a sharp pair of scissors or a utility knife. It’s important to make sure that there is enough liner left around the edges for it to fit properly into the coping track. If too much is cut off, it may not fit correctly, leading to leaks and other issues.
Folding techniques can vary depending on the type of above-ground pool being installed. For round pools, fold the excess liner towards the center of the pool and then create pleats that run perpendicular to each other. This technique helps prevent wrinkles from forming in the bottom of the pool. For oval pools, folds should be made at each end of the pool so that they meet in the middle. Again, pleats should be made perpendicular to each other.
Once all excess liner has been trimmed and folded, it’s time to move on to installing skimmer, return, and light fittings. These components are essential for proper pool function and should be installed according to manufacturer instructions. Make sure all connections are tight and secure before filling with water. By following these steps carefully, you can ensure a successful above-ground pool installation that will provide years of enjoyment for you and your family.
Installing Skimmer, Return, And Light Fittings
After the liner is installed, it’s time to add the skimmer, return and light fittings. Proper sealing is crucial to ensure that these components are watertight before filling the pool. The skimmer is usually located on one of the pool walls and should be aligned with the water level. It’s important to use a good quality adhesive or sealant when installing the skimmer faceplate to prevent any leaks. Once in place, connect the skimmer hose to the pump and filter system.
When installing return fittings, position them on opposite sides of the pool and make sure they’re at least 6 inches below water level. Again, proper sealing is essential here, using a high-quality sealant or gasket between the fitting and wall opening. After installation, connect these fittings to your pump and filter system as well.
If you plan on adding a light fixture to your above-ground pool, there are several wiring options available for you to choose from. You can run a conduit from your home’s electrical panel or use an outdoor-rated extension cord for temporary installations. Remember that safety should always come first when dealing with electricity near water sources, so it’s highly recommended that you hire a licensed electrician for this task.
Moving forward, connecting and testing the equipment is critical in ensuring that everything works properly before filling up your new above-ground pool. Stay tuned for our next section where we will dive into connecting all of your equipment together while also providing tips on how to test everything out before swimming season begins!
Connecting And Testing The Equipment
Now that the skimmer, return, and light fittings have been installed, it’s time to move on to connecting and testing the equipment. This critical step ensures that everything is functioning correctly before proceeding with the liner installation. Testing equipment can be a simple process if performed correctly, but troubleshooting issues can be time-consuming and frustrating. It’s essential to take your time during this step to avoid any future headaches.
Firstly, connect the pump and filter system according to the manufacturer’s instructions. Ensure all connections are tight and secure. Next, prime the system by filling the pump basket with water until it overflows. Turn on the pump and check for leaks or abnormal noises coming from the system. If everything checks out, proceed to test each piece of equipment individually by turning them on one at a time while observing their operation.
Secondly, inspect all electrical connections for damage or wear as faulty wiring can cause significant problems down the line. Use a multimeter to check for proper voltage levels at each connection point before proceeding further. Finally, perform a water circulation test by running water through all outlets (skimmer and return) simultaneously to ensure adequate flow rate.
Testing equipment is a vital process in above-ground pool installation; taking shortcuts during this step can lead to significant problems down the road. Troubleshooting issues after installation can be costly and time-consuming compared to addressing them during testing. The next section will cover how to fill your newly installed above-ground pool with water properly.
Filling The Pool With Water
Now that the liner is securely in place, it’s time to fill the pool with water. Before getting started, consider your water source options. If you have access to a well or other natural source of water, using this option may be more cost-effective than filling up with city water. However, if you do use city water, make sure to check your local regulations for any restrictions on filling a swimming pool.
When filling your above-ground pool with water, it’s important to keep conservation in mind. One simple tip is to use a pool cover when not in use. This will help reduce evaporation and also keep debris out of the pool. Additionally, you can conserve water by monitoring the filter system and keeping it clean and efficient.
By following these tips, you can ensure that your above-ground pool is filled properly while also being mindful of the environment and conserving resources. In the next section, we will discuss how to adjust the liner and water level once the pool is filled.
Adjusting The Liner And Water Level
When installing an above-ground pool, it is important to adjust the liner correctly. This involves aligning the top of the pool wall with the top of the liner, ensuring the liner lays flat and making sure the wall is properly supported. After the liner has been installed, adding water to the pool is the next step. Care should be taken to ensure the water is added slowly and evenly throughout the pool, to prevent the pool wall from bowing or buckling. After the pool is filled with water, the water level should be set to halfway up the pool skimmer. This ensures the filter is able to perform efficiently and the pool is able to maintain the correct water level.
Adjusting The Liner
As an above-ground pool installation expert, it is important to ensure that the liner is properly adjusted. This step in the installation process involves sealing edges, smoothing wrinkles, trimming excess material, and adjusting tension. By taking time to adjust the liner correctly, you can prevent future issues with leaks or damage.
Firstly, sealing edges is crucial for keeping water inside the pool and preventing any damage to the liner. This involves using a specialized adhesive to seal the edges of the liner around the perimeter of the pool. It’s important to make sure that there are no gaps or spaces where water could escape.
Secondly, smoothing out any wrinkles in the liner is essential for a smooth and even surface when filling up the pool with water. This can be done by gently pushing out any wrinkles with your hands or a soft tool such as a broom handle.
Lastly, trimming excess material and adjusting tension will give your liner a neat and polished appearance. Be sure to trim off any excess material with sharp scissors before adjusting tension evenly around all sides of the pool. By following these steps carefully, you can have confidence that your above-ground pool will look great and function properly for years to come.
Overall, taking care when adjusting your above-ground pool liner can save you from potential headaches down the road. Properly sealing edges, smoothing wrinkles, trimming excess material, and adjusting tension all contribute towards ensuring a successful installation process.
Adding Water
After properly adjusting the liner, the next crucial step in above-ground pool installation is adding water. As an expert in this field, it is important to educate homeowners on the importance of maintaining pH levels and preventing leaks when filling up their pools. Choosing the right water source and filling techniques can also make a significant difference in overall pool maintenance.
One important consideration when adding water is maintaining proper pH levels. This can be achieved by regularly testing the water using a pool test kit and adjusting with chemicals as needed. Additionally, it’s important to choose a water source that is free from contaminants such as bacteria or algae. Homeowners should also be aware of any local regulations regarding draining or refilling pools.
Another important factor to consider when adding water is preventing leaks. It’s crucial to ensure that all connections and fittings are tightly secured before filling up the pool, and to monitor for any signs of leakage during the process. Additionally, choosing the right filling techniques such as slowly filling from multiple locations can help prevent excessive pressure on certain areas of the liner.
In conclusion, adding water to an above-ground pool may seem like a simple task, but there are several key considerations that can impact overall maintenance and longevity of the pool. By maintaining proper pH levels and preventing leaks through careful monitoring and choosing the right water source and filling techniques, homeowners can enjoy their pools for years to come.
Setting Water Level
Properly adjusting the liner and adding water are crucial steps in installing an above-ground pool. In our previous discussion, we talked about how to maintain pH levels and prevent leaks when filling up the pool. In this subtopic, we will discuss another important consideration when adding water – setting the water level.
To set the water level, it’s essential to ensure that the pool is level. Before filling up the pool, use a level to check that the ground is even and adjust as necessary. Once you’ve established that the ground is level, you can begin filling up the pool with water. As you do so, keep an eye on the water level and make sure it doesn’t exceed the recommended height for your particular pool model.
Adjusting chemicals and maintaining water clarity are also important factors to consider when setting the water level. As previously mentioned, regularly testing pH levels and adjusting with chemicals as needed is crucial for proper maintenance of your above-ground pool. Additionally, monitoring water clarity can help prevent issues such as algae growth or bacterial contamination. By keeping these considerations in mind when setting your pool’s water level, you can ensure years of enjoyment from your above-ground pool.
Adding Chemicals And Balancing The Water
After the liner is installed, it’s time to add chemicals and balance the water. Chemical safety should always be a top priority when handling pool chemicals. It’s important to read all labels and instructions before adding any chemicals to your pool.
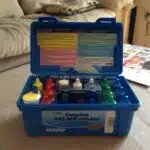
Before adding any chemicals, you’ll need to test the water. Water testing kits are readily available at most pool supply stores or online. The kit will measure pH levels, alkalinity, and chlorine levels. Based on the results of the test, you can adjust the chemical levels accordingly.
To ensure proper chemical balance, follow these steps:
- Adjust pH first if necessary
- Add alkalinity increaser or decreaser as needed
- Add chlorine or other sanitizer according to manufacturer instructions
- Allow chemicals to circulate through the water for several hours before testing again
By taking care of your above-ground pool and maintaining proper chemical balance, you can enjoy a safe and clean swimming experience all season long. In the next section, we’ll discuss how to properly maintain and clean your new liner.
Maintaining And Cleaning The Liner
After adding chemicals and balancing the water in your above-ground pool, it’s time to move on to the next step: installing the liner. The liner is an essential component of any pool as it prevents leaks and adds a decorative touch. Before proceeding with the installation, make sure you have all the necessary tools and equipment at hand.
To begin with, choose a liner that fits the dimensions of your pool. You can opt for a traditional beaded liner or a unibead liner that can fit either a beaded or J-hook track. Once you have selected your preferred type of liner, lay it out flat in the sun for several hours to help soften it up and make it easier to work with. Next, remove any old liners or debris from the pool and smooth out any bumps or ridges on the bottom surface.
Before installing the new liner, ensure that you have chosen proper cleaners for your specific type of pool material (vinyl, fiberglass, etc.). Using harsh chemicals or abrasive cleaning agents can cause permanent damage to your liner. Additionally, take care when handling sharp objects such as scissors or blades during installation to prevent common damages like cuts or punctures. Follow these steps carefully to ensure a smooth installation process and enjoy your new pool for years to come.
Moving forward, maintaining and cleaning your newly installed liner is crucial to prolonging its lifespan. In the next section, we will discuss troubleshooting common issues that may arise during regular maintenance such as tears, wrinkles, or leaks. By following our expert advice and taking preventative measures against potential damages now, you’ll save yourself time and money down the line in repairs and replacements. Remember that proper care and attention towards your above-ground pool will not only benefit yourself but also those who enjoy using it with you!
Troubleshooting Common Issues
Common mistakes are a part of any DIY pool installation, and above-ground pool liners are no exception. One common mistake is failing to properly measure the liner before installation. This often results in the liner being too small or large for the pool, leading to wrinkles, bunching, or tearing. Another mistake is not smoothing out the liner as it is being installed, which can also cause wrinkles and unevenness. To avoid these issues, take accurate measurements of your pool before purchasing a liner and make sure to smooth out any wrinkles during installation.
In addition to measurement and smoothing errors, there are other common issues that can arise during above-ground pool liner installation. For example, some people may experience leakage due to improper sealing around fittings such as skimmers or return jets. This can be resolved by ensuring that all fittings are tightly sealed with silicone sealer or gaskets. Another issue is air pockets forming under the liner during installation. This can cause unevenness in the bottom of the pool and lead to tears over time. To prevent this from happening, use a shop vac to suck out any air pockets while installing the liner.
Overall, troubleshooting common issues when installing an above-ground pool liner can save you time and money in the long run. By avoiding common mistakes like inaccurate measurements or failing to smooth out wrinkles during installation, you can ensure a smoother process with fewer setbacks. Additionally, being aware of potential issues like leaking around fittings or air pockets forming under the liner will allow you to address these problems proactively rather than waiting for them to become major headaches down the line.
Conclusion
Installing a liner on an above-ground pool requires careful consideration of several factors, including the pool’s size and shape, the condition of the existing liner (if applicable), and any potential issues with the pool area. Proper preparation is key to ensuring a successful installation, which involves measuring the pool and liner, filling in low spots, and adjusting water levels.
Once the liner is installed, it’s important to add chemicals and balance the water to avoid any issues such as algae growth or pH imbalances. Regular maintenance and cleaning will also help extend the life of your liner. If you encounter any issues during installation or maintenance, troubleshooting tips are available to help you resolve common problems.
As an above-ground pool installation expert, I can attest that installing a new liner can be a challenging but rewarding project for homeowners. By following these steps and taking care to maintain your new liner properly, you can enjoy years of swimming fun in your above-ground pool. Remember to assess your needs carefully before beginning this project, prepare thoroughly and take care during every step of the process.
Image Credits
- “Above Ground Pool” by bennylin0724 (featured)

