As the temperatures begin to drop and the summer season comes to an end, it is important for above-ground pool owners to start thinking about winterizing their pools. Proper winterization of your pool can prevent costly damage and ensure a smooth opening when the warm weather returns. As a pool maintenance specialist, I have seen firsthand the importance of properly closing an above-ground pool for the winter months.
Winterizing your above-ground pool involves several steps that must be completed in order to protect against freezing temperatures, debris buildup, and equipment damage. The process includes draining water from the pool and equipment, removing any accessories or attachments, adding chemicals to balance pH levels, covering the pool with a high-quality cover, and storing equipment in a dry place. Neglecting any of these steps can lead to costly repairs come springtime. In this article, we will discuss how to successfully winterize your above-ground pool step by step so that you can enjoy a worry-free season next year.
Why Winterizing Your Above-Ground Pool Is Important
Importance of Winterizing Your Above-Ground Pool
As a pool maintenance specialist, I cannot stress enough the importance of winterizing your above-ground pool. This process is crucial to ensure that your pool remains in good condition and can be enjoyed for many years to come. Winterizing your pool involves taking certain steps to protect it from damage caused by freezing temperatures, snow, and ice.
Maintenance is key to keeping your pool in excellent condition. Neglecting to winterize your above-ground pool can result in costly damage that can be difficult and time-consuming to repair. When water freezes, it expands, which can cause cracks in the walls or liner of your pool. Additionally, the weight of snow and ice can put immense pressure on the structure of your above-ground pool.
Winterizing your above-ground pool can save you time and money in the long run by preventing costly repairs and extending the life of your pool. By following a few simple steps before winter sets in, you can ensure that your above-ground pool will be ready for use when warmer weather returns. The first step in this process is removing accessories and attachments from your pool, which we will discuss further in the next section.
Step 1: Removing Accessories And Attachments
- Above-ground pools need to be winterized prior to colder weather, which includes removing accessories and attachments.
- Unscrew ladders from the pool walls to prevent any potential damage from freezing temperatures.
- Skimmer baskets should be removed from the pool and emptied of any debris.
- Disconnect the hoses that connect the pump to the pool, and drain any remaining water and sediment.
- The pump should also be removed, emptied of water, and stored in a dry place.
- Once all accessories and attachments are removed, the pool is ready to be winterized.
Unscrew Ladders
One of the first steps in winterizing an above-ground pool is to remove all accessories and attachments, including ladders. This helps prevent any damage caused by harsh winter weather, such as snow and ice accumulation. As a pool maintenance specialist, I highly recommend removing the ladder with great care and attention to safety precautions.
To remove ladders from your above-ground pool, start by gathering all necessary tools such as a socket wrench or screwdriver. Once you have the appropriate tools on hand, carefully unscrew any bolts or screws that are holding the ladder in place. It’s important to note that some ladders may require more than one person to safely remove due to their weight.
As you remove the ladder from your above-ground pool, make sure to take all necessary safety precautions. Always wear protective gloves and eyewear when handling tools and equipment. Additionally, be mindful of any sharp edges or protruding parts that could cause injury during the removal process. With careful attention paid to safety measures, removing ladders from your above-ground pool can be completed quickly and easily as part of your winterization efforts.
Remove Skimmer Baskets
Transitioning from removing ladders, the next accessory to be addressed in winterizing an above-ground pool is the skimmer basket. Skimmer baskets are responsible for collecting debris and other contaminants that may accumulate on the water’s surface. To ensure proper function and longevity, these components must be removed and cleaned before storage.
As a pool maintenance specialist, I highly recommend cleaning skimmer baskets before storing them away for the winter season. To do this, start by removing the basket from the skimmer. Next, thoroughly rinse it with a high-pressure hose or soak it in a mixture of warm water and mild detergent. After cleaning, allow the basket to dry completely before placing it into storage.
Before storing your skimmer baskets, inspect them for any signs of damage or wear. Replace any damaged or broken parts as necessary to ensure proper function during the next swimming season. Additionally, make sure to store your cleaned and inspected skimmer baskets in a clean, dry area that is protected from harsh weather conditions. By following these simple steps, you can help prolong the life of your pool equipment and avoid costly repairs down the line.
Disconnect Pump Hoses
As part of the process to winterize an above-ground pool, one of the first steps is to remove all accessories and attachments. One such accessory that needs attention is the pump hoses. Before storing your pool equipment for the winter, it is essential to disconnect the pump hoses from both the skimmer and return fittings. This process helps prevent water from freezing inside the lines, which could cause damage to your pool’s plumbing system.
As a pool maintenance specialist, I recommend taking extra precautions when removing pump hoses. You should turn off the power supply to your pool’s filtration system before starting this process. Next, loosen the hose clamps at both ends of each hose and gently pull them free from their fittings. Be sure not to twist or bend any portion of the hose during removal as it may cause damage.
After disconnecting all pump hoses, drain any remaining water from them by holding them upright and allowing gravity to pull out any trapped water. Once dry, store your disconnected hoses in a dry place that is protected from harsh weather conditions – preferably indoors. Following these simple steps will ensure that your pump hoses remain in good condition for next year’s swimming season.
In conclusion, removing accessories and attachments is an integral part of winterizing an above-ground pool, including disconnecting pump hoses properly. By following these simple steps outlined above, you can avoid costly repairs due to damaged plumbing systems caused by frozen water during the cold months ahead. Remember always to take care when handling delicate equipment like pool hoses and store them safely for best results next season!
Step 2: Draining Water From The Pool
Now that all the accessories and attachments have been removed from the above-ground pool, it’s time to move on to the next step of winterizing: draining the water. This is a crucial step in preventing damage to your pool during the winter months. Leaving water in your pool can cause freeze damage that may result in costly repairs in the spring.
Before you start draining your above-ground pool, be sure to avoid common winterizing mistakes. First, never drain your pool completely. Doing so can cause vinyl liners to shrink or become brittle, which could lead to leaks or tears. Additionally, avoid using a sump pump for drainage as it can damage the liner and leave water at the bottom of your pool. Instead, use a submersible pump designed specifically for above-ground pools.
There are also alternatives to traditional drainage methods such as using an air pillow or cover pump. An air pillow helps protect against ice expansion by creating space between the cover and water surface while allowing for water movement under the cover. A cover pump will automatically remove any excess water that accumulates on top of your winter cover throughout the season. Proper drainage ensures that there is no standing water left in your pool or equipment which can then be safely stored away for the winter season.
Moving on from removing accessories and attachments, it’s important to drain any remaining water from both your filter and plumbing systems before storing them away for winterization.
Step 3: Draining Water From The Equipment
The next step in winterizing an above-ground pool is draining water from the equipment. This is a crucial step to prevent damage to the pool equipment during freezing temperatures. It is recommended to drain all the water from the pump, filter, heater, and any other equipment connected to the pool.
Before you start draining the water, ensure that you have all the necessary equipment maintenance tools and winterization supplies ready. These may include a shop vac, air compressor, or a submersible pump. Make sure you also have pool antifreeze and plumbing plugs for sealing off any open pipes.
Start by turning off the power supply to your pool equipment. Then, remove any drain plugs or caps from the pump and filter system and let the water drain out completely. For additional protection against freezing temperatures, use air compressors to blow out any remaining water in your pool’s plumbing lines.
In preparation for step 4 on cleaning your pool before winter sets in, make sure that all of your winterization supplies are stored away safely so that they can be used again next year. With proper winterization techniques followed annually, you can extend the life of your pool while reducing repair costs in future years.
Step 4: Cleaning The Pool
Cleaning the pool is an essential step in winterizing your above-ground pool. Just like how a surgeon uses a scalpel to clean and sterilize the surgical site before an operation, you will need the right pool cleaning equipment to effectively clean your pool. Pool cleaning equipment includes a skimmer net, vacuum hose, and brush. These tools help to remove debris and dirt that may have accumulated in the water over time.
Chemical-free cleaning methods are becoming increasingly popular among pool owners. This method involves using natural ingredients such as vinegar or baking soda instead of harsh chemicals to clean the pool. Not only is this method eco-friendly, but it’s also less expensive. However, it’s important to note that chemical-free cleaning methods may not be effective against stubborn stains or algae buildup.
Remember to pay extra attention to areas such as the steps, walls, and corners of the pool when cleaning. Once you’ve thoroughly cleaned the pool, it’s time to move on to balancing pH levels. By doing so, you’ll ensure that your pool remains sparkling clean and safe for use even during winter months when it’s not in use.
Step 5: Balancing Ph Levels
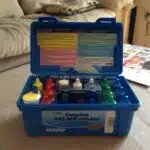
Maintaining the pH levels of your pool is an important part of winterization. Before adding any winterizing chemicals, it’s crucial to test the pH level of your pool water. The ideal range for pH is between 7.2 and 7.8 on a standard testing kit. If the levels are too high or too low, it can affect the effectiveness of the winterizing chemicals you add later.
Once you have tested your pool’s pH level, you will need to adjust it accordingly. If the pH level is too high, you will need to add a pH decreaser to lower it down to the ideal range. On the other hand, if the pH level is too low, you will need to add a pH increaser to bring it up within range. Once this step is completed successfully, proceed with adding winterizing chemicals based on dosage recommendations according to your pool size.
It’s important to note that adding more winterizing chemicals than recommended can be dangerous and lead to damage in both equipment and materials surrounding your pool area. Therefore, always refer to manufacturer instructions before adding any chemicals into your pool water. A good rule of thumb is to use only as much as necessary based on your pool size or consult with a professional for guidance in case of doubt.
Step 6: Adding Algaecide And Winterizing Chemicals
Using algaecide and chemical winterizing agents is a crucial step in ensuring that your above-ground pool survives the harsh winter months. Algaecide is essential to prevent algae from growing in your pool during the dormant season. It works by killing any existing algae and preventing new growth, which reduces the amount of cleaning required when you reopen your pool in the spring.
Chemical winterizing agents are also necessary to protect your pool’s surfaces and equipment from damage caused by freezing water. When water freezes, it expands, which can cause cracks or leaks in the pool walls, pipes, and other components. Chemical winterizing agents help reduce the risk of such damage by lowering the freezing point of water.
When adding algaecide and chemical winterizing agents to your above-ground pool, follow their respective instructions carefully. Typically, you will need to add these chemicals after balancing your pool water chemistry and cleaning your pool thoroughly. Make sure to distribute them evenly throughout the water using a skimmer or pump before closing up for winter.
After adding algaecide and winterizing chemicals to your above-ground pool, you are now ready for step 7: covering the pool. Covering your pool is an important step that helps keep debris out of it while protecting it from extreme weather conditions during the dormant season. In the next section, we will discuss how to properly cover your above-ground pool for optimal protection during winter months.
Step 7: Covering The Pool
As the winter season approaches, it’s time to put your above-ground pool to rest. Covering the pool is a vital step in protecting it from harsh weather conditions and debris. However, choosing the right pool cover material is crucial for ensuring its effectiveness.
There are different types of pool cover materials available on the market, including mesh, solid vinyl, and thermal covers. Each material has its pros and cons that you should consider before making a purchase. Mesh covers are lightweight and easy to install but allow sunlight and debris to pass through. Solid vinyl covers provide better protection against debris but require a pump or siphon to remove standing water. Thermal covers offer insulation benefits by trapping heat inside the pool but are more expensive than other options.
Once you have selected the appropriate cover material for your above-ground pool, it’s essential to maintain it properly. Regular maintenance can extend the life of your cover and ensure its functionality throughout the winter season. Here are some tips on how to maintain your pool cover:
- Remove any large debris that accumulates on top of the cover regularly.
- Use a leaf blower or soft-bristled broom to clean off smaller particles.
- Store your cover in a dry area when not in use.
Now that you know how important it is to choose the right pool cover material and how to maintain it properly let’s move on to securing the cover tightly over your above-ground pool without leaving any gaps where debris can enter during harsh weather conditions.
Step 8: Securing The Cover
After covering your above-ground pool, it is important to secure the cover properly using cover anchors. Cover anchors are essential in keeping the winter cover securely in place and preventing any debris or snow from entering the pool. These anchors come in different types such as water bags, cable ties, clips, and others. Choose the type of anchor that suits your pool’s size, shape, and cover type.
Once you have secured the winter cover with anchors, it is also important to perform regular winter cover maintenance. This includes removing any debris or snow that accumulates on top of the cover to prevent it from sagging or tearing. You should also check for any damages or tears on the cover and repair them immediately if found. Regular maintenance will ensure that your above-ground pool stays protected during the winter months.
Properly securing your winter cover with anchors and performing regular maintenance will ensure that your above-ground pool stays protected during the colder months. In addition to this step, storing equipment in a dry place is also crucial in maintaining your pool’s longevity. By doing so, you can avoid rusting and other damage caused by exposure to moisture and cold temperatures. Keep reading for more information on how to store your equipment properly for next season’s use.
Step 9: Storing Equipment In A Dry Place
Organizing pool equipment before storing is essential for easy access. Ventilating the space where the equipment is stored will help to prevent mold and mildew buildup. Draining the pool equipment of any liquid or moisture before storing will help to preserve it. Covering, protecting, and placing the equipment in a sealed container on shelving units, dryers, and dehumidifiers in garages and basements will help to protect it from the elements.
Organizing
As the winter season approaches, it’s time to start thinking about how to winterize your above-ground pool properly. Step 9 in this process is storing equipment in a dry place, which is essential for protecting your winter gear from damage caused by moisture. As a pool maintenance specialist, I highly encourage you to take this step seriously.
To organize your winter gear effectively, it’s crucial to find suitable storage solutions that will keep everything dry and protected. You can use plastic containers with lids or invest in storage shelves that are specifically designed for pool equipment. Be sure to label each container or shelf so that you can easily locate what you need when it’s time to reopen your pool.
Overall, organizing your winter gear and finding the right storage solutions will make the process of closing and reopening your above-ground pool much more manageable. By taking the time to store equipment in a dry place properly, you’ll avoid costly repairs and extend the life of your pool components. So, don’t hesitate – start organizing today!
Ventilating
Proper ventilation is crucial when storing your above-ground pool equipment in a dry place. Without adequate airflow, the risk of moisture buildup increases, which can cause damage to your winter gear. As a pool maintenance specialist, I highly recommend ensuring proper ventilation in your storage area.
One way to promote proper ventilation is by using shelves or racks that allow air to circulate around your equipment. Avoid stacking containers on top of each other as this can limit airflow and increase the risk of moisture accumulation. Additionally, be sure to leave space between items so that air can move freely around them.
Moisture prevention is key when it comes to storing your winter gear properly. By promoting proper ventilation and taking steps to prevent moisture buildup, you’ll protect your pool equipment from damage and extend its lifespan. So be proactive and take the time to organize your storage area today.
Step 10: Securing The Pool Area
Like a captain securing their ship before a storm, preparing your winter pool requires securing the area around it. Before the snow falls and ice forms, be sure to remove any objects that may blow or fall into the pool. This includes patio furniture, plants, and any loose items in the vicinity.
Safety measures should also be taken to ensure no one accidentally falls into the pool during the winter months. Consider installing a safety cover that is strong enough to hold weight and covers both the pool and surrounding area. Additionally, erecting a fence with a locking gate can help prevent unwanted access to the pool area.
Taking these precautions will not only protect your pool from potential damage but also keep those around it safe during the winter season. Keeping in mind safety first as you secure your winter above-ground pool will provide peace of mind for everyone involved in its care.
Transition: While taking safety measures when securing your winter pool is essential, there are still common mistakes to avoid when winterizing your pool, which we will explore in the next section.
Common Mistakes To Avoid When Winterizing Your Pool
When it comes to winterizing your pool, there are a few common mistakes that many pool owners make. These mistakes can lead to costly repairs and even health hazards. One of the most common mistakes is not properly draining the water from the pipes and equipment. This can lead to freezing and cracking, which can cause leaks and other damage.
Another mistake is not properly cleaning and treating the water before closing the pool for the winter. This can lead to bacteria growth, algae buildup, and other issues that can be difficult to deal with when you open your pool in the spring. It’s important to balance the chemicals in your pool and add algaecide before closing it up for the winter.
Preventative measures should be taken when winterizing your pool, such as properly covering it with a good quality cover that will keep out debris and prevent evaporation. It’s also important to remove any toys or other items from the pool area that could become damaged during inclement weather. Additionally, it’s a good idea to invest in a pool maintenance kit so that you have everything you need on hand when it’s time to close up your pool for the winter.
Moving forward, taking care of your above-ground pool during the winter months is just as important as preparing it for winterization. In order to keep your pool in top condition throughout the off-season, there are several tips and tricks you’ll want to keep in mind.
Tips For Maintaining Your Pool During The Winter Months
- It is important to cover the pool with a tarp or pool cover to protect it from debris, dirt, and animals during the winter months.
- All pool accessories should be removed from the pool and stored away in a safe and dry place.
- It is also important to ensure that any remaining water is removed from the pool’s filter, pump, and hoses, and that these components are properly drained and stored away.
- Finally, any chemical levels should be tested and adjusted as necessary before covering the pool for the winter.
Cover The Pool
One of the most crucial steps in winterizing an above-ground pool is covering it properly. There are different types of pool covers available in the market, including mesh, solid, and solar covers. Mesh covers are the most popular as they allow water to pass through and keep debris out, while solid covers prevent sunlight from entering the pool and can be used as a safety cover. Solar covers help retain heat and reduce evaporation but do not offer protection against debris.
Installing a pool cover requires proper placement to ensure that it is secure and tight. One of the critical factors to consider when installing a cover is ensuring that there is no standing water on top of it as this can cause damage or make it difficult to remove during springtime. Additionally, removing snow accumulation regularly from the cover can help prevent damage due to excess weight.
In conclusion, investing in a good quality pool cover and ensuring proper installation can save time and money in the long run by protecting your above-ground pool during winter months. It’s essential to consider different types of covers before purchasing one that meets your needs. Installing a cover correctly will guarantee its effectiveness in keeping debris out and preventing damage caused by standing water or heavy snow accumulation throughout the winter season.
Remove Pool Accessories
As a pool maintenance specialist, it’s crucial to consider every aspect of winter pool maintenance, including removing pool accessories. While winterizing your above-ground pool, you should remove all detachable accessories such as ladders, diving boards, and handrails. Doing so will protect them from damage during the cold months and ensure they are in good condition for the next swimming season.
Once you have removed these accessories, it’s essential to store them correctly to prevent damage or corrosion. Keep them in a dry place such as a garage or shed and cover them with a protective coating like silicone spray or oil. Doing so will keep them in good condition and extend their lifespan.
In conclusion, removing pool accessories is a crucial part of winter pool maintenance that should not be overlooked. Proper storage of these items will ensure they remain in good condition and prevent unnecessary expenses on replacement or repairs when the swimming season comes around again. By following this tip along with others like covering your pool securely, you can enjoy a hassle-free experience when preparing your above-ground pool for the winter months.
When To Start Winterizing Your Above-Ground Pool
Determining when to start winterizing your above-ground pool is crucial to ensuring its longevity and preventing costly damages. Best practices suggest that you should begin the process once the temperature starts dropping consistently below 60°F. It’s important to note that this can vary depending on your geographic location, so it’s best to consult with a pool maintenance specialist in your area.
Timing considerations are also essential when it comes to winterizing your above-ground pool. Starting too early or too late can lead to various issues, such as algae growth or water freezing in the pipes, respectively. Therefore, it’s vital to strike a balance between starting early enough to complete the process thoroughly and not waiting too long.
To make things easier for you, here are three essential timing tips for winterizing your above-ground pool:
- Don’t wait until the last minute – start the process at least two weeks before the temperature drops below freezing.
- Keep an eye on weather forecasts and plan accordingly.
- Invest in a good quality pool cover that fits correctly and provides adequate protection against harsh winter elements.
By following these best practices and timing considerations, you’ll be able to successfully winterize your above-ground pool without any complications or damages. In doing so, you’ll ensure that come springtime, you’ll be able to enjoy a clean and healthy swimming environment without any hiccups.
Transition: Now that we’ve covered when to start winterizing your above-ground pool let’s delve into why it’s essential to do so correctly – the benefits of properly winterizing your above-ground pool.
Benefits Of Properly Winterizing Your Above-Ground Pool
As a pool maintenance specialist, I have seen first-hand the negative consequences of neglecting to properly winterize an above-ground pool. The benefits of taking the time to prepare your pool for winter are numerous and significant. By investing in the necessary equipment and following proper procedures, you can ensure that your pool remains protected throughout the colder months.
The importance of winterizing your above-ground pool cannot be overstated. Failing to do so can result in costly repairs and even permanent damage to your pool. Freezing temperatures can cause water to expand within your pool’s plumbing system, leading to cracked pipes and other issues. Additionally, neglecting to remove any remaining water from the pump and filter can also cause damage over time.
Proper preparation and equipment are key when it comes to winterizing your above-ground pool. This includes draining all water from the system, adding necessary chemicals, covering the pool with a high-quality cover, and more. By taking these steps, you can rest easy knowing that your investment is protected and will be ready for use come springtime. Don’t wait until it’s too late – take action now to ensure a smooth transition into the colder months without any unexpected complications or headaches!
Conclusion
Winterizing your above-ground pool is a crucial step in maintaining its longevity and ensuring that it will be ready for use when the warmer months roll around. By following the proper steps, you can protect your pool from damage caused by freezing temperatures, debris buildup, and other winter-related issues.
To begin the winterization process, start by removing all accessories and attachments from the pool. Next, drain the water from both the pool and any attached equipment such as filters or pumps. It is important to thoroughly clean the pool before covering it for the season to avoid any buildup of algae or other contaminants.
Common mistakes to avoid include leaving water in the equipment or failing to properly cover the pool. Additionally, keeping up with maintenance during the winter months can help prevent any unexpected issues when it comes time to reopen your pool in the spring.
According to a study conducted by The Association of Pool & Spa Professionals, properly winterizing your pool can extend its lifespan by up to 50%. By taking care of your above-ground pool during the colder months, you can save money on repairs and replacements down the line.
As a pool maintenance specialist, I recommend starting the winterization process at least two weeks before temperatures consistently drop below freezing. This will give you ample time to complete each step thoroughly and ensure that your pool is fully prepared for winter weather conditions.
In conclusion, taking care of your above-ground pool during the off-season is just as important as maintaining it during peak usage times. By following these steps and avoiding common mistakes, you can protect your investment and enjoy many more years of summer fun in your backyard oasis.
Image Credits
- “Children’s paddling pool, camping grounds, Grampians, Victoria – 1940s” by Aussie~mobs (featured)

